Wednesday, July 20, 2011
Close, very close… Optimistic Test Drive
Today I busied myself with getting the trailer assembled to a point where testing could be accomplished. This took a bit longer than anticipated.
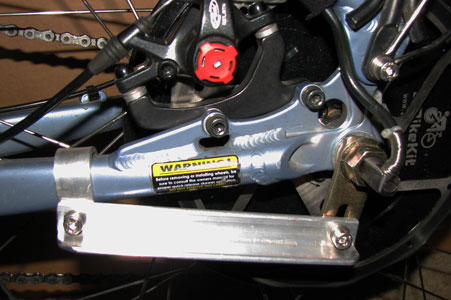
- The Hitch Bracket – now with the bronze bearing is slightly wider due to the flange and washer, AND the hub axle in shorter than my custom axle (now mounted on the Trailer). Took a while to sort out the absolute minimum washers that could go on to the axle. As it turned out, I didn’t use washers. Instead I used the flat file and leveled the surfaces of the stamped-steel torque arms and put them on first, then the bronze washer, then the hitch bracket, and finally the nut; that’s all the room there was, and no threads left to spare. This was all tightened down and then I worked it over making sure the nut would not back out.
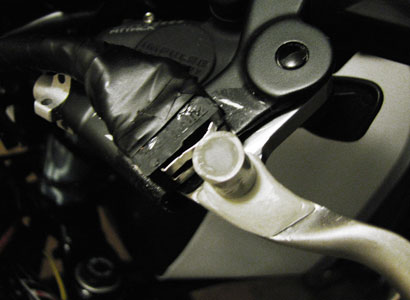
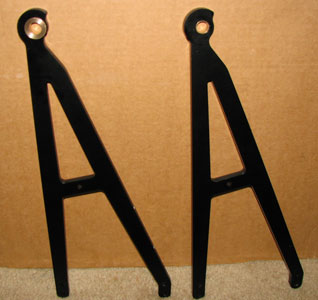
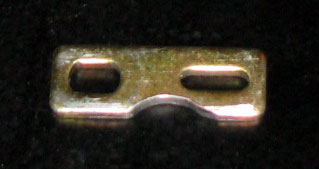
Right side rear stamped steel torque arm, modified to miss the rear derailleur mounting.
- Also I removed the EBikeKit torque arm cos it was pointing in a direction that was not useful. Instead I used a modified stamped-steel torque arm, leveled on both sides, and then cut out a link from Aluminum angle and fabricated the clamp. These items were planted flat black and heat cured in the oven one the paint was dry.
- In parallel to this, I would alternate to the trailer and put the unit back together again sans the faring. Really – those are the two big ticket items other than mounting the trailer to the hitch which took time to set correctly.
Prepping for the Test Drive
About 4 PM I started calculating what I needed to do here. Much of my stuff is still packed, so choosing a load was easy. The Timbuk2 bags were stuffed with 6 batteries each and temporarily saddled over the front of the bike. The Ortliebs were loaded out with 12 batteries on each side just like I did last year using the same pieces of framework and paneling. Then I added a 3 lb. free weight to each side to mimic the charger and some food. Next the trailer was loaded with 12 batteries on each side – forward inside the boxes, and down some bags of clothes. Grabbed a yellow Ortlieb and stuffed two frozen gallons of water inside and strapped that in the forward section over the center and on top of the clothes to simulate the maximum about of crap that I could probably take. Here’s the weight chart:
Code:
Where		 Type		  Amount		Total	F/R Tot	Comments
Trailer	  Batteries	12			 15.24
Trailer	  Gallons	  2			  16.6
Trailer	  Clothes	  2			  4		 35.84		Trailer Total
L/R Rear	 Batteries	24			 30.48
L/R Rear	 Weights	  2			  6		 36.48		Rear; Simulate charger and food
L/R Front	Batteries	18			 22.86				 Already loaded in Triangle
L/R Front	Batteries	12			 15.24	38.1		Front

Total						110.42
Bike only					74.58
The total weight is about 10 lbs. over what I expect. After strapping it all down temporarily I headed out for a test drive at 6:30 PM.
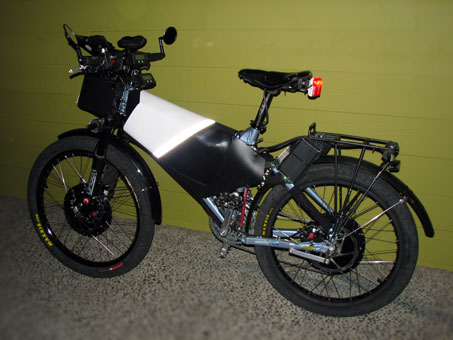
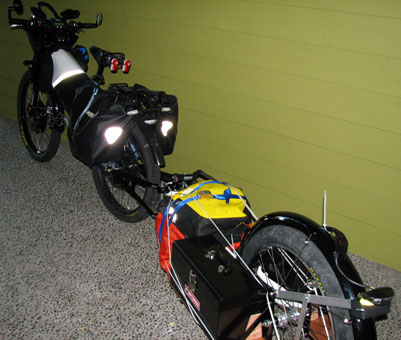
No faring; just a go-no-go test.
Toolboxes contain 12 batteries shoved all the way to the left (forward). Orange bags are heavy clothes. The yellow Ortlieb had two gallons of frozen water inside.
Test Drive
Decided to head up the hill. The bike lugged heavily. I fear that I must reprogram some current back into the controllers to get more horsepower. Once near the top the bike picked up speed just fine. Handling was good going up and down the hill. On the flat, wobbling can be induced by the rider.
I headed down the horseshoe – braking at first, then slowing allowing more speed then braking, several times before reaching the bottom. I was very satisfied with the brake work done yesterday; between the eBrake and the double-discs, stopped in not a challenge and the trailer does not swing around. Still unsure about flat and level riding, I gingerly drove into town, though taking right turns and eventually winding up climbing the backside ridge of Redmond also known as Education Hill. Very steep and winding rural roads had me on my toes keeping the bike stable at low speeds.
Eventually I wound up on the main route back into town and going faster and faster. Though I really had to watch it cos I could induce a wobble if distracted. Part of me wants to remove more batteries from the bike and place them on the trailer, though I fear this could exasperate the known problems. Another thought was to rearrange the battery packing so that they are closest to the front-to-rear centerline, reducing the lever (moment) and hopefully the wobble. The ride concluded with one of the hubs dropping out at a stop-light; I had to make a quick stop when the light changed suddenly. Acceleration was off, and I couldn’t climb the hill back home. Both wheels spin though with throttle, so I don’t know if it’s a controller issue yet (FET?). The total test drive was 5.8 miles with an elevation gain of 459 feet. On the whole I consider the ride an optimistic albeit limited success.
I am going to take one more day to evaluate whether I can use the trailer or not; more testing required.
What’s left to do:
- Fabricate the saddle bags connective link.
- Create battery bags for the trailer; just a simple sling where I can pull the whole lot out to make the trailer lighter. The plan is to pull the saddle bags and the Ortliebs off the ebike to make it lighter for stowing. The trailer could be unloaded quickly as well cos my clothes and stuff are already bagged; we just need to bag (or sling) the batteries as well.
- Finish up the batteries cabling; prune the existing cables and add connectors.
Summary
We are getting there. Just need a bit finer tuning. There is still a chance to make the trip. I am concerned about the power consumption; means I’ll need to go slower to save energy or break up the trip into more days. Moving the hub motor to the eBike offset some of the wobbling, but did not eliminate it. I don’t think there is a viable way to do that though with Aluminum frames.
Zonked out and tired after the ride.
KF

 [At least I can't run on 24/7 fumes anymore... but it sure is hell is fun reading all the live updates & excitement of the immediate adventure & creation in the moment... :lol: Not say'n it's destined for failure as in LFP taking 3rd place!!! :wink: 8)