StudEbiker
100 kW
I try to run 36v LiFePo4. I am a commuter rider, so not wanting to run faster than 25, but I like to get off the line fast and be able to climb walls.
Right now I am pulling about 1300w tops from my pack, but I know I have some inefficiencies in my set-up that is sucking a bunch of that up.
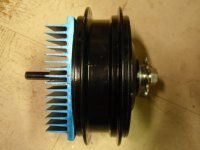
Also, it looks as though you are using a freewheel on both sides of the motor. Is this necessary? It seems like one on the crank side is enough since the rear wheel will have a freewheel on it. Could you not use a fixed gear on the output side of the motor?
I have been thinking of ways to use #219 cart chain in a mid-drive setup and it seems like using a fixed gear on the output side of the motor and one of the crossfire 10-hole freewheels on the back (I'm using Nuvinci hub) would be a good solution for using #219.
http://www.ebay.com/itm/321024484944?ssPageName=STRK:MEWAX:IT&_trksid=p3984.m1438.l2649
Right now I am pulling about 1300w tops from my pack, but I know I have some inefficiencies in my set-up that is sucking a bunch of that up.
Also, it looks as though you are using a freewheel on both sides of the motor. Is this necessary? It seems like one on the crank side is enough since the rear wheel will have a freewheel on it. Could you not use a fixed gear on the output side of the motor?
I have been thinking of ways to use #219 cart chain in a mid-drive setup and it seems like using a fixed gear on the output side of the motor and one of the crossfire 10-hole freewheels on the back (I'm using Nuvinci hub) would be a good solution for using #219.
http://www.ebay.com/itm/321024484944?ssPageName=STRK:MEWAX:IT&_trksid=p3984.m1438.l2649
") Instead do a #219 chain overdrive on the pedal side. Getting 5:1 ratio for example using 60/12 and buy a fast BPM. I have not figured out how you can get a freewheel into a #219 12T sprocket. At least you can do this using a freewheel crank :? but that's something I would want to avoid.
Instead do a #219 chain overdrive on the pedal side. Getting 5:1 ratio for example using 60/12 and buy a fast BPM. I have not figured out how you can get a freewheel into a #219 12T sprocket. At least you can do this using a freewheel crank :? but that's something I would want to avoid.