Kent
1 kW
First many thanks to Oatnet for giving us the original idea and inspiration, and the great tip about fork mounted clamps  .
.
In the beginning...
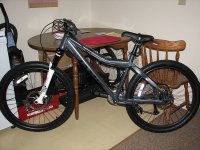
A year later...
For info on my downsizing to a 24" moped rear, go here: http://www.endless-sphere.com/forums/viewtopic.php?f=3&t=39751
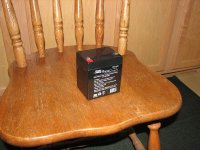
I originally embarked on the front mounted battery idea by working backwards. First I decided that I wanted to go with Lifepo because I wanted plug and play and realized that my memory isn’t what it used to be. Plus I live in an apartment. I recognized the cost and weight penalty. Since I had already experienced a Ping 36 v 15ah on my first bike, and having decided to embark on full 72 volt on my new build, I realized that a 72 v brick would be way too big, so decided to use two separate 36 volt packs hooked together in series.
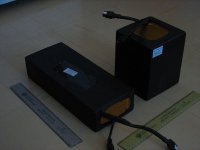
Next, after having decided on (2) 36 volt 10 ah batteries from Emissions Free, I checked his sizing chart (very handy) and determined what size my front case would have to be for the square brick that I chose.. I just couldn’t find the size I wanted in a Pelican Case and being eager at the bit, found a lighter duty one at the local battery store. Oh well, it got me started.
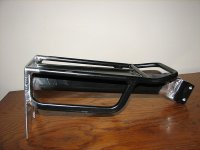
But there was the problem of how to mount it as it wasn’t sturdy enough to just drill holes with a few bolts, so I came across front mount luggage racks and decided to try one of those. The bottom legs of the rack attached to the fork clamps and the top to the handlebar via a couple of clamps from Amazon.
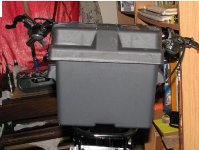
This setup turned out to be not sturdy enough as my front fork, a Marczocchi Bomber, is very stiff and there was too much pounding. The rack broke in several places. Another problem with this fork was limited 100mm travel, so it was best that I keep it stiff as the clamps took 1” off the travel. Details, details.
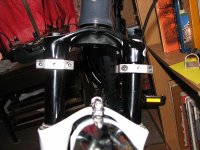
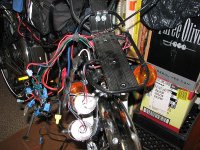
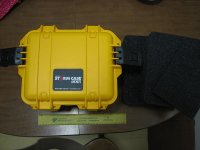
Well it got me through the summer and I finally located the case I was looking for. Large enough for the battery and some electrics but no larger than necessary. I found it on E-Bay. Perfect size. I was tempted to paint it grey to match the bike but decided that the yellow was such a great attention/safety feature so i kept it.
View attachment 12
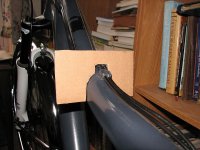
This time around I skipped the front rack idea, and decided to mount it more securely. Attached the top of the case to the handlebars with clamps from Amazon:
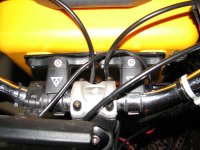
The bottom I mounted the case on "L" brackets which are secured to the fork clamps. And keeping in mind the pounding, I cushioned the case by installing rubber isolation biscuits which are secured by bolts which go through the bottom of the case and screw directly into the top of the rubbers which have implanted threaded nuts. On the bottoms of the rubbers are bolts permanantly attached.
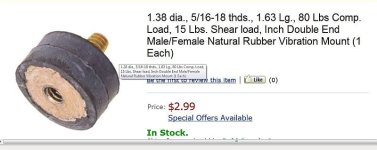
View attachment 11
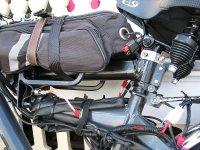
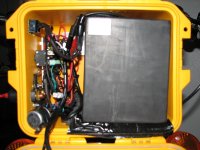
The wiring process-strictly Saturday morning at the kitchen table with the latest ideas..
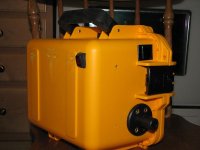
Sitting on a piece of foam, its a tight fit. Someday I'll make up a divider to separate the battery from the electrics.
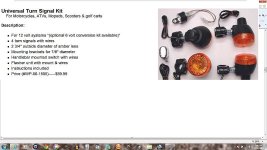
I was originally going to go with a couple of small LEDs that many have used, but but then I came across this little gem on sale at Northern Tool. It fits on the front of the case really well and is out of the road.
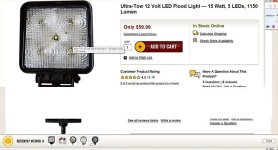
View attachment 6
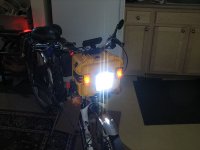
Remarkable the little 20 watt dc:dc converter from ebikes.ca has held up to all the electrical demands quite well. I wish though that they would upgrade the diameter of the wires.
Edit: Here is a photo of the rear light described furthur down. A terrific light for the $:
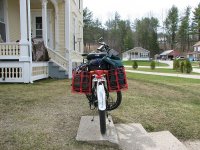
The second battery box build is here: http://endless-sphere.com/forums/viewtopic.php?f=3&t=12847&start=350 page 15
In the beginning...

A year later...
For info on my downsizing to a 24" moped rear, go here: http://www.endless-sphere.com/forums/viewtopic.php?f=3&t=39751
I originally embarked on the front mounted battery idea by working backwards. First I decided that I wanted to go with Lifepo because I wanted plug and play and realized that my memory isn’t what it used to be. Plus I live in an apartment. I recognized the cost and weight penalty. Since I had already experienced a Ping 36 v 15ah on my first bike, and having decided to embark on full 72 volt on my new build, I realized that a 72 v brick would be way too big, so decided to use two separate 36 volt packs hooked together in series.
Next, after having decided on (2) 36 volt 10 ah batteries from Emissions Free, I checked his sizing chart (very handy) and determined what size my front case would have to be for the square brick that I chose.. I just couldn’t find the size I wanted in a Pelican Case and being eager at the bit, found a lighter duty one at the local battery store. Oh well, it got me started.
But there was the problem of how to mount it as it wasn’t sturdy enough to just drill holes with a few bolts, so I came across front mount luggage racks and decided to try one of those. The bottom legs of the rack attached to the fork clamps and the top to the handlebar via a couple of clamps from Amazon.

This setup turned out to be not sturdy enough as my front fork, a Marczocchi Bomber, is very stiff and there was too much pounding. The rack broke in several places. Another problem with this fork was limited 100mm travel, so it was best that I keep it stiff as the clamps took 1” off the travel. Details, details.


Well it got me through the summer and I finally located the case I was looking for. Large enough for the battery and some electrics but no larger than necessary. I found it on E-Bay. Perfect size. I was tempted to paint it grey to match the bike but decided that the yellow was such a great attention/safety feature so i kept it.

View attachment 12
This time around I skipped the front rack idea, and decided to mount it more securely. Attached the top of the case to the handlebars with clamps from Amazon:

The bottom I mounted the case on "L" brackets which are secured to the fork clamps. And keeping in mind the pounding, I cushioned the case by installing rubber isolation biscuits which are secured by bolts which go through the bottom of the case and screw directly into the top of the rubbers which have implanted threaded nuts. On the bottoms of the rubbers are bolts permanantly attached.

View attachment 11
The wiring process-strictly Saturday morning at the kitchen table with the latest ideas..

Sitting on a piece of foam, its a tight fit. Someday I'll make up a divider to separate the battery from the electrics.

I was originally going to go with a couple of small LEDs that many have used, but but then I came across this little gem on sale at Northern Tool. It fits on the front of the case really well and is out of the road.

View attachment 6

Remarkable the little 20 watt dc:dc converter from ebikes.ca has held up to all the electrical demands quite well. I wish though that they would upgrade the diameter of the wires.
Edit: Here is a photo of the rear light described furthur down. A terrific light for the $:

The second battery box build is here: http://endless-sphere.com/forums/viewtopic.php?f=3&t=12847&start=350 page 15


