mon-goose to MON-STER

Hyena said:
Ah I missed the bit earlier where you planned to mod the frame. I thought you'd stacked it and snapped it at first!
And now that it's welded like that I'd be all the more cautious of that happening :lol:
I'm no pro welder myself but I'd be a bit shy of riding it hard or at speed. I'd be inclined to put a gussett on it too, in that gap on the underside.
What are you using for the head tube ? Looks somewhat oversized! I can't see a headset, have you just use bearings with an OD to suit the tube and ID to suit the steerer ?

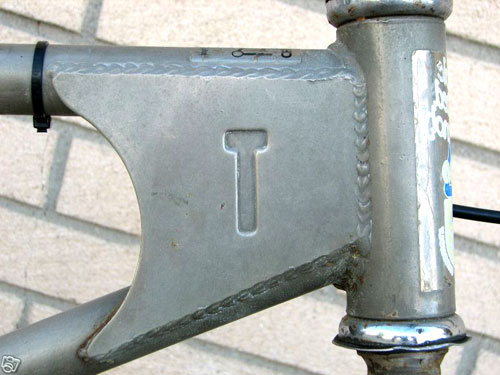
Bearings - correct. Head tube is some
at tube that fit the fat bearings. Was good to smash 10 or so arc rods into it. Gusset? Please explain...
I have that triangle piece there. I think the steer tube will now be the weakest part up front. Yeah the welds are ugly but meh.
Btw IRS 1.5" steer tube..
 
For the gusset I meant something like this
Though in your case more just on the underside.
It'll probably be right, I'd just be worried about it braking at speed. It's steel though right ?

gussett_mototrac.jpg
 
Oh OK yeah I see what you mean, yeah I was thinking something similar. Its hard to see side on but the head tube is 73mm dia and the frame is 40 or so, so the side plates would have had to be bent with curve to go around head tube. I did some seam welds and went over it and over it 'cos im worried if it brakes it could be catastrofic and that would be really bad if it was my gf or a mate riding. I'll do I suspension / weld test video soon. It rides easy with no hands now.

I got get the new wheels on and connect new gear lever and cut frame for battery box(350x120x120mm) lid underneath hinged at front.

Also yes it is steel. :)
 
good night mongoose.JPG

got front wheel on with dh tube in and crazy bob tyre. got the 203mm disk and caliper on (unfortunately the disk is bent a mm or so, and got the gear lever set up. I had to file and bend the finger lever so it could activate before hitting the throttle shell. it wasnt too much hastle and im glad i got it set up like a have, it feels nice and natural.
also got the big rim brakes on the rear and they are just enough to lock it up so as Hyena and others say, thats enough...
ran out of time to video the "harlem shake" weld test but i did thrash the f^ck out of it and its not going anywhere, i guess it looks better IRL than in photo.
 
We don't need any of this grainy pic business. We need some real photos. :D
Did you weld this metal plates on as well? What ever you did it looks pretty cool mate. I'm rather jealous you can weld your stuff. What I would for with a welder.
 
Trackman417 said:
pendragon8000 said:
We don't need any of this grainy pic business. We need some real photos. :D
Did you weld this metal plates on as well? What ever you did it looks pretty cool mate. I'm rather jealous you can weld your stuff. What I would for with a welder.
IMG904.JPG
there you go trackman, my welds are arc so its with the rod in the handle type. i have trouble getting a consistent weld and it gives me the F^CKING SHITS but i persist and just use more and more rods till im sure it will hold. its good when the metal gets red hot cos then the bond is going to be good but its close to burning a hole through the metal and takes so much concentration and patients. one side is nice and neat and small weld but the other i though it wasnt enough on the first so i tried to make it thicker and started burning hols in the frame and ahh man, i need to get a mig welder, but anyway ill just throw a few rods in there and make it work then grind it back to look half decent and spary epoxy paint on there and no one will know, (except all you ES crew) :)
I reakon its looking prety cool.
WHEEL BASE 117CM
 
t3sla said:
Your LEDs blew because you can't run them at that power rating without a constant current, constant voltage pulse modulated source CC,CV,PWM.
They aren't an 'analog' bulb that can just have volts thrown at it.

You would need typically need something like this to drive them
http://www.ebay.com/itm/CREE-10W-XM...739?pt=LH_DefaultDomain_0&hash=item20ce34fd83

Led driver.
cheers mate, yeah i know leds dont like just straight up voltage, especially from a cheap(ish) psu but i have a rear light on my spark thats got leds running at (suposedly)2.4v each 5 in series on 12v... not ideal but its had 1000km with that light going and seems fine. I think if using a plug pack or dc-dc with no constant current led driver it needs to be very reserved in voltage per LED.
 
pendragon8000 said:
Trackman417 said:
pendragon8000 said:
We don't need any of this grainy pic business. We need some real photos. :D
Did you weld this metal plates on as well? What ever you did it looks pretty cool mate. I'm rather jealous you can weld your stuff. What I would for with a welder.

there you go trackman, my welds are arc so its with the rod in the handle type. i have trouble getting a consistent weld and it gives me the F^CKING SHITS but i persist and just use more and more rods till im sure it will hold. its good when the metal gets red hot cos then the bond is going to be good but its close to burning a hole through the metal and takes so much concentration and patients. one side is nice and neat and small weld but the other i though it wasnt enough on the first so i tried to make it thicker and started burning hols in the frame and ahh man, i need to get a mig welder, but anyway ill just throw a few rods in there and make it work then grind it back to look half decent and spary epoxy paint on there and no one will know, (except all you ES crew) :)
I reakon its looking prety cool.
WHEEL BASE 117CM

Hi there, from what i see your welds look cold ,may be that electrodes you are using are too thick or the low amps setting on the welder.Those holes in the weld are from slag ,you have to clean all those spots(use something like screwdriver tip ) because simply welding over it wont help ,they will just become deeper .Or grind all of the weld on one side , preheat it using a torch if u have one it will reduce burning thru material .When welding tilt the electrode 30" and slowly move it in one direction as it melts ,stop when its about half used up .If u have not covered whole joint ,finish it by welding with another electrode from the opposite direction until the two ends meet . :wink:
 
ev tocak said:
Hi there, from what i see your welds look cold ,may be that electrodes you are using are too thick or the low amps setting on the welder.Those holes in the weld are from slag ,you have to clean all those spots(use something like screwdriver tip ) because simply welding over it wont help ,they will just become deeper .Or grind all of the weld on one side , preheat it using a torch if u have one it will reduce burning thru material .When welding tilt the electrode 30" and slowly move it in one direction as it melts ,stop when its about half used up .If u have not covered whole joint ,finish it by welding with another electrode from the opposite direction until the two ends meet . :wink:
Thanks Ev tocak, I do clean it up with hammer then wire wheel. I've been trying a few different techniques. I like the preheating the metal idea. I have 2mm general purpose rods and the metal is 2mm (bike frame is just under 2mm)
Thanks for your help :)
 
Got my CA v3 today :) :) and 10 x 6s balance cable paralel leads to make up my harness.
I decided to use the silicone coated 10g wires from hobby king. I compared them to the phase wires on the ht3525 and they are significantly thicker and have a nice dense core(not your average wire). I hope 3m of each (black and red)is enough to go around.
Also having second thoughts about where to mount controller.
 
lipo stash box.JPG
carb loading,,, please wait.JPG
The blue foam is from a cheap camping matress thing, its 12mm thick and feels slightly on the dense/hard side for the 8kg battery pack but atleast it wont rip and wear. i had to replace the side pieces with some thiner low density foam but that should be ok as its probably the least impact dimension.
so its gunna be a bit tight in there but it will accomidate the 8 blocks of lipo and 4 lvc beepers.
next:
-upgrade some wires to 10g
-clean and enamel coat controller pcb
-make the series plug with black nylon blocks and 10mm gold plugs
-change hall plugs and make wires longer
-mount and setup Cycle Analyst v3

that will get it going
then:
-make second torque arm
-triangle brace batery box at ends to frame for extra strength for when i get mental @ 6KW
-reinforce steer tube bearings a bit more for same reason as above ^^^^^^^^^^^^^
-install lights, still have to make the rear.. might do that now while i get my beer on :)
beer boobs.JPG
geting heavy man.JPG
 
after i eventually over took this guy i spent the night soldering and such. so tired now..
(note petrol motor and thongs 38kph wtf?) :shock:
ICE + thongs.JPG
so i used some tricks from ES member "Methods"
like it ows me money.JPG
iclear insulation.JPG
new plugs.JPG
i also added a 4khz buzzer to a 70 ºC no thermostat in series with a 1k 1watt resister. got warm at 100v but seemed like it should be fine, it would be hot already anyway at by the time it turns on.. meh.. sory no photo of how i tucked it in the controller shell just wanted that to be over, getting sooo tired right now.. anyway.. the phase wires on the motor have the 8-10mm plugs on there and just need the 6 pin phase+temp plug on it then can run a test spin up..
goodnight es crew :/ zzz
 
Hey, that's all coming on well.
Just thought I'd mention something I remember an old boss telling me about welding.
This is after telling him I could weld to get a job doing garage doors. (welding back thick safety chains to a Howard slasher was all I had done) he chucked me on his front lawn with a 9" grinder and small cig welder with only 2 settings for rod diameter and a bunch of 30mm, 50mm/19mm gal rhs, told me to build 5meter x 2 metre panels for T fitting type garage doors with 19 mm truss top and bottom I realised welding could be a heartbreaking type of career.
Anyway I finished up building heaps of them n gates , tilt doors ,whatever. Finished up I always used the welder on the higher setting. Just do a bit at a time like one second hits, looking through the glass watch the red glow dissipate after you stop( only a second or so aswell)then hit it again one second or so. That will still be hot enough to continue the weld without it starting on the slag but letting it cool just enough to hang in . It is a pretty fine line.
No joy having it set low enough to try to do it continually. Hotter - better . I recon on the little inverter I have now its usually around 100/110A with 2mm rods welding 1.6mm stuff.
You can see on the pic looking into your battrey box that there are sections that haven't had much heat.
I don't know heaps about it but that could be where cracks could start.
 
After much thought and reading here, this is my new favorite place to put a battery pack. Plus, with a steel enclosure, a battery meltdown would produce smoke, but still allow plenty of time to remove the seat and wheels before it gets too bad...

file.php
 
I don't think its gonna get even warm with that much steel, thats like 1.5mm sheets, should weigh some, bomb proof :D
That welding is bad, very bad and not mean to be rude, i would take it to someone with MIG and do it properly. That's probably done with arc welder?
 
Yay welding advice. Thanks all, but its a bit late.

Its 2mm. I had to straighten it up with a sledge hammer and normal hammer after the heat warped the box out of square. So for me that was proof enough of heat and strength (I was belting it fairly hard).

I have ridden it and will add more triangulation b4 I go WOT off the line.

Most of it is short blasts of swirl beads as sugested. I think the bike will be stronger than before , that was my goal.

I'll do some close ups ...
bottom of box.JPG
 
test spin up with new wires and plugs etc... something strange happens :shock:
[youtube]JxlCR8IiTgM[/youtube]
so it running in reverse.. HELP anyone? im guessing i can swap 2 halls and 2 phases?
or look at the software.. I'd like to ride it stock (software) though while testing.
ill have a search around to find the answere but if anyone wants to jump in and help me out I'd really apriciate it. cheers
 
Back
Top