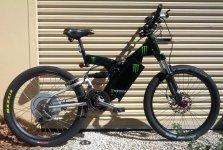
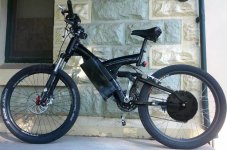
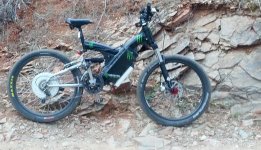
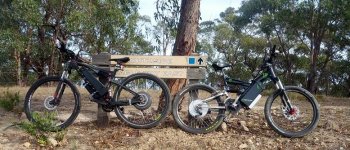
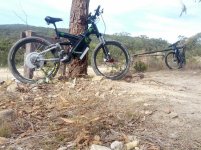
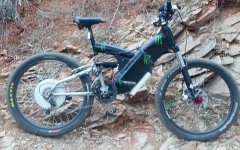
mon-goose to MON-STER

pendragon8000 said:
test spin up with new wires and plugs etc... something strange happens :shock:
[youtube]JxlCR8IiTgM[/youtube]
so it running in reverse.. HELP anyone? im guessing i can swap 2 halls and 2 phases?
or look at the software.. I'd like to ride it stock (software) though while testing.
ill have a search around to find the answere but if anyone wants to jump in and help me out I'd really apriciate it. cheers
tried switching 2 phases then 2 halls then 2 phases and 2 halls. switching 2 phases and 2 halls maded it spin in reverse. others made it vibrate with no movement.

Edit:
really quick replys from Lyen :)
Lyen Controller to Crystalyte motor wire color lining (no load current draw on HS3540 = around 1.55A unlaced at 48v tested on 8/10/2012):

Controller: Motor:
HALL:
Yellow Yellow
Green Blue
Blue Green

PHASE:
Yellow Blue
Green Green
Blue Yellow
SUCCESS! spins beautifully in the correct direction. must have missed the corect phase combo when i switched the halls (that i randomly got the right combo of when i cut the wires)

next step; battery harness / series plug
 
how did you mount the thermostat ? You shouldn't have any extra wires leaving the motor, that's the whole reason I do them like that. You cut out of the hall wires and solder the thermostat in there in series.

As for your welding, well, it ain't going to win any beauty contests :p As long as it doesn't break on you at speed! If it's mainly for street use you should be right.

Oh and your kwh capacity goes off the nominal voltage (or closer) not the fully charged voltage x ah capacity.
So you'd be looking at around 900 whr. Still a respectable amount of most purposes.
 
pendragon8000 said:
thought Id better mount the controller so i can have it handy when getting other bits on there so...

I used a block of black nylon at the front end to screw counter sunk screws into.

Wow :shock: Your bike is definitely starting to come together. I think I'm jealous. Everything is starting to look great. Have fun, hope all goes well from here.
Sorry I couldn't help with some of your answers of let you touch my infinite wisdom :wink: .
 
Hyena said:
how did you mount the thermostat ? You shouldn't have any extra wires leaving the motor, that's the whole reason I do them like that. You cut out of the hall wires and solder the thermostat in there in series.
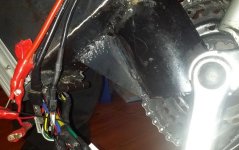
the extra wire is from a ntc thermistor. I put the thermostat in there as you said, cutting the common positive hall wire.

Hyena said:
As for your welding, well, it ain't going to win any beauty contests :p As long as it doesn't break on you at speed! If it's mainly for street use you should be right.
yeah im prety sure it will be fine. I still have to re-enforce the ends of the battery box with triangle brackets.

Hyena said:
Oh and your kwh capacity goes off the nominal voltage (or closer) not the fully charged voltage x ah capacity.
So you'd be looking at around 900 whr. Still a respectable amount of most purposes.
thanks i didn't know that, I guess that would make sense.

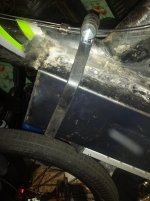
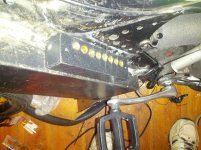
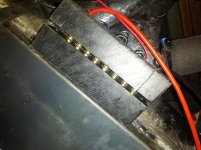
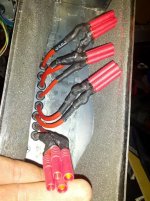
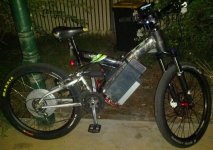
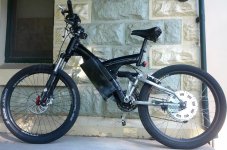
So here's my progress...

IMG_20130330_191416.jpg
IMG_20130331_193456.jpg
IMG_20130331_212012.jpg
IMG_20130401_010155.jpg
Trackman417 said:
Wow :shock: Your bike is definitely starting to come together. I think I'm jealous. Everything is starting to look great. Have fun, hope all goes well from here.
Sorry I couldn't help with some of your answers of let you touch my infinite wisdom :wink: .
thanks. yeah its comming along. i hope i get it rideable tomorow. i need another torque arm and then i can get around without the cycle analyst at least.
happy and tired...

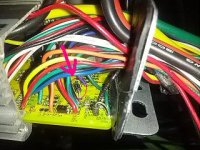
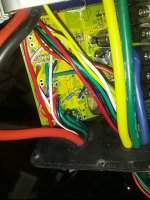
I think i found the diode in the controller i need to swap for 10k R, it looks to be connected to the blue wire on ca direct plug... not sure whats going on there.
 
throttle diode.jpg
has anyone played with this? its not a huge priority but i have the controller open ready to change the diode if thats the problem. i have not got a responce from Lyen on this one. I'm guessing he's busy or doesnt know. i will try connecting a throttle to the ca and the controller and see if i can come up with something.

my multimeter says 25K ohm from ca direct plug throttle wire to the circled diode.

any help would be much apriciated.
Edit
Lyen DID reply. I just missed it somehow. He is most helpfull
 
put a 10k R in place of the diode but it seemed a bit high because even with 5v throttle input from the CA it wasn't spinning up all that fast. so i put a 5k in there. still seems a bit restrictive but i cant be certain because i set the speed limit of the Lyen controller to 80%
anyway i went for a cruse and limited to 500watt first then when i decided it was safeish i put it upto 1KW. i was getting a top speed of 40kph at 1kw.
IMG_20130401_164349.jpg
prety unexciting but may be of use to someone in the future.

so heres how it looks atm. needs another torque arm and the battery box isnt really big enough for battery monitors as well so ill set up an external compartment thing with switches or something. and yeah its heavy as buggery. (thats heavy)
also needs some attention in the steer tube bearings (needs to be tightend up)
IMG_20130401_213515.jpg

need to play with phase angle aswell.

anyway. i spent most of easter on this trying to get it done, at least i got to ride it easter monday night. still need quite a few hrs on it for it to be finished.
 
Ok after a few PM's with Kepler about the CA and the Lyen controller I reread my email from Lyen that i couldn't find b4 cos i was so tired... and he said 1K ohm in place of diode not 10k agh.. so i had just bought some 1k for the precharge resistor led indicator, and so i put it in and runns SWEEEET! i couldnt resist switching it up to 1.5 kw and it felt so smooth and like it wasnt trying to hard on take off. i do have the phase angle at 120 deg i think so that may explain the power consumption being a little high, Ill switch that to auto as per Keplers advice.

anyway, finaly got to have a ride with the throttle working properly so now its onto:
- strengthening the frame a little
- tighten up the head tube / steer tube bearings
- make another torque arm.

then i can put some proper lights on there and my 24v car/truck horn.
 
pendragon8000 said:
Ok after a few PM's with Kepler about the CA and the Lyen controller I reread my email from Lyen that i couldn't find b4 cos i was so tired... and he said 1K ohm in place of diode not 10k agh.. so i had just bought some 1k for the precharge resistor led indicator, and so i put it in and runns SWEEEET! i couldnt resist switching it up to 1.5 kw and it felt so smooth and like it wasnt trying to hard on take off...
What is gained by replacing this diode with a 1K Ohm ??? watt resistor? Increased acceleration at a dead stand-still or what?

FA
 
The way the cycle analyst v3 connects to the controller won't work with a diode. So for this controller a 1k ohm R is required. Kepler and myself agreed that theoretically a link could be used instead but apparently that is not suited to the Lyen 4115x18 controller.
The CA v3's throttle output min and Max are set so the throttle varys in the effective range only so if u need it to be up toward 5v to get full throttle (because of the 1k R)I can do that. At this stage 4.2 volts seems to give me full throttle. But this may change when I reprogram the controller via USB PC connect.
This resistor
file.php
 
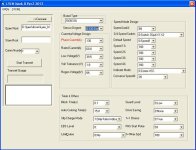
lastnight i reprogramed the controller as such:
lyen software1.JPG

thismorning i put a new chain on and linked it with a 2 piece linker similar to this
images


Ok today i'll be; adding the triangulation bracket to the front of the battery box, drilling and taping 5mm thread holes in steer tube to tighten up the tiny bit of slack in the bearing housing, put a latch on the batery box lid (although the rubber strap is doing a great job).
then paint with the "epoxy gloss enamel" (anti corosive top coat no primer required)
then i have a SUPRISZE for you all :) hint:
439778.jpg
 
Pendragon - thank you for the extreme detail. I'm aiming to upgrade to a similar controller and will probably need to perform the same resistor-substitution process.
 
jkbrigman said:
Pendragon - thank you for the extreme detail. I'm aiming to upgrade to a similar controller and will probably need to perform the same resistor-substitution process.
no worries. Lyen would probly swap it for you if you let him know you want to run a ca v3. thats why i had to do the diode to 1k R swap.
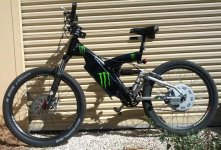
painted black.JPG
there it is with mimial wire and just straight up black enamel paint.
when i was wire wheeling off old stickers and paint i accidently got the brake and gear cables cought up in there and they are now mangled... so ill have to replace them i think front derailer cable is ok. bummer cos the rear derailer cable was new .. sholdn't cost much. anyway i have 1 other thing to do b4 todays trail ride ;)
 
wow :shock:
Not bad for your first time welding man!!!! :D . Everything being the same color and the monster energy stickers just bring the bike together. How hard was welding the aluminum for your first time?
I am really impressed with the series block you made! It's so idiot proof, I wish I thought of something like that for my bike. However, it is just a frame with a bag in it. Nothing too sturdy to do that with.
Yeah I agree Mr.Mushymelon about the motor. It doesn't really match the rest of the bike. But no offense in any way possible :p
 
Mushymelon, thanks for the photo shop I think I may go there with the pain on the hub. Maby just the side plates? The spoke flange may be to much of apita to paint.
Thanks trackman and dimpirate.
More photos soon and a couple vids ill have to edit together. I think a new avitar is coming ;)

Also thanks to Hyena, Kepler, Lyen, John (from stealth), Rix, other es members for welding advice.
Btw its STEEL not aluminum. And I got better as I went with the arc welding.
PS
Its my birthday and my gf got me a camzilla phone mount for me bike . I used it for the video I'll upload later. Its choice :)
 
Heh the old monster decals hey. I looked at some of those a few weeks ago when trying to make my cut and shut specialized bike look more factory but they didnt suit the bike. I've seen alot of pit bikes and the like with them and they suit well.

The bike has turned out pretty well. Are you going to leave it at that or do more work / revisions ?
If starting over and you want the advice of someone who's not particualrly qualified to give it :p I'd recommend replacing the whole downtube section and headtube with a new piece/box and then just weld on the bottom bracket and what ever part of the top bar / seat post support is suitable to keep. In your case it would be easy. Eg like this:

monster.JPG

This is what I'll be doing and it's how timma2500 does his brilliant creations too. They're thicker aluminium but same deal essentially.
Oh and +1 for the black painted hub.
 
Hyena said:
Heh the old monster decals hey. I looked at some of those a few weeks ago when trying to make my cut and shut specialized bike look more factory but they didnt suit the bike. I've seen alot of pit bikes and the like with them and they suit well.

The bike has turned out pretty well. Are you going to leave it at that or do more work / revisions ?
If starting over and you want the advice of someone who's not particualrly qualified to give it :p I'd recommend replacing the whole downtube section and headtube with a new piece/box and then just weld on the bottom bracket and what ever part of the top bar / seat post support is suitable to keep. In your case it would be easy. Eg like this:


This is what I'll be doing and it's how timma2500 does his brilliant creations too. They're thicker aluminium but same deal essentially.
Oh and +1 for the black painted hub.
thanks for the advice...
well what I AM going to do is add a second clamping torque arm so i can pump the for told 6kw through the HT3525.
and add the 24v horn thats going to be taped off one 6s pack, and add the high wattage lights i made.
i was thinking about adding a housing around the frame where you added frame in you edited version, to contain the 240v plug pack(s) come dc-dc converters. But yeah thanks for the insperation to follow timma2500's desighn, that photoshoped version looks prety sik. and yeah agh more work to paint the hub and rear arm.

any votes / sugestions on how to do it , regarding spokes? just do the lot and mask the rim/tyre?
 
pendragon8000 said:
Hyena said:
Heh the old monster decals hey. I looked at some of those a few weeks ago when trying to make my cut and shut specialized bike look more factory but they didnt suit the bike. I've seen alot of pit bikes and the like with them and they suit well.

The bike has turned out pretty well. Are you going to leave it at that or do more work / revisions ?
If starting over and you want the advice of someone who's not particualrly qualified to give it :p I'd recommend replacing the whole downtube section and headtube with a new piece/box and then just weld on the bottom bracket and what ever part of the top bar / seat post support is suitable to keep. In your case it would be easy. Eg like this:


This is what I'll be doing and it's how timma2500 does his brilliant creations too. They're thicker aluminium but same deal essentially.
Oh and +1 for the black painted hub.
thanks for the advice...
well what I AM going to do is add a second clamping torque arm so i can pump the for told 6kw through the HT3525.
and add the 24v horn thats going to be taped off one 6s pack, and add the high wattage lights i made.
i was thinking about adding a housing around the frame where you added frame in you edited version, to contain the 240v plug pack(s) come dc-dc converters. But yeah thanks for the insperation to follow timma2500's desighn, that photoshoped version looks prety sik. and yeah agh more work to paint the hub and rear arm.

any votes / sugestions on how to do it , regarding spokes? just do the lot and mask the rim/tyre?

I say order a set of stainless spokes and shelf them for now.
$20 black or stainless.

Heres a link, many spokes to choose from, decent pricing as well the page takes a min to load scroll down to the bottom.

http://electricrider.com/crystalyte/parts.htm

Have fun riding then when your ready remove the spokes take the motor out do it right.

But for now just go ride the thing.

Mushy
 
Back
Top