
dmwahl
10 kW
SamTexas said:I also use LiFePO4. But right now my most pressing need is a cell level LVC for a 3s and a 7s consumer LiCo packs. I would love to have a 3.0V LVC, but 2.50V would also do.
I don't know how you plan to notify the user when LVC is reached. I prefer to have a single continuous signal, say going from 0V to 5V for example when any of the 3 (or 7) cells is at or below the LVC. I don't need to know which cell it is. Just my thought.
It's basically an active low signal. In my case I'm connecting it to one of the brake inputs on my controller, so when the LVC point is reached on any cell it shuts off the motor current.
I have the output from each cell monitor going to an opto isolator. The transistor outputs of the optos are all tied together, so whenever any one of the cells goes below the LVC point (or above the HVC point) the corresponding opto turns on and the output starts to conduct. The only down side to this approach is there is a roughly 1-2mA draw on the cell when the LVC signal is asserted. I figured this was far better though than allowing the user to continue discharging at many times higher current.
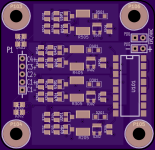
I attached the relevant part of the schematic in case that's more help.

")

