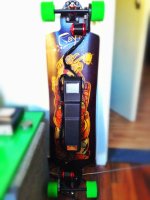
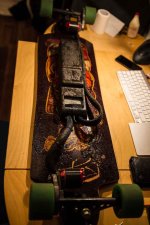
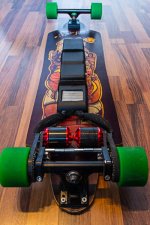
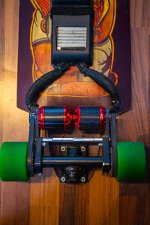
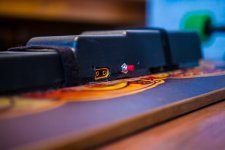
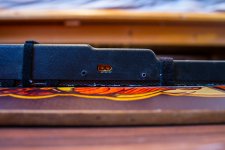
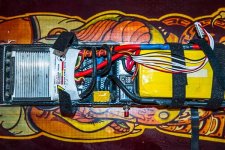
My build. Rayne Killswitch Electrified, 4KW Alien Components

superpef

100 W
Joined
Jul 28, 2013
Messages
126
Hi guys,
I have recently been building my own electric longboard, so I thought I'd post it on here for people to see. This forum has been more than great help and I hope I can give something back, so please don't hesitate to ask, especially the "newbies" under you as I still consider myself one and wouldn't have been able to pull this off (even with Richard's and Bruno's kits) without the help of others..

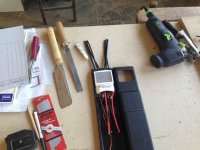
So here's an overview of the components and parts I used:

- My beloved Rayne Killswitch (yeah it hurt to screw the battery case in there but I can remove it any time if I wanted)
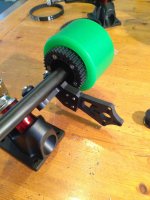
- Alien Kit by Richard for Dual 50mm motors, Holey trucks
- Abec 11 Flywheels 76mm 75a
- 7s Battery case kit by Richard
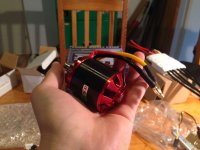
- Twin 50mm Kit from Bruno (Twin 120A ESC with internal BEC and 2x 50mm motors à 2000W, 270kv
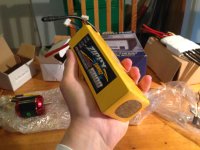
- Zippy Compact 7s 5800 maH 25C Lipo
- Imax B8+ balance charger 1-8s
- Graupner Power supply
- Modelcraft GT2 transmitter
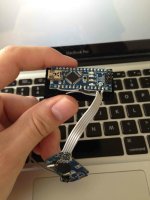
- Arduino Nano V3.1
- Memorex wireless Wii nunchuck
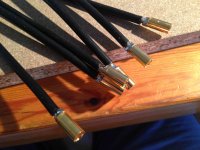
- 10 awg cable to extend esc
- 5.5mm bullet connectors
- some heat shrink
- momentary switch for antispark cable

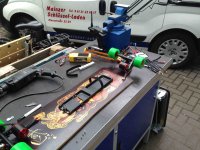
Now the main parts (motors, esc, truck mounts, battery) are exactly the same as on Richard's "commuter" board so you've seen them before and they have already been tested and verified to work great but here's how everything looks..
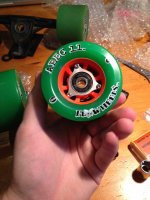
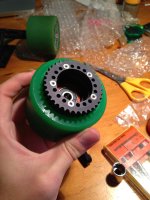
2013-08-27 12.48.35.jpg

2013-08-27 12.48.45.jpg

2013-08-27 14.29.38.jpeg

2013-08-30 08.05.39.jpeg

2013-08-30 08.05.49.jpeg

2013-09-01 17.02.25.jpg

2013-09-05 13.46.14.jpeg

2013-09-06 15.13.16.jpeg

2013-09-07 12.57.04.jpeg

View attachment 1

2013-09-09 10.17.16-5.jpg


For now I am using the RC transmitter as it works perfectly. It only looks a little weird with that big pistol thingy in your hand, so I will either break down the thing and make it smaller or just wait for somebody else to do it 8). Toddy from the forum has developed a really nice code for his nunchuck/arduino setup that he was kind enough to share, so I will be playing with that in the future and see how it will handle. For now the RC transmitter is doing a great job. Again, thanks Todd for sharing and also explaining the stuff!!

The first test run was already an out of this word experience. I thought that if it would work have as well as I imagined, it would be awesome but it exceeded my expectations by far. Take off after one push is very smooth and controllable. The acceleration is just unbelievable and the board still handles really nicely, even with the motors mounted diagonally on front and rear truck.
I will be sure to post a video as soon as will be able to do some more runs.
Right now I am having trouble with my charger as it will recognize only 6 of the 7 cells of the battery.
I thought I killed my battery after ONE!! charge and discharge but it seems the low voltage cutoff by the esc worked just fine as my voltage monitor tells me the battery is fine. So it should be the charger.. No more testing until the charger replacement arrives..

My 2 cents on the recent discussion about Bruno being a distributor and not the manufacturer of the products: I am perfectly fine with it. For someone like me, support is a big factor and I think it's safe to say I probably couldn't have pulled this off without bugging the guy with LOADS of e-mails. He knows very well about his products and took time to answer each one. From support on my choice of components, to shipping everything I needed including stuff he bought for me on Hobbyking that wasn't available at my warehouse, to supporting me to get everything up and running, to bugfixing. Thanks for that!
Same goes for Richard, he also received loads of e-mails with questions. He is just as helpful and with these guys as suppliers, you definitely have a base for your DIY project.

Hope I could give you guys some insight. Keep your projects going!!
 
Hi Superpef,

Awesome set up!!!
I am amazed with your feedback about Richard. I asked him a while ago about the warranty for the dual ESC and I personally didn't liked his answer. Now, seeing your feedback I am thinking to try his dual 8S ESC. The only thing I don't like in Richard longboards are the trucks! The base is super short...

I built my own truck which still holds pretty good after 7 months of riding (@700 miles on it) but I came across La Grange L1 and I decided to try it and I am super surprised. Even the noise of the engine changed :))
The truck is much wider and offers more stability at higher speeds compared to my own one (paris 195mm). The hanger of the LaGrange is 6" but I machined 2 copy of the La Grange that are 8" wide bringing the total length to 13.75" from end to end of the wheels. Looks so much cooler!!!
I tested 6374-192kv and I can start from a dead end and the current does not spikes at all. The 6364-245 also can do it but I don't like to noise when it starts and I feel a little cogging (maybe 2 of them will be a different story). Who knows...
I can't test my dual set up yet because of the shipping delay from Castle Creation and I wanted to ask you if you tested one engine set up vs 2 engines set up. Does the 2 engine gives you more range? does it run more efficient?
Why are you still pushing the board when you start? I was thinking that 2 engines should be able to start from a dead stop with no problem.

Thanks!
 
Thanks for the compliments!
You're right, the holey could be a little wider, still I come from riding that exact board with Randal trucks that are just a bit wider and was always happy with stability even downhill. The difference doesn't really bug me but as I said I still need to do lots of test riding.. How responsive is the LaGrange truck compared to the popular longboard trucks? I am really pleased with the holeys when it comes to carving..
I still push once because I think for a (smooth) dead-end start I'd need a sensored system. It works but I don't like the abrupt start..
I haven't tested the setup with only one motor yet, maybe I will some time..
 
If I was an objectophile, I would definitely have sex with it.
I can't even imagine what two 63mm motors would feel like, mine feels like it can climb hills very well and the acceleration is awesome, no need for more I think.
Have you tried less powerful setups than yours? Have you taken your setup to somewhere near max??
 
Haha yeah its actually way more power then I need. I'm not really a speed demon. I have not taken it to max or no where near it. Maybe 60-70 percent of throttle. Even 1x 63mm is powerful. I'm working on a board like yours next. I plan on 2x 50mm same as yours and 83mm wheels. I ended up going with the biggest incase the 2x50mm didn't climb hills. But realized after dual 63's are more then needed.

I'm guessing you spent a pretty penny then. :)

Once I get some time I want to implement the Ps3 motion controller.
 
I have right now 195mm paris in the front. When I mounted front and rear La Grage it felt so much easier to turn in any corner. I felt much better response. I will start a thread when the 14 inch trucks are completed. With 26V 8S, 2 - 6374 turnigy and white captains I should get 25 miles/h super smooth start and breaking.
 
Hey guys just wanna give a little update on my experiences with my board.
It's been quite a while now since it was finished and I had such a great time with this thing. Too bad I finished the build during the end of summer so I didn't really have many sunny/warm days left, but I really used it as much as possible and still do in winter. From joining my roomies on their bicycle rides to commuting only by skateboard or in combination with trains, busses, car-sharing, it literally closes the gap that I had with a bike that I simply couldn't take anywhere. It's so convenient that it still feels too good to be true. I took one major fall which was my fault because I wore gloves (thin but still bad idea) and accidentally hit the brake at near top speed (I measured top speed and it says exactly 41 km/h). My pelvis still feels a bit funny over a month later but seems to be fine according to my doc.
As for the performance and maintenance of the parts.. as you can see above I'm using alien parts for both mechanics and electronics. Dual drive is working flawlessly, can't imagine anything else to be better. The motors have been running nicely and never make funny noises that don't sound like they are supposed to, the esc has also been running very well with just a few occurrences that remain a mystery:
- Once after a longer downhill-braking period it wouldn't let me accelerate for a few seconds (felt like a low voltage cut-off)
- Sometimes under very heavy acceleration there seems to be a drop in power (feels like it's only affecting one of the motors but can't tell for sure)
Anyone experienced the same/ knows what could be the issue?
One thing that is a little bit of a pain is belt re-tightening, I have to do that every second or third time I go out there. Definitely a solvable issue, just haven't come up with a solution yet.
The other screws and bolts also require tightening but not nearly as often so that's ok (of course I use loctite on every single one).
Another thing to mention is that I am currently converting from holey to caliber trucks, not because I didn't like the holey trucks (I loved them) but because there have been some bending and breaking issues of the alien brackets mentioned on the forum and mine also showed some wear after a couple months of use. The calibers just offer more space for a more solid bracket construction. I am a little concerned about the caliber truck mount too as it is considerably longer (the motor is farther away from the truck), so the belt is longer too which could increase some risks like bending sideways but Richard says it's very solid so I'll give it a try. The fat bracket itself feels extremely sturdy.

I recently joined my roomies on their daily bike ride as it was a nice sunny day out but I was fooled. Although it was dry everywhere else, the bike path we took was super wet. I didn't want to turn around and thought that would be the ultimate rain test.. and it was!! I came home soaked just from splash water from the wheels, the motors were soaked but kept working perfectly and gladly luckily the electronics were ok even though some drops of water/mud made it into the casing. Pretty lucky I guess, but at least that shows that an occasional puddle shouldn't be a problem, especially not for the motors.

IMG_6488.jpg
 
Awesome update. Glad you enjoy your eboard. It's mad fun! I've probably been riding 6 or 8 months and it doesn't stop being fun. I definitely noticed that issue with wearing a glove on the controller hand that it's easier to screw up so I tend to not wear a glove for that reason. I remember in the beginning I took quite a bit of falls but so far thank god I haven't taken any crazy falls since then been getting real comfortable cruising around town. I probably ripped about 3 pairs of pants more like holey pants!

You can try and get the higher quality belts which would prevent the belt from stretching. The belts that have fiberglass and/or PolyBelt.com has real cheap belts. But I went that route with my alien setup and I had to replace belts every so often. I'd probably go with fiberglass belts.

Also if the actual motor mount is flexing separate I would think this can cause issues with stretching the belt out. Ever since I upgraded my own motor mounts and made them thicker. I no longer have the issue with adjusting belt tension and/or belt's becoming loose. I think this is due to a stronger motor mount that doesn't flex against it's natural position which is inline with the two pulleys.

Definitely a clean looking setup with that enclosure and the nice wire covers w/ zip ties. I'm waiting on some enclosures and hope to make something as clean cut as yours. How often do you take out your enclosure to charge your batteries?

As for cogging, I definitely want to give a smaller pitch a try GT2 3mm and 15mm belts. Maybe on my next run. It seems boostedboards went that route to stop cogging from their blog.
 
Thanks, that's a valuable update!

I can't really tell from the picture, but my main concern would be scratching the parts mounted below the deck. Did that occur? What's the clearance with and without yourself on top of it?

Do you have to re-tighten the belt due to stretch or loose bolts? I can think of a few ways to solve the loose bolts issue but most would include redesigning of the mount. However if you have a good position of the motor that results in a good belt tension which you want to keep, you could drill a hole right next to it and lock this position with an inserted bolt.
 
torqueboards said:
How often do you take out your enclosure to charge your batteries?
Very often, pretty much each two shorter rides or after each longer ride (I think I get about 10-13 km on one charge depending on incline..). But that's no hassle, the cover is only secured by velcro and one reusable zip tie. I leave the battery attached to the board for charging, only take it out for balance charging which I barely do.

torqueboards said:
As for cogging, I definitely want to give a smaller pitch a try GT2 3mm and 15mm belts. Maybe on my next run. It seems boostedboards went that route to stop cogging from their blog.
Yeah I think that's the way to go.. As soon as you're done, make them look real sleek and I'm in :wink:

Murfix said:
I can't really tell from the picture, but my main concern would be scratching the parts mounted below the deck. Did that occur? What's the clearance with and without yourself on top of it?
The clearance has been about 4 cm, which is plenty. I'm lowering my deck a little. Never ever had something scratch the street. I'm pretty careful with curbs, though. It's been pretty straightforward, anything I wouldn't have ridden over with my non-electric longboard (the same deck) I still don't ride over. The clearance with me and without me is about the same even though I'm about 82kg, as the deck is a stiff downhill deck with no flex..

Murfix said:
Do you have to re-tighten the belt due to stretch or loose bolts?
I don't think its the belts stretching, as you might know, the alien bracket is a two-part construction. One part attaches to the truck, the other part attaches to the motor and slides into the truck mount to make belt tightening possible. It is secured by 4 small bolts that tend to loosen, so that seems to be the culprit. I could either find a way to secure the hell out of these 4 bolts, or I could stick something into the gap between the two mount parts to prevent this gap from becoming narrower effectively preventing the belt from becoming loose.. I was thinking about filling the gap with solder :shock:
 
superpef said:
Murfix said:
Do you have to re-tighten the belt due to stretch or loose bolts?
I don't think its the belts stretching, as you might know, the alien bracket is a two-part construction. One part attaches to the truck, the other part attaches to the motor and slides into the truck mount to make belt tightening possible. It is secured by 4 small bolts that tend to loosen, so that seems to be the culprit. I could either find a way to secure the hell out of these 4 bolts, or I could stick something into the gap between the two mount parts to prevent this gap from becoming narrower effectively preventing the belt from becoming loose.. I was thinking about filling the gap with solder :shock:

Use longer bolts and include nylon nuts on the other end. That's what I did when I had my alien mounts. Smart idea with the velcro for the cover.
 
superpef said:
Nylon nuts, good call! I'll do that..
Would you have an idea what could cause the loss in power on hard acceleration that I mentioned above?

Check your controller batteries maybe. Usually if I have issues with throttle and the motors its due to my controller batteries. Perhaps, connectors and/or programming on the ESC?
 
torqueboards said:
Check your controller batteries maybe. Usually if I have issues with throttle and the motors its due to my controller batteries. Perhaps, connectors and/or programming on the ESC?
Yeah, you're right, could have been the transmitter, I'll be sure to check the batteries next time this appears.. ESC programming and connectors are fine. Thanks for the input!
 
...It is secured by 4 small bolts that tend to loosen, so that seems to be the culprit. I could either find a way to secure the hell out of these 4 bolts...

There are stronger screws like 9.8, 10.9, 12.9 or even 15.8. That is possible to tighten harder than the normal 8.8 screws. I refer to Metric screws.
 
Update

I recently put some more work into my setup to get it ready for summer.
I converted from Holey to Caliber trucks for safety reasons. The Calibers give more room for the mounts to sit on and allow them to be beefier. Was worried about the holey mounts snapping someday as I could already see wear after a short period of use.
I also converted from dual diagonal to dual rear drive, mainly to be able to stiffen the construction by connecting the two sides with each other. As you can see it was possible to fit two 5065 motors to one caliber truck using alien parts. Caliber trucks have pretty long wheel shafts allowing to fit 6!! speedrings between each wheel and truck giving me enough room to fit both motors. Theres hardly any gap between the motors as you can see but it works.

IMG_6662.jpg

The connecting piece is made out of m4 threaded rod and and m4 rod joiners in between the mounts. Onloop from the forum has made something similar for his Caliber/Alien setup. Without this, the Caliber mounts would always move a little bit away from each other, no matter how hard I tightened the mounts, this would happen. The connection works great, the construction is now rock solid and the mounts can go nowhere. The only thing I worry about now are the motor brackets as a number of users seem to have bent or snapped those. Onloop has also pointed out that the brace puts even more stress on the motor brackets, as they are now the only part that able to move and he has recently snapped two Alien brackets. I can tell they swing sideways to a certain extent as I can hear the motors clapping against each other when riding on rougher roads. Beetbocks, if you read this, maybe you could consider making the motor brackets with more durable material (but exactly the same thickness)?? A little more weight surely wouldn't hurt if we could forget wear&tear issues..

IMG_6668.jpg

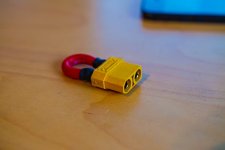
I also re-cabled everything to have an antispark momentary switch, a key and a charging port. Using an XT90 Plug for an isolation loop and an XT60 for a charging port seemed to be the best solution and I'm really happy with it. This was way overdue as it was a pain to remove the cover to power up/down and to charge the board. Now I can just grab it and run. I don't think twice anymore whether I am taking the board for small distances or not. One thing I still have to do is to either implement a lipo meter into the board with a window to read the display at any time, or to make a port for the balance lead to momentarily connect a lipo meter from the outside. I would prefer something like a "CellLog 8" implemented and always connected, but they seem to be drawing quite a bit and draining the batteries fast and unevenly, even in sleep mode. Bummer..

IMG_6671.jpg
IMG_6673.jpg
IMG_6683.jpg
IMG_6680.jpg
 
Sick board man. Real nice and simple. You still bring a lipo charger around with you right?

Crazy you have 6 speed rings on each side to push it outwards. I've always wondered how that fit.

I guess, I'm not the only one snapping Alien mounts. Weird because LPBug has a similar design and his seems to be holding up fine.
 
torqueboards said:
You still bring a lipo charger around with you right?
Unfortunately yes, it wouldn't be such a hassle if no damn power supply was needed. I saw you're looking into the bms thing, that's awesome. It's really the way to go. Bruno is working on a flat 7s 8000 mAh battery with bms which I'm pretty sure I'm gonna upgrade to as soon as its available.

torqueboards said:
Weird because LPBug has a similar design and his seems to be holding up fine.
I was wondering about the same thing!!
 
superpef said:
torqueboards said:
For your charging port - did you just split the wires from the batteries so 1 side goes to ESC and the 2nd side goes to the charging port?
Exactly. Of course charging doesn't require the wires to be as thick as the main wires so that helped while soldering..

Nice. What charger are you using just an imax charger w/ a power supply? Are you going to use extensions for your balance port?
 
torqueboards said:
Nice. What charger are you using just an imax charger w/ a power supply? Are you going to use extensions for your balance port?
Yup, Imax B8+. The balance lead you can see in the last picture is actually a 30cm extension. I bought it so I could conveniently place an internal lipo meter where it would fit nicely but I found out that keeping a CellLog connected isn't a very good solution. Some guys on the forum have hacked the CellLog to stop it from draining the batteries but I don't have the time to put days of work into every piece of my setup, so I haven't decided yet about what to do. I hardly ever balance charge my battery, the cells always stay within 0.015V deviation so having a balance lead extension for charging is not my concern but I still want to always keep an eye on the cells.
 
Really nice setup! Wish I would have waited for the caliber parts as well instead of my holeys. On the cell log topic: Wouldnt a simple switch on one of the outermost balance leads of the pack allow to turn it off?
 
Back
Top