Weight Sensing Longboard with Inline Wheel Motors

bandaro said:
It's interesting how you have the motor mounted to the wheels, I was avoiding having things mounted that low as I was worried about them hitting rocks or bottoming out, do you have to nurse it much/be very careful what you run over to keep the motors clear?

As they are right now, they run a little close to the ground and definitely hit smaller rocks they you normally wouldn't worry about. Since the motors are spinning, they just roll over without much problem but the motor shells are getting pretty nicked up. What I'd like to have is a ~3-4mm thick tough rubber sleeve over the motor, so that when it does bottom against something it has cushion to absorb the blow just like the urethane wheels do. It would also be possible to further seat motor inside the body of the main skateboard wheel and reduce the exposure that way.

As for the weight activated power, have you taken the board on some downhill runs to see what it does when you slide/throw it around?

We'll need to find someone who knows how to slide and throw around a board to tell us! That's a skill level that I don't have yet, but I'm hoping there are some people at the Maker faire who will be able to put it through those kind of paces. The good news is that there is no need for a downhill run, the motors will handily look after that detail. :mrgreen:

I take it dancing with this type of throttle would be impossible?

It would just add a new element to your dance routine, where the location of your center of gravity as you move around is also controlling the board's acceleration, just like as you dance sideways you control the steering. I haven't succesfully surfed on the waves before, but those who have said that the handling felt just like catching a wave, where you can speed up and slow down by moving weight to the nose and tail respectively.

And that breaking ability... the lane isn't nearly wide enough to carve/slide

I'm in awe whenever I see longboarders in Vancouver weave through traffic and slide to a stop at intersections, but for the rest of us electrical regen braking is like a godsend.
 
That is the beauty of regen on a skateboard, it allows newbs like myself to ride confidently without worrying about what car I will slam into to stop myself. :D It is an equalizer, just like electric bikes, allowing more people to enjoy the sport.
 
Just a small update on this project. The skateboard has clocked a lot of mileage since we started off on the bike trip from Vancouver to SF. In our original travel plans were were hoping to occasionally use one bike to tow the 2nd bike and free one of us up to actually ride the skateboard for some length of the journey. But instead, it's been serving us much more as an "around town" vehicle, being way more nimble than our heavily burdened cargo ebikes. It's also been fun seeing how quickly people take to the board, even those who start off with a somewhat blasé attitude about powerboards.

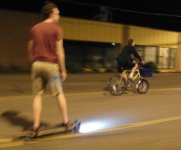
Here's Henry of Liontail cycle's zipping back from drinks at night in Seattle:
Henry Night Skating.jpg

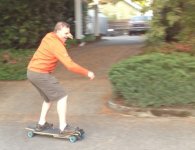
Wake who runs TheEbikeStore in Portland had barely ridden skateboard before in his life, but after one trip to the park he was basically hooked (and substantially more confident than in this early shot!):
Wake Skating.jpg

We did have one incident in Portland though. On the front truck, the sense wires for the strain gauge were a bit exposed, and I was worried that if there was a wire failure here it could cause the board to take off uncontrolled. I was planning to write a small safe guard in the software that would detect out of bounds signals from the strain gauges and quickly shut things down if this were to case, which would be a pretty trivial thing to implement but didn't get done in the rush before leaving.

Well, sure enough, Jonathan who runs the failry renown bikeportland blog was happily on a test spin doing a corner when presumably a rock struck one of the strain sensor wires. He jumped off the board which took off and started spinning in circles. Fortunately nothing bad happened, and once the front wheels were stopped after he picked it up then the <2kph speed cutoff kicked in and the motors shut down.

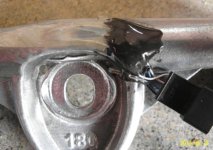
Here's the damage:
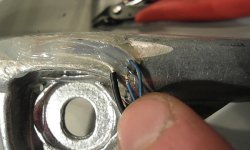
Broken Strain Wire.jpg
Two of the strain sensor leads ended up getting severed. At our next stop in Corvallis, we were staying with Otmar, the electrical engineer behind the Zilla controllers, with a shop full of tools, and it was a straighforward solder repair. After fixing the wires, we put on a healthy covering of JBWeld to protect against future impacts:
Truck Repaired.jpg

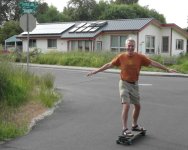
Here's Otmar reaping the rewards of that:
Otmar Rockin It.jpg
 
For distance, maybe add a trailer with extra batteries...

http://www.skatefurther.com/forum/viewtopic.php?f=15&t=69&start=40

... and a cook stove, tent, sleeping bag, greens :mrgreen:... LONGBOARD CAMPING!!!! F'YA!!!

btw - Justin, thanx for the updates, I'm checkin' this thread like er' day. awesome project.
 
For distance, maybe add a trailer with extra batteries...
http://www.skatefurther.com/forum/viewtopic.php?f=15&t=69&start=40

Very interesting! After trying Justin's board in Portland, I got real interested. I've never been on skateboard/snowboard/surfboard, but it was very intuitive with the weight sensing. But I couldn't see how it would work for me with my 38 mile-each way commute. But maybe with a trailer??? How many amp/hr do you think I would need on the trailer?!
 
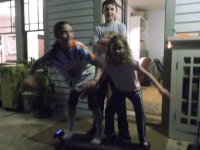
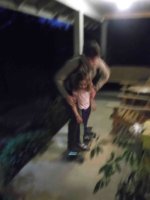
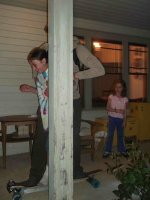
I didn't get any good pics--I hadn't quite figured out the night settings for our new camera. But here is Justin impressing our kids! We have a rough gravel driveway, so we had to stick to the front porch.
 

Attachments

  • Tom Elaina Lydia.jpg
    Tom Elaina Lydia.jpg
    21.1 KB · Views: 7,089
  • Justing and Lydia.jpg
    Justing and Lydia.jpg
    21.9 KB · Views: 7,089
  • Justin and Elaina.jpg
    Justin and Elaina.jpg
    21.3 KB · Views: 7,089
treefarmer said:
For distance, maybe add a trailer with extra batteries...
http://www.skatefurther.com/forum/viewtopic.php?f=15&t=69&start=40

Very interesting! After trying Justin's board in Portland, I got real interested. I've never been on skateboard/snowboard/surfboard, but it was very intuitive with the weight sensing. But I couldn't see how it would work for me with my 38 mile-each way commute. But maybe with a trailer??? How many amp/hr do you think I would need on the trailer?!

You're talking about two hours on a longboard. You will have good balance if you train yourself to that, but it would be quite tiring. I think 20 miles, let alone 30 miles, it very far on a longboard. Even 10 depends on the terrain. But this is still beautiful and suitable to certain applications.
 
You're talking about two hours on a longboard. You will have good balance if you train yourself to that, but it would be quite tiring. I think 20 miles, let alone 30 miles, it very far on a longboard. Even 10 depends on the terrain. But this is still beautiful and suitable to certain applications.


You are right--the batteries would likely outlast me--and then I would have to work a twelve hour shift and ride home. Right now it is a 1.75 hour commute by bike, so 2 hours doesn't sound too much longer. But still, if I could rent a board to try it sure would be an adventure....
 
treefarmer said:
... But I couldn't see how it would work for me with my 38 mile-each way commute. But maybe with a trailer??? How many amp/hr do you think I would need on the trailer?!

I think the board was running at about 11 WHr/km which is 18.3 Whr/mile. At 38 miles you'd need ~700Whr, thats ~36V 19AmpHr.

It's not unheard of for people to kick 40 miles in one day. If you were just hanging out on the eboard, seems like it wouldn't be too hard to go 40 miles if the board was set up well.

I think you'd be surprised at how quickly you'd pick up the balance, particularly if the you didn't have to change your foot position to kick.

I'm not sure it'd be something you'd do every day tho :p
 
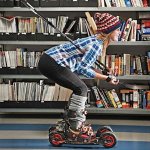
What I really want are roller skis--used by cross-country skiers to keep in shape during the summer. One of the problems is that the roads are more unforgiving than snow, so the downhills are dangerous. They do sell roller skis with brakes, but that kinda takes the fun out of it--all that work to get up the hill just to burn it up in friction going down. However, with regen, at least the energy would go to charging the battery to give more range--so it wouldn't feel so wasted. And of course electric assist would help with those uphills. Some roller skis have two wheels in the back for those practicing diagonal stride instead of skate skiing. Perhaps Justin's set-up could be converted to work? I guess one problem would be getting the two skis coordinated--would need something to tell each one when to go. Or perhaps they would each be weight sensitive like the board--as you kick and push down, the ski would give you a boost. This whole skateboard thing sure is interesting. I miss being able to commute to work by ski like when I was in Fairbanks--just like I missed how I commuted to work by bike due to the long distance until the ebike made the commute doable.
 

Attachments

  • st_dangerous.jpg
    st_dangerous.jpg
    31.7 KB · Views: 7,101
  • rollersafeskis.jpg
    rollersafeskis.jpg
    13.6 KB · Views: 7,101
OT - but funny you should mention that... I'm actually starting a company to selling a special type of longboard . I've had the same issue, you go up and get a workout. You go down and no fun for you; you can't carve, you just sit there. Plus you destroy boots, you have to use bindings, your feet get hot, no braking, and when you fall you have to go down with the ship.

Now what if you could do your double pole workouts on a longboard? Double pole up, carve down. Or in the case of an eboard, charge on the downhills

I'll have the first pre-production board done next week and have enough parts for a ton more. It should be in some stores starting this summer. PM me and I'll give you pricing.

Sorry everyone else for the OT...
 
Before seeing Justin's longboard, I was thinking about converting a pulk/bike trailer to electric assist with regen. Then it could either be hooked to a bike for e-assist, or worn like a x-c ski pulk, but with wheels. I think it would work well in regen to slow a roller skier, but I'm not sure if it would be controllable when it was in the assist mode and pushing me. I know it is difficult skiing downhill with a sled pushing me. So having the motors in the roller skis themselves would likely be the most intuitive and comfortable ride. The trailer could then haul 30 amp/hr of 48 volt batteries!
 
sk8norcal said:
people have tried ski poles for skateboarding.
http://www.wackyboards.blogspot.com/search/label/%7Dsticks%20and%20poles


Excellent idea! Justin talked about working the programing so his board could be using in "assist mode", but he mentioned the added complexity of the weight sensing being confused by the rider taking weight off to kick. However, with double poling (or single as in the above link) perhaps the program could continue the same rate of acceleration so long as the weight is on the front verses back of board. Polling will take weight off the board, but depending on where one is standing, perhaps the ratio of front to back weight would be relatively the same? Double poling my way to work would sure work the arms, but would be great balance with the days I bike!
 
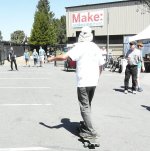
Time to give an update on this project. The board was a pretty huge hit at maker faire in SF last year:
Maker Rider.jpg

But it died right at the end of the show. On further inspection, we found that all the vibration on the skateboard deck had loosened one of the mosfet screws in the ASI controller, and the loose screw bounced around andshorted a pair of FET bodies together. Fortunately, a bit further down the road we made it to Method's place and he had all the tools and a new 4110 mosffet was all it took to be running again.

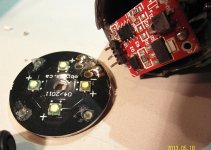
So the first real lesson is that vibration on an electric skateboard is brutal, and stuff that holds up fine on an electric bike can loosen and fail pretty easily on a board. We has some clue to this when the lumenator headlight stopped working earlier in the trip. It was mounted right to the deck with no damping and the vibration caused the header pins which link to boards together to fatigue and crack off:
Fatigue Failed Lumenator.jpg

After these were fixed, we rode it around Vancouver just for kicks and also to take out to various events, but after hitting a railroad track at one point the motor just cut out and the ASI controller began blinking a fault flash code. This would be reset with a power cycle, but eventually it would happen more and more often until every sidewalk crack or pebble on the road would cause a controller shutdown. We went down a lot of wrong tracks trying to solve that one until finally on fully opening up the motors we saw this:
Worn Off Phase Insulation.jpg
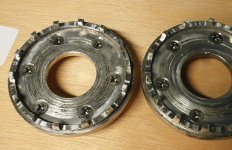
Pitted End Plates.jpg

The mechanics of the motor had developed enough play that the end caps were occasionally rubbing against the stator windings, shorting them out every time they hit a bump, and that was causing the controller phase overcurrent faults.

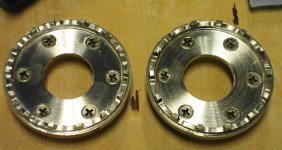
So the 2nd lesson was that a homebrew inline wheel motor needs to be quite rigidly secured against side thrusts from all the impact forces that a wheel imposes. In this particular situation, I just hogged out more aluminum from the end plate so that it was about 1mm deeper, which improved the clearance to the windings and so far seems to have sorted this for now:
End Plates Remachined.jpg

The final lesson involved overall clearances with stuff on the road. I had mentioned earlier that a rock in the road had severed one of the strain gauge sense leads:
More Severed Hall Wires.jpg

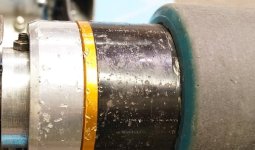
Well the other problem with this design is that the motor body was only slightly embedded inside the wheel and was mostly exposed, and has gotten pretty dinged up. Any rocks more than about 1cm will hit the motor bell. From the outside there are a number of dents in the can.
Dinged Up Motor.jpg
It hasn't done anything more than cosmetic damage yet, but ideally it would be nice if only the rubber wheels were in contact with the ground and road debris.
 
All of that brings us to the 2nd build that we sure hope to have rolling for the maker faire in Vancouver this coming weekend. We sponsored a student project at UBC to redesesign the motor mechanics to address a lot of these limitations, built a hand machined mock-up over winter, learned some things from that, and are now trying to whip up a handful of using CNC'd components for better precision.

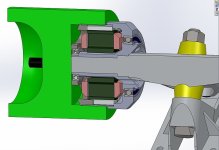
Here's the cutaway view of the target design:
CAD Section View.jpg

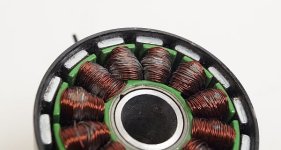
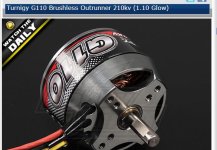
The motor in this case is based on the turnigy G110 motor from hobbyking:
http://hobbyking.com/hobbyking/store/__19039__Turnigy_G110_Brushless_Outrunner_210kv_1_10_Glow_.html
G110 Motor.jpg

It's got a narrower stator than the first build, 21mm wide versus 30mm. We found that with the previous board, two motors was overkill for power, but running on just one 30mm motor was a little undewhelming, so we hoped that two 21mm motors would hit the right spot, while making the overall motor narrower to reduce it's exposure. We also used a much wider skateboard wheel which we would overlap the bulk of the motor shell to fully protect it, in this case the 83mm ABEC11 Centrax
http://www.sk8trip.com/mm5/merchant.mvc?Screen=PROD&Store_Code=S&Product_Code=CX8380Set&Category_Code=cx83

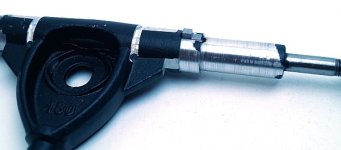
The trucks were prepared much as before, turning them on a lathe in order to get a round profile where the motor fits, and then machining flat spots for the strain gauges. Only in this case we also machined small wire channels in the truck so that the strain gauge wires could be completely embedded and covered in epoxy for full protection:
Mark2 Rear Truck.jpg
Mark2 Truck Strain Gauges.jpg

The RC motors are disassembled easily enough, but freeing the stator is a bit tricky. First drilling and then boring out the press fit aluminum support until it pops free, and being careful not to damage any of the phase wires in the process:
Cutting Motor End Plate.jpg
View attachment 4

And this is at last the free stator which will then be press fit on our own stator support which has a large enough bore to slide over the truck
Stator Core Cleared Out.jpg
 
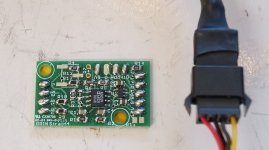
Amazing work, Justin, and excellent documentation. Might you (pretty please!) add a photo of the instrumentation amplifier board you are using to process the strain gauge signals? Also, are you using just the two strain gauges (half bridge) visible in the photos, or 4 (full bridge)?

Here's hoping you have terrific weather at the Faire, and a great big "Thank You" from those of us following your exploits with bated breath!
 
rowbiker said:
Amazing work, Justin, and excellent documentation. Might you (pretty please!) add a photo of the instrumentation amplifier board you are using to process the strain gauge signals?

Much obliged, to a very patient man :wink:
Strain Board.jpg

And here is the actual schematic, which is a dual op-amp instrumentation amplifier including a 5V regulator. It's the board that we designed for the right side drive stokemonkey kit, only we'll be depopulating the resistors R9 and R10 for use in the full bridge configuration (stokemonkey uses just a half bridge, so R9/R10 form the other half)
View attachment 4

Also, are you using just the two strain gauges (half bridge) visible in the photos, or 4 (full bridge)?

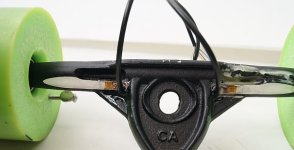
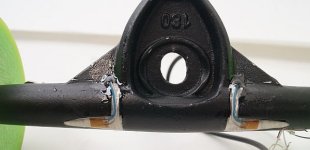
Full bridge, although in reality we could surely get away with a half bridge. Here are the top side gauges:
Top Gauges.jpg
and the bottom side:
Bottom Gauges.jpg

With the full bridge and a 5V excitation, we are getting a 4-5 mV signal when a person stands with all their weight over one of the trucks, so that is plenty of signal range to play with. We'll configure the amplifier board to have a gain of about 500.

Here's hoping you have terrific weather at the Faire, and a great big "Thank You" from those of us following your exploits with bated breath!

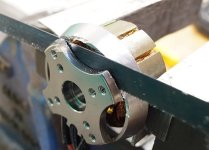
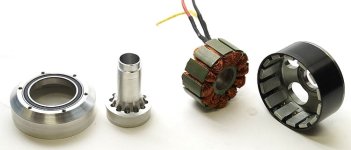
Weather is great now and we are sure hoping for a maiden voyage at the end of today. Here are all the CNC'd motor parts which we'll soon be pressing together:
Mark2 Motor Parts.jpg
 
Your approach is the singular e-skateboard drive system I've seen that makes sense Justin. It was a pleasure to get to timidly ride the impressive machine when you visited. I was amazed how fast you were able to travel roads with it.
 
Great thread Justin! I will be sure to follow your lead, when I get around to my longboard build.
 
What we really need is to get some motors built into the wheels, that would solve many issues. Just tighten them down on your board and go. If you could produce your design though, they'd sell well. Not many of use here can machine down a set of trucks to fit motors. Not to mention adding weight sensors. Its hard enough for most of us to get the motor mounts fit on a pair of trucks, but luckily we now have some off the shelf solutions for that. It's nice to see so much happening with eboards. A big jump from what we had just a year or so back. I remember seeing like three or four rideable setups last year, anywhere on the net, now there are hundreds if not more on ES alone. I alone have built about ten boards if you include emts.

I'm not personally a big fan of the weight sensing on a longboard, but it does solve some problems. However, I would love to see that on an esurfboard. It would be really nice not to have a controller where balance is so much more critical. In my attempt at an esurfboard, holding onto the controller was one of the more noticeable issues that I wish I could change.

Awesome build.
 
Very cool Justin.
 
justin_le said:
rowbiker said:
Amazing work, Justin, and excellent documentation. Might you (pretty please!) add a photo of the instrumentation amplifier board you are using to process the strain gauge signals?

Much obliged, to a very patient man :wink:
View attachment 3

And here is the actual schematic, which is a dual op-amp instrumentation amplifier including a 5V regulator. It's the board that we designed for the right side drive stokemonkey kit, only we'll be depopulating the resistors R9 and R10 for use in the full bridge configuration (stokemonkey uses just a half bridge, so R9/R10 form the other half)
View attachment 4

Also, are you using just the two strain gauges (half bridge) visible in the photos, or 4 (full bridge)?

Full bridge, although in reality we could surely get away with a half bridge. Here are the top side gauges:
View attachment 2
and the bottom side:
View attachment 1

With the full bridge and a 5V excitation, we are getting a 4-5 mV signal when a person stands with all their weight over one of the trucks, so that is plenty of signal range to play with. We'll configure the amplifier board to have a gain of about 500.

Here's hoping you have terrific weather at the Faire, and a great big "Thank You" from those of us following your exploits with bated breath!

Weather is great now and we are sure hoping for a maiden voyage at the end of today. Here are all the CNC'd motor parts which we'll soon be pressing together:
Justin IM working on a variable regen lever I am going to use strain gauges and need an amplifier would you be interested in selling the stain gauges and amplifier board?
 
Back
Top