2WD Electric Yuba Mundo Build

I think it's safe to say this thread serves as a build reference to many people here. Thanks for your great efforts in assembling all of this info in one place.

One thing I wasn't clear on was the diode across the horn inputs. Could you please explain what purpose this serves? I was quite curious since that's the first time I've seen it anywhere.

Cheers
 
trevc2 said:
One thing I wasn't clear on was the diode across the horn inputs. Could you please explain what purpose this serves? I was quite curious since that's the first time I've seen it anywhere.
First - thanks for the kind words - hope there is a snippet or two that you might recycle into your build... :D

The diode on the horn is probably superfluous since the horn has dedicated power leads all the way back to the battery and shares no wiring with the electronics, but was added for the same reason that you see similar snubber diodes across relay coils. When the coil is switched off, a large reverse voltage is induced by the collapsing field and the snubber shorts it out before the voltage spike can propagate into the attached circuitry. Since the horn is very high current and makes/breaks the coil power at an audio rate, the electrical noise it immense. This was just a knee-jerk effort to keep things quiet in the neighborhood....
 
teklektik said:
I had a bit of an electrical loading issue with the controls when the Analogger was switched off and the inputs changed to a low impedance, upsetting the resistor dividers for bike controls. Since I had a 3PDT switch on hand, I opted to just open-circuit the two inputs when the powering down the Analogger.


Can you explain more, with regard to

electrical loading issue with the controls

What was happening and what were you monitoring with the extra inputs?
 
Sure - guess I kind of breezed over that.... :)

We are talking about the Analogger re-packaging in this post. In the post preceding that one, I decribed some changes to the 3-position 'hi/med/lo power' switch and the '1-motor/2-motor' switch circuitry to allow the analogger to also record the states of these switches. Just having the Analogger record 30mph at 1200W isn't too helpful if you don't know if you are on one or two motors or running med vs hi power. (Well maybe it would, but I wanted to collect data to compare running 1WD vs 2WD, etc).

There's a lot of stuff in the switch schematic, but only a few parts are playing a meaningful role for the basic switch operation - the way it works is described here. In the end a handful of trimpots and resistors form some resistor dividers that make the two switches force the CA into different levels of power limiting via AuxPot. The switch control voltages are recorded by the Analogger.

The loading problem arose because the Analogger high impedance inputs monitoring these control voltages lowered significantly when the Analogger was switched off. So - instead of being a harmless monitor, the Analogger materially altered the resistor dividers and thus the power CA delivered. Powering down the Analogger only takes a simple SPST switch, but since I had a 3PDT available, I just ran the two monitoring leads through the extra two switch sections to disconnect the monitoring inputs when the Analogger is off.

In general, for normal serial-only Analogger use, this cannot be a problem. It really only arose because of tacking on the extra Analogger inputs as an afterthought to the CA AuxPot dividers - an issue with my circuit, not the Analogger. Using the analog inputs to record extra thermistor temp probes, etc would also not encounter this issue.
 
Ah yes, the 2wd 'complicaions' I had forgotten about that I had not read the whole thread, merely the bit about the Analogger.
 
Hello Teklektik!

Your build is truly professional. I have learned so much from perusing this thread.

I have a question about your horn. On page 1 you say the following...
The horn relay (eBay – ‘auto relay 12v’) is run conventionally from the handlebar horn button. Since car horns of this type are just giant interrupting inductors, the electrical noise spikes are beyond huge. Rather than overspec’ing the DC/DC converter by 6A for an occasional frantic blast and trying to suppress the electrical noise, the horn uses dedicated (+/-) lines to the battery so the rest of the bike is unaffected. A 1N4006 diode is soldered across the horn terminals as a snubber.

I run 24s lipo and would like to know if a snubber diode can be used to run an automotive horn directly from the battery pack (>100 V fully charged but normally about 95 V)? I see that you run your horn from the battery pack at above 50 V or so. As you can tell, I don't know much of anything about electrical circuits.

Thanks in advance!
 
dendy said:
I have a question about your horn....

I run 24s lipo and would like to know if a snubber diode can be used to run an automotive horn directly from the battery pack (>100 V fully charged but normally about 95 V)? I see that you run your horn from the battery pack at above 50 V or so.
Ah - okay - perhaps a little lack of clarity there :D

I actually tap the battery at 4s (4 x 3.2 = 12.8v) and run separate (+/-) wires from the pack to power a 12v auto horn (Fiamm Freeway Blaster - rated as one of the loudest non-air horns). Since a brief blast actually expends very little power, it isn't going to unbalance the pack. This eliminates a big DC/DC converter to handle the 6-7A horn load. I do have a DC/DC converter on board, but it gets used for the lighting which consumes measurable power, making the 12v tap gimmick inapplicable for that purpose. So - for the cost of a little extra wiring, I get to use a really loud car horn...

The snubber diode is just a high voltage (1N4006) diode wired across the horn terminals in reverse polarity to squelch the large induced voltage spikes that arise from the huge horn inductor doing a circuit make/break on every audio wave cycle. This helps keep noise out of the system and has nothing to do with getting the horn to operate at a particular battery voltage. (In fact, since the horn has dedicated power connections that are unshared and run directly back to the battery, the snubber is probably largely superfluous, but it got a mention anway :D )
 
Hi!

Thanks so much for your reply. I understand now.

I really like the idea of having a horn on board that does not need air recharging periodically like my horn (air zounds). I see the benefits of a really loud horn as motorist take notice when you only use it for a fraction of a second.

Your thread and recent reply has been most helpful!
 
Sorry for my bad english and the troll session.

I'm making the something like the bike of this post.
2x2 for a lot off application

I am the new owner of a frameset 4.3 Yuba
I have a problem with the mounting of yhe front brake disc, consisting of a 203mm disc and a caliper Shimano XT BR-M765
What adapter should I mount it?
postmount > IS ? like this http://www.probikeshop.fr/shimano-adaptateur-etrier-avant-postmount-standard-international-disque-203mm/28954.html
some thing else?

20140427_094739.jpg
 
pierre1911 said:
I am the new owner of a frameset 4.3 Yuba
I have a problem with the mounting of yhe front brake disc, consisting of a 203mm disc and a caliper Shimano XT BR-M765
What adapter should I mount it?
postmount > IS ? like this http://www.probikeshop.fr/shimano-adaptateur-etrier-avant-postmount-standard-international-disque-203mm/28954.html
some thing else?
That looks like what you need but that's just a guess. The BB7s I used in this build came with adapters which sidestepped this issue...

Re-posting this question in its own thread (maybe "Proper adapter for Shimano Discs?") might get you some feedback from knowledgeable bike mechanics.
 
teklektik-- can you tell me what rpm/volt you see at no load (ie wheels in the air)? According to my controller, I'm getting about 15,all the way up to 1055rpm at 69.3v. This has gotta be wrong, but I'm hoping its just a simple multiple of real answer.

The controller is calculating rpm based on my setting "number of pole pairs" to 40 (8 times 5:1 gearing). Oh, and I'm running a bmc v2t.

And, hey, since I'm asking dumb questions, let me throw in one more: what sort of function describes how the speed of your two motors combine? In other words, if you set
BackRPM > frontRPM , would your realized speed converge to = min(frontRPM, backRPM), or avg( fR,bR),or max(fR, bR) - cogging, or ... ?


Thanks for any help you can offer,
S.
 
Apologies for delay - away for a few days...
sgds23 said:
Can you tell me what rpm/volt you see at no load (ie wheels in the air)? According to my controller, I'm getting about 15,all the way up to 1055rpm at 69.3v. This has gotta be wrong, but I'm hoping its just a simple multiple of real answer.
Using the gimmick described in section "6.9 Displaying Wheel RPM" of the V3 Unofficial Guide, I read 727rpm from the CA at 65.9V or 11.0 rpm/V (wheel) which is 55.2 rpm/V for the true inner motor (V2S). Just got back from a ride so the battery is kind of drained, but that should ballpark things for you.

sgds23 said:
And, hey, since I'm asking dumb questions, let me throw in one more: what sort of function describes how the speed of your two motors combine? In other words, if you set
BackRPM > frontRPM , would your realized speed converge to = min(frontRPM, backRPM), or avg( fR,bR),or max(fR, bR) - cogging, or ... ?
None of those things. The bike is specifically designed for equal throttle/rpm/wheel size to avoid control and efficiency issues - so your postulated scenario cannot occur with this build. The bike pretty much exactly follows the simulator 2WD predictions when made using the technique outlined in this post. I won't repeat the explanation here, but the speed is somewhat higher than the speed of a single motor and there is no cogging or contention.

With the single throttle it drives like one big motor with twice the torque and heat capacity. Since the size and weight of the bike pretty much prevent wheel spin, if you didn't know it was 2WD, you would never suspect - the fat tires hook up and it just goes. No surprises, no strange 2WD artifacts.
 
Way, way behind in posting... but there are presently a couple of active threads about wheel building and truing

so this looks like a good time to post up some shots taken earlier in the year.

New Skills - New Tools:

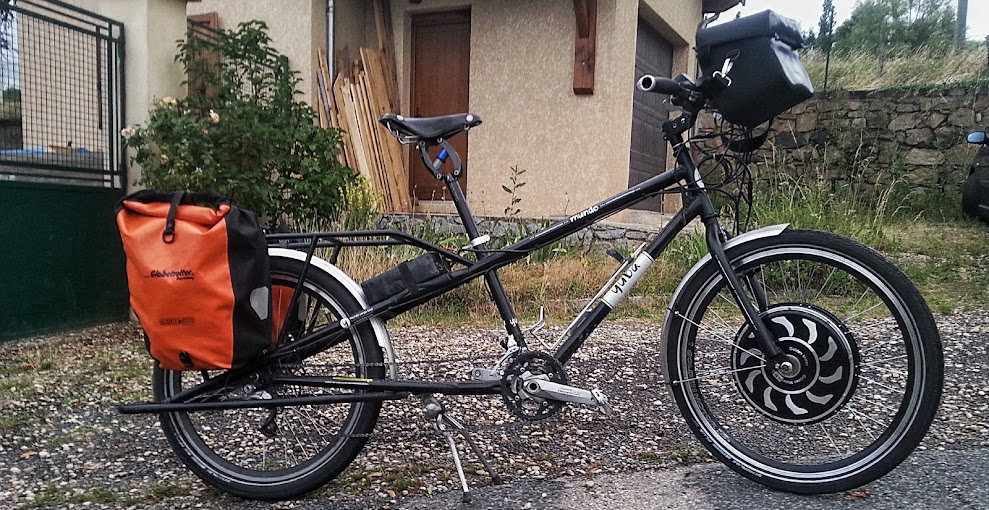
Poor wheel maintenance led to a broken spoke a while back. Wheel truing and I are strangers and LBSes around here have never seen a hubbie - I just kept putting off giving one an opportunity to learn on mine... Anyhow - Ilia at Ebikes SF built my wheels with a lifetime warranty I so gave him a call. Unfortunately, he's 3000 miles away so we worked out a deal and Ilia sent me some nipples and spokes for L/R sides of front and rear wheels in lieu of the cross-country ship to get the wheel fixed under warranty - his usual Outstanding Service! (FWIW - his wheel went 8400miles before neglect did it in...)

Since I needed to get the spoke installed, the wheel trued, and also needed to have a wheel built for a new build, I figured it was time to learn a new skill or two and decided to pick up a truing stand. Although there are some quick and dirty truing stand approaches, I kind of believe that it's the novice that needs the best tools - so I looked at truing stands and was pretty well resolved to picking up a Bikehand stand which seems to be a high quality clone of the revered Park TS-2.2:

81-00_commercialStands_small.png
But - just before ordering, I ran across an on-line wheel building book "The Professional Guide to Wheelbuilding" that has plans for what appeared to be a pretty nice stand. The stand is made of MDF and a few bits of wood and has some clever guides for lateral and radial truing.

View attachment 8
Sadly, woodworking and I are not good friends, so I looked around the shop for scraps of this and that to fab an equivalent stand. Using a scrap of MDF and some aluminum and plastic stock from the drops bin, I only needed to spring for an HDPE cutting board and a handful of hardware. All the metal and plastic work was done on small table and chop saws using Freud aluminum and plastic blades - quick and easy - just a few chops and a little drilling. The dropout plates took the longest to cut and file, but even that went pretty quickly.

There's lots of ways to make WheelPro-like stands - here's how mine came out:

81-04a_oview.jpg
I used some scrap aluminum channel and just sliced it to make dropout width adjustment slots. This was a quick and sleazy gimmick but I had to drill a few extra holes for the right upright to get adjustment range for really wide hubs... no problem and it avoided fussy work with the router. Putting the extra adjustment holes too close together would weaken the MDF when the EZ-Loks were screwed in, so I just made two rows for the odd/even holes and just pick any hole that seems to line up okay in either slider slot. Setup using other holes takes an extra couple of minutes which is fine for my occasional use.

Scrap plastic and a $5 cutting board from the dollar store made up the truing guides. Brass terminal nuts (Ace Hardware) run down a couple of 10-32 screws make small finger adjusts for the moveable guide arms - they mate with RivNuts set into the plastic guide bases. The guides are accurate, easy to use, and avoid the complicated mechanism of the Park/Bikehand style stands. Dishing is measured from the rim to the uprights using a $10 Harbor freight digital caliper - there is no need for a separate dishing tool.

A small stainless pocket rule is screwed down as a width gauge and there is a fixed aluminum stop at 100mm for quickie width setup for front wheels.

View attachment 2
A 35mm wide plastic spacer can be dropped behind the fixed 100mm setup stop to quickly align the upright for rear wheels.

81-12b_quickRearSetup_iv250.jpg
The dropout plates are made from 1/4" mild steel and can be flipped around for either standard hub motor 10mm slots or other sizes sizes (9mm and up). The plates can be raised in the uprights to accommodate 29er wheels with mounted tires.

81-06b_dropouts_iv250.jpg
The uprights and dropout plates are rigid enough to serve double duty as a motor test stand.

View attachment 4
All the bolts to the base are run into EZ-Lok threaded inserts (901420-13 1/4-20 x 13mm) that are just threaded into the MDF using a hex wrench. The small screws go into 4mm and 5mm RivNuts (designed for sheetmetal) that were just set into the MDF and expanded in place.

81-07_bottom.JPG
I used the stand in the unfinished form to true up my wheel, then applied MinWax satin varnish later to seal the MDF. It took quite a few coats, but since this was after the fact with no time constraints, it didn't matter. A square of white adhesive contact shelf liner over the front of the base makes the gap from rim to truing gauge easy to see.

When I finally set out to change the spoke and true the wheel (and as it turned out, replace some nipples as well), I ran into the noobie problem of not really knowing what a 'good' spoke tension sounded like when plucked. This is the 'experience' part that gets you to the point where you don't need fancy tools. I found a table of 'musical note to spoke tension' on line and downloaded a piano app for my tablet so I could play the tones. This worked pretty well and I tuned up the wheel using this technique.

81-21_SpokeTones.png
None the less, I decided to spring for a Park tension meter for peace of mind ($$ substitute for 'experience' :wink: ):

81-20_TM-1.png
The gauge works by hooking the three measurement pins over the spoke and releasing the grip so the calibrated spring can deflect the spoke by trying to force the center pin to move between the two end pins. The deflection is read of the gauge and the reading is looked up on a provided chart according to the spoke type.

81-22_TM-1.jpg
81-30_TM-1ConversionC.png
Anyhow, with a few spokes adjusted into the proper zone, I could pluck my way around the wheel pretty well using the initial TM-1 measured spokes as a baseline. My 'piano app' strategy had worked well, but the tension was a little low. I went back and used the gauge after the fact to see how things came out and fixed up some spokes that were too far off - final truing leaves spokes a little unbalanced anyway...

IMHO as a noobie at this, the TM-1 was a good buy to make up for lack of experience and no musical ear. Since the whole stand cost very little, the gauge seems like a good investment to get the most out of the rest of the rig. The stand is certainly more than the minimum required, but it was a fun project that will last me forever.

Anyhow - with hundreds of miles of miles on my trued wheel, I'm feeling very LBS-independent these days.... :D :D :D
 
Impressed by the detail of this build. I'm looking at putting a Xiongda disc motor in a Mundo frame but was concerned about spreading (cold set) the frame. Your description and jig on p5 is great. I still need a bit wider but am encouraged that it maybe possible.
 
I have to admit the jig works well. I actually went back for a second round and spread the frame a bit more to accommodate the different offset in the 11-28T vs original 11-32T DNP freewheel.

The frame opened up another few millimeters without effort. I'm not sure how much you need, but the frame is Hi-Tensile and takes the operation well.
 
Simplified 2WD Wiring with 1WD/2WD Control

It seems there has been a flurry of 2WD interest recently -- I've gotten some PM traffic on the subject and there are also a couple of notable builds underway:
  • Teslanv has a dual DD 2WD Luna build with the identical single-throttle/single-CA-V3/external-shunt configuration that I used here.
  • Alan B is pursuing an interesting build here that has promise for some spiffy active control.
  • A completed and impressive 2WD build, The Duty Cycle AWD, uses the same equal-gearmotor/controller/magura throttle setup as this build.
  • The final urging came while this post was hanging out as a draft when teslanv posted up a a complete wiring diagram for his 2WD DD bikes here :) .

This provided some motivation to distill some of the basic 2WD information from this build into a single post. The idea is to describe an equivalent but simplified build HowTo that focuses on only the 2WD wiring and control aspects without the 'extras' (DC/DC converter, etc).

The basic parallel power/throttle wiring scheme is as described briefly in "4.2.1.6 Installation with Multiple Controllers (2WD)" of the CA V3 Unofficial Guide. This build departs from that basic strategy primarily in the 1WD/2WD 3-power level switch integration to give more operational flexibility.

Build Overview

  • Controls and Other Stuff
    1. The CA V3 is an integral part of making the bike drivable. It provides throttle ramping to protect the motor clutches, Power Throttle for smooth control, 3-speed power restrictions in 1WD or 2WD modes, and integrated PAS using either 1WD or 2WD.

    2. The CA uses a front wheel pickup so that proper speed/distance reporting is not dependent on a single motor (hall). This allows the controller to be powered off completely with the kill switch and pedaled normally while the CA remains active with the wheel pickup as a viable signal source.

    3. There are 3 'standard and one 'extra' control that are readily manipulable on the bars:
      • a single throttle,
      • a three-speed switch,
      • the familiar kill switch, and
      • 1WD/2WD switch. <<== the 'extra' control
      An auxiliary switch on the dash determines if '1WD' means FWD or RWD - not used often so not necessary to put at the fingertips. 2WD mode provides twice the power as 1WD. The three-speed switch provides roughly 100%/66%/33% power in either 1WD or 2WD mode so the are really six power levels in total. Basically, you drive it like a regular ebike and the throttle and 3-speed switch just work the way you'd expect regardless of whether you are in 1WD or 2WD mode. Simple - no special learning required.

    4. The bike is designed on the idea of equal wheels/motors/controllers splitting the load and power 50/50. It operates and handles well with this 50/50 split and the result is significantly simplified control electronics - none. Other strategies are certainly possible, but this approach works well and is simple to implement. With the same Kv and performance curve for all situations, the motors are always operating equally with the same efficiency.

      In general it can be useful to see the two motors as geared together 1:1 through the wheels and road - essentially two motors on the same shaft or one motor with a stator twice as wide.

    5. The controllers were specifically programmed to provide very similar power using inclined testing to enforce the 50/50 split concept for getaways. They are set to run only to 99% PWM - the Infineon 100+% modes are not used.

      Some adjustment of controller limiting is possible to unbalance the 'equal power' concept. This would take effect only when the motors are controller-limited - basically acceleration and heavier load (eg hill-climbing). General cruising on the flat sees the motors running without controller limiting where such adjustments have no effect.

    6. Motor and CA 'contention' reported in some threads is not detectable. This is likely due in part to the modest power, specific wiring practices, controller programming, and use of the CA internal 5V supply to drive the throttle. There may also be an effect from the freewheel clutches mechanically de-coupling the motors to some extent if one overruns the other.

    7. Only the front motor has temperature monitoring. Again, owing to the 50/50 power division there is no reason to believe there will be materially divergent motor temperatures. External temperature tests with infrared and point-of-contact thermocouples support this view. This works well with the V3 which has but a single temp input and so uses the front motor temperature to throttle back power to both motors in 2WD mode.
  • Generic Version of Wiring and Controls
    1. Particular attention was paid to the wiring and ground practices. In addition, the CA is an integral component in that it provides a separate 5V supply for the throttles that is largely independent of either controller ground reference (DC bias and noise issues)
      • The CA uses an external shunt to give unified power management for both motors. This also separates the CA ground from the controller grounds. The Ground wiring from the external shunt is actually a bit long on this bike but should be kept as short as possible. Although the effect might be small, the wiring from the shunt to controllers is of equal length in an effort to ensure the controller ground references are the same.

      • No controller signal grounds are tied to the CA or to each other in any way. This avoids ground loops and is necessary to preserve the CA ground reference voltage as that of the external shunt. Specifically:
        • No throttle/ebrake/etc Gnds are connected at all (just the signal wires) - all signal the Gnd references are drawn entirely from the controller and CA power wiring.
        • Although the Throttle Override signals are used from the controller CA-DP connectors, no other CA-DP signals are used - Gnd, Vbatt(+), and shunt connections are specifically left unconnected.
        • The front motor thermistor uses a dedicated Gnd instead of sharing it with the halls as is frequently done.
    2. Below is a simplified version of the main wiring. There is nothing unusual - power is simply paralleled to the dual controllers and fed through the common CA external shunt. Although the CA molded shunt is rated at 50A, the back is sanded flat and it is bolted to an aluminum heat sink. It operates reliably at 60A and has been run higher.

      82-1_mainWiring2wd.png
    3. The throttle is driven from the CA +5V supply and the CA Throttle OUT drives the two controllers in parallel. The CA instead drives the controller throttle inputs directly instead of using the controller throttle Override connections at the controller CA-DP connectors.

      The controller CA-DP Throttle Override connections are used to control 1WD/2WD instead of providing CA V3 throttle input as is normally done. Both controllers are always powered up and 1WD/2WD is implemented by overriding/suppressing the controller throttle inputs in exactly the manner of a CA V2 overriding the operator throttle - by 'limiting' it to ZERO. So, here a switch limits the CA throttle instead of the CA limiting the operator throttle... The two controller CA-DP Throttle Override inputs are either or neither shorted to ground as appropriate to disable one or neither controller throttle inputs - the result is that either both throttles work (2WD) or one of the throttle inputs is suppressed (FWD/RWD).

    4. Here is a simplified version of the scheme used on this bike with a 1WD/2WD handlebar thumbswitch and a dashboard 1WD F/R selection switch. This very convenient and easy to work with gloves. (Again, cogging losses may make the 1WD operation provided by this control design of questionable value for DD builds, but that's another issue...)

      82-2_Simplified2wdControls.png
    5. Below is a variation with a combined FWD/2WD/RWD switch (ON-OFF-ON). This would work well with a rocker switch because the center position is easy to hit. If using toggle switches, the two-switch approach above is better since hitting the center position on a toggle can be more challenging than on a rocker - with a simple sweep of the toggle the above approach goes to 1WD or 2WD without fussing.

      82-3_Simplified2wdControls-SwitchVariation.png
      Although even the 'simplified' controls require a bit of fabrication effort, IMHO the flexibility and ease of use allow the bike to be quickly adjusted to best run in a variety of situations so there are no 'locked in' operating modes where a simpler 2WD bike might provide a less than optimal experience.

So - to sort of sum it up - My personal preference for 2WD is to front-end the controllers with a CA V3 and external shunt which solves a variety of noise and control issues at once by moving a lot of the 'dual controller' functionalities into the single CA - the controllers are run in 'dumb mode'. All the complexities of 'two of everything' sort of disappear and you get:
  • a third (CA) +5V supply distinct from either controller to operate throttle, ebrakes, PAS, etc
  • unified single throttle control
  • unified monitoring, LVC, and limiting
  • unified 3-position switch
  • unified ebrake cutout
  • unified proportional regen if using Grin controllers (you have to address the duality by other means if you have non-Grin controllers with regen)
  • unified PAS
  • unified temp monitoring (assuming the same drive front and rear)
After that, a little attention to grounding practice should keep controller interactions to a minimum.

Anyhow - that's some hints about how to reproduce the build and controls and some explanation of why things are wired as they are. Many aspects of the build are designed around a 'pedalable' bike with modest powered gear motors and may not be directly applicable to DD 2WD, but the reasons for the decisions are here to be evaluated for other applications... :D
 
No More MaxiFuses! Mini-ANL Fuse Holder Replacement

My bike has dual batteries that were originally protected by a 50A MaxiFuse in each pack. The holders have short 8awg leads and simply replace a busbar in each pack. The bike spends most of its time under 20mph but does run a max of 60+ Amps for bursts every ride.

83-01_original.jpg
A few years back I had simultaneous severe failures with the MaxiFuse holders. Each holder had melted in normal use and the fuses themselves were damaged. The problem was easily attributable to heat from the FastOn connectors that grab the fuse legs by friction. I temporarily replaced the fuses with busbars (I have a main breaker in the controller wiring anyway).

83-02_meltedFuseHolder_iv350.jpg
Although some recommend soldering directly to the fuse legs, this precludes field replacement - a really unattractive strategy from a service perspective. I decided to use min-ANL fuses which are readily available in fairly high amperages and have the benefit of bolt-on attachment that eliminates the high resistance of the FastOn friction mount. Finding a physically small holder that was inexpensive and easily serviced took a while. I purchases a couple of varieties and finally settled on a nice compact design that I could only find in Europe (search eBay for 'striplink fuse holder').

Anyhow - these are small and moderately priced - actually smaller than the Maxi-holders they replace. I trimmed the unwanted screw mounts with a Dremel and grafted some ring terminals onto the 8awg wire leads from the old Maxi-holders. I popped in a couple of 80A fuses and bolted them up to the packs. After a year or so and many thousands of miles, they are working great. No issues at all with heat or otherwise and easily field-replaceable.

83-03_miniAnlHolder_iv250.jpg
83-04_anlHolderWithMaxiWires_iv250.jpg
Highly recommended! :D :D :D
 
Nice improvement! I like those fuses and the bolt on connections.

I have used some 6 gauge wired Maxifuse holders, perhaps some of the heat is coming from the faston to wire connection, adding to the problem, whereas the 6 gauge will run cooler and wick some heat away from the connections. They have never failed but the mountain bike has one DD motor instead of two (at the moment, soon to change) so the peak current may be lower, and it does not have the mileage you have accrued.

The solar circuit breakers are excellent, I popped a 63 amp unit on the Borg climbing a long hill at 80A (specs indicated it should handle that for 2 minutes but that wasn't quite enough), so I went to a 100A unit and that has never popped.
 
I wasw about to advise you about those poor quality fuse holder that just melt at 50% continuous rating lol.. when i scrolled the page to see you also posted a pics of melted holder lol!

Doc
 
I'd bought some of those bad fuse holders but luckily I'd read the warnings before fitting them. I still haven't sourced any replacements but think I'll be looking for the re-settable type first- I can see the fuse blowing when I'm out and the spares can't be found.
 
alsmith said:
I'd bought some of those bad fuse holders but luckily I'd read the warnings before fitting them. I still haven't sourced any replacements but think I'll be looking for the re-settable type first- I can see the fuse blowing when I'm out and the spares can't be found.
Ya - that 'melted' picture was from my 'warning' post back in 2012. :D

The fuses are inside the packs just for pack protection when disconnected from the bike. For frame harness protection I use a marine Blue Seas 7630 50A 65vdc breaker at 73V HOC. It has an interrupt rating of 7500A - so, no self-destruct issues.

For higher voltage you can also use a solar breaker as Alan B mentioned, here's a unit by Midnite Solar - 150vDC at up to 100A.

I actually ended up running the bike hotter than planned and the 50A breaker is too small. I wanted to upgrade to a solar breaker, but would have to rework the custom controller mount for the physically larger breaker - so - I've been getting by on the 62A max trip specification for the 50A breaker. Anyhow - I selected too low - select a breaker at least 150% of your expected max Amps - it's there for short protection in which case Big Current will happen and the 150% breaker will certainly trip...
 
Back
Top