My econo-e-bike

Chalo said:
If you can get EBC Gold HH rated pads for the brakes you have, try those first. It's wacky how long they last. If you're not happy with their endurance when they're spent, you can add regen or plug braking then.

Cloud 9 Cruiser Select Airflow ES is my go-to comfort saddle. I've never put anyone (big or small) on one, who didn't decide they liked it.

That's the one! Feels great, and I can still pedal.
I think the pads are worth a try; I was getting used the the range thing, but maintenance is really something I'm trying to avoid. Thanks for the tip.
 
Looks like you have two dueling features here: cheap generic controller vs. low-maintenance schedule braking system. Which one is more important? Change the other.

Try the EBCs first.

How are you braking? Pumping the brakes or riding them steady?
 
I replaced the rear pads today, and saw that I needed to adjust the caliper mount a little more. There was a very small lip that wasn't contacting the rotor, and as the pad wore, the lip on both pads caused the pads to tilt, and wear more along the bottom until it was metal to metal. I adjusted the caliper adapter and seems like it should be good now. Stopping power seems improved.

The pads were the start of my winter maintenance. It's been raining for days, but I've been avoiding starting on the bike since it's cold out in the garage, which gave me a good excuse. Today, the sun came out, at least for a while, so I decided to change the pads. While changing them, I noticed I had a broken spoke. Ugh, my first ever, and immediately wondered if there would be more to come. I definitely need to get to the rear wheel redo, but after being cooped up in the house, I decided to take a quick ride while there was a break in the rain. I like looking at architecture, so I got the idea of Googling for something nearby and interesting. I ended up Googling the biggest mansion in Berkeley, and it spat out the John Hopkins Spring Estate. I tried to view it on Google Maps but they have it blurred and the street view stops a block from the entrance.

This video made is look nice though. Posted 4 years ago, being offered at $7.5 million:
https://www.youtube.com/watch?v=CKcKWU8WTyk&t=483s

Then I saw this series of videos from 9 years ago, about a fundraiser to restore the mansion. It looked totally dilapidated, and nothing like the real estate video, so I assumed it had gone under renovation/restoration.
https://www.youtube.com/watch?v=rmvv1RweUUk

Well, I noticed when I got up there, I couldn't see it from the street below, so was hoping I could see it, driving past where Google Maps stopped. The street said not a through street. It was actually a through street though, and the mansion was on the right about halfway through the "non through" part. The place was a mess and the landscaping was unkept. The concrete patio had big weeds growing up through the cracks. The structure itself looked like it needed a good power washing, patch repair and repainting. It looked like the "before" video from what I could see. There were several work trucks in the service entrance driveway, so I'm guessing that's what's going on. It explains the porta potty. Oh well, at least once it's really fixed up, I can say I saw the before state.
John Hopkins Spring Estate.jpg

I decided to keep riding up the hill to see if there was anything else interesting. I'd ridden in the area before, but haven't gone on all of the streets. There are several rock climbing parks in the area. The hillside used to be all rock, and I've seen a few houses that have a boulder for their front yard, the size of my garage. So they made rock climbing parks where the bigger boulders are. Anyway, found a new one near the top of the hill that I hadn't ridden by before. It had a pretty cool lookout that looked over the bay and at the golden gate. The park has a short stone wall perimeter, and as you walk along it, you get a greater than 180 degree panoramic view of the bay, through openings in the foliage.
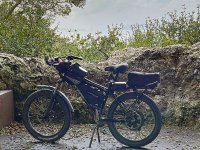
Cragmont Rock Park.jpg

A few minutes after leaving the park, I felt a few droplets. Big ones. I hadn't noticed, but the big rain clouds had come in and the sun was gone. The brake pads got a pretty good workout going down the hill. I took a straighter route down, braking all the way down one street with a 15% steady grade for a half mile and didn't detect much fade. The rest of the ride down was less steep so no brake issues. I throttled home after that and just beat the rain. With the broken spoke, the bike is overdue for maintenance, so I have to get off my lazy butt and get it done. I'm excited about the torque sensor though.
 
E-HP said:
I replaced the rear pads today, and saw that I needed to adjust the caliper mount a little more. There was a very small lip that wasn't contacting the rotor, and as the pad wore,

Yep, I get this issue as well, Time to time if I don’t position the brake pads, right dead center on the the rotors. Or I guess the adapter could shift slightly causing this.


E-HP said:
I noticed I had a broken spoke. Ugh, my first ever, and immediately wondered if there would be more to come. I definitely need to get to the rear wheel redo, but after being cooped up in the house,

Same here just recently broke some rear spokes myself :lol: well, mainly due to having a flat tire and being multiple miles in the wood with the rim spinning inside the tire.

But yeah, you should be able to just replace the one spoke and nipple…
I can’t remember., Did you build your hub motor or maybe it was pre laced? Seems like there’s always going to be some extra maintenance with hub motors spokes when used with any off-road use at some time., But it’s worth it haha 8)
 
Eastwood said:
Same here just recently broke some rear spokes myself :lol: well, mainly due to having a flat tire and being multiple miles in the wood with the rim spinning inside the tire.

But yeah, you should be able to just replace the one spoke and nipple…

I thought I had more, but I had 3 extra spokes, so now I only have 2. I only had to remove one other spoke to get the replacement in, so not too much of a hassle.
I started replacing the rest of the mangled nipples and have 3 or 4 left before I start re-truing the wheel. The spoke that broke, broke right at the end of the threads, and the nipple was fully engaged. Besides not having a decent amount of tension, I think the failure may be related to the amount of spoke bend there is with a one cross pattern and 24" rim.

I may need to order more spokes just in case. Now that the wheel is off, I guess I'm committed to doing all of the other upgrades and maintenance on my growing list. I'll swap out the freewheel after truing the wheel, then start on the electronics and installing the ERider.

spoke.jpg
 
E-HP said:
I think the failure may be related to the amount of spoke bend there is with a one cross pattern and 24" rim.

Yeah sounds like the spoke angle is to much with the large hub + plus small rim. Have you considered slightly drilling out the spoke hole “angle” in the rim to create a better angle for the nipple?

I’ve had the same issue with halo SAS rims where you can see the spoke slightly bending at the nipple engagement because of the spoke angle.
 
Eastwood said:
Have you considered slightly drilling out the spoke hole “angle” in the rim to create a better angle for the nipple?

I think if more start breaking, I'll just relace it in a radial pattern. If I don't break any between now and next winter, I'd be happy, and deal with it later if they are going to break.

ZeroEm said:
Any idea of how many miles on the wheel build? I'm sure your wheel is exposed to more stress than most lower power ebikes. Enjoy reading.
I think around 2500 miles or so. I'll check later.

I replaced the bad nipples and spokes. There are still 3 spokes that are still sticky where the nipple is hard to turn. I suspect the threads are messed up a little, but I'll replace those on the next go around, since I need to order at least on more spoke, but a few extras in case I have breakage between now and next winter. Soaking the nipple in oil (I just used some old gear oil that I had on the shelf) made a huge difference. I dripped a drop on all of the nipple heads for the ones I wasn't replacing too. This was a great improvement when it came to truing the rim, which is now way better than my original lacing job. It's almost perfectly true, both laterally and radially. I also slightly fixed the dishing too.

There was a 2 hour break in the rainstorm right around when I got done, so even though I had just started on my list, I decided to check out the wheel and see if I can tell a difference. First, it tracks way straighter now, riding no hands, etc. It's also smoother above 20 mph, since the lateral and radial variation was eliminated. 30 or 40 mph+ is similarly smooth, whereas before I always felt uneasy going too much over 40. Overall, I did a pretty crappy job on my first attempt, but now it's like it should have been the first time around. Who knew lubing/soaking the nipples would make such a big difference :shock:

I'm going to work on my cable harness today. Besides cleaning up the cabling mess and swapping out some switches, I'll be adding back my brake cutoffs and cruise control, which might help my range a bit. I won't be swapping in the ERider torque sensor until I get the CA programming cable and update the firmware. I'm worried that I'll lose momentum if the weather starts getting better, so I think I'll just set some goals to complete specific upgrades before going for the next ride, and spread it out :shock:
 
Don't need exact miles. Going to try a 24" wheel (been dragging about for some months now) and the spoke angle bothers me. Will spend some time trying to angle the nipples to take some of the bend out of the spoke.

The more wheels we build the better we get, go figure. Have over 5000 miles on my last build. I'm gentle compared to you. :lol:
After watching amberwolf, radial lacing does not bother me.
 
ZeroEm said:
Don't need exact miles. Going to try a 24" wheel (been dragging about for some months now) and the spoke angle bothers me. Will spend some time trying to angle the nipples to take some of the bend out of the spoke.

The more wheels we build the better we get, go figure. Have over 5000 miles on my last build. I'm gentle compared to you. :lol:
After watching amberwolf, radial lacing does not bother me.

The spoke calculator I used last time, calculates a 128mm spoke length when radial lacing the 24" rim to the Leaf. If it were a 20" rim, they would be even shorter. My gut says that shorter spokes in a radial lacing are stronger than longer spokes. If they keep breaking, I may have no choice, unless I switch to a rim where the holes are already angled, or can by modified to be that way.

The good news is that I think no matter what, my next wheel build will go much smoother.
 
ZeroEm said:
Now you can have paired spoke holes in a radial laced wheel. Gives some angle for torque.

Ah, I just read about them. Are you suggesting a different motor that has flanges with paired holes, or drilling my Leaf motor's flanges to create paired hole. Based on the article I read, seems like choosing the right spoke length is the challenge, but I'm not opposed to trying it.
 
by E-HP » Jan 16 2023 6:44pm

ZeroEm wrote: ↑Jan 16 2023 6:30pm
Now you can have paired spoke holes in a radial laced wheel. Gives some angle for torque.
Ah, I just read about them. Are you suggesting a different motor that has flanges with paired holes, or drilling my Leaf motor's flanges to create paired hole. Based on the article I read, seems like choosing the right spoke length is the challenge, but I'm not opposed to trying it.

Not really pushing it, would not drill mine unless it seem like a different solution was needed. IF radial was not holding up. Personally looks like big motors and small rims are a good match for radial lacing.
 
amberwolf said:
This section of Sheldon's page covers those
https://www.sheldonbrown.com/special-spoking.html#paired
if it's helpful.

Hmm, almost like I had imagined it, but looks like it requires two spoke lengths to accomplish. Conceptually, it looks like a good compromise though.

EDIT 01-17-23 I performed one more upgrade today so I could make some progress and then go out for a ride. Actually I switched out my freewheel when I did the work on the spokes, but the freewheel was binding against the motor so it wouldn't freewheel. It needed a spacer, but since I didn't have on, and bent a piece of coat hanger into circle and used it for a temporary spacer, while waiting for a real one to arrive. That took too much space, and didn't provide enough clearance to use the smallest cog (which is the "upgrade").

I swapped out the coat hanger spacer with a 1mm real spacer and freewheels perfectly and good clearance for the small cog. Topped off my battery pack and went out for a short ride. The smaller cog restores my ability to comfortably pedal, with a decent amount of contribution, between 20 to 22 mph. I'm I my crossing my fingers that I'll have the same chain line when I install the ERider. Right now, I have 1mm clearence between my chainring and chainstay. Any further inboard and I'd have to switch to a smaller chainring.
 
E-HP said:
Hmm, almost like I had imagined it, but looks like it requires two spoke lengths to accomplish. Conceptually, it looks like a good compromise though.

What if you ran a moto rim with your hub, like a 19” pro wheel 1.40”?? I’m Guessing you don’t because of weight right?
But yeah, would solve the spoke angle issues plus not having to worry about flats. Not that you’ve had an issue with flats it’s just nice to have that piece of mine. Moto tires last forever as well. The shinko 241, I think it’s the perfect E-bike Moto tire for commuter type of riding. But yeah, would definitely add some pounds which would also eat at your range so there’s definitely negative having a moto rim. Just an idea.
When I went from the Halo SAS rim to the Excel rims, I couldn’t really feel too much of a difference with the added weight. As far as acceleration, it was very minimal. But definitely rolls a lot more stable than the traditional bicycle tire.
 
Eastwood said:
What if you ran a moto rim with your hub, like a 19” pro wheel 1.40”?? I’m Guessing you don’t because of weight right?
Yup, I think I'm at my upper limit for weight. Any more and lifting the bike or flipping it over for maintenance becomes a challenge. Hopefully now that the spokes are more evenly tensioned, I won't see more of them.

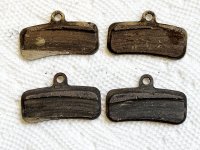
I heard some metal on metal coming from my front brakes. It looks like the front calipers had the same issue as the rear, sitting higher when mounted than my old BB7 calipers (where the pads aligned perfectly with the disc). Not as pronounced, but enough so that the same problem occurred causing the pads to tilt when the brakes were applied. I adjusted the caliper adapter, shaving off about 1/16" which should allow full contact.

Front pads on top, rear pads on bottom:
knock off pad wear.jpg

I put semi metallic on the front this time. They are super quiet compared to sintered. I'll inspect both sets after 100 miles or so to see if I need to do any fine tuning.

Took a ride on the flat ground to break them in. Cool but sunny out. I got a hot dog for lunch, then rode up behind the UC campus to explore. The gate at the Memorial Stadium was open, so poked around. It has some good views, but there are a lot of trees on that side of the campus, and the stadium is on the hillside. I've ridden around that campus for hours at a time, and there's always some new secluded spot, or building, or statue, etc., that I discover, so it's not boring. I'm riding mostly on pavement or concrete, and since it's ADA compliant, there ramps everywhere (the campus is on a hill, so there are a lot of stairs around), too. It's perfect for an ebike, but would be less fun on a pedal bike. It looks like electric scooters have taken the place of bicycles on campus, and there are a lot of them.

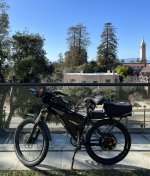
Looking west from the Memorial Stadium. I'm still trying to get used to how the Cloud 9 looks on my bike, but it sure feels good:
Campinile.jpg
 
E-HP said:
Yup, I think I'm at my upper limit for weight. Any more and lifting the bike or flipping it over for maintenance becomes a challenge. Hopefully now that the spokes are more evenly tensioned, I won't see more of them.
Yeah makes sense. Good point about the weight be a factor while doing maintenance like flipping the bike over etc. What is your bike weight at now?
E-HP said:
Front pads on top, rear pads on bottom:
knock off pad wear.jpg

The front wasn’t as bad as the rear pad alignment.
Look at this way, now you will have more stopping power front and rear, because of more surface area with the pads making contact with the rotors. :thumb:
 
Eastwood said:
E-HP said:
Yup, I think I'm at my upper limit for weight. Any more and lifting the bike or flipping it over for maintenance becomes a challenge. Hopefully now that the spokes are more evenly tensioned, I won't see more of them.
Yeah makes sense. Good point about the weight be a factor while doing maintenance like flipping the bike over etc. What is your bike weight at now?
E-HP said:
Front pads on top, rear pads on bottom:
knock off pad wear.jpg

The front wasn’t as bad as the rear pad alignment.
Look at this way, now you will have more stopping power front and rear, because of more surface area with the pads making contact with the rotors. :thumb:
After two weeks, I heard a slight creak from the spokes yesterday, so time to snug them up. My bike was 84 lbs the last time I weighed it, so enough that I don't worry about someone picking it up and carrying down the street if I make a quick stop somewhere, which is one positive.

Brakes are working great too. I'll switch the rear to semi metallic once the sintered ones wear out, since they are near silent.

Winter maintenance is going slow, and experiencing hiccups relative to plan. The more I try the features of this generic controller, the more I'm finding that those features don't work, like the soft start, and cruise control. That and not being regen capable, make it the epitome of a dumb controller, with the CA in front of it. Still, the power delivery doesn't disappoint, and the CA provide work arounds so happy overall.

I installed the CA digital auxiliary switches yesterday. The third button, a momentary contact switch, was originally planned to invoke cruise control, but not needed now. I've decided to use the analog aux for power, and the digital aux for PAS levels.

So, I'm glad I've procrastinated on the cabling swap to run the single 9 conductor bundle, in order to eliminated the multiple cables currently in place. Because of the lost features, I only need 6 conductors, so now it probably a good time to place my 12V buck converter back into service and do a little work on my lighting. The extra wires may also be used for the torque sensor, depending on how I route that cable, but I have a few options.
https://endless-sphere.com/forums/viewtopic.php?f=6&t=118345

Adding the digital switch had immediate benefits on my riding. PAS felt more like the old KT PAS days, just clicking up or down for some more assist. Without the switch, I've limited my pedaling to certain speeds on flat ground, so now a lot of flexibility has been restored and I was really enjoying it during my test ride. I have it set to 5 levels now, but will try 7 next to dial in the increments. I have the cadence ramping set conservatively now that I have easier PAS level control. Not sure if I'll change all of this once I install the toque sensor, or if I'll even need PAS levels.

So, even though I hate the thought of using the CA autocruise function, I may be able to implement it without the dangers of having it turn on unexpectedly if I'm running with high throttle for too long if I remember to turn the power down via the analog input. Another alternative is to use one of the three modes, since it looks like the auto cruise function can be set per mode, so could be turned on in the Economy mode, where I have the power level reduced already. If I end up not needing PAS levels after installing my torque sensor, I could use the digital aux switch to change modes on the fly, rather than requiring two hands when changing it from the CA display buttons.

So the one physical change I'll make today before going for a ride, is to install the brake cutoff to the CA, since I'll need it when using it for cruise.

EDIT: Oh ya, I swapped out my rear shifter to a 6 speed to match the 6 speed freewheel. I also ordered a new derailleur, since the 30 year old Deore LX is bent and on it's last leg, so that will go on tomorrow. I also swapped out my half grips.
 
E-HP said:
So, I'm glad I've procrastinated on the cabling swap to run the single 9 conductor bundle, in order to eliminated the multiple cables currently in place. Because of the lost features, I only need 6 conductors, so now it probably a good time to place my 12V buck converter back into service and do a little work on my lighting. The extra wires may also be used for the torque sensor, depending on how I route that cable, but I have a few options.

Just a thought based on various experiences over the years, when deciding what to run in that cable:

Only run similar-voltage and current signals in any particular cable. If possible, run critical control or feedback signals separately or within their own shielding within a common signal cable, and using separate ground returns for separate sensors and systems even if in the same cable. This can help prevent system damage in the event of any form of failure that causes physical damage to that cable.

For a very common example not directly related to your cable: a motor cable usually has high-(battery)-voltage high-current phase wires *and* low-voltage low-current hall (and other) signals. This has caused numerous problems of varying severity for various people, such as:

--wiring damage (usually at the motor axle exit) allowing shorts between phase/signal can blow up the sensors. If phase shorts to sensor power supply, it can destroy not just the sensors, but the controller itself and anything else on the system connected to that power supply that isn't protected against this sort of thing (and protection is rare). That can include throttle, PAS, ebrake, hall, etc., outside the controller, and inside the controller can include the 5v regulator (or the entire LVPS), the MCU, and anything else powered from that 5v (assuming the 5v is what is used to power the motor sensors).

--Incorrect motor operation especially at high phase currents (like startup from a stop) due to induced currents from phase wires into signal wires or supply/ground wires.


Another possible problem can be with low-voltage but higher current mixed with low-current. I have made the mistake of running system lighting with system control signals...and then had harness damage that should have been but was not sufficient to blow the fuse to the lighting power, but *was* sufficient to cause wiring heating enough to allow signals to short together, simply because the bundle was so well-insulated thermally at the point the wire sets met, and cause the system to be inoperable. Thankfully the lighting voltage didn't get shorted to the control signals, or it could have damaged the CA itself, and the control signal sources.


Another problem that crops up very occasionally in the last situation is the change in lighting current (to feed brake lights, turn markers, etc) can cause induced currents that cause voltage changes in the control signals that cause undesired operation.


One more thing that causes issues is using only one ground return (or power supply) wire for multiple sensors, signals or lighting, etc. If a separate ground for at least each different "system" that's in a cable is used, it can help prevent some interference (ground lift, etc).


It's not always (even usually) necessary to do these things...but doing them should prevent the need for troubleshooting or fixing such problems when they could occur (because then they wont' occur).
 
amberwolf said:
It's not always (even usually) necessary to do these things...but doing them should prevent the need for troubleshooting or fixing such problems when they could occur (because then they wont' occur).

Well that's more to consider since I wasn't planning on separate grounds. Luckily, without cruise, soft start, or having to run the brake cutoffs to the controller, I can get it all wired and still have a couple of spare wires.

3 speed switch > 3 wires
Temp sensor > 1 wire
On/Off > 2 wires (battery level)

Cruise control via the CA worked OK, but not as nice as the cruise control on my old PowerVelocity controller. With the CA, cruise seems to just maintain a certain power level (i.e. partial throttle), rather than maintaining speed. My PV controller would just add power to maintain speed if I encountered a grade and would reduce assist and even regen when going down a hill. The CA holds the power steady, so slows down or speeds up depending on the grade. I need to study the manual some more to see if it can maintain speed.

The other issue is that it seems random as far as the amount of time you have to hold the throttle steady to start cruise. I have it set to 8 seconds, but it seems to kick in in as little as 3 or 4 seconds at times. That may be tied to an issue I've been trying to diagnose for a week now; and that seems consistent with a bad throttle ground issue. The particular behavior is very odd, since it happens randomly, but also seems to have a consistent power output when it does occur, and luckily not full throttle. This was happening before using the autocruise function, too.

I believe the fault is happening prior to the controller or the throttle signal being sent from the CA to the controller. Adding the brake cutoff to the CA seems to confirm that, since hitting the brake stops the behavior. When I had the cutoff going to the controller, the behavior would stop when pulling the brake, but letting off the brake would cause the motor to start again. I've checked the connector between the throttle and CA and it seems good.

Another theory is that the CA is outputting the random throttle signal due to some settings, etc., so not ground related. Could it be PAS related? And, can a poor or intermittent connection on any of the PAS conductors cause assist to start up? When the random "throttle" behavior happens, the output is not random; it's usually at a level between 275W and 300W. That happens to be the same as I had the PAS power set to. So, something randomly triggering PAS might cause similar behavior that I'm seeing. I'm using the Grin one piece PAS sensor, since I haven't installed the torque sensor yet. Last clue, consistent with the last theory is, if it happened when I was at a stop, using my brakes (that didn't have the cutoffs at the time), was enough to hold the bike, and in a second or two the behavior would stop. I need to check a few settings to see if I inadvertently made a change to something like the PAS Stop Threshold. I'll test that by moving that setting up and down to see if the behavior duration changes. I have my PAS ramp (up) rate maxed, but I need to see if I accidentally changed the PAS Start Threshold too. But, I don't think I've intentionally made changes to those settings for a long time now, but still worth checking.
 
E-HP said:
Well that's more to consider since I wasn't planning on separate grounds. Luckily, without cruise, soft start, or having to run the brake cutoffs to the controller, I can get it all wired and still have a couple of spare wires.
Might not have any need for any of the issues I noted, but I figured it's worth considering in the event of problems and/or prevention. :)


Cruise control via the CA worked OK, but not as nice as the cruise control on my old PowerVelocity controller. With the CA, cruise seems to just maintain a certain power level (i.e. partial throttle), rather than maintaining speed.
There are different ways it can be configured, but I think it depends on your throttle mode, because IIRC it just holds the last throttle output voltage by default.

But, if it works the way I *think* I remember, then if you are using the Speed mode of throttle, for instance, it should maintain the last set speed, or Power mode the last power level, or Current the last current. I'm not certain of that, since it has been a long long time since I used any cruise control, and I haven't looked at that CA manual section in a while either. Glancing at the CAv3 info page on ebikes.ca it says
[ ThrI->Auto Cruis ]*
Autocruise is a form of cruise control that automatically maintains a fixed throttle level. Holding the throttle steady for the configured time causes the throttle slider on the main screen to flash indicating that autocruise is engaged and the throttle can be released. That throttle level is maintained until autocruise is disengaged by braking or re-applying the throttle.
which seems to indicate it would just latch the throttle at the last voltage it was at, assuming "level" means "voltage". If "level" instead means the level of (whichever mode throttle is in) then it should hold speed if you are using speed control throttle.


I believe the fault is happening prior to the controller or the throttle signal being sent from the CA to the controller. Adding the brake cutoff to the CA seems to confirm that, since hitting the brake stops the behavior. When I had the cutoff going to the controller, the behavior would stop when pulling the brake, but letting off the brake would cause the motor to start again. I've checked the connector between the throttle and CA and it seems good.
If you are on the CA diagnostic screen (one left button push from main), it shows you the actual throttle input voltage and the CA's output voltage continuously. If it's not just some instantaneous spike too short to show on this screen, a problem with in or out should be visible on this screen.

If there is no actual throttle signal input problem (always tracks exactly what throttle really is), but there is an output voltage higher than should be, or it stops tracking actual and shouldn't, the CA would have to have stopped processing the throttle data, or held the output. for some reason but I don't know of any settings that can do that except autocruise, which should only do so after the time limit.

If it seems to be disobeying the time limit, make sure the voltage range it is supposed to do it in is correct here
[ ThrI->Cruise Hld ]
Sets the throttle voltage range for auto cruise to consider the throttle 'stationary'. Small numbers are more sensitive and can make engaging autocruise difficult. Large values reduce motion sensitivity but can cause unintended autocruise engagement.


Another theory is that the CA is outputting the random throttle signal due to some settings, etc., so not ground related. Could it be PAS related?
Throttle overrides PAS, so if you are holding the throttle at any voltage above the minimum input threshold, PAS input is ignored.


And, can a poor or intermittent connection on any of the PAS conductors cause assist to start up?
Only if there is no valid throttle input at the time.


Last clue, consistent with the last theory is, if it happened when I was at a stop, using my brakes (that didn't have the cutoffs at the time), was enough to hold the bike, and in a second or two the behavior would stop.
That last bit is consistent with my own expereinces of accidental PAS triggering at a stop.

If it happens, and you reverse-pedal, does it stop? (that should, if it's PAS-triggered, and no throttle signal is present, "instantly" cease any PAS-caused throttle signal output).
 
E-HP,

I have been looking at different version of the generic controller.

I found one that comes with the USB > Serial cable, this one does NOT show if it has a regen cable (to turn it on/off)

https://www.aliexpress.us/item/3256804021339507.html

There is another one which comes with the USB connect cable and regen cable.
Hope that helps if you are still looking for a reasonably priced regen controller.
 
gobi said:
I found one that comes with the USB > Serial cable, this one does NOT show if it has a regen cable (to turn it on/off)
<snip>
There is another one which comes with the USB connect cable and regen cable.
Not sure what you mean by "regen cable". With the linked controller, the braking is just a two-wire switch input (either high or low activation, but still just a switch), so you use whatever switch (like on an ebrake or brake lever with brake light switches, reed switch and magnet on a lever, caliper, or cable, button on handlebars, etc) you like, that is open circuit except when you want to engage braking.

If you have a controller that has variable regen controlled by a separate analog (usually three wire) input, then a hall or pot based throttle can be used, even including a cable-operated throttle unit with the cable pulled by a brake lever (which is how my SB Cruiser is setup).
 
gobi said:
E-HP,

I have been looking at different version of the generic controller.

I found one that comes with the USB > Serial cable, this one does NOT show if it has a regen cable (to turn it on/off)

https://www.aliexpress.us/item/3256804021339507.html

There is another one which comes with the USB connect cable and regen cable.
Hope that helps if you are still looking for a reasonably priced regen controller.

Well that's not a generic controller. That's the genuine article, the Savboton controllers that the generic controllers are cloning, with stripped down features. I wish the site sold the 7280, but the 7260 might work out with a mild shunt mod.
http://mqcontroller.com/show/?id=25

Thanks for the links. Those are better prices than I've seen around.
 
Back
Top