PWD's Rocky Mountain Element - 2WD

thundercamel said:
Wow, that looks just like my ebikeling 1500w motor, seen here. I recently got 50mL of statorade, and just just going to dump 10mL in. Why are you choosing 7mL? I didn't see a number you used last time.

That motor does look very similar! Last time I put 5.5 mL in but this time will be 7mL mainly because that is how much I have left from other applications. Ideally I would put 8-10ml based on some discussions here but I figured 7mL would still be an improvement over 5.5mL and I could save the cost of another order or Statorade.
 
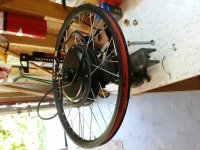
After completing a build for someone else; I was able to get my new motor/wheel installed.
IMG_20190728_135002.jpg

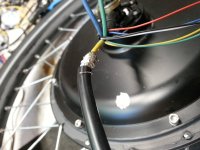
I went with 8AWG phase cable about 6cm away from the axle. My last one had 10AWG. I estimate the motor should be seeing phase peaks of 185A-190A.
IMG_20190731_191937.jpg

Leafbike used the wrong temp sensor (I asked for 10K NTC and they used a 100K NTC), so I also had to swap that out while it was opening for Statorade. I am glad I had one handy.

I am currently having a very annoying intermittent throttle issue. The rear motor throttle signal appears to be cutting out. This is taking the fun out of riding it. Unfortunately with all the lighting circuits and dual hall throttle; it isn't easy to track down where the issue is. :x I did attach a new throttle this morning for testing and it made it through the commute without cutting out. So the issue could be the throttle itself or the one of many connections in between the throttle hall sensor and the controller. I may end up having to build a new dual hall throttle.

Aside from the throttle issue, the new motor/wheel seem to be working well. The extra top speed is nice and the 24x2.15 Schwalbe Big Ben Plus is doing a good job of replacing my 26x2.0 Schwalbe Marathon. I still have to transfer the HubSinks from the old motor.
 
Beefy! I just just looking at 20" tires for my newest experiment, and the Big Ben Plus was one of them... I have a lot of crushed limestone gravel trails around me, and there are sometimes deep sandy sections that throw me off balance.
 
by pwd » Aug 09 2019 10:58am
Aside from the throttle issue, the new motor/wheel seem to be working well. The extra top speed is nice and the 24x21.5 Schwalbe Big Ben Plus is doing a good job of replacing my 26x2.0 Schwalbe Marathon. I still have to transfer the HubSinks from the old motor.
I have been debating going down to a 24" from a 26" when I change motors from a 7T to a 5T. Don't need the speed just want the motor rpms up as much as possible. But not sure it is a noticeable change of 3 mph.
 
I bought an extra large bike with a high top tube in order to stuff as much battery in the frame as possible. But w/ a 30" inseam, that fore-mentioned top tube was uncomfortably close to the Family Jewels. I went from a 26 X 2.0 tire to a 24 X 2.4, both ends. Due to the larger size of the 24" tire, the speed difference was small ( 1 or 2 MPH). But at the same time, it did lower the bike a noticable amount, but t also came w/ pedal strikes if I tried to pedal in corners. I had to go w/ shorter crank arms, which w/ my Octalink crank, ment a new crank.
The funny thing is, after a couple of years, I carry about half the battery capacity I thought I needed. I've kind of settled in to routine routes, know their power needs well and generally lost my "range anxiety" But the extra space is still nice to have.
 
thundercamel said:
Beefy! I just just looking at 20" tires for my newest experiment, and the Big Ben Plus was one of them... I have a lot of crushed limestone gravel trails around me, and there are sometimes deep sandy sections that throw me off balance.
Thanks thundercamel. I would certainly prefer running an even smaller wheel too but I also have to combat some nasty pot-holes etc ... during my commute

ZeroEm said:
I have been debating going down to a 24" from a 26" when I change motors from a 7T to a 5T. Don't need the speed just want the motor rpms up as much as possible. But not sure it is a noticeable change of 3 mph.
In my case, switching to a 24" from a 26" hasn't made much of a difference but it is nice to know I am running a more optimal setup than before. If you are changing motors anyway, definitely go for a smaller wheel; the smallest size you are comfortable with.

motomech said:
I bought an extra large bike with a high top tube in order to stuff as much battery in the frame as possible. But w/ a 30" inseam, that fore-mentioned top tube was uncomfortably close to the Family Jewels. I went from a 26 X 2.0 tire to a 24 X 2.4, both ends. Due to the larger size of the 24" tire, the speed difference was small ( 1 or 2 MPH). But at the same time, it did lower the bike a noticable amount, but t also came w/ pedal strikes if I tried to pedal in corners. I had to go w/ shorter crank arms, which w/ my Octalink crank, ment a new crank.
The funny thing is, after a couple of years, I carry about half the battery capacity I thought I needed. I've kind of settled in to routine routes, know their power needs well and generally lost my "range anxiety" But the extra space is still nice to have.
Ah yes, the height difference is something I didn't consider with a wider tire. I went from a 26 X 2.0 to a 24 X 2.15 and the speed difference is not quite as much as I expected either, so I can imagine how much less it would be with a 24 X 2.4. I tend to just not pedal around corners anymore to avoid strikes.
 
pwd said:
I am currently having a very annoying intermittent throttle issue. The rear motor throttle signal appears to be cutting out. This is taking the fun out of riding it. Unfortunately with all the lighting circuits and dual hall throttle; it isn't easy to track down where the issue is. :x I did attach a new throttle this morning for testing and it made it through the commute without cutting out. So the issue could be the throttle itself or the one of many connections in between the throttle hall sensor and the controller. I may end up having to build a new dual hall throttle.

I seemed to have solved the intermittent throttle issue. The jst-sm connectors from the throttle cable to the controller had a bit of play on the pins. Normally its not an issue with those connectors but the connection is susceptible to more cable movement with the full suspension frame etc. The solution was to remove the hot-glue from my previous repair attempt, push the pins in as far as they would go and re-apply hot glue to the plus to keep the wires from moving in the plug/connector. I had ordered a replacement throttle and extra throttle hall sensors just in but looks like they'll be added to my bucket of spare parts. :lol:

It was a bit of a pain to troubleshoot since I have multiple connections for the throttle signal cable but the bike is performing much better and it accelerates a lot smoother. The bike is back to being a blast to ride.

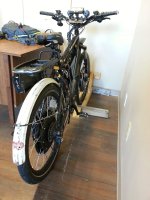
A couple of other updates on it: I've moved the Hubsinks over to the new motor and am using an old (probably late 1960's) rear fender for a 24 inch tire. It need a bit of paint :mrgreen: but fits much better than the over sized 700C fender:
IMG_20190909_103547_rotate.jpg
 
Nice fender! Ran over a coffee cup and it rolled up under my front fender but I am a fender fan.
Adding lights and USB port, when I am done going to make a wiring harness to replace my spider web. I prefer to keep the wires hidden as much as possible. Your bike looks clean for all the electronics on it!
 
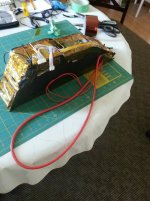
The bike has been parked for the season (fat ebike filling some of the gap) but I'm beginning to cobble together materials for something like this:
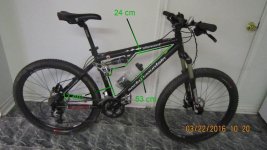
The bike before it went electric, showing the approximate available space for a battery box:
pack_size.jpg

https://e4bike.ru/page/battery-shape-configurator?c=72100501407111481109253175253174173351173405127725131

It will be a battery box for a 14S7P Samsung 40T pack. The plan is to replace the existing triangle pack + my backpack battery so simply and enhance my riding experience. I won't have to charge two separate packs or ride with a 5kg pack on my back. I plan on using the bike at the same power levels as before but with hopefully slightly less voltage sag and identical range. This will be my first battery build other than some RC LiPo used some years back on a previous build.

The enclosure will be made from bent and welded 20 guage steel and perhaps 22 guage steel sides so that I can have a fire resistant enclosure should something go to hell. I don't expect it to be pretty but as they say "A grinder and paint makes me the welder I ain't" This will also allow me to use minimum nuts and bolts to limit the number of protrusions into the battery box.

My nickname for the bike is The Ali-Express. Since most of my materials are on hold from China, I will begin by creating the battery box. This will be a relatively slow process since that is how I work.

Some things I have acquired so far:
Malectrics spot welder
21700 cell holders (the compact diagonal kind)
kapton tape
cell insulator stickers
20 guage steel for enclosure
 
pwd said:
I don't expect it to be pretty but as they say "A grinder and paint makes me the welder I ain't"

My nickname for the bike is The Ali-Express.
:lol:
These desciptions would fit my build very well too... :wink:
 
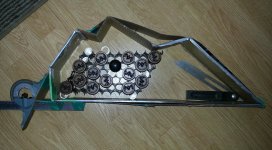
I have finally managed to start doing some cardboard assisted design. After a few adjustments and realizing the width of this battery box interferes with my chainring and derailleur, I have come up with this:

IMG_20200301_122822.jpg

A preview to see how wide this pack will be on the bike:
IMG_20200301_122843.jpg

I've been playing with potential cell layouts for a couple hours but I have determined it will be best until I get the box build first before I settle on something. My cardboard version won't be exactly the same as the final metal product due to measurement errors and bending errors. After all, I'm just using some clamps and lumber to bend the metal and I'm not really taking the bend radius etc... into account; I'll just be winging it.
IMG_20200301_124728.jpg

My cell testers (2 x LiitoKala Lii-500S ) and LiPo battery for the spot welder have arrived too, so I will need to test that as well. I'm getting close to ordering my cells too.
 
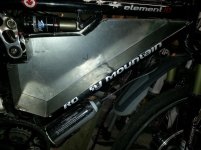
I've been chipping away at bending up the sheet metal for the box over the last few days. I think I've just about finished it before I begin welding. 14S7P of 21700s will be a tight fit:

IMG_20200305_080728.jpg
 
I did a very quick test with the Malectrics spot welder using my HRB 3S 8aH lipo pack and it was a success. I managed to spot weld some tin can tops together. My next test will be nickle sheet on some dead cells once the nickel sheet arrives...
 
Looks like fun :) Very similar to the box I built for my wife's bike, and I also used the Malectrics welder (with a car battery) and had to modify the derailleur to clear. How do you plan to attach the side panels? With only one screw in each corner of the triangle, mine don't seal tight at all in the middle.
 
thundercamel said:
Looks like fun :) Very similar to the box I built for my wife's bike, and I also used the Malectrics welder (with a car battery) and had to modify the derailleur to clear. How do you plan to attach the side panels? With only one screw in each corner of the triangle, mine don't seal tight at all in the middle.

I saw your pack build too (nice job) and the box is similar to yours. One of the side panels will be welded to the the main box and the other side panel will be bolted/silicon-ed to the main box. Originally, I wanted no protrusions inside the box (no nuts and/or bolts/ other hardware) but in order to make the side panel easily removable; I will most likely weld some tiny nuts to the corners of the box to secure the side panel. The nuts shouldn't interfere with the pack. To try and void the same issue you had (thank you for mentioning that by the way) along the middle/bottom, I will weld a few nuts to the outside of the box (on the bottom) so that the side panel can be secured there too.

:es:

My BMS (IC GOGOGO 16-20S 320A Bluetooth) just arrived today and will be a tight fit. Life is quite busy at the moment so progress may be delayed a week or two.
 
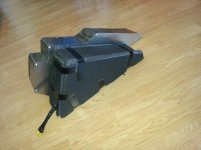
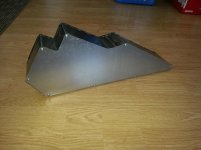
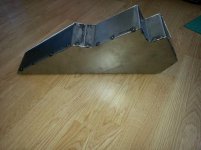
Made some more progress on the battery box:
IMG_20200319_134759.jpg
IMG_20200319_134810.jpg
IMG_20200319_134820.jpg

Test fit on the bike:
IMG_20200319_141833.jpg

Comparison to an em3ev triangle pack which was covered in 11mm thick foam:
IMG_20200322_144148.jpg
IMG_20200322_144206.jpg

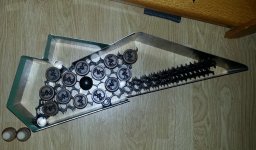
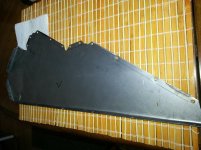
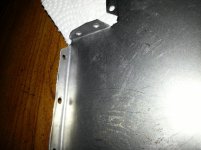
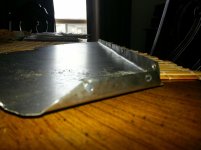
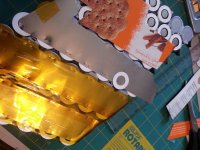
Removable side cover is aluminum:
IMG_20200322_144128.jpg
IMG_20200322_144058.jpg

I've also received the shaft collars which are the perfect fit for my bike frame. I have since welded four nuts to the bottom of the box which will make it nice and secure when fitted to the bike.
 
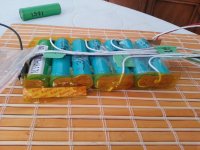
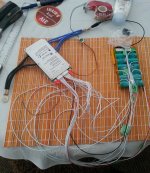
Some more items for my battery build arrived. Received some 0.2mm X 30mm pure nickle strip and XLR connectors. This finally allowed me to assemble a quick 7S pack made of old 18650 cells so that I could test out the BMS and dial in my spot welder. This is my first pack ever. Everything has gone fairly smooth and the BMS (and Android app) seems to function as intended. The nickle stripp also has passed a 3 day salt water test showing no signs of corrosion. I also tested a piece of nickle strip on the bench grinder to check for sparks etc... and it looks good.

IMG_20200417_085205.jpg

IMG_20200417_085139 (1).jpg

I am still waiting on some 0.2 X 100mm nickle strip and of course the cells for the real battery build.
 
The cells have arrived! I'm testing each cell which is going to take a long time (20 hours per cell).
IMG_20200427_161055.jpg
I have hastily ordered a couple more chargers (Zanfare C4) to try and speed up the process. They should be arriving today (thanks to Amazon Prime).

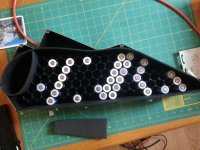
I was also able to begin test fitting the cells. My estimates without real cells to work with were pretty good, I can fit the full 14S7P in there. I may have to find some thinner padding but the main thing is the cells will fit.
IMG_20200430_112255 (1).jpg
 
Looking good! So why did you go for 21700? I haven't done the math, but the extra 0.5ah per cell doesn't seem like it will benefit with the extra space needed over packing more MJ1 cells instead. Maybe more amps are what you want?
 
Thanks! Yep, you got it. It is more current/less sag that I'm looking for. The 40T should be the right balance between current output and capacity that I can fit in this space. I'm looking draw peaks of around 110A total. The extra 50mm of cell height is something I had room to accommodate for.
 
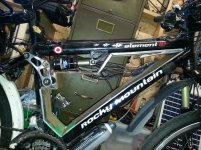
Nice choice for a donor bike, my daily driver is a 2004 Rocky Mt Slayer (Element's big brother) with the same linkage. The box looks tight to the linkage at the end of the shock, have you compressed your suspension to ensure the linkage doesn't hit the box?
 
I'm a fan of Rocky Mountain bikes, this was my first one and I'm using a Blizzard 20 for my other build. The box is fairly tight to the shock linkage, good point. ^^ I have done some crude tests by "jumping" onto the bike to compress the suspension. It does make contact but only in extreme cases. I can "trim" the box if it is a problem in the real world. Hopefully I'll get lucky.

In other news, the cell testing is coming along nicely. I'm over 3/4 done. I've never used these type of lithium cell chargers/analyzers before but I can see that they have some inaccuracies that you need to be aware of. I've been recording the measured capacity of each cell (yes, might be overkill for brand new cells) and each slot has its own variance. For example on one of the LittoKala Li-500S units, slot 4 is always a good 180 mah higher than the rest. So far I'm averaging about 4150 mah per cell but slot 4 is 4330 average. I am not using the test function on the Zanflar C4 units to try and limit test deviations but they are good for charging/discharging cells.
 
The pack build continues.

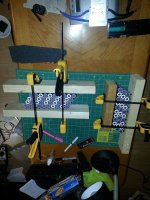
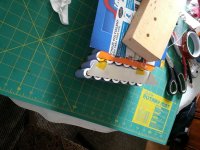
Clamping the cells together after applying Gorilla glue
IMG_20200508_203846.jpg

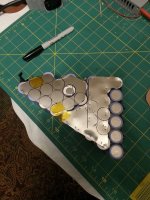
Cutting and fitting nickle strip. I made cardboard pieces first to try and reduce wasted/trimmed nickle sheet. I am using 0.2mm x 30mm sheet and 0.2mm x 100mm for the more complicated pieces.
IMG_20200510_083307.jpg

First welds. Took some time to dial it in. I achieved better results when cleaning the cells and nickle sheet with rubbing alcohol :
IMG_20200510_102503.jpg

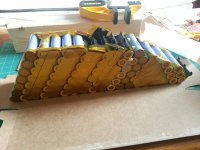
Second "half" of the pack. I only spot welded once per cell in case I messed up the connection.
IMG_20200510_200911.jpg

Glued the two halves together and ready for final welding.
IMG_20200512_075024.jpg

I finished making all the sheet nickle pieces and am currently doing all the final spot welds.
 
The battery is complete and I have been riding the bike for a few days now. Here are some photos of the build and the bike:

test fitting the pack inside the battery box. I had to be very cautious since the case is conductive and I haven't fully insulated the pack yet.
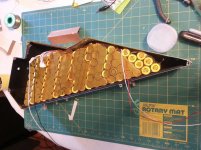
IMG_20200513_195746.jpg

How I terminated the positive end of the pack. I folded the nickle sheet over and then added more spot welds. You can see a couple spot welding mistakes where I missed the mark. Otherwise it went pretty smoothly.
IMG_20200516_085902.jpg

Added some 3mm thick rubber padding
IMG_20200516_161609.jpg

Soldering the positive cable. As suggested my many on ES, I finally purchased a fat tip soldering iron (80W) since my butane torch stopped working. What a difference it is having an adequate sized soldering iron! I used a lot of solder on those 8AWG cables but I am happy with the result. I made a goof when selecting the solder to use. I had accidentally used 40/60 rosin core instead of 60/40 rosin core. That explains why the soldering appeared more dull. I switched back to 60/40 as soon as I realized what happened.
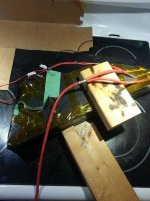
IMG_20200516_204809.jpg

Pretty happy with how the box turned out.
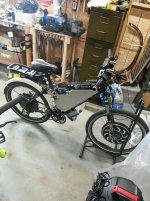
IMG_20200518_143128.jpg

I am happy I chose XLR connectors for charging. The make a nice solid connection.
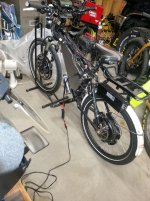
IMG_20200518_143051.jpg

Current pulled after first real ride. As expected, the performance of this new 14S7P 40T pack is virtually the same as when I was running a 14S5P 30Q + 14S6P 25R. It has a bit less voltage sag which is exactly what I was after, although not much less. The real benefit is having one pack instead of two. Charging and riding is more enjoyable.
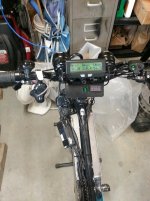
IMG_20200519_141746.jpg

I'm quite proud of how everything turned out, especially for my first cylindrical cell pack. There are definitely some issues I need to address with the battery box but nothing that is stopping me from riding.

If kind of funny. I was used to riding the fat bike since last fall and up to now. This bike is a completely different ride (street vs offroad). When I twisted the throttle for the first time on the bike since last year, the acceleration is enough to make me laugh and be a bit frightened.
 
Back
Top