RIPPY CAT

Hi, the flipsky, is it running vesc? In that case it is probably better to look at vesc instructions. The reverse dosent have its own input in that case, you just connect it to rx or tx (dont remember which one) and activate it in the software. If you find an easy way to get a three speed switch, let me know ;)
 
The FT60BD is not a Vedder. Its not radio or remote controlled, Theres just 2 controls, direction and throttle.
I bench booted 2 small thrusters on my PC but then went to config the actual thrusters in the boat using a laptop
but the usb driver wouldnt run in the laptop, same OS Win7. Never had so much trouble.

FLIPSKY CONTROLS.jpg
 
Ally subframe is in with 4 M6 threaded rods through the front beam and 2 in the rear beam.
Cat sits low in the front and the steering is worse than ever crotchety and jams up.
The motor kicks up in reverse and almost chops the thrust ropes.
Really want to go to 2 motors and thrust vectoring for steering. This would eliminate all the ropes and power cables
going to the front beam. Battery is massive it will never go flat, its actually too big.
Needs a floor to walk around on and also a roof for the sun.
 
Raised the motor 25cm and bolted on a big rudder fin.
Didnt think I could survive without a CNC router but I hacked
this thing out of 3mm ally in 40 mins.
This thrust rope attachment wont work.
Trying to combine the thrust rope and steering rope into one.
MOUNT 2.0.jpg

RUDDER.jpg
HANGER BEARING.jpg
 
move the motor to the back of the stock cross bar
they make mounts for the hobie 14
front rudders are just very odd
weight needs to be out of the extreme ends or they pitch/hobby horse bad
stear from the top with a wider single bar called a tiller
that line underwater is temping the prop to eat it
props live to eat lines never ever temped a prop like that

I built a 18ft hobie el troller
the 18 does not have the foil shape hulls
but the big battery lead/a d8 were tooo much
 
Ive extended the steering rope attachment arms for more leverage
and removed any rudder that was in front of the pivot tube for some auto straightening effect.
Did a 3.6km cruise this morning, was enjoyable except for the rednecks in tinnies making waves and almost running into me.
The thrust ropes still come too close to the prop but can adjust the attachment point higher up.
Ive had the rippycat out 3 times with this motor battery config and still havent needed to charge the battery.
If I hooked up the charger, it would show full charged and not switch on. At mostly 20 amps motor current, this cat would have all day range. Concrete bridge is Como rail bridge. The steel bridge top of shot was built in 1885 and prefabbed in the UK.
 

Attachments

  • COMO BRIDGE.jpg
    COMO BRIDGE.jpg
    3.7 MB · Views: 6
  • GPS COMO.jpg
    GPS COMO.jpg
    495 KB · Views: 6
  • RAMP DEC.jpg
    RAMP DEC.jpg
    2.1 MB · Views: 6
Gettin a bit too adventurous here. Went on a 6km cruise but did the last 1km getting towed by a small tinnie.
Was pullin 25 amps motor side (8kmh) and heard a pop and lost power. Waited a while and heard a click
and tried to power it up again.
The prop turned but way smoke came out of a mosfet. I could have tried to burn through it till it
went open circuit and limped home on 5 amps.
TOWED.jpg
 
Pulled the trolling motor apart to see how the brushes are handling the 55 volts and the big prop.
Looks ok, They have only seen 35 amps tops so they should handle it ok. Max 2kW.
Took a few shots of the potted windings and decided to add some more Araldite in the slots.
ROTOR POTTED.jpg
 
You can see this 90lb rotor is very long so the windings would be quite prone to looping out at high rpm.
Also found some honeycomb fibreglass panel for the decking. At 35mm thick it should wedge between the hull tops and under the aluminium subframe.
 

Attachments

  • BRUSHSET.jpg
    BRUSHSET.jpg
    2.1 MB · Views: 10
  • ROTOR.jpg
    ROTOR.jpg
    2.3 MB · Views: 10
Everything must be modified. 2x 50mm fans at 0.1 amps each.
Tried to power them off the fwd rev switch which had 10v but that wrecked
a chip and the throttle doesnt work anymore so found a 55v-12v dcdc.
DC CONTROLLER.jpg
 
Realising just in time that the front tramp beam needs to be supported by a trapezoidal cable so it doesnt snap in the middle and sink the cat. The Hobie used to have this spar sticking straight down below the beam under the mast which supported the beam.
Now the original cable uses the subframe like a double spar.
Also bolted the right side deck in. The outside rests on the hull with a rubber strip, no bolts.
CABLE.jpg
DECKING.jpg
 
After 6 outings I finally tried to connect the charger and see if it would start up.
Top of charge is 55v and the battery was about 53v but the charger booted and went to 35 amps.
It warmed up pretty quick even though it has a fan and got to 55v in 15 minutes.
The draw on the battery while running is around 7 to 12 amps max when the motor current is 20 to 30 amps.
The battery is way too big for this application and could easily run 2 of these motor ctlr combos.
CHARGING.jpg
 
Successful 6.3km run this morning with the new ctlr cooling fans running 20 motor amps most of the time.
After the run the ctlr had no smell to it meaning its running cool enough to survive.
Had to prop the battery box open with the clips to let air in. There will need to be some kind of ventilation in the battery box.
The steering is still annoying, have to constantly tug on the rope to keep the hulls travelling straight.
Really need to mount the motor in a fixed position and add a rudder that is pedal or tiller operated.
WONNY 2.1.jpg

WONNY 2.3.jpg
 
It had to happen sooner or later. The motor sat for about a week half full of salt water.
I cleaned and painted everything, reassembled with tonnes of silicon and then put half
litre of electrical coolant in the motor.
WET MOTOR 2.jpg


WET MOTOR 3.jpg

WET MOTOR 1.jpg
 
Heres an experiment using 3M coolant that came out of an RAAF AEWAC radar plane.
These radars use high power electrics that are submerged in this coolant.
Got this stuff used from a buddy who is RAAF tech.
 
Im testing the range of the battery and Ive got 15km (3 cruises) clocked up so far on one charge.
I go out on the 4th cruise and get 5km up the river and the cell logs go off beeping.
3 of the 14 cell blocks are undervolting 2.2v but the other 11 are ok 3.6v
I decide to leave the cat parked up on the beach, drop some rocks on its mooring rope.
Right on queue, 2 guys in a fishing tinnie come round the corner and I wave them in.
They give me a ride all the way back to the boat ramp. I go home get the 33v battery out of my other boat
and get a friend to follow me to the ramp where I leave the van. Then they give me a lift to Woranora Heights
which is right near where the cat is parked. I go down this steep bush trail with the 33v battery in a back pack
and fit it to the cat and drive it back to the ramp. I run aground twice cause its super low tide.
By the time I get back the 3 low cells in the pack have come back up to 3.3v as I connect the 35A charger.
So I think there are just a few dodgy cells in those 3 low blocks.
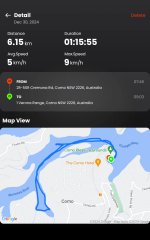
I checked the trip distance in Google Earth and it 100m shorter.
When I parked the cat, the water line was up to the chair.
RAN FLAT.jpg

RAN FLAT 2.jpg

RAN FLAT 3.jpg
 
Charged the battery up to full to see those low blocks come up to the same level as the others.
Now going to discharge it again to see exactly which blocks are low and take the pack apart and fish out those bad cells.
Confirming that the cat gets blown around by the wind, I locked the steering in the straight ahead pos and drove directly into this strong northerly. The tail of the cat was getting blown left and right but ended up doing this slalom run and generally going in one direction against the wind.

OYSTER BAY 1.2.png
 
When I was right up the Woranora river I noticed the hulls were sitting lower in the water.
Underway, the water was lapping up over the gunnal edges and thought the hull had taken on water but it was the reduced salinity of the water so far up the river where theres more rain run off than sea water and the water tastes different too.
Back down in the Georges there was about 30mm gap under the gunnals.
DRAFT.jpg
 
Last edited:
Im pre-empting this trolling motor blowing up so started planning the next motor / prop setup.
I can mount one of the 55hp R1 race motors between my feet and run an angled shaft back to a prop
between the sterns.
CENTER DRIVE.jpg
 
Thanks for the likes (y)
Got a Johnson 90hp leg off GumTree for $100, only want to use the prop and prop shaft.
The casing has metal putty repairs so it was goin in the bin. That made taking it apart easier.
Didnt have circlip pliers long enough so just used the cutoff wheel to go through the casing AND the circlips
to get the thrust bearing out.
This prop is 36cm diameter so will be a slow turner.
JOHNSON 90hp.jpg


STRIP.jpg
 
Back
Top