Soldering 26650 cans with a "through-hole" technique.

markz

100 TW
Joined
Jan 9, 2014
Messages
12,179
Location
Canada and the USA
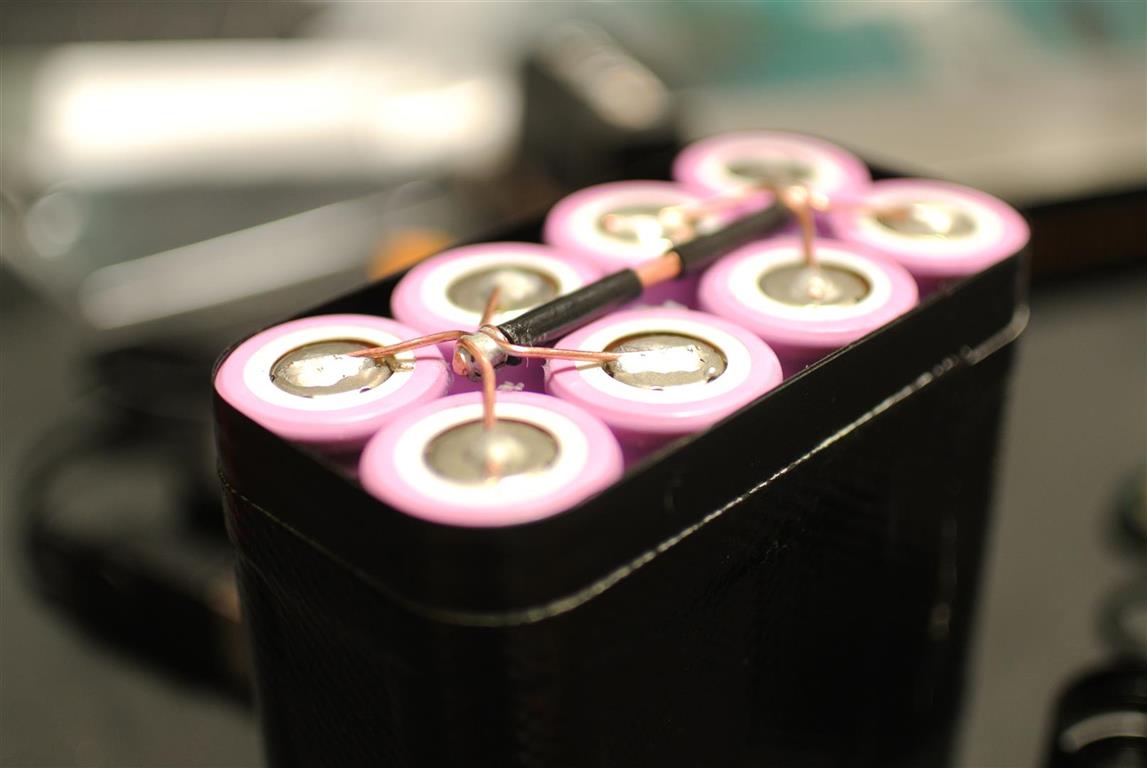
I have had this idea in my mind for some time, ever since I was trying to figure out proper ways to connect batteries securely.
Most likely after I read the magnet, no tab-weld build someone did.
I believe this technique will reduce the heat that the battery recieves. I might try some thicker strips around the hole to eat up some of the heat, but leaving the hole clear for solder to make contact with battery end.

strips.jpg

Here is the Rosin I bought, I am not sure if this is the right stuff.
View attachment 2

I have to head on out of my cacoon, and hit up my electronics store, for a big roll (0.5lbs) of 63/47 solder. Been trying out a bunch of tests lately. Is that the right Rosin to use for soldering?

Supower Nickel Strips for 26650 holders-seperators.jpg

 
Well what I did was dab the bottom of the metal with some solder, making sure the solder goes up through the hole.
The bottom being the part that connects to the battery terminals.
I will let it cool to room temprature as I do them all.
Then when I place the metal onto the battery pack, the iron will heat up the solder first through the hole in the metal.
And the metal acts as a heat sink.

From what I have read, the temperature for melting 63/37 solder and 60/40 solder is not much different.
But I have both, some wide diameter 60/40 and some thin diameter 63/37.

I believe this is the same technique used in welding. Where the welder drills a hole on the top piece of metal, so he can weld the top and bottom metal pieces together.
 
Your first picture there shows solder on the can itself.

What I am talking about is preassembling the strips off the cans themselves. Just soldering the nickel/copper strips themselves to get a lump/bump of solder on the strip, the underside where it touches the can, and the hole in the strips are just a quick, fast and easy way to get the heat to the other side of the strips so it can melt onto the can itself. This, I would assume negate the need to heat the can up anymore then it should. I would suggest 63/37 but it seems to be a bit more expensive. I bought 250g of 60/40 for $10 from TheSource (RadioShack), and only 45g of 63/37 for the same price. The solder just liquifies faster. Its worth giving it a try, or atleast practicing and using a temp probe. I just recieved one today from Princess Auto (Harbor Freight) and will practice and give you guys the results. I have about 4 less then ideal cans to practice on. My temp probe is laser.

I dont know if I should use flux on the can and hardened solder on the strips, after I preassembled the strips and ready to solder onto can.
 
Actually i solder to the Nickel also first but no picture on that. I think it is easier to solder those together with presolder on both parts first.
 
Actually i solder to the Nickel also first but no picture on that. I think it is easier to solder those together with presolder on both parts first.
 
I might try it your way, I have tried twice now and it doesnt seem to work the way I thought it might.
I used a small drill bit, then went up to a bigger one. No rosin flux though. I probably could go a little bit bigger drill bit.
 
Pretin the tabs then with a very small amount of flux on cell solder with a 80 watt fat tip iron cool with wet sponge. I would use a gasket. Cheap insurance. Dont plug the vent hole.
Buy them spot welded in parallel the you solder on the tabs between the cells for series.
 
the problem with soldering:

1) solder is SOFT. so you need a large blob of it to guarantee mechanical integrity

2) you need to heat BOTH surfaces to be joined


to solder 18650 you need to use as little heat as possible as quickly as possible

z7E3o2u.jpg


[youtube]0ZRwMXL-Rvs[/youtube]
 
Back
Top