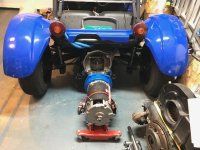
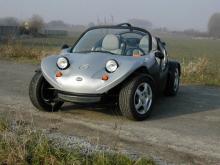
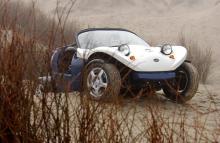
1,000lb "Elec-tow’d” Electric Tow’d Dune Buggy Build Thread

.
Whups - too many pictures for the last post. Who, me? :oops:

46 IMG_2439.JPG

47 IMG_2384.JPG

View attachment 1

49 IMG_2394.JPG
.
.

After the motor was back in, I did a late-nite test down the block. I got a nice short burnout, but it seemed like the second burnout might have been slipping so I stopped trying. If so, I'll have to troubleshoot it, but even the last clutch was fine for normal driving, so now that I know nothing is broken per se, it is not my top priority. Instead, I'll be focusing more on drivability/restoration issues.

Oh, and I was able to find reverse... but had so much power I could only do backwards burnouts so I ended up rolling it into the garage by hand. Either the reverse switch isn't working, or while testing I removed the mild settings for reverse, one of those drivability issues I need to work on.

.
.
.
 
01 IMG_2519.JPG

02 IMG_2520.JPG

03 IMG_2522.JPG

04 IMG_2523.JPG

05 IMG_2536.JPG

View attachment 19

07 IMG_2540.JPG

09 IMG_2696.JPG

10 IMG_2707.JPG

11 IMG_2798.JPG

12 IMG_2712.JPG

13 IMG_2713.JPG

14 IMG_2751.JPG

15 IMG_2663.JPG

View attachment 10

17 IMG_2747.JPG

View attachment 8

32 IMG_2800.JPG

33 IMG_2760.JPG

View attachment 5

35 IMG_2802.JPG

36 IMG_2762.JPG

37 IMG_2763.JPG

38 IMG_2775.JPG

38 IMG_2789.JPG


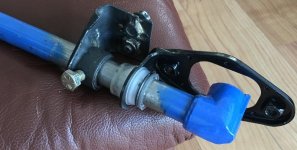
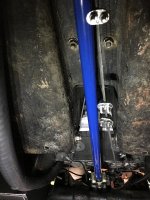
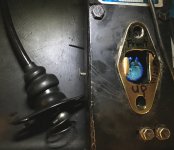
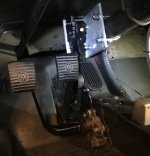
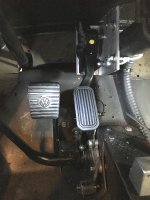
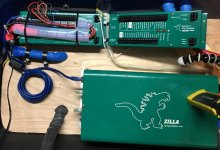
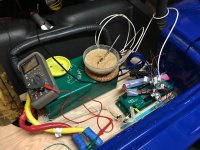
So, this is the completion of Phase II, a major milestone for me :mrgreen: , and I feel released from the cloud of work that has been over my head. 8) The zilla is installed, the substandard POT throttle is no longer blocking the passenger seat, and I've sorted out the shifter, driveline, and suspension along the way. While I need to sort out the current startup problem, that is troubleshooting a known, previously working system, not engineering a new one.

I'd like to take it for a test drive and see how the front end feels with new shocks and full travel, except for the pesky detail of the new hairball not starting up. I have been pushing myself pretty hard for a few months in order to get to this point, so I decided to take the rest of the day off. With the pressure off, I was suprised to find how exhausted I was, I didn't have energy to move for the rest of the day.

Plenty of work still needs to be done, but the difference is that these tasks enhance an existing build, instead of being critical path to getting on the road in the first place. I can take my time and enjoy installing the upgrades, instead of worrying about how to make the pile of parts in the garage back into a car.

Phase III will be about driveability and tuning. I want to move the CA to behind the steering wheel for better visibility. I need to finish redesigning, print and mount the CellLog array so I can range-test the pack. During the range testing, I can find out whether the power stage actually needs cooling - other dune buggies are running zillas without it, but I may have more hills than they do. Encoder for the zilla so it will drive the tachometer. "Valet" Button. Sort out the reverse switch. Have seats made. Swap the Z1K-HV for the Z2K-LV then send the Z2K in for an EHV upgrade. etc. etc. etc.

-JD
 
Very nice!
 
Thanks Wb9k! :D

The tow'd was delivered to me on June 5, 2013. On Sunday 12/13/15 it took its first beach cruise under electric power, a long wanted milestone for the project. 2 years/6months/9 days, including two major burnout periods where I had to completely forget about the project to build up enthusiasm for it again.

Shakedown Cruise, driving down a beach road in wide view, through some local suburbia for the hills, then the beach again in narrow view this time.
[youtube]46_EDW2tI98[/youtube]

Walkaround - I took a walkaround while at the beach, shot in 4k so you can up the resolution. Note the 2x2 for the gopro bunji-tied to the rollbar, the camera mount I forgot and left sitting on the motor, the laptop for zillaview in the passenger footwell, and the bag of tools/parts/extinguisher in the passenger seat.
[youtube]ttluo4MIt0Q[/youtube]

A zillaview of the run, pretty boring stuff but data nonetheless.
[youtube]_0JnZiHP1p0[/youtube]

I'll be posting the CA mount and CellLog holder on my 3d printer thread later.

So you may notice, no rolling burnouts - despite the pressure plate/clutch upgrades, it still slips so I get a tiny burnout and lots of clutch smell. As you see from the video it accelerates faster than most cars without slipping, it just can't do the drama I experienced on my first ride. I'm starting to wonder if the hub the pressure plate is mounted to has drifted up the shaft, pressing the release bearing just enough to keep the clutch loose.

It took a whopping 301wh/m, but I was trying to heat the controller and motor by speeding up steep hills, and through dozens of stops signs, real-world usage that I would drive every day anyhow. The controller finally started heating up near the end but despite the abuse it was a gradual not sudden change; I'll still add a cooling system but now I know it doesn't have to be top of the todo list. The motor seemed to sink a lot of heat, it was cool for a long while but eventually got pretty warm to the touch.

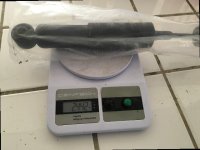
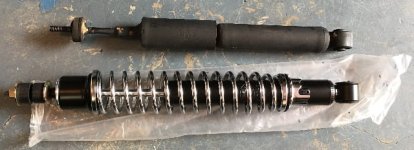
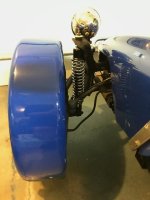
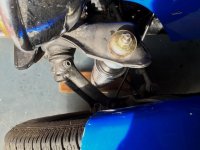
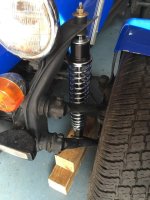
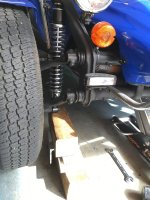
I found out there is no over in the coilovers - they are just springs. I was worried that It would feel like a turbocharged bouncy house, but it works pretty well for now. Handling is pretty bad on rough roads, but I think that is a function of vw torsion bar front end.

-JD
 
file.php


A this intersection, the towdster didn't weigh enough to trip the traffic light, I had to get out and press the pedestrian button. :lol:
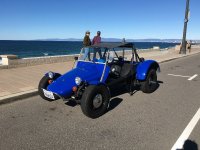
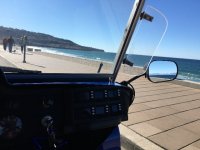
IMG_5817.JPG

IMG_5838.JPG

I got the towdster out for its second shakedown cruise on Xmas, to baseline the pack's capacity. Last time, a cell dipped low after only 2kw of discharge, but had recovered by the time I got home. I hoped it was a cellLog issue but feared one (or more) low capacity cells were going to limit me to shallow discharges, adding to the punch list of things to fix.

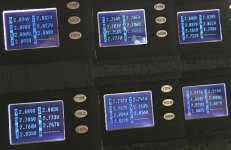
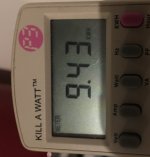
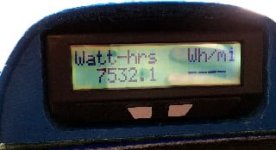
The CellLog Array makes it so easy to baseline a pack, my installation was labor intensive but still saved me time in the long run. This time around, the fully-balanced 60ah pack gave up 57.19ah/7,532wh before the first cell dropped low, and the kill-a-watt says 9,430wh went back in on the charge. I was targeting a conservative 2.7v cutoff, and the cellLog pic shows most of the cells were in that region after the discharge. I'd be worried about the 2.16v low cell if it wasn't a123 and its voltage hadn't bounced back up after resting. Next time I have the body off, I might parallel an M1 cell so it has the same capacity as its peers.

Weak cell aside, these old a123 pouches delivered close to their rated 60ah at the top of the "knee" of the discharge curve, 2.7v. That is good news, more capacity than I hoped for. I wish all manufacturers rated their cells on usable capacity like a123, so we wouldn't have to lop 20% off the top to account for 80% DOD.

I travelled 24.9 real-world miles (hills, high winds, many stops and hard launches) during the discharge, which translates to 303wh/m. This meets MY needs, a 16 mile weekday commute leaves 9 extra miles for errands, or on weekends it can do a dozen trips to the beach. However, in the first post I set a target range of 35 miles (5 miles more than 60% of Americans travel daily) which would require 215wh/m.

Hopefully I can meet that target with tuning and technique. For example, I bet the wheel bearings need inspection/replacement/lube, given the work the rest of the car needed. The tires need air again, adding rolling resistance. The motor could have a voltage leak from carbon dust buildup. I did the test in third gear for simplicity, which isn't efficient for launches so I might do better rowing the gears. Depending on how bad I want to get there, I could add another 7s3p module for more range and volts, or tune the DC motor with timing and Helwig brushes, or even go brushless. What I will NOT do is mislead people by measuring on a banked oval at 25mph with no stops, then quoting it as real-world for the bragging rights. I have seen too many optomists over the years, and too little hard data.

Although it seemed unrealistic, part of me hoped that Rickard's "100wh/m per 1,000lb of EV" theory would apply to this build, so it would get 100wh/m and have a 75 mile range. He publishes a lot of data points to support this, but they are from long-range big-battery EVs that are a bit heavier, and I don't think it translates to lighter vehicles. My 70mph Vectrix weighed 500lbs, but instead of the 50 whm his theory would suggest, it used 130-160wh/m depending on how hard I was pushing it - that translates to 320wh/m per 1,000lbs. I typically get 35wh/m on 100lb ebikes, which translates to 350wh/m per 1,000lbs. Based on my own data points, I have a different wh/m theory.

Since I haven't added cooling yet, the other important data point was HEAT. The controller was good for about 10 miles of spirited hilly driving before it would start to cut back (more than enough for each leg of my commute). I am glad I had a chance to add a sense of heat dissipation to my design vocabulary, but summer is coming, so when it is convenient I'll downsize to the Z1K and use the freed-up real estate for a coolant reservoir. The motor got pretty warm in the same duty cycle - just enough for me to consider forced air cooling for longer runs. The battery pack was absolutely cool throughout the discharge.


Also, I finally posted details about 3D printing the CellLog holder and Cyclanalyst enclosure I made to my Kit-taz thread - CLICK HERE to see more.


View attachment 4
IMG_5880.JPG

IMG_5883.JPG

IMG_6122.JPG

IMG_5886.JPG


Please ignore this duplicate:
 
Just wanted to say I like this project very much, think you've done a great job with it so far and look forward to seeing it continue!

I have a coworker who is building his second VW-buggy based EV now, it is a really cool platform for sure. He drives his first buggy to work often when the weather is nice, something like a 30 mile freeway trip for him, quite crazy!

One thing occurred to me in reviewing the pages of posts to this point-- I wouldn't worry about twisting the motor cables to reduce inductance, as they're just in series with the motor which is a huge inductor! Certainly reducing inductance and loop-area is important on the battery side, where you want to avoid having the current ripple causing voltage peaks.
 
Excellent work. I wish that type of chassis was legal here. The closest we could get would be either a moke Californian or vw buggy including the vw floor plan and lower frame. Nothing as light as 1000lbs!!!
 
Awesome dude. I love how ES has more awesome stuff like this then any other forum! We are supposed to be a bicycle build forum but NOPE lets all build bad ass shit.

Congrats. I love these "Dune Buggies"
 
Arlo1 said:
Awesome dude. I love how ES has more awesome stuff like this then any other forum! We are supposed to be a bicycle build forum but NOPE lets all build bad ass shit.

Congrats. I love these "Dune Buggies"

Thanks Arlo,

I hope I can try a Leaf motor on it when you bring that amazing controller you made to market! Work like yours is what will put cheap homebuilt EVs in people's garages. :mrgreen:

-JD
 
Beautiful build. I'm two wheeled man but I would love to take this particular four wheel for a spin.
 
Thanks maydaverave!

fechter said:
Do you have a way to disconnect the CellLogs when not in use?

Nothing elegant, I just unplug them from the balance connectors for the pack. I followed your thread on turning off cellLogs for a while, and thought about just putting a switch on pin1, haven't gotten there yet. Please let me know if you find a better solution!

-JD
 
Unplugging them seems to be the best thing. I made a breakout board that went to a big DB-37 connector so I could unplug a bunch of them at the same time. Eventually someone will come out with something better.
 
.

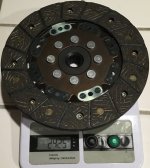
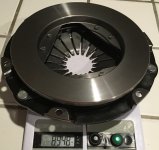
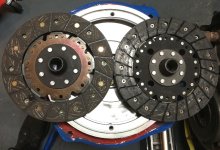
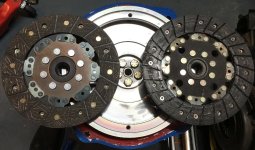
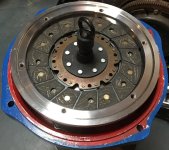
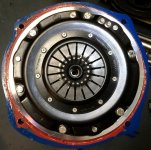
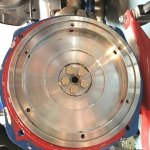
I've been troubleshooting the tranny slip problem for some time now. I suspected a broken CV joint, but I took the axles off and they seemed fine. I suspected the tranny, but the more I studied it, the harder it was to envision a failure that matched the symptoms. I thought maybe the key to the motor shaft had slipped, and the hub holding the flywheel had drifted, but when I took the motor/pressure plate/clutch off and it was fine. I thought maybe my flywheel was ground wrong when it was lightened, but as mounted I only found .0025" variation on the face, and the pressure plate "shelf" was the correct 21mm above the face. I did have burn marks on the face, so maybe I had created hard spots on the flywheel and needed to replace it.

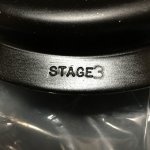
A guy who had done a really clean build of an ICE Manx Kickout had come across my youtubes, and in the course of conversation he mentioned that on a sandrail build with a big ICE, he had to use a Stage 3 pressure plate (rated for 260lb/ft) to get his clutch to hold. The Stage 1 pressure plate I was using was rated for 180lb/ft, but I've been running lower power levels with half that torque and a gentle pedal to keep it from slipping, so I had trouble seeing that as being the problem.

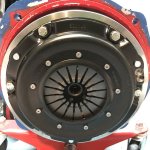
Having ruled out everything else, I finally bought a stage 3 pressure plate from Kennedy Engineered Products. I thought that maybe the instant torque of electric was different, maybe launching in second gear had an impact, such that this would be necessary... The motor was off already anyhow and it would only cost $150 to find out, much cheaper and faster than having a new flywheel cut, so I went for it.

Before I mounted it, I cleaned up the flywheel face. I had once tried to remove the burn marks with 2000 grit sandpaper, but it had no impact. In the course of my research, I had seen a recommendation to sand a cross-hatch pattern with 320 grit; I tried that, and the burn marks came off - Yay!

I did a test at @350a, and was able to chirp the tires while rolling in 1st gear, with no burnt clutch smell, but couldn't break the tires loose in 2nd. I bumped power up to 475a, and was able to get some mild rolling burnouts in 2nd gear. Note that these were achieved by merely stepping on the throttle, NOT dropping the clutch. I haven't had to use the clutch pedal in a while. :D

[youtube]Nm8-BHbjE6k[/youtube]

It got up to speed right quick, although it wasn't the same as the wild power I felt on those first few test rides. I need to see how many amps I was running and get some vid of that... But I want to take it to a minor event next week, so I don't want to risk snapping an axle, CV joint, or transaxle, so I'm calling it a day. I think I've gotten past the slipping clutch that has been holding me back, so I can start progressing other areas of the build, like downgrading to the Z1K while adding cooling for it.

Oh, and while I'm at it, I finally posted this build on the EV Album. (click here) Of all the builds I've done, this is the first one I actually put up there. I think I did the best job yet of trying to capture what I was trying to prove out with this build.

file.php

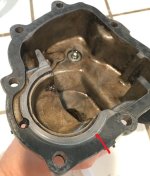
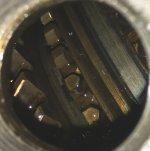
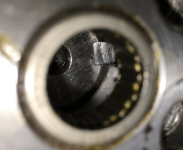
The Key as seen through the pilot bearing in the flywheel for the input shaft. It is still flush with the motor shaft, so I don't think the hub the flywheel is mounted to has drifted.

View attachment 4

IMG_9259.JPG

IMG_9266.JPG

IMG_9268.JPG


Please ignore this duplicate photo:
 

Attachments

  • IMG_9274.PNG
    IMG_9274.PNG
    160.4 KB · Views: 7,034
Awesome work JD :D

Interesting about your clutch I have similar but different experience with Sonic and the BMW lsd diff, if I dont turn the steering wheel first and move a couple of feet before accelerating the Diff locks and the car lauches straight quiet scary when you have steering wheel turned.. :roll:

I think the electric torque is too quick for the Diff, this also happened at speed in my hill climb video. :evil:

Cheers Kiwi
 
From slipping clutch to slipping tires. You're going in the right direction! Very nice build 8)
So after the minor event get some grippier tires and enjoy the increased acceleration. Until something breaks (hope not)... :shock:
 
Thanks Slowco!

Nothing has broken yet, had it to a few local car shows. :mrgreen:

-JD
 
oatnet said:
So, this is the completion of Phase II, a major milestone for me :mrgreen: , and I feel released from the cloud of work that has been over my head. 8) The zilla is installed, the substandard POT throttle is no longer blocking the passenger seat, and I've sorted out the shifter, driveline, and suspension along the way. While I need to sort out the current startup problem, that is troubleshooting a known, previously working system, not engineering a new one.

I'd like to take it for a test drive and see how the front end feels with new shocks and full travel, except for the pesky detail of the new hairball not starting up. I have been pushing myself pretty hard for a few months in order to get to this point, so I decided to take the rest of the day off. With the pressure off, I was suprised to find how exhausted I was, I didn't have energy to move for the rest of the day.

Plenty of work still needs to be done, but the difference is that these tasks enhance an existing build, instead of being critical path to getting on the road in the first place. I can take my time and enjoy installing the upgrades, instead of worrying about how to make the pile of parts in the garage back into a car.

Phase III will be about driveability and tuning. I want to move the CA to behind the steering wheel for better visibility. I need to finish redesigning, print and mount the CellLog array so I can range-test the pack. During the range testing, I can find out whether the power stage actually needs cooling - other dune buggies are running zillas without it, but I may have more hills than they do. Encoder for the zilla so it will drive the tachometer. "Valet" Button. Sort out the reverse switch. Have seats made. Swap the Z1K-HV for the Z2K-LV then send the Z2K in for an EHV upgrade. etc. etc. etc.

-JD
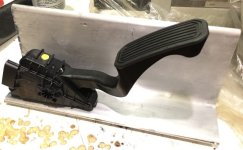
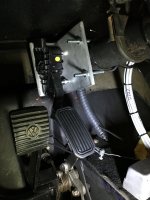
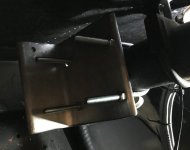
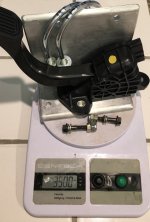
That is a 2 signal hall throttle. I got one for my CRX. I just have not got around to installing it yet.
I believe its opposing signals as well. Which makes it very noise immune and robust and very good for fail safe.
 
Arlo1 said:
oatnet said:
So, this is the completion of Phase II, a major milestone for me :mrgreen: , and I feel released from the cloud of work that has been over my head. 8) The zilla is installed, the substandard POT throttle is no longer blocking the passenger seat, and I've sorted out the shifter, driveline, and suspension along the way. While I need to sort out the current startup problem, that is troubleshooting a known, previously working system, not engineering a new one.

I'd like to take it for a test drive and see how the front end feels with new shocks and full travel, except for the pesky detail of the new hairball not starting up. I have been pushing myself pretty hard for a few months in order to get to this point, so I decided to take the rest of the day off. With the pressure off, I was suprised to find how exhausted I was, I didn't have energy to move for the rest of the day.

Plenty of work still needs to be done, but the difference is that these tasks enhance an existing build, instead of being critical path to getting on the road in the first place. I can take my time and enjoy installing the upgrades, instead of worrying about how to make the pile of parts in the garage back into a car.

Phase III will be about driveability and tuning. I want to move the CA to behind the steering wheel for better visibility. I need to finish redesigning, print and mount the CellLog array so I can range-test the pack. During the range testing, I can find out whether the power stage actually needs cooling - other dune buggies are running zillas without it, but I may have more hills than they do. Encoder for the zilla so it will drive the tachometer. "Valet" Button. Sort out the reverse switch. Have seats made. Swap the Z1K-HV for the Z2K-LV then send the Z2K in for an EHV upgrade. etc. etc. etc.

-JD
That is a 2 signal hall throttle. I got one for my CRX. I just have not got around to installing it yet.
I believe its opposing signals as well. Which makes it very noise immune and robust and very good for fail safe.

That is correct, "HEPA" stands for Hall Effect Pedal Assembly, it is dual channel, and it does mitigate the short-to-WOT risk of a potbox. It's been a year and a half since I installed it, I seem to remember the zilla community being concerned about noise, such that I moved wires around to give the throttle it's own shielded cable to reduce noise. Either way it was a Big step up from the pot throttle, smoother travel allowing much more linear application of power, so I hope you get a chance to slap it into your CRX asap! :D

-JD
 
Today is the 4 year anniversary of when I took delivery of the Towdster. :D

It seems like another lifetime ago, the project took so much time, over so many cycles of hard work and consequent burnout. :lol:
 
oatnet said:
. . . .he had found the one rare buyer who found full value in most of the upgrades he added. I don’t think I’d get my money back if I turned around and sold it, but it is convenient because it has everything I wanted, so I don’t have to go through the hassle or expense of upgrading it, on top of doing the conversion.

Yeah, you can't put a price on that. I should think 4 year later you realize you made the right decision. I just wish someone in the family had bought that kit for $500 and it wound up at my house the way so much of their junk did. (Without permission, I come home and guess what another unsettled brother or sister has stored here) The way they eventually forget it I'd have wound up with my project.

But today people want $750 for the damaged bare tub.
booxt-secma-buggy-cabriolet-fun-xtrem-500_031031.jpg

I don't know if I could afford one that's worth dealing with at this point, but 4 years ago when I could you had me convinced the Tow'dster was the way to go. Something tells me you were never all that burntout.

But I know what I REALLY wish I could find on Craigslist here in the U.S.

http://www.secmavehicule.com/

booxt-secma-buggy-cabriolet-fun-xtrem-500_091091.jpg
 
Thanks dauntless, that looks like a nice donor!
 
Back
Top