A-Lines Abound: First ride after some major changes

OK,
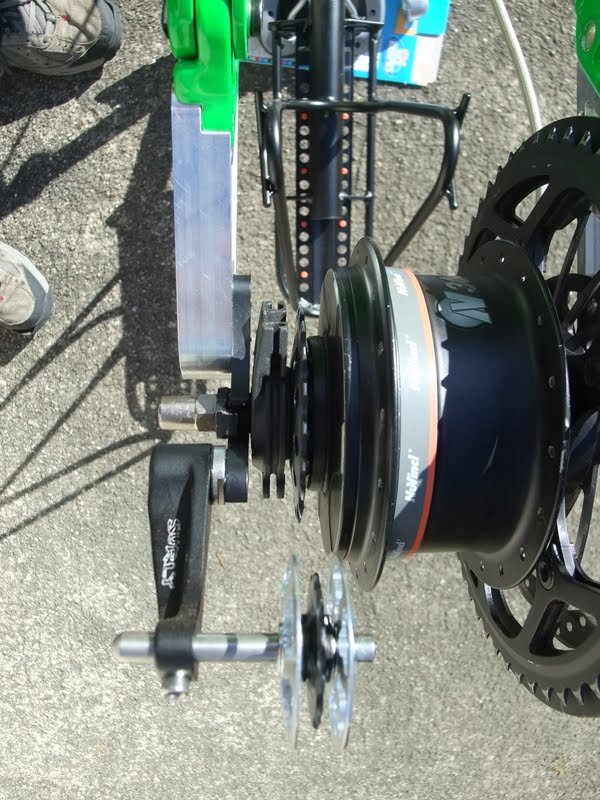
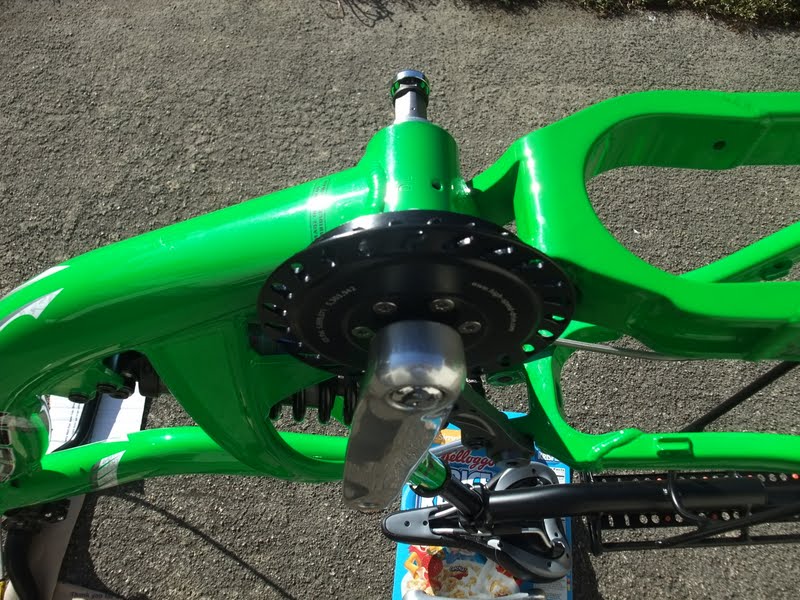
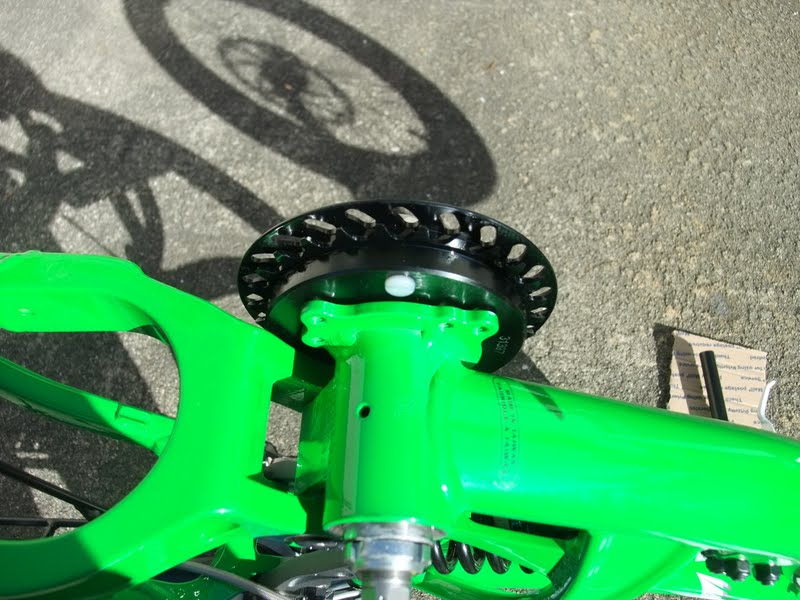
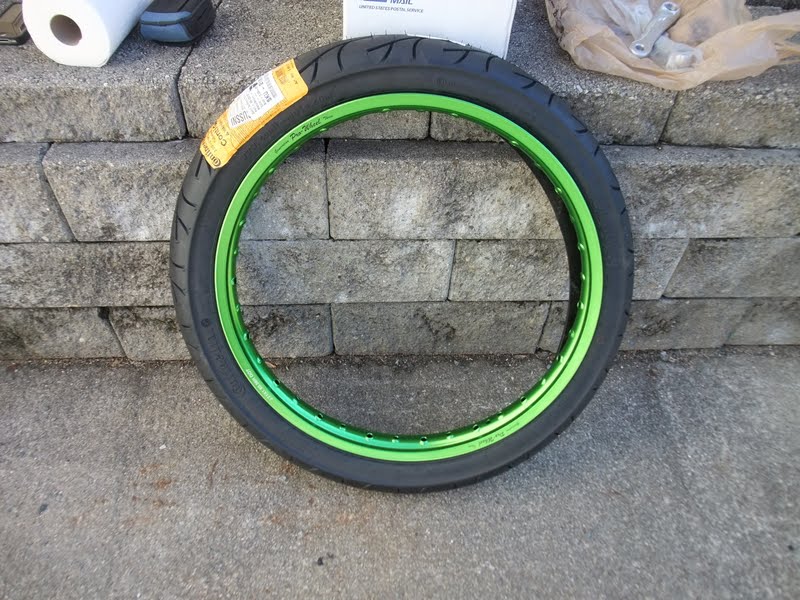
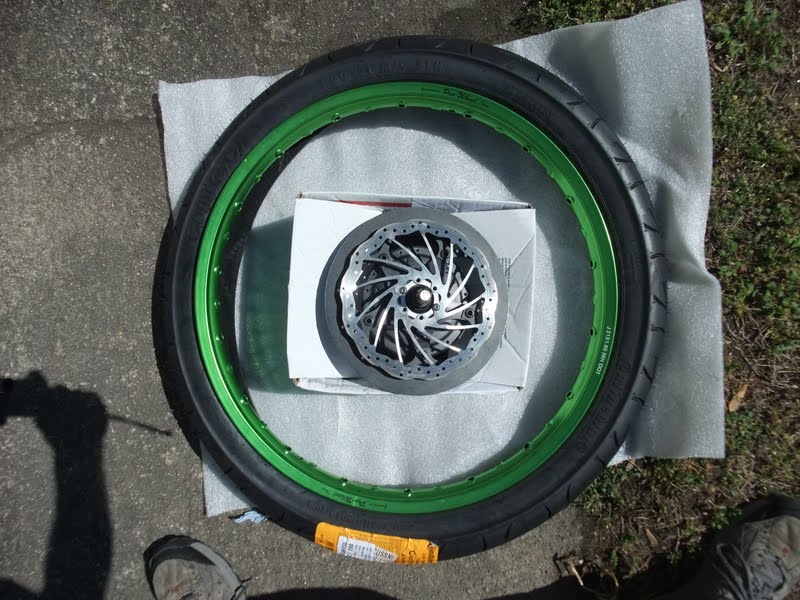
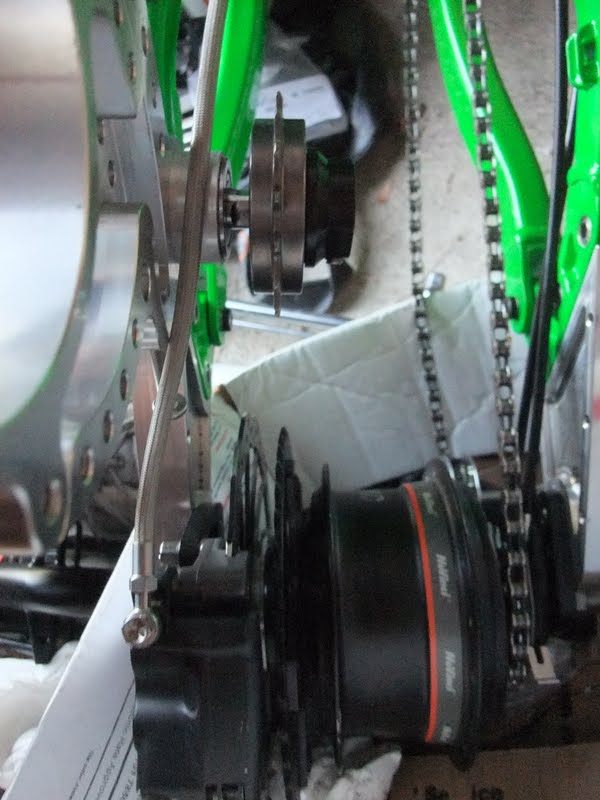
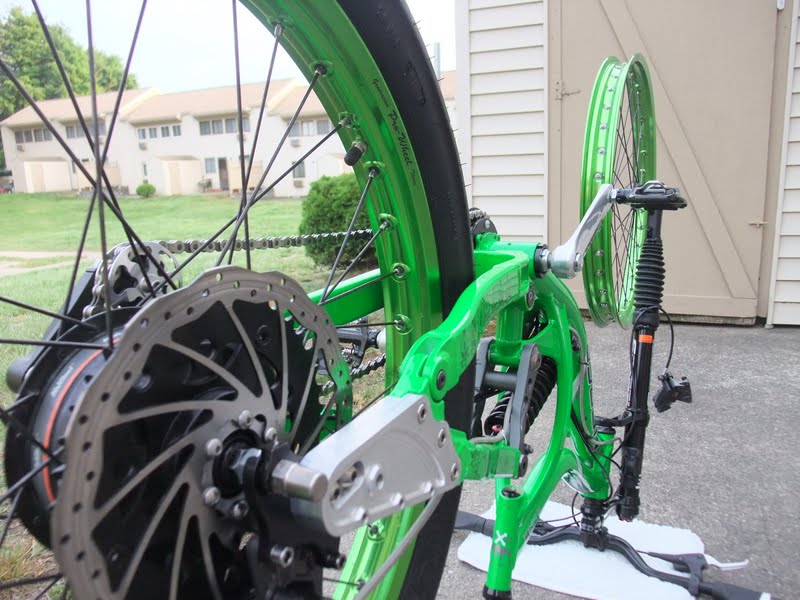
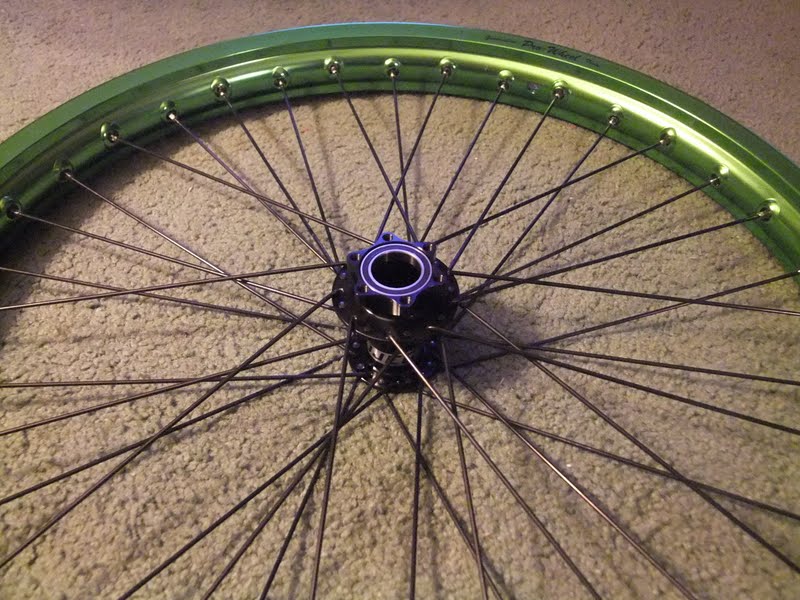
Parts for the new wheels are starting to arrive. Here's the best "test fit" I can do without - you know, rims or spokes. This will be a tight fit both front and back! I have exactly 100mm clearance up front - and 100mm of travel.

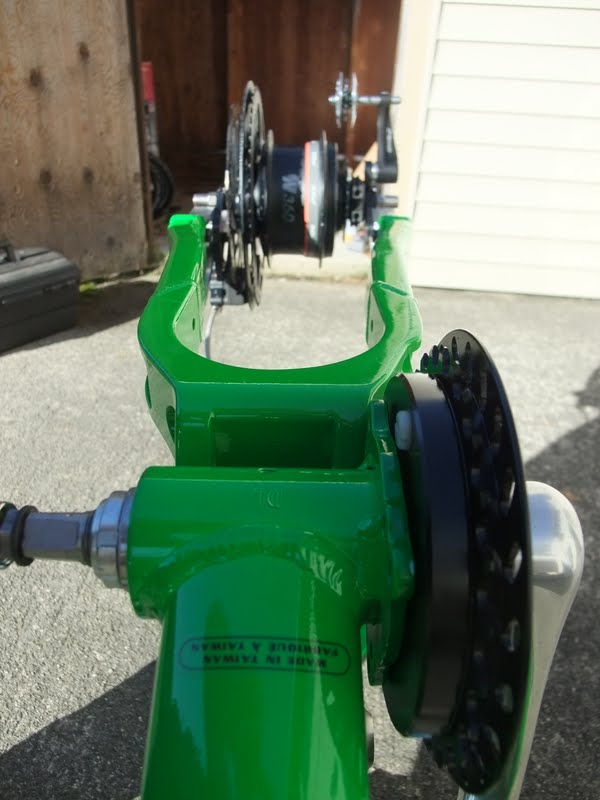
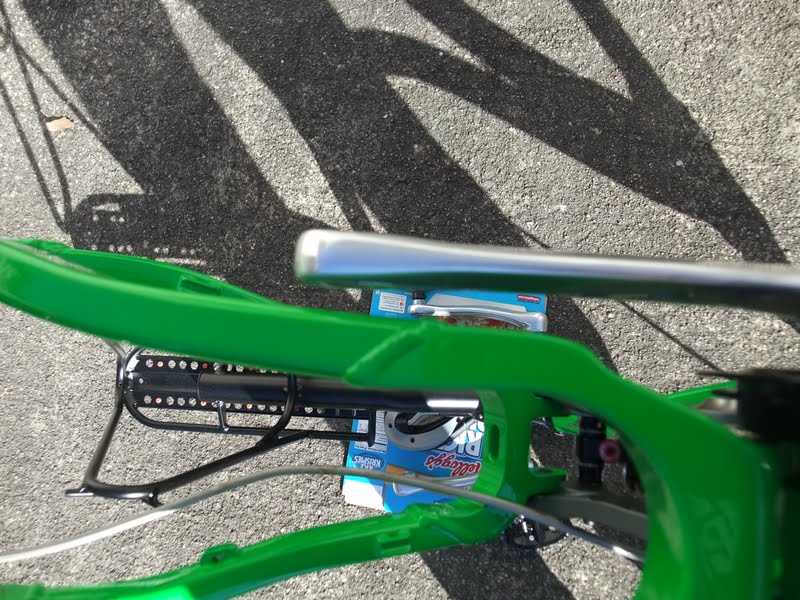
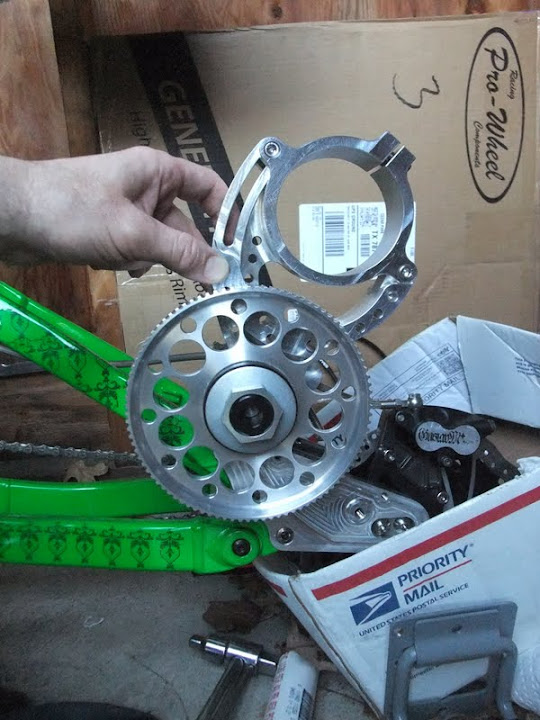
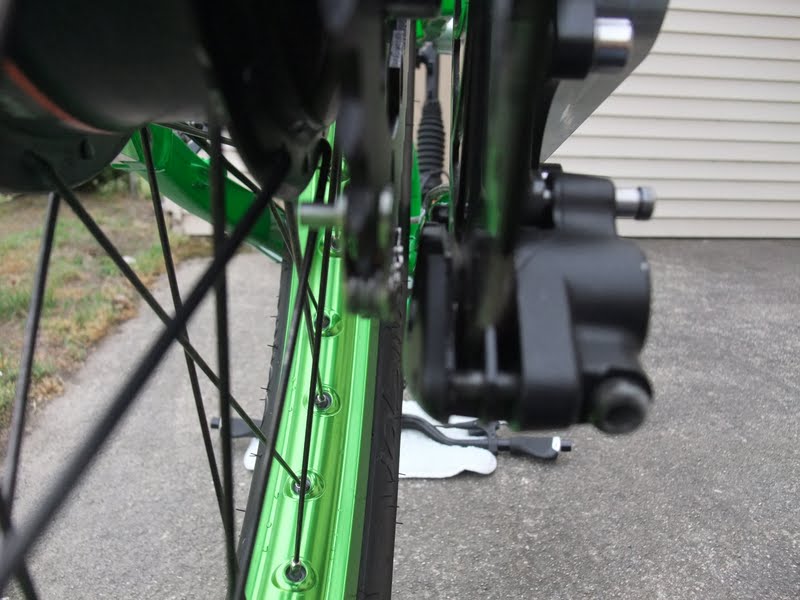
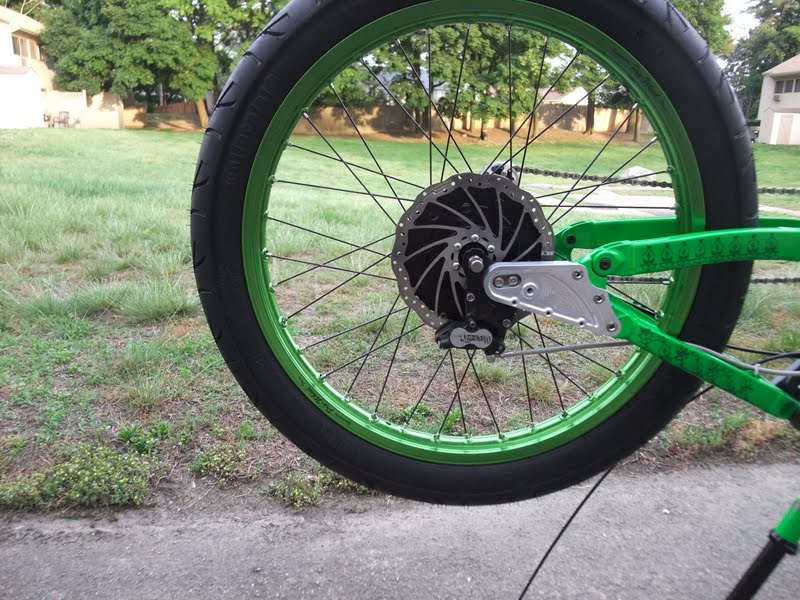
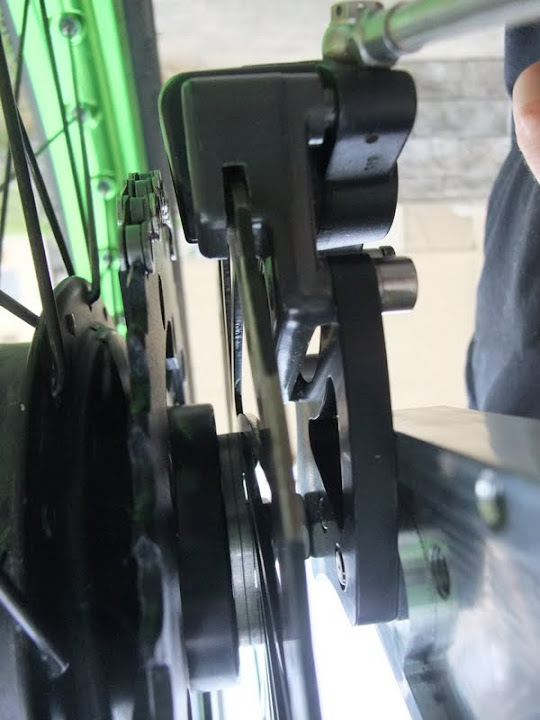
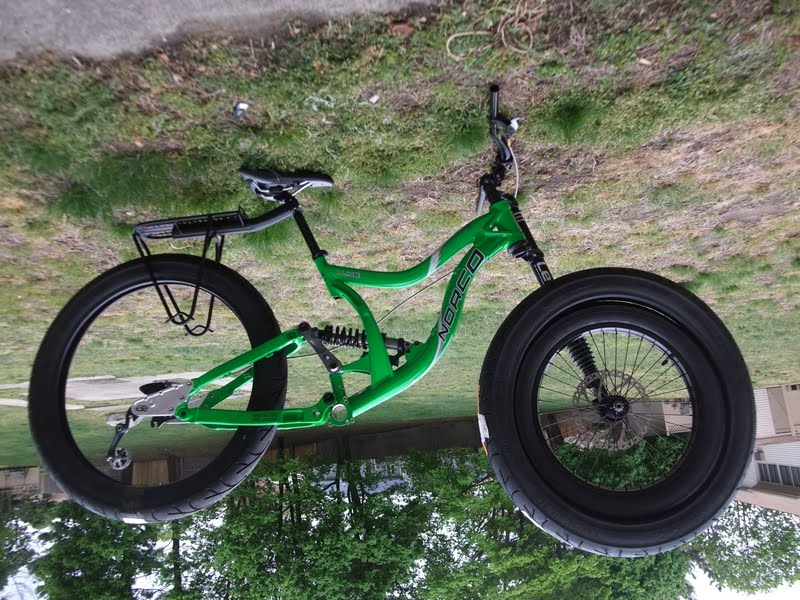
In the rear, the A-Line chain stays narrow near the pivot (to clear feet/pedaling), and the tires have about 5mm each side clearance.

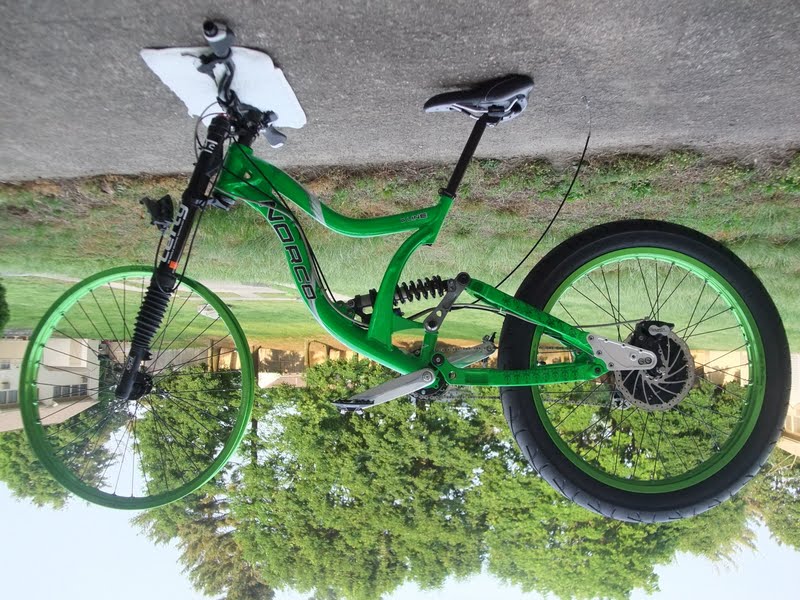
I'm going to remove that rear rack - I have a better option in the works. And the seat will have to come waaaaay down.
DSCF3120.JPG
 
Looks like, according to the Lefty manual, I need to have 10mm of space between a fully compressed strut and the steerer tube. The '29er version of the Lefty has 10mm spacers that prevent bottoming. Looks like I might need one of those spacers...
 
MattyCiii said:
Thanks Nep! Unfortunately I backed myself into a corner on this build... I want to use a Schlumpf Speed Drive on this beast so I'm limited to the smallest Schlumpf (155mm) cranks. But the rear shock is still definitely an option. I can go up an inch and still use a bicycle shock, or if I need longer punt and go with a dirt bike shock, which allows me flexibility in mounting the reservoir to boot.

From the Schlumpf price list, an additional 40 euro will get you the following crank lengths: ( from price list pdf )

Extra charge for special crankarm
lengths: 102, 114, 127,
140, 155 straight shape, 160, 165, 170,
172.5, 175mm
(all except 155 offset)

http://www.haberstock-mobility.com/en/products/schlumpf-drive.html
 
Thanks Adam!
I have the 155mm crank arms in hand so I'll stick with that for now. Good find though, I probably should have cast a wider net when looking for options.

As it stands, those big wheels should get me the ground clearance I need to <cough> get this project rolling agin.

It looks like you're thinking about a High Speed Drive for your A-Line? I'll definitley get info posted here when mine comes in, and once I have the unit in hand I can answer any questions you have.
~Matt
 
One step closer to having a working bicycle...

I received my Schlumpf High Speed Drive yesterday and installed it today

It's a real nice piece of kit
DSCF3122.JPG


The bottom bracket was prepared back a few months ago when I rented the install tool and set my folding bike up with an ATS Speed Drive:
DSCF3124.JPG
 
Here's the drive simply placed into the BB shell. From the looks of things my chain line is off a bit. We'll see... My hub assembly is mounted in the dropouts: NuVinci N360 and left-side mount with chainring and bash guard (not needed but helps stalthify the drive):
DSCF3125.JPG


I have the rim, tire and tube for this wheel, and spokes on order with JRH. I guess when it's all built up it'll end up being as heavy as a hub motor setup with bike rim/tire...
DSCF3127.JPG


That 27t chainring is nice and small. I will have the 1:1 ratio drive set to really low, since it's a heavy bike with lots of rotational inertia. But I don't want it to be geared too low. A 15t rear cog will get me 1:1.8 ratio, a 13t gets me 1:2.08
DSCF3129.JPG


Per Ilia's video, I have the oiling port positioned at the bottom of the drive
DSCF3130.JPG


Not a lot of chain stay clearance, maybe 10mm
DSCF3132.JPG


Here's the rim and tire. This will be a pain in the @$$ to mount. I like the anodized green, but it's not quite a color match to the frame :(
DSCF3133.JPG


Here's about what the rear wheel will look like
DSCF3142.JPG


I hope I can get this bike together as a pedal bike by Memorial Day weekend, take it up to the mountains and ride it a bit. Electric power will come later...
 
My spokes have shipped from JRH, expected delivery Monday. With any luck I'll be able to build my rear wheel Mon/Tues night and actually be able to pedal the bike around a bit.

It'll be a challenge, my first 2-cross pattern wheel (I usually only have enough spoke length for 1 cross as I prefer 406mm rims with wide hubs). Also it's a motorcycle rim and 13g a spokes. I bought the "extra large" nipples, but I still need to use washers to ensure they don't pull through. Wish me luck!
 
Electric drive:

My Matt Shumaker DaVinci drive arrived recently and I've finally had the time to look into how to best integrate it into the A-Line. Forgive the crappy pictures...

First, I did not buy mounts for it. I figured my design was just enough off the beaten path that I'd want to study the problem and figure out the best path to take. Here's where I'm at. I plan to fab some custom mounts that attach the shaft collar directly to the custom dropouts/chain stays. The drive will go here:
DSCF3225.JPG


Hard to picture without the wheel, but the drive is sitting right on top of the border between the custom dropout and the chain stay. The piece that attaches the electric motor mount to the belt pulley shaft collar (see below) is exactly the same width as the chain stay/dropouts. See how I have the motor mount part of the DaVinci flipped, giving me about 15mm of shaft collar on each side of the motor mount. My custom mounts will grab this round tube on each side.
DSCF3233.JPG


Here's an early design of the mount. At the top it clams around the shaft collar. I'll use a pair of these. The pair clamp down on the square shape in between - on the A-Line, the square shape is the chain stay (I plan to use this same clamp on two different bikes, which is why it has so many holes). This design will change, but it's good enough for now to illustrate. Also, on the A-Line, I have pre-drilled and tapped holes on the custom dropouts I can use to precisely locate and attach the clamp-mounts to.
Screen%2520Shot%25202012-05-19%2520at%25208.12.57%2520PM.jpg
 
I'll need to get a slightly longer shaft for the drive. See I have the sprocket adapter flipped. This is necessary for two reasons:
1) If I don't flip it, the sprocket freewheels in the direction of drive - not good. I could use a left hand freewheel, but then I'd need a left-hand threaded adapter and I'm not in a hurry to find one/have one machined.
2) With it flipped I have a nice chain line.
DSCF3231.JPG


What I won't know is if I'm clearing the spokes. I hope to have the wheel laced up within a week and we'll know. Worst case - I don't clear the spokes... then I'll look into having a shallower sprocket adapter machined, or one that's lefty threaded.
 
I'm heading to the White Mountains of New Hampshire over the Memorial Day weekend... If I can get that rear wheel built up in time I'll be riding down the east side of the Kanc from the peak just to get a feel for how much heat those Magura Gustav's can handle. I've ridden the Kanc on a cruiser motorcycle, it's a nice scenic, twisty/turny road with 7 to 9 degree downgrade, I should be able to get the bike up to at least 50MPH if I lay off the brakes and I'm not trapped behind a slow poke.

I'll catch some video on the helmet cam and post it here, should be very nice.
 
Received my spokes from JRH and laced up the wheel tonight. No pix, I coat the spoke threads and nipples with automotive anti seize when I build a wheel, my fingers get messy and I don't want to mess up my camera. Tomorrow I'll clean the wheel up some more and give it proper tensioning and truing. Then comes the struggle to mount the motorcycle tire onto the wheel.

Maybe the 5th wheel I've built, went very smoothly. Smooth, but still a pain in the back, sitting on the floor all hunched over the wheel. This was my first 2-cross pattern, normally I go 1-cross due to short spokes (e.g., NuVinci hub in a 406mm rim).
 
Well the bike won't be rideable this weekend :( I failed to get the tire on the rim (it's designed to be tubeless, which makes it nearly impossible to mount by hand). The good news is I found a motorcycle shop that mounted the tire for what I consider short money - $25. But time ran out, I'm already on the road and left the now-built wheel behind.

I had a great conversation with the shop owner. Small startup shop, young man and wife leveraged everything to start the biz. He grew up on BMX - took a real shine to the NuVinci hub. I'll be building the front wheel this weekend, and when I go drop off the front I'll bring the bike. From our first chat it sounds like it won't be too hard to get this young man onboard with the electric revolution.
 
Very Nice Work Here! :)

\\m//

Tommy L sends.....
 
Thanks Tommy!

This thing is going to be a BEAST! I can still carry it around, but it is getting heavy.

I picked up my finished wheel from the motorcycle shop. I think the owner regretted quoting me $25, he had to do the install manually. I checked to be sure he'd be willing to do the front - I told him not to be shy about upping the price if he has to. I'd rather support a scrappy up and coming shop than save some short money. Well I've got the front laced and true, hopefully the tension is OK. Here's a pic:
DSCF3242.JPG


I think that seat post will have to be shortened some.

Tolerances from here out will be in the 1/2 cm or less range... part of what makes this hobby fun. This pic is supposed to show the ~4mm I have between the Magura Gustav M brake caliper and the electric drive chainring. Too bad I focused on the rim instead:
DSCF3243.JPG


Once I get the front tire mounted, I'll actually be able to pedal-ride this thing. And with it upright, I'll able to plan/measure specifications to mount the electric drive. With the wheel mounted it still looks like I can place the Astro 3220 DaVinci drive on the left side upper chain stay. But I'm better off doing all the measures with the bike upright, so that'll be kicked down the road a bit.

One last pic...
A close-up of just the brake side. The electric drive chainring is hiding behind that disc brake. Looks pretty stealthy now, but once I get that DaVinci drive mounted there'll be no hiding the fact that this bike is power assisted.
DSCF3252.JPG
 
Wow! I'm totally jealous!

I also noticed that you've been here since 2007. How many builds? I've done 4 and will continue to keep going. :D
I keep fighting between EBicycle and Electric Motorcycle. The torque and the power and the range can be great on both.
Speed safety is all Motorcycle. But keeping is light and quick is also cool!
Nice wheels! I can't wait for you to report how they ride!

Peace!
Tommy L sends....\\m//
 
Tommy L said:
I also noticed that you've been here since 2007. How many builds?
I guess you can say I spent far too long as an e-bike wannabe, living vicariously through this forum. I actually spent another year or two before ES at the "V is for Voltage" forums, but I don't even think I registered there... only lurked.

So what I have for builds are my "two firsts" linked in my sig... This beast, and the light, nimble, go-everywhhere folding bike. Nether move on e-power, yet, but now instead of dragging my feet saying "some day", now I build as well/quickly as I can, then order more parts :D Hopefully I'll have that electron tailwind here by July!

I'm constantly inspired by the people here and what they build. I like that Catrike you built - I plan a tadpole trike for myself some day but for now two simultaneous builds is too much. Thanks again for the props!
 
A couple more pix:

I just like this pic. Lots of green bike with a nice neutral background.
DSCF3244.JPG


This one shows the clearance between the brake caliper and the electric drive sprocket, in focus this time.
DSCF3249.JPG
 
MattyCiii said:
I like that Catrike you built

Aerodynamics is cool! With the magic number of 12 degrees leaving you is amazing! and punching a smaller hole
in the frontal area is neat! I notice a difference with and without the "White Sperm". It went from being called
a Road Piranha or Road Shark to Road Sperm.... and we call these people our friends. lol oh, friends and nicknames lol

Headwinds are welcome as you really don't feel them. The cars and trucks on the road today are a drag. Pun intended! :)

I'm back to two wheels again. The Catrike has the Bionx that can only be mildly tweaked. It's cool for what it is. Very Efficient!
But I want more more more! So my latest build is all about voltage! I will push the 150v mark. Just waiting for my Lyen 18Fet4115
:) It's in the mail, so it should be here by the end of the year! lol :) Hmmmmm I just might have to take the Bionx off the Catrike
and put a big motor and slick tire on it!

I'll be watching your build! Again, very nice work here!

Tommy L sends.... \\m//
 
Looking really good Matty! Nice color match on the wheels. These A-Lines feel built to take hard duty!

-JD
 
oatnet said:
These A-Lines feel built to take hard duty!

-JD

THANKS Oatnet,
It was your "Fight!" thread that inspired me to go find/buy the '09 A-Line... I can't wait to get this thing rolling!
 
Good work Matt!!! Love the wheels!!! As for me, its been awhile. I've been really busy with other stuff. I've made tons of progress. Will post pics this weekend. Did you bleed the brakes yourself? I have to shorten the hoses and rebleed them. I watched a couple of videos on youtube, dosent look too hard but you need the right tools. I always hesitate to go the the LBS and explain what i'm doing.
 
fractal said:
Will post pics this weekend.
Hi Fractal! Looking forward to those pix, it has indeed been awhile. Can't wait to see what's new.

fractal said:
Did you bleed the brakes yourself?
Not yet but at come point I will have to. They're the right length and work great - but I have pressure switches to install, so I'd best do some learning myself.

fractal said:
I always hesitate to go the the LBS and explain what i'm doing.
With you on that. The motorcycle shop that mounted my tire was a lifelong BMX guy before he got into m'cycles... Otherwise I suspect he wouldn't have given my bike-hubbed motorcycle wheel a second glance.
 
In another thread somebody asked about motorcycle rims. I realize I skipped some details about how I implemented them.

Jumping right in. I wanted to go no thicker than 13ga spokes. I would have preferred 13/14 butted, or plain ol' 14, but JRH carries 13ga that have oversize nipples. I went with these. I suppose without calipers this shot is useless... but believe me these are oversize nipples.
DSCF3262.JPG


Even with oversize nipples, the spoke holes on the rims I got were too big. I have no pic, but suffice it to say the spoke nipple can pass through the hole without touching the sides of the bore at all. Enter #10 stainless steel washers:
DSCF3263.JPG

DSCF3265.JPG


These make for a nice fit - here's the inside view...
DSCF3256.JPG


And the view from the outside.
DSCF3258.JPG


The washers are thin, so I stacked two on each spoke nipple. This is in case they dish in completely, I want the thickness of the metal itself to prevent pull-through.
 
For some reason, these rims came with two inflation valve stem holes. I used an aluminum post mount thingy to plug the hole, though I'm confident rime tape would keep the tube inside.
DSCF3257.JPG


DSCF3259.JPG


Here's the completed front wheel.
DSCF3261.JPG


I'm toying with the idea of running the front wheel tubeless, as the tire is tubeless. But I'd need to seal those 36 spoke holes and that extra valve stem hole. Any advice?
 
Back
Top