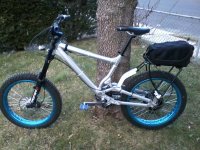
Ch00paKabrA Giant DH Comp - Finally Done!

Thanks Darren,

Here is the issue that I believe you will come up against as I did earlier on. If you lower the dropouts that much, your chain will hit the lower chain stay in the higher gears. I initially had that same thought.

I am going to experiment with a taller handlebar and dropping the stanchions in the triple clamp. Right now it has some serious over steer. As a last resort, I have a 150mm single crown fork on my trail bike and will try that out. If all fails, this frame will hit the for sale section.

I have a Gary Fisher Kingfisher 1 that has much better geometry. I have already figured out the battery attachment issue for that bike and it is waiting in the wings should the DH Comp shit the bed.

Another thing that I have considered is to convert the bike to a 29er and just use a 29er Suntour XCR fork that I have laying around; or maybe convert it to 650b. Once you cut off the rear drop outs and switch to bolt on drop outs, the possibilities are endless

Good luck with your build
 
Fingers crossed my funky 3 speed cassette, 18 ,23, 28 may compensate for the chainstay issue, Will let you know how it goes when she runs.
Great build mate keep on keeping on.
Darren
 
THIS IS A NIGHTMARE!!!!

Just had to get that out of my system.

I managed to fit a set of 5" rise handle bars on the DH Comp and it did make a bit of a difference comfort wise. My battery drained fairly quickly today. I thought that maybe it was the cold or that I had forgotten to put it on the charger last night. I went down earlier and noticed that the charger had stopped charging. It was too soon so upon close inspection I noticed that a part of the battery housing I had made had melted and it was still very hot. Fortunately this is a 15ah 29E pack and not my 25R pack.

Here is what it looks like happened: the soldered connections on 3 of the five cells in parallel came loose during the ride. So it looks like 2 of the cells got all of the juice for that particular line. No, no BMS but I guarantee that is going to change. The other 2 cells when I check them on my voltmeter register over 120 volts so I am guessing that they are toast.

Bottom line is that my soldering skillz suck. The other cells charged to 4.3v each. I know that is not good.

I am going to break down my other packs and check all of the soldered joins. It looks like I only lost 2 cells though and I have a few extras. Sucks though that I have to heat the batteries up again. Probably lose about 100 charge cycles because of this mess.

I had to remove some of the plastic shrink wrap from some of the cells but I have the cardboard sleeves from Suppower.

That was my sucky day.
 
Hope your sucky day gets better mate.
Still thinking on the geometry side of things, how about a 24" front wheel?
That would steepen things up a bit, especially with the shorter travel fork.
Darren
 
Dropping the stanchions down the the "minimum" sticker, about an inch, has cured 90% of the over steer problem. It is still there but it does not feel like the bike wants to jerk the handlebars out of your hand when you turn. It really is just too small though. Its a shame. I will stick with it for a while though just because I like the way it looks.

After disassembling and checking each cell, it looks like I only blew up 3 cells. one registers less -0.9v, one registers 127.06v and the other registers over 247v. This morning the one registering 247v is still warm so I really don't know what to do with it. Fortunately I do have few extra cells. I'd just hate to re-solder them because I think they have been through enough heat to begin with so I will see if I can work out a "no solder" solution. I do have an 18mm forstner bit so I will see if I can work something out with that.
 
dnmun said:
can you show pictures of how your pack is wired up and where it became disconnected? i doubt if it is possible for any of these cells to support a voltage of 120V.

it was just a basic 5p 10s configuration using the nickel strips that you generally use with those black 18650 connectors. What happened was that the soldered joints for the middle 3 cells in one of the 5p racks came apart so when I was charging it, apparently all of the juice for those five cells went into just 2 cells. the got very hot and melted the black abs housing that I made for it and also the Gorilla tape inside that held them together. I just check the bad cells again and the voltage registering on the one that was over 240V is down to less than 100 and the other one is down to zero.

I do not think that there is over 100 volts in the tiny cell, just that there is something messed up to throw my voltmeter off. One other cell melted and I decided to increase it to 6P so I ordered some more cells.

I am experimenting with some 1/2" thick PVC and an 18mm forstner bit to see if I can do a "no weld - no solder" pack.
 
i would never use nickel strips but would like to see what it looks like in order to help you.

you should never build a battery up by connecting the cells in parallel first. build the battery by building individual packs in series first and then connect them in parallel by soldering a small wire from each of the serial links to each other to make the parallel connection and then connect the BMS sense wire to those paralleling wires.
 
dnmun said:
i would never use nickel strips but would like to see what it looks like in order to help you.

you should never build a battery up by connecting the cells in parallel first. build the battery by building individual packs in series first and then connect them in parallel by soldering a small wire from each of the serial links to each other to make the parallel connection and then connect the BMS sense wire to those paralleling wires.

Are you sure? The reason that I ask is that over in the battery section Just about everyone builds then parallel first and when one person did not, many of the forum members questioned that decision.

I was considering building them the way you describe simply to be able to use a variable amount of ah as needed but I don't understand how to use a bms if you do the series first.

Also, doesn't it amount to the same thing once the battery is done?

One other thing, if I don't use nicke strips, what should I use?
 
DNMun I read a bunch of your posts and decided to do it your way. Batteries are reconfigured. I have been riding the bike a bit and I am now having a real problem with my neck. Ever since I started riding this bike, it is killing me. It is just too small for me.

It is a pity since I like the way it looks with the blue wheels.

0115151535.jpg

I am going to give it a few more days to see if my neck loosens up. I didn't have this problem when I rode my hardrock or stinky so I am a bit perplexed.
 
Looking good in blue!

That's a shame, your frame is hurting you! :oops:

How is bike handling with rear rack?
Any instability problem(s)?
What is weight of your pack and how many cells?

Thanks!
 
I have 2 packs with 40 cells each in the bag and there is room for many more. what I laike about that bag is that I can actually flip it upside down and it fits in the triangle.

I have the frame listed in the for sale section so if it sells, I will switch to a different frame. Otherwise, I am not completely giving up on it. I will continue to experiment with seats, seat position, handlebars and stems. I really like the way the bike is looking and once I get rid of the rear rack, I think it will look better. If I can find a winning combo, I will keep it.

As far as the bag screwing with balance, it doesn't noticeably do so. I can't tell the difference.
 
Thanks!
Too bad the frame didn't work out for you! :oops:

Regarding the battery build, I don't understand any pictures how to build the battery in sequence? Also what are the benefits of this way?
 
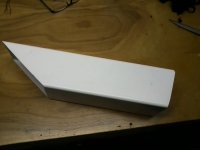
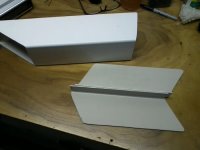
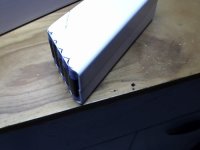
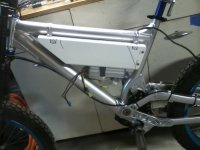
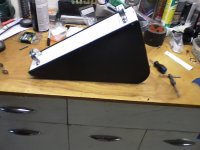
I am not going to give up on the frame yet. I have been experimenting with different handlebars and seats as well as seat angles and positioning. That rear rack was really bothering me so I decided to work on the battery enclosure. I don't have machining tools or the skills to use them so I just picked up a 4x4 PVC fence post cover and cut it to fit in the triangle. PVC is great stuff. It is easy to work with, durable and it can be tapped for bolts.

The controller will be mounted under it and will be open to air. It has the seals. This creates a dilemma. I can fit approximately 90 18650 cells in the enclosure as it sits. This is acceptable to me as I intend to put a plug in the box so I can add a supplemental battery if I need to go a long distance. The dilemma is should I stick with 10S or go to 14S. The initial plan was for 14S but I found the speed unnecessary. On 10s the bike will do 28mph. It takes a bit to get there but it will do it. However, if there is any kind of head wind, it will easily knock 5mph off of that.

I am considering doing 14S and just setting speed #3 on the 3 Speed switch to 40% or so. I took some pictures but I left my camera in the basement and I am too lazy to go get it. will post them tomorrow.

All in all, I am making great progress and I believe Phase 1 will be completed this month. If I can get this frame to stop killing my back and neck, then Phase 2 will be another MAC 6T for the front.
 
Worked on the battery box for the past couple of days and finally got something done. I actually designed 2 battery enclosures but so far I only built one.

After a few visits to the chiropractor, I finally have mobility back in my neck. When it cracked it sounded like a tree falling. Relief at last...

I have decided that I am going to keep this bike and will experiment with handlebars, seats and seat positioning until I find a suitable arrangement.Battery enclosure number 2 is the one I have no built yet but I have all of the materials. this enclosure holds 2 sets of 98 cells side by side for 14S 14P. this will be the enclosure that I use with the Samsung 25R cells. Right now I only have 100 cells and I don't work in the winter so I will wait until Spring to get another 100 cells.

The enclosure that will be used in the mean time will hold 14S 6P Samsung 18650 29E cells. This one is just about 900 watt hours (I think I did the math correctly...).

Here are some pictures but please don't judge too harshly. I don't have a machine shop or cad. I just have regular hand tools so it is not going to be up to par with some of the other battery boxes on the forum. Also It only cost less than $20.00 in materials.

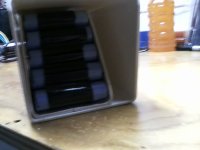
4x4 fence post cover.jpg

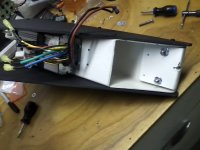
It occured to me that I should probably protect the pack further inside the the battery case so this is the solution that came up with.
battery secondary housing.jpg

bat sec house with bats.jpg

View attachment 3

Shown is a 5P 14S pack. There is room next to it for another 14S 1P pack to run parallel.
bat fitment.jpg

It ain't pretty yet but it fits.
test fit.jpg

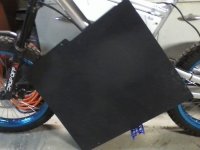
Here is the black ABS that I salvaged. This won't end up in a landfill 8)
Black ABS.jpg

This post got a little long. I will post the pics with the side covers in another post.
 
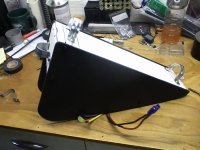
Here are some more pictures of the box. It still needs to be contoured to the frame but that should only take about 1/2 hour tomorrow. then it will be time for a test ride. It is just really cold right now and it doesn't help that it is snowing at the moment.

kinda finished.jpg

kinda finished 2.jpg

View attachment 1

kinda finished 4.jpg

That's it for now. Tomorrow, hopefully it will be done and ride-able again.
 
That box looks pretty nice with the black side covers on there.

What position is your neck in? do you feel like you're looking too far up or down?

I am 6' tall myself and I haven't had any problems.

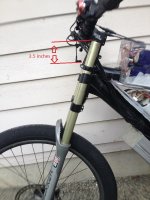
My seat is all the way down and I pulled my stanchions through the clamps 3.5 inches. Since I do mostly road riding this amount of travel is perfect. My bike felt a lot better after doing this (it still felt awesome before). Even if you do a lot of off road riding I would recommend lowering the front down at least 3 inches and ride on the road to see what it feels like.

Maybe try a longer stem?

Giant 3.1 close up on stanchions.jpg
 
Thanks Magic Pie.

Hi Scott, I am 6' 4" (was 6"5" but I shrunk) the problem is too low. I am craning my neck all the time. the seat is as low as it will go at the moment. I believe I need to cut the post. The 5 inch rise bars help a lot.

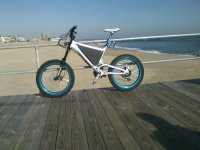
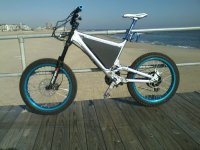
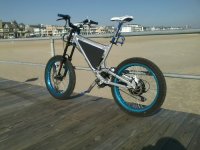
Here is some good news: IT IS FINALLY DONE!!!

I I just went out for the maiden voyage. What a blast. I was a little skeptical about the M/C tire and wheel in the front because most just run it in the rear. I absolutely love it.

Eventually I will have get it repainted since I screwed up the paint with the metal hangers for the battery box.

At the Beach:

0123151146.jpg

0123151146a.jpg

0123151146b.jpg

At the iconic Stone Pony:

0123151155a.jpg

There are still some minor things to do like painting the forks and some deraileur adjustments but it is good to have an ebike again.
 
Wow! That thing turned out really nice. Good work.

At the risk of sounding like I know what I am talking about... I wonder myself half the time.
I used the same pedals for about 800-900 miles before I realized they were killing my feet, they are very narrow.
Switched over to my new favorites, however they are not blue.

http://www.origin8.bike/product-description/?prod_model_uid=9618

/cheers
 
You're bike looks like a very nice clean build!

Ch00paKabrA said:
Hi Scott, I am 6' 4" (was 6"5" but I shrunk) the problem is too low. I am craning my neck all the time. the seat is as low as it will go at the moment. I believe I need to cut the post. The 5 inch rise cars help a lot.

Thats pretty tall!

Getting a setback seatpost might also help make the bike feel longer.


MAGICPIE3FOCUSPOWER said:
Scott are you still offering dropouts?

I don't want to hijack Ch00paKabrA's thread too much, but yes I am selling them. If you have any questions for me please ask here. (as you already have)
 
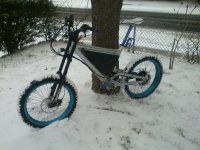
It showed a little bit today. The bulk of the snow is due to come in over night. I took the bike out for a blast though. I bought myself a one of those go pro clones and hooked it up on the bike last night. I kinda turned it on and it recorded my basement wall until the card was full and I didn't realize it until I was out already. Lesson learned. I think calling this a Go Pro clone is a bit generous. The Go Pro Clone is the SJ4000 that sells for around $100.00. so this would be a cheap clone of the cheap clone that I got for $35.00. It works though.

There was only a few inches of snow but it was a blast because all the roads were empty and there was no one in the field where I was riding around.

0126151457.jpg

this is definitely going to need a wash.
 
Back
Top