Electric Jeepster - New(ish)member new build

Here is a new product to think about (especially you GCinDC).
http://tubliss.com/

Apparently it is a pneumatic bead lock system that goes inside the tube and inflates to force seal the bead from the inside allowing you to go tubeless. They claim it saves 3 lbs per tire from heavy duty tubes and that you can run tire pressures in the sub 10 psi range and never get a pinch flat. A friend of mine uses this on his motorcycle and says it is great. They are spendy though at $99.00 per tire. I thought GC would like these considering his penchant for jumping and love of a plush riding feel.
 
Thanks 999 I had been thinking about the possibility of doing it with the PE foam for a while and figured it was worth a try. Unless it becomes a heat problem I think I am going to like it. If it does, well I have a few ideas to try. We'll see how it holds up.
 
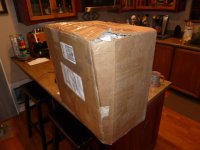
WooHooooooo! New wheel-set with motor in the house! Got my shipment from JRH this morning and could not wait to dig in. The packaging was really well done and a good thing too since it looked like it had taken some hits:
P1080846.JPG
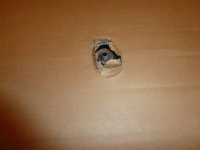
One penetration on a corner but otherwise solid. On opening I found the front wheel behind several cushioning layers of card board in a separate box. the axel had worked its way through on both sides but stopped there:
P1080847.JPG
P1080848.JPG

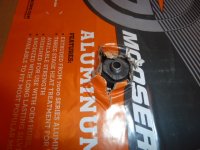
Lots of goodies included. JRH included 4 spare spokes/nipples/washers for each wheel with the rear wheel spokes separated into the two different lengths (difference of about 2mm for the dish I am assuming).:
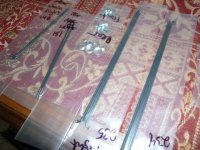
P1080850.JPG
Here is a close-up of the pre-coned conforming washers:
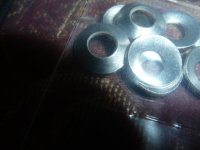
P1080851.JPG

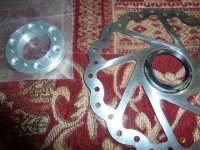
Ypedal, the previous owner, threw in some extra treats as well (Thanks Gaston) . 2 spare threaded side covers, a threaded 160mm disc, and a disk adapter (i think) for standard disks.:
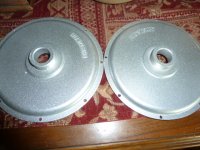
P1080853.JPG
P1080852.JPG

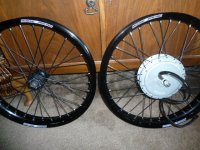
Now to the wheels:
P1080854.JPG
P1080860.JPG
View attachment 2
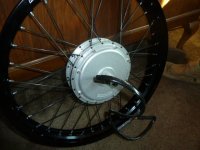
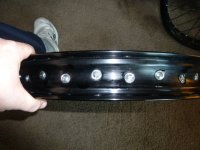
They look really good and incredibly solid. I like the black on black and I will have to figure out if I am going to leave the hub in silver. The angled, indented nipple holes worked out fine. the front wheel nipples are sitting in the middle of the holes at the perfect angle and the rear are against the hole but just barely and don't appear to be bending or tweaking the spokes. Here is a picture of the inside with the conforming washers:
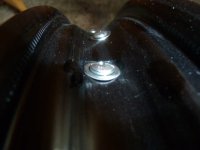
P1080858.JPG
P1080859.JPG
tried to see how they fit on the bike but the brake bosses are in the way and I will need to take a little off of them before I can appraise the fit in the frame and forks. So now, for the info you have all been waiting for :wink: The weight and size totals. Here is a comparison list of what I have found so far. One proviso, my digital scale is FUBAR so I had to use an older analog scale.

-Shinko 244 19 X 2.75 tire= 7.0 lbs.
-Standard tube + rim liner= 1.25 lbs.
-Old rear wheel-set (Mavic X223 disc (eyelets w/14G spokes I think)559 X 17 with 9 sprocket freewheel and 160mm disc holding a GEAX Sturdy 26 X 2.25 tire) =6.5 lbs.
-New front wheel (Moose racing, aluminum 19 X 1.85 (total rim width=2.545", diameter edge-to-edge=20") with Shimano hb-m525VIAM, 13G spokes i think and no disc yet) = 5.1 lbs. Plus Shinko tire/tube/liner= 13.35 lbs.
-New rear wheel (Moose racing, aluminum 19 X 1.85 (total rim width=2.545", diameter edge-to-edge=20") with Crystalyte 408, 13G spokes i think and no disc or freewheel)=18.0 lbs. Plus Shinko tire/tube/liner= 26.25 lbs.

Unfortunately I can't add the old fron wheel to the comparison since I disassembled it to send the hub to JRH.
So, what next? I think that I will first grind off the tips of the Brake bosses on the frame and do a paint touch-up on the scars so I can slip the wheel in and evaluate. The either mount the tires myself (help of a friend) or get them mounted to further evaluate the fit. I am determined to go slow here and get this set-up as slick as possible. I am definately planning to do the motor upgrade and have some ideas about ways to do this which I will be testing. I am pretty sure I have all the materials in hand and enough extra wire for some tests. I was going to test the motor but Ypedal already did that before shipping.

I am thinking about developing a step-by-step new motor check list that can be used in the future by us Noobs (you know, small words and flailing hand gestures) that goes from unboxing, through testing, wire upgrade, thermal sensor install, varnish treatment, brake and freewheel install and mounting with all the little steps in between. could be used as a sort of punch-list to prevent missing any thing. So would all of you help with that to fill in my blind spots? I'll do all of the heavy lifting I promise :mrgreen:
 
so did you weigh the rear wheel? maybe i missed it.. i saw the shinko & tube, but curious what the moose/spokes & 408 come to..
Obiwan007 said:
So, what next?...I am thinking about developing a step-by-step new motor check list...
your discipline is impressive. if it were me, i'd tape anything loose and ride it! :p

plenty of time for evaluation later!

i wouldn't go through those motor upgrades yet either until you run it a bit to get a feel for it. see how hot it gets. but again, that's me. i'll try to shut up.

nice tubliss vid btw. get yourself a pair of those tire irons. can't do w/o 'em...
 
My mistake. I listed the front wheel twice. Its edited it now. The moose, spokes and 408 came to 18.0 lbs. and with the tire/tube/liner it all added up to 26.25 lbs.

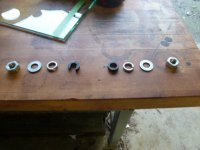
Well... I can't run it just yet. Got to get the tires mounted and i'm a bit hesitant to try it myself since these wheel are looking so primo. I'd hate to scratch em up from inexperience. Friend has the spoons and we should be able to get together around Wed. Also, I am still waiting on the wiring harness from Icecube57. As for evaluation i really meant evaluate if they are going to fit in the frame. Started working on that today. Turns out that some of the brake bosses had to come off both the front and the back to clear the rims. Back dropouts needed a bit of filing for a good fit. And then I ran into a problem that I am hoping someone can help me with. After fitting the axle to the dropouts I realized I did not keep track of how the washers went. Nor do I know which go on the inside of the drop-outs and what goes on the outside. Here is a picture of what I have:
P1080874.JPG

Can someone line me out on the correct order. I will search for the answer in the mean time.

On another note, in regard to developing the punch list, should I do it on a separate thread? Just as a landing point for the information i add over time? Is that OK to do? I thought i would list the tentative punch list here and get input from others on things to add and then fill it in with pictures as I do each step. Then keep it all in order and updated on the other thread. Does that sound like a plan? Is there a better way to do it? I'm going to get the ball rolling right now.

- Inspect the package Look for splits and or penetrations in the box. Look for areas that, even if not penetrated, look like they may have taken an impact. If you see exterior damage to the package take a picture preferably with a time and date stamp.

- inspect the contents Once the lid is open, and before removing any of the contents, try to see what is adjacent to any problem areas you identified in the previous step.

- Remove all of the shipped pieces Make sure to check under the packing materials for loose items that came with the order or vibrated loose in shipment.

- Inspect the motor and other items for damage

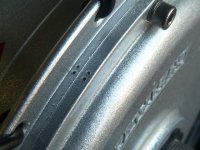
- Put index marks on the motor to permanently identify which side cover goes on which side of the motor and to clock them the same way any time you take them off and put them back on. Make it permanent so it can't wash or wear off. Something like this:
View attachment 2
View attachment 1
P1080872.JPG


Please add to the punch list and suggest additional steps. I will add more as i go
 
GCinDC said:
not sure how much of the forum, you browse, but spinningmagnets has just made you famous.

I have been wandering aimlessly for months on the forum and get caught up in threads mostly. Spinningmagnets appears to indeed be famous. Me, not so much yet. I'll keep plugging along though. Spinningmagnets got me lined out on the axle fasteners I think. So the shoulder of the axle goes directly up against the frame? If so then then I am going to have to do some filing on the axel because where the threads end there is a raised lip before the main flat part of the shoulder. This prevents the shoulder from sitting flush to the frame. Am I missing something here? If I put a washer there it stretches out the the frame slightly but the slightly larger hole slips over the lip and allows it to sit flush to the frame. The wheel currently sits slightly off center between the drop-outs and is rubbing on the right side brake boss. I have no problem grinding that down further but since the fit of my tires is going to be so close on width, maybe I should dish the tire a bit more to fix this instead of doing more grinding. I'll ask JRH about dishing some more. I have been meaning to write him anyway to compliment him on the wheel build.
 
Great work on the covers, they came out looking really pro. I love the indents too 8)

Why the 408 though ? A HT3525 would have been my pick given your intentions. Those heavy rims and tires will suck a bit of power even at no load.
 
Thanks Hyena,

I am having lots of fun. Imagine how much once it becomes roadable. As for the 408 well chalk it up to noobieness but there was a method to my madness. First, I have an e-bike now. It is a horribly underpowered e-moto that I picked up for a song and have been really enjoying. So I thought to myself, "self, anything would be better than this". Second, I knew I was jumping in without knowing how to swim to some extent so was trying to limit my monetary exposure somewhat. Third, I knew almost immediately that I would be doing future builds and thought that this bike would likely become a hand-me-down for the wife. In the end, I figured that this would get me going and learning and I would likely be able to either upgrade later or sell it or replace it. That's my story and I'm sticking to it! Anyway, thanks for all the help you have been to me even though this is the first time we have really spoken directly. I get off duty in the morning and can't wait to get back to work on this. JRH has given me some insight and I think I can get things worked out.
 
GCinDC I'll look up what I spent tomorrow and post it, good idea.

5 bikes? Didn't I mention that is what I am shooting for? :wink:

The quiet reputation of the 408 was actually one of my considerations since it is a factor that the SWMBO appreciates. This will likely be her bike eventually. But I'll ride it for a while until I find a large Giant for #2. After that...only three more to go.
 
Ok so here are the totals for the cost of the wheel build. The price of the motor is not included and the numbers listed all include shipping from the supplier to JRH and then to me here in California from him. the price of having the tires mounted is also not included since i may still do this myself but would likely be $20.00 per tire.

Rims-$203.90 shipped
Tires tubes liner- $86.70 shipped.
Build-$440.00 including parts/labor/shipping.

Total= $730.60, or about $365 per wheel.

Wow! That feels like a pretty big number. Doesn't hurt so much when you pay a little bit at a time. I don't really have any idea of a comparison to standard bike wheels/rims/tires/lacing service cost. Can someone estimate their costs of having this done with standard bike parts for a comparison?
 
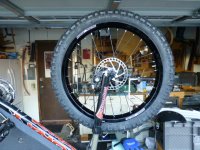
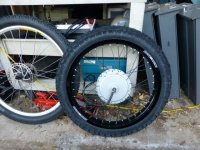
OK, got some work in today. Got the tires mounted on the wheels. They look great!!

Front:
P1000169.JPG
View attachment 3

And rear:
P1000170.JPG
View attachment 2

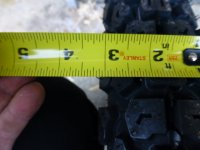
Problems were apparent right away though. These are really wide. The tire is listed as 2.75" but the mounted tire is almost 3 1/8" wide.
P1000162.JPG
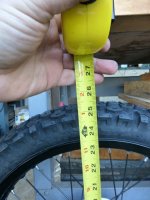
And for the record the mounted tires are about 25 1/2" tall:
P1000161.jpg

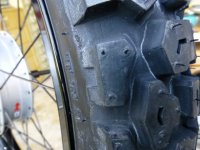
It's not going to fit in my rear frame as is. the front forks are wide enough but really close. Sitting in the dropouts it rubbed on one side. The rear frame opening is even narrower than the tire but ...close. Considered many options, agonized over it for a while, and then did the unthinkable. That's right, i performed a treadectomy! So the tread on the very edges of these tires has a little lip, probably vitally important to traction but I will find out because i very carefully cut those suckers off. here is what it looked like before:
P1000163.JPG
And after:
P1000164.JPG

So on the front i only had to do the tread removal on one side and it yielded about 1/8" extra clearance.
View attachment 1

And the rims clear the modified brake bosses OK:
P1000167.JPG

By my calculations, if I do the same tread removal on both sides for the back wheel it should fit. Going to work on that tomorrow. Nobody said it would be easy, right? Probably going to order my charger and the CA tonight.

On another topic, i have been considering my Torque Arm options. Something easy and bolt on would be nice but I have not seen any thing that really gets me going. My drop-out area, as I said, is disgracefully small, too small to use the doc TAs I think. With the help of a nicely timed link from Spinningmagnets, I was able to look at many of the previously used methods for inspiration. Considering I fancy myself at least a hobby machinist and that I do actually have a mill, I wouldn't be able look in the mirror if i did not try a little R&D. So I have an idea for a torque arm that is a little different. More on that later when I have some pics to share and i'll be wanting you all to tear it up.

Incidentally, I think my existing 9 stack freewheel is going to fit...go figure.
 
Do you have a link on the torque arms.
You win some you lose some. Great the 9sp. fits and then having to cutting the rear tire some. I did the same and didn't know enough if there is a problem with it. So had to just go ride.
 
No link for the torque arms, I'm going to make them my self and they will be bike model specific. But the concept would be the same for any bike and really not that difficult to make. I'll be documenting it as part of this build and looking for feedback from the group but I really think it is a bit hard to visualize without some pictures. It's comming soon though, I began working on the templates yesterday since I wanted to get the basic template out of the way before I started working on getting the rear wheel into the frame. So does any one have any other techniques for removing tread besides the old razor knife? I have been thinking about using a belt sander on the spinning wheel. Would need to make a stand for the wheel though, hmmmmmm?
 
Obiwan007 said:
So does any one have any other techniques for removing tread besides the old razor knife?
sounds like a job for a dremel, or a reciprocating saw.. :twisted: no shame in cutting treads.

wheels look awesome. how bout a pic of the whole bike now?

re torque arms, make them pinching! will be really helpful when you go w/ a bigger motor... i've been wondering - anyone know off hand if the other xlyte magnet rings are a similar enough dimension that he could just remove the spokes and relace the new motor in? that'd make the job much easier! and i'm sure that 408 would sell quick, so minimal loss.. but that decision may be well ahead.. just thinking thru it now for you.. :mrgreen:

what 9sp freewheel is it? does it have an 11T cog? cause that is by far the most valuable gear on my 7 spd... :twisted:
 
GCinDC said:
Obiwan007 said:
So does any one have any other techniques for removing tread besides the old razor knife?

wheels look awesome. how bout a pic of the whole bike now?

I'll get a whole bike picture when out when I get the rear tire mounted

re torque arms, make them pinching! will be really helpful when you go w/ a bigger motor...

I'm going to make it non- pinching at first but the design will allow retro fit of pinching if I move up in power.

i've been wondering - anyone know off hand if the other xlyte magnet rings are a similar enough dimension that he could just remove the spokes and relace the new motor in? that'd make the job much easier!

I may be wrong but I think the 408 is smaller.

what 9sp freewheel is it? does it have an 11T cog? cause that is by far the most valuable gear on my 7 spd... :twisted:

I was wrong about this, turns out what I got now is a cassette. So I,ll have to get a 7 stack if I want 11t the 9 stack cassette already had an 11t so I was bummed when I realized it was the wrong connection type. Looks like 7stacks are pretty inexpensive from grin and I have to order some other stuff too from them. I have been holding off until I know if I will need a rotor shim. Later today.
 
awsome stuff, i just found this thread !

the wheels look butch.. i like !

Thick tires look cool, but that's where it ends, 2.5's and 2.3's are common and i love the Holy Roller personally . :wink:

About the washers, those are just a random bunch of parts, there is no one way to do it, all depends on your setup...

and what you need is a Freewheel (*threaded ) . not a cassette :wink:
 
About the rubber removal. Use a belt sander with 24 grit belt. I did this to sone tires I picked up for my motorhome, michelin 8R 19.5 They were cupped and made lots of noise but were in good shape. Used a bosch 4x24 belt 24 grit. Dirty job but made' em run good.
 
Wish I had read this earlier. Spent most of the day trying to get this wheel to fit. Got blisters using the razor knife. The suggestion to use a belt sander is a good one though. Problem is I don't have one. I did try several other sanding type options though with no joy. Random orbit sander with 40 grit, no joy. Dremel with sanding drum, worse. Finally, I tried one of the 3M scotch brite grinding pads in my right angle die grinder and "Bobs your uncle"! That thing gives nice controlled removal. I don't have the tire totally fitted yet but at least now I know it's going to fit. My biggest problem was the incorrect assumption that the narrowest part would be the upper tubes...nope it was the chain stays. About 1/8" narrower on each side. The other weird thing is that now the wheel is no longer true after having the tires mounted. It's close enough though to get the tread grinding done then I will work on truing the wheel. Got to go back to work for a couple of day but then I,ll get back to it. Thanks for all the help everyone.
 
I would have wrapped the offending area of your frame in a coarse grit sand paper, lifted the wheel off the front and given it full throttle until it stops rubbing :lol:
 
Back
Top