Loaded Tesseract Carbon Single VESC 6355 10S4P

ah well, done once more - think if that case doesnt hold up Ill really go back to rubber tubes. :p

main issue of a strongly bonded case is that it affects the board flex and its under a lot of stress. there isnt really a way to get around that. its obviously less of a problem if you have a dead board, but I dont like that. :?

anyway, enough carbon dust and resin inhaled for a while, need a break from tweaking the tesseract:
tesseract_final.jpg
 
sl33py said:
Thoughts on the flex issue - can you solidly mount the centerline bolt, and oval out the front and back bolt holes in your cover? It would let it move a bit perhaps at the bolt hole when it flexes?

hmyea, I thought about that too, but dont like the idea of enclosure and board rubbing on each other constantly. been driving another 2 battery charges now and no more visible wear on the enclosure mounting holes. the flex is still ok, its perfect without enclosure, but not much stiffer with enclosure. think the key to success was the double adhesive tape between board & enclosure and properly tightened mounting screws.
 
Can i ask , the Bushings you recommended in your Topspeed thread (Riptide Krank Barrel Bushings 87a), were they to make your board more stable, and did you put them just on back trucks ?

Did you put them on this board also?

Thanks !
 
yea, I fiddled with the bushings to achieve several things: most important was "is it stable at max speed", from there onwards I tried to find the sweet spot of surfy feeling vs. carving precision.

too surfy isnt my thing cause I dont like the binary left/right turn feeling, but too stiff kills the feeling too - and this feeling is really speed dependent, so you always tune your bushings to the speed you are typically running. in that process I went through nearly 300€ worth of bushings on several boards by now - my dream combo for the calibers with my weight of 80kg and a typical usage of 25-30kph average and short 40kph+ peaks is still:

boardside: riptide krank barrel 93A
roadside: riptide krank barrel 87A
pivots: riptide 96A wfb formula

and, mostly because of the insanely sexy looks, but also a little bit for the added steering precision: amish cupped precision washers! cupped is the most important part though, the barrels will immediately feel loose and all steering precision is lost when you dont use cupped washers!

that total combo gives the perfect blend of surfy vs. precision and can easily be finetuned by playing with the kingpin nut thanks to the flexible krank formula. for an extra butter feeling, add a thin layer of silicone grease into the pivot cup and on the hanger-sides of the barrels. :mrgreen:
 
I might have to try those Kranks. I just started the bushing journey myself and it sounds like you have the wisdom. I am running the Riptide WFB: boardside:95.5a, roadside:93a, 96a pivot cups

I have a cupped washer on the baseplate side and one of these: https://www.muirskate.com/longboard/products/9681/array-machined-barrel-sleeved-washers on the nut/road side. Do you think I should put a cupped washer under the nut or does the sleeved work similar? I ordered the WFB before realizing the way the formulas are like 15% soft feeling. Luckily I got the hardest one they had. I will say they feel amazing compared to the stock bushings and have run up to 30mph no problem. Thanks
 
stealth71 said:
I might have to try those Kranks. I just started the bushing journey myself and it sounds like you have the wisdom. I am running the Riptide WFB: boardside:95.5a, roadside:93a, 96a pivot cups

I have a cupped washer on the baseplate side and one of these: https://www.muirskate.com/longboard/products/9681/array-machined-barrel-sleeved-washers on the nut/road side. Do you think I should put a cupped washer under the nut or does the sleeved work similar? I ordered the WFB before realizing the way the formulas are like 15% soft feeling. Luckily I got the hardest one they had. I will say they feel amazing compared to the stock bushings and have run up to 30mph no problem. Thanks

the precision washer you have are non-cupped and give the bushing no lateral support. the whole feeling will be less precise and the bushing feels softer compared to the same bushing with a cupped washer!

the wfb formula is really supersoft, Im running 80 and 85A wfb riptides on my pump board and its great for pumping, but not so much for anything else :p

in the end youll probably have to test for yourself I think. people have very different things they want from a board and for their riding style. Im always suprised for example, how little people carve in videos. small amplitudes, hardly any lean, often just riding straight. people like that have probably completely different things in mind for their setup.
 
Cool. I will swap them out for cupped and give it a run. Probably also order some others to try. I used to skate a lot 10 years ago, but that was kickflips and stair gaps. Bushings were never a worry of mine. Now they are very important.

Thanks for the info!
 
Im really enjoying my tesseract these last few days - weather is awesome and Im eating up charge after charge. I rode the board down some really shitty roads by now as a stresstest - the case shows no signs of wear. yesterday night I also hit 47.5kph, but I guess I had some wind in my back! :lol:

with all these kilometers in the board (think this week about 200km at least), I now think that 6355 192kV with 16/36T and 90mm wheels for a max speed of 52kph theory is geared too wide, even for my comparably flat region. the board behaves a little like I would hubs expect to feel. its great smooth though, coasts really well, but has to work a lot on inclines.

I now ordered an SK3 6374 168kV for a max theory speed of 45kph. the larger motor and smaller kV should hopefully give me enough torque-boost so that I can keep the 16T motor pulley. of course, as usual, the SKs are on backorder, so it will take a while until I see the thing in my mail :p
 
today I did a max range tour, i.e. go until battery dies! last time I did that was with the topspeed dual rear - I reached about 30km range with an average of 25kph, dual torqueboard ESC and dual 6355 r-specc, same flywheels, same battery.

today I reached 40km range with 32V -> 30V vesc settings (BLDC mode), i.e. there is a soft exit strategy of the vesc at 32V, allowing slow cruising until 30V. its interesting now if that can be accounted to 1 vs 2 motors or on vesc vs. torqueboard esc. its a respectable 33% range increase and the battery certainly hasnt become better AND I was running an average of 28-30kph for most segments AAAAND I had partly really bad pavement, so that I actually had to walk for about a kilometer in total. :p

nirvana.jpg
 
Nice feedback whitepony !

This is on the 10s4p Sanyo's correct?

Im looking forward to see what my sk3 6364 245kv , 15t, 36t , 80mm can do ?
 
Great board! Do you still use the wooden plank to make your carbon enclosure (the shape of it under the carbon before going sous-vide) or did you find a foam that works nicely?
 
laurentxr said:
Great board! Do you still use the wooden plank to make your carbon enclosure (the shape of it under the carbon before going sous-vide) or did you find a foam that works nicely?

still wood, not experimenting with foam unless I cannot shape wood good enough with my tools! :p

good news: the 2.4Ghz mini-remote managed to get to the receiver through the carbon, so I dont have to use a dangling receiver antenna outside anymore! :D
 
Are you using the mini remote that Psychotiller and torque sell?, ...if so how do you like it ?
 
Tried finding Gates GT3 belts here in Canada but smallest they say they have is 60T 300mm ?
 
bleh, I need to be a LOT more careful with insulation and carbon. while charging my 4mm bullet connector basically evaporated in my hand, leaving me with a coal finger and a partly destroyed enclosure. basically I had a short through the carbon fibers.

its interesting to see what actually happened with the enclosure: it looks as if the resin evaporated, leaving the bare carbon fibers open:
zzzap1.jpg


i reinforced the backside again with 3 layers of gfk, used resin to fixate the CFK fibers on the outside again - and to speed it up I let it cure under 60°C with my girlfriends heat lamp:
zzzap2.jpg


sanded everything thoroughly, basically removing one carbon layer on the outside with quite coarse grit to leave a large surface for re-laminating another carbon layer
zzzap3.jpg


curing as we speak. Ill use much thicker insulation and most of all Ill let the 4mm female bullet connectors stick out a little, so that the male connectors wont have to go through carbon to close the connection!
 
this better holds up now - repair of the enclosure was successful, thats really a cool part of gfk/cfk laminating. :) made the holes 1mm bigger now and used dual shrink tube on the female bullet connectors. finally I let them stick out by 2mm so that my male loop key will never even come close to the carbon in future! :?

zzzap4.jpg
 
Wow! I commented in your other thread earlier without seeing this. A Tesseract! Absolutely beautful. This is pretty much exactly what I want to build. If you have one available I would love to see a complete parts list. Absolutely beautiful build!
 
Nice stuff Whitepony.... as usual. Your build threads are very useful and informative... All the pictures are really great too. Wish I had as much time and money as you appear to have!! Still wouldn't do as nice a job, I'm sure....

Anyhow, I know an anti-spark switch costs a lot (though much less to to build yourself). But this is an application that just begs for one even leaving aside the benefits of the soft start. Only penetration of the enclosure would be for the switch instead of running full current, full voltage wires/connectors through highly conductive and abrasive material...
 
Ballistrophobia said:
Wow! I commented in your other thread earlier without seeing this. A Tesseract! Absolutely beautful. This is pretty much exactly what I want to build. If you have one available I would love to see a complete parts list. Absolutely beautiful build!

hehe :) not sure, a complete part list would be pretty hard to write down and the essential list is in the first post as usual. cant list every cable, connector, shrink tube and nickel strip I used on this ... maybe start with your build and this forum will gladly fill in the blanks when you have specific questions for parts or howtos! :)

bobfandango said:
Anyhow, I know an anti-spark switch costs a lot (though much less to to build yourself). But this is an application that just begs for one even leaving aside the benefits of the soft start. Only penetration of the enclosure would be for the switch instead of running full current, full voltage wires/connectors through highly conductive and abrasive material...

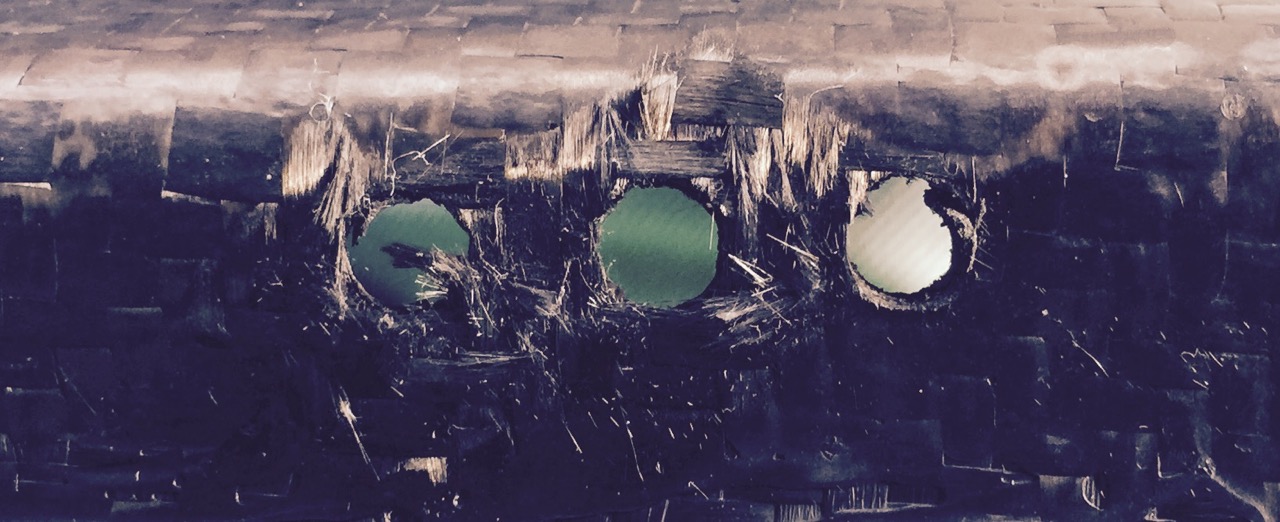
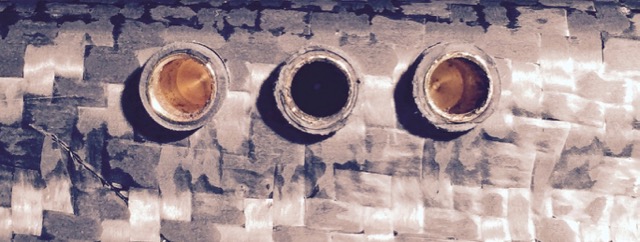
yes, you are so right! :? after the latest burnt finger and destroyed enclosure I took a look at vedders antispark, problem is: I just dont have enough room! when I switched to the mini remote I had a REALLY hard time finding a place for that little receiver. and that would only resolve the soft start, Id still need a jack for charging too, so in the end I always need 2 holes minimum - and thats also the critical one since my on/off is ++, but the charger is +- female connector, ready for a short. didnt really expect carbon to be THAT conductive. :?

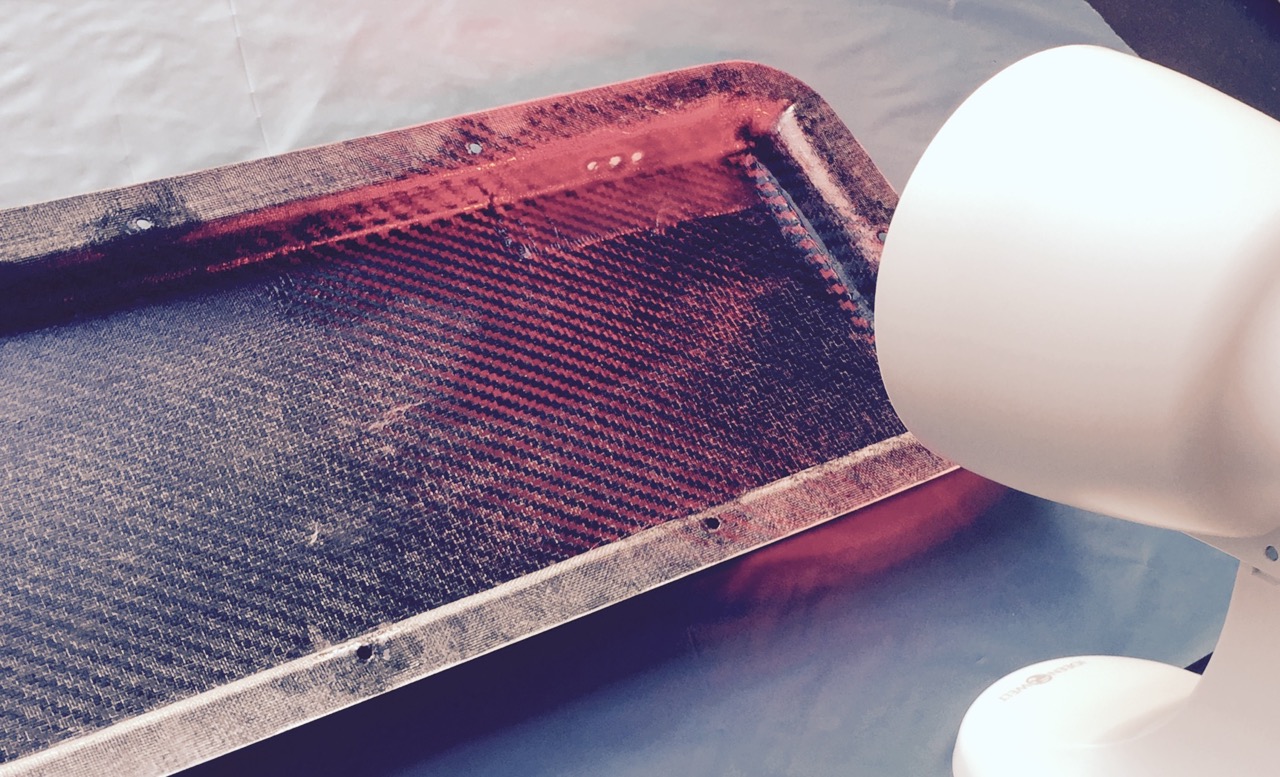
I had a 3.5mm charging jack on my topspeed build - that was really great, but required a large hole of nearly 2cm diameter which is basically the height of the carbon enclosure. so from a structural point of view, Id had to install that one facing the road ... problem is that the depths of that jack also might not fit the height of the carbon enclosure. its complicated when you want to make things as compact as possible. :p

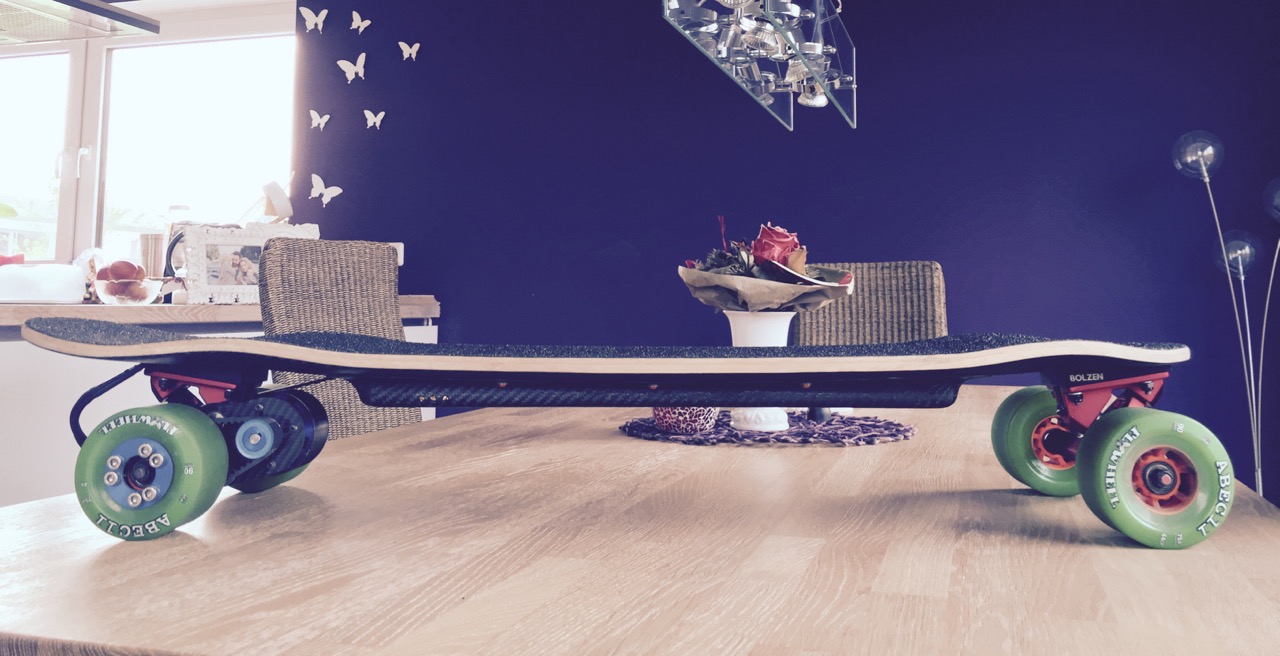
ran the tesseract with my aluminum rubber tube enclosure for a long time like that and never had issues. I think the way I installed the female connectors now will not give me any trouble anymore. bit worried about the lack of "soft switching", but Ive had enough fiddling for now, just want to ride it! think I just underestimated the small resistance of carbon, thought its a conductor, but not a superawesome one like my aluminum enclosure. if I had actually checked beforehand, I wouldve been more careful with the installation!

maybe, if I feel like soldering again, Ill reorganize the elements on vedders antispark to fit into my enclosure. need less of a quadrat - ideal would be 10 x 1.8cm dimension. ;)
 
Back
Top