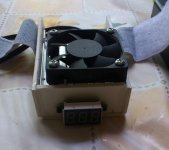
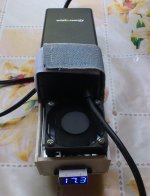
My version of Friction Bike.

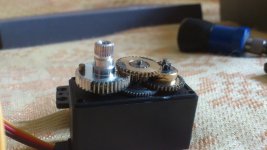
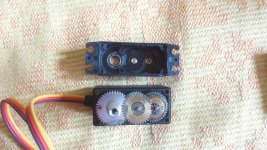
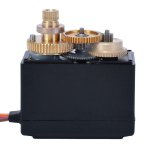
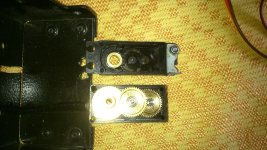
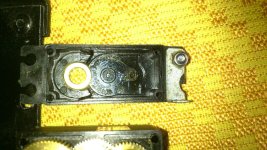
Hi! Today I receive package from Hobby King. After I buy another fake MG996R from Ebay, I decide to purchase Original Tower Pro MG996R Servo motor. Why? Because I make a research in the field of Servo motors. Youtube and Google help a lot and here we are.
Original Tower Pro MG996R.
View attachment 6
Another "original" pictures.
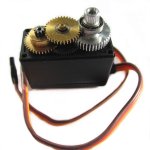
Original-Tower Pro MG996R.jpg
Original MG996R.JPG
original_tower_pro_mg996r_1.jpg
Some "fake" pictures.
Fake MG996R 2.jpg
fake_mg996r.jpg
fake_servo_bushings.jpg
As you see, there is 2 differences in outside design. Engraving of "Tower Pro" and "white" metal shaft in Original vs Brass Shaft and no engravings.
That`s all from now.
After some time I will do changes and tell about results!
:wink:
P.S. It will be nice if you think about to buy something at first time in Hobby King to go from my referrals link:
https://hobbyking.com/en_us/customer/account/create/referral/5ODEXNDEWMCAXNT/
It is good for me, I have a small but discount of buying goods from them.
Thank you very much!
:)
 
Today I fixed my setup. New original MG996R works nice. No problems. I make some improovments. I take gear lubricant and put a little more on gears inside Servo motor. I undersand one thing, spring on shock absorber is little bit too weak. Maximum presure is about 3kg, which is maybe not enough for everyone. 3-5 kg of spring tension is much better! With 3kg of Servo motor presure to tyre there is tendency to slip, but my setup with Current limitations compensate that. It means, when I start to stop bike tyre with hand, motor controller start to swich off the operation.
 
Hi! Today I decide to test new Servo setup and my goal was to reach this place:
Memorial Plaque for the Livs of the Daugava and their Leader Ako.
http://visit.salaspils.lv/lv/kurp-doties/salaspils-novads-kulturvesture/pieminas-zime-daugavas-libiesiem-un-vinu-vadonim-ako/
Latvia(n) - Livs - Stonehenge :) (small scale).
Total distance about 30 km. Moderate wind and sunshine with some clouds.
Another question which I answer today - how long I can ride with assistance.
Answer is about 50km maximal.
Here some pictures of bike and place.
rsz_dsc_0381.jpg

View attachment 1

rsz_dsc_0384.jpg

That`s all. :)
 
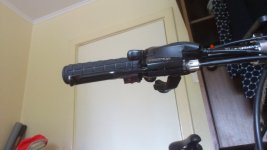
I change position of the "Drive" button. Old position was near LED, at right from normal chest position on the steering wheel.
View attachment 2
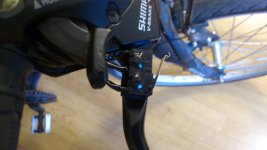
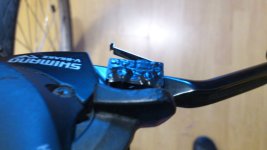
New position is on Right Brake bracket. I drill 2 holes and use long - small diameter bolts with nuts.
rsz_dsc_0389.jpg

I hope, new "Drive" button place will help me avoid fatigue and pain in the chest, because of 2 positions of the chest - Drive and Brake.
After my last trip my 1 and 2 finger still hurts.
I hope this modification will be much better.
:)
 
Hi! Today I think about, what is important to tell to you. When I start to think about my electric assistant bike, first question was about battery heatsink. I don't know what to do, but my friend in the Sky :), gave me link to the Elon Mask video about it. In that video he tell about aluminum(aluminium) dress. In my setup I take aluminum foil and wrap every battery and after that, every 4 cells together. After that I take 4 cells and wrap tham all together 16 cells, after that I use paper isolation tape for window painting and isolate everything after soldering.
It looks like tnat.
 
I change my "Drive button" to SS0504A type.
View attachment 3
Old type microswitch with tiny "push button" was not usefull.
It is not possible to drive 1 hour.
New design looks like that.

rsz_dsc_0397.jpg

View attachment 1

rsz_dsc_0400.jpg

To push "down" is very easy now.
I hope, it will be good enough. :)
 
Modification of Zecto Drive White LED light combo

Today I recieve parcel from China. 10$ Zecto LED Front+Rear lights.
Here is link: https://www.ebay.com/p/1-Pair-Bicycle-Cycling-Head-Front-Rear-Tail-3-LED-Light-USB-Rechargeable-4-Mode/818466268

Red light is good, really, but White... It is something...
OK, I explain here.
LED diodes was discovered long ago, but they was Red, Green and Blue in the beginning. White LED is different. This kind is Phosphor-based LEDs.
Read here: https://en.m.wikipedia.org/wiki/Light-emitting_diode#Phosphor-based_LEDs

"This method involves coating LEDs of one color (mostly blue LEDs made of InGaN) with phosphors of different colors to form white light; the resultant LEDs are called phosphor-based or phosphor-converted white LEDs (pcLEDs).[132] A fraction of the blue light undergoes the Stokes shift, which transforms it from shorter wavelengths to longer. Depending on the original LED's color, various color phosphors are used. Using several phosphor layers of distinct colors broadens the emitted spectrum, effectively raising the color rendering index (CRI)."

As you see the main color of "white" LED is blue but Phosphor layer make light more white from 2000K to 6500K (Kelvins)
http://www.westinghouselighting.com/color-temperature.aspx

Today's home lights are 2700K color temperature.

OK. Let's go back.
Zecto White LED light originally comes with 3 led diodes covered with lenses.

These lenses are with big magnification and gives BLUE light!!! It is because lenses take light from cristal itself! They are too close and we must eliminate tham! :)

About quality. Quality is really good! Thank's!

Here some pictures.
rsz_dsc_0401.jpg

View attachment 3

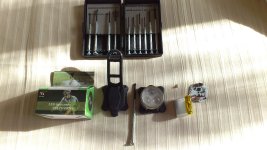
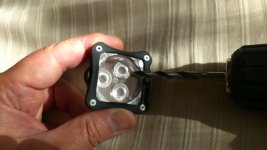
For doing that we must take 5mm drill bit and your hand drill.

View attachment 2

We must drill inside of the lenses about 2 mm in depth.
Thats it!

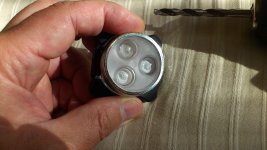
Here is pictures after modification.

rsz_dsc_0404.jpg

rsz_dsc_0405.jpg

Thats all you need! After drilling White Zecto Drive LED light is White!!! :)
 
About maximum range in not ideal weather conditions.
In moderate wind 37 km.
In strong wind only 25 km.
:idea:
 
Some update. Summer is gone. 1 month ago when I drive there was a noise, which was "mechanic" in nature. Today I decide to clean Motor setup and set it aside for winter time. I notice - all screws of Servo motor arm was loosen up. There is 3 screws. Two small and one central screw. Yes, if some of you will try to make something similar to my setup, use Loctite 243 or Nail Polish to prevent bolt loosening.
[youtube]q8tVl_nqN6k[/youtube]
 
Good evening!
The Winter is gone, but the snow and rain still remains, but I start the "bikers season". After Winter, there is dust on the road and N5065 electric motor is full with holes which is good :) if we have ideal road conditions. I start to think about 2 options. The first is easiest one. After some period of time just take a compressor and blow away all dust. Second is to make all holes sealed with aluminum tape. I notice, my setup is cold. It means, it can be done, without risk of overheating. I just think about it. Maybe you have experience? Thanks!
 
Some update.
When I made my battery charger, I notice the problem - I can not know, when battery is full.
Earlier I use Grid Power meter to manage Charge.
But, there is simple solution.
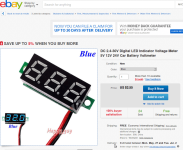
I buy simple Voltage LED indicator and mount it inside my modified self made Battery Charger case.
https://www.ebay.com/itm/DC-2-4-30V-Digital-LED-Indicator-Voltage-Meter-5V-12V-24V-Car-Battery-Voltmeter/192717902553?hash=item2cdee1d2d9:m:m3U7t1TpRADxZw_nzxrsFvg
LED indicator.png
I use Komatex PVC plastic.
http://www.sign-mart.com/komatex-pvc.html
My final product :) looks like that.
rsz_dsc_0437_resized.jpg
I glue all together with Super glue+Baking soda, use nails like fixation elements and use Velcro strips for tie up :).
rsz_1dsc_0436.jpg
In free run, without charging My PC power supply give 18.4V, after Load element (Darlington transistor+Schottky diode) I have 17.3V.
Battery is full when Indicator is about 17.0V, but of course absolute fullness is when Battery controller go OFF(17.3V).
That`s it for now.
P.S. Rubber sleeve is brake in now and Servo motor works great too!
:)
 
Small update.
It's wintertime here and exact time for upgrade.
Today I add 5th element to my 4P battery pack.
This one is 2.4A/h (2500mA version which is only 2400mA in fact).
Now I have 5P4S battery pack, which is good.
Here is picture.
 
Good morning!
Maybe it is interesting to you guys? About how to pack 18650 batterys in one "brick" with heatsink properties inside.
When I start my project, it was important question! Because of heating under the load. Than I investigate this subjec and Elon Musk gave the answer. He speaks about Teslas thermal management system and about simple, but effective solution. He tell about aluminum foil and aluminum box which is part of heatsink. And yes, I do the same! I buy 3 kind of tapes.

Aluminum, paper, double sided and for sticking purposes PVC between(look at previous picture).
At first I wrap every cell with 1-2 layers of aluminum tape.
Than I formed brick (5 cells) and wrap all 5 together with 2 leyers of tape and than 5+5, which formed flat long brick of 10 cells.
I repeat with next 5+5.
Than I squize it together 5+5 brick with next 5+5 brick and made shape of my bike bag(shapes are different and we must adjust "bricks" for propper seat inside). Than I wrap all together with paper tape many layers for ideal strong contact between aluminum foils. Than I soldered all together, make wire connections for BMS and finished with paper tape (all sides). Than I take PVC tape, made place for BMS and fixed BMS with double sided stick take on top. Made all final connections and final paped tape rolling.
That's it!
:)
 
Hi, guys!
I want to ask you! If some of you make something similar to my build, please paste here a link!
P.S. My bike is working OK. No problems. In this year I am not ride much. About 80? km only. That's it.
 
Hi! I made some changes in my battery charging system. After I add 4 batteries in my battery pack, old charger was not capable to do job properly. Old charger blow up and I think it is happening to many peoples who charge LiPo batteries with big capacity.
What I did? I take old PC Power Supply (12V) and make Pulse Voltage Boost Converter Constant Current charger.

I make it myself - use 555 timer with 50/50 cycle about 20kHz pulse frequency - use 5 leg of 555 for "Shut down", "Current control". "Voltage adjustment". Works nice! 555 timer is stable, cheep, and reliable. IRF540 is good enough for 3A Constant Current delivery to the system. I use 40V 10A Schottky barrier rectifier which works without heating much. 4S30A BMS which I use, can handle up to 25V of charging (I use 20V output voltage). All adjustments happened by voltage drop on 0.2Ohms self made resistor which I made from welding wire - which is made with nichrome or nickel additives which make these wires ideal for self made high power resistors. It gives me 3A constant charger which is self protected :).
Something like that!
Slava Ukraine!
 
Back
Top