RC Greyborg build thread

comradegerry

100 W
Joined
Apr 12, 2009
Messages
173
Location
Afloat somewhere sunny
After lurking, reading, learning and generally being left in awe at the slew of recent builds on the sphere, I thought it was about time to start a build thread to help document and hopefully get some advice to save any obvious costly mistakes during this iminent build.

The plan is simple, take Hal's awesome Greyborg platform, mate it with Matt' awesome 2 stage reduction, integrate a 48v 20ah battery into the frame, flesh the rest of the bike out with the best parts available and then run it through the cranks to the 11 speed Alfine lurking in the rear wheel. The bike will be initially built with a chain drive, however once the new monoque aluminium swing arm becomes available it will be getting switched out to a Gates Carbon Drive system to the rear wheel.

The bike is currently in transit and most of the parts are gathered or ordered, with the exception of the battery, this will be something a little special and hopefully a debut of something new. :)

I have next to no mechanical, electrical or engineering skills, therefore this build will showcase the skills of others and encourage others with limited abilities to take advantage of the plethora of available parts that helped Ebikes become plug and play. I have a mate that is an engineer and I will be bribing him with alcohol on a regular basis to ensure his assistance with things technical.

Whilst waiting for the parts to arrive, I thought I might make a start on the handlebars. It is worth mentioning that I am currently suffering a compulsive attraction to titanium bike parts and also am trying deal with an Ebay addiction, the build log may end up being part of my therapy and the first step to recovery.

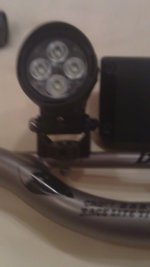
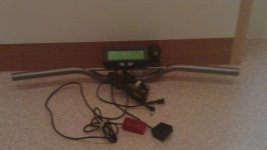
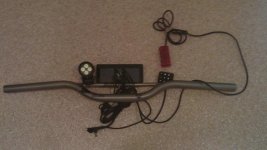
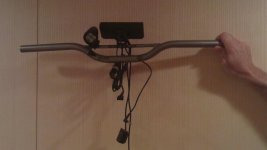
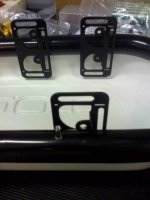
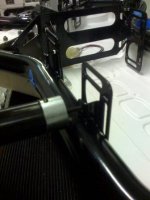
The bars are Bontrager Race Lite Ti, I saw them on ebay and just had to have them. The idea is to mount a large format Cycle Analyst with 2 of rather bright LED lamps either side. I originally was leaning towards just the one but in the interest of symmetry I have ordered another one. The lamps are shipped with a standard handle bar mount, well made and quick release. This did not really wok for what I wanted so they have been adapted a little. I did a couple of dry runs to see where I wanted the parts to sit then drilled 3 x 4mm holes through the top bar. I worried about ruining the structural integrity of the bar so I mixed up some JB Weld, taped the bottom of the through hloes, took a syringe and put a good blob in each to help spread any load, I drill the holes out again the next day. I took the original mounts off then hand filed a half round profile into the plastic so that the mounts sits squarely on the skinny pipe. 3 stainless M4 machine screws will then be used to secure everything. Once I have the other LED light in hand I will shorten the cables to make them as tidy as I can on the bars. Few pictures below for illustration purposes.

I need this to be up and running in 3 months so that is my timeline.

Having seen Grayborg #1 in matt black posted by Hal in another thread, that pretty much settles my colour choice, black it will be!
 

Attachments

  • LED light.JPG
    LED light.JPG
    44.4 KB · Views: 8,737
  • Bar back.JPG
    Bar back.JPG
    18.7 KB · Views: 8,703
  • Bar front.JPG
    Bar front.JPG
    64.9 KB · Views: 3,027
  • Bar.JPG
    Bar.JPG
    48.1 KB · Views: 3,027
The canopy of the bike is going to be secured by Rivnuts, which I thought would be straight foorward enough. I bought all the gear and then had a go at it last night.
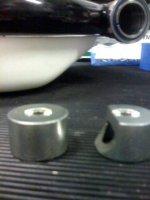
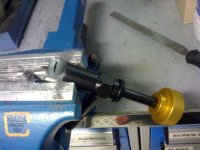
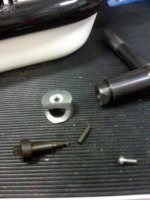
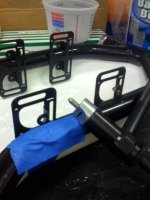
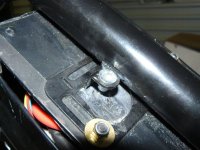
The plan was to use the M4 stainless rivnut which uses a 6mm clearence hole. I drilled the hole out from 5 to 6mm, easy enough, assembled the instalation tool only to find that the frame tube does not allow the tool to sit square over the hole. After some head scratching and advice from my engineer buddy, I started to mod the tool a little on the grinding wheel and then by file to a profile that would clear the tube and allow a straight pull. I ground the shiny piece at the end of the tool and then had another crack at the instalation. First one went in but because I had not ground the other part of the insertion tool, it did not sit square and as I tightened the handle, it twisted and cracked the threaded mandrel. Back to the vice with the tool and removed the offending material, it now looks like it should work. Just need to get a new 4mm mandrel that I will order online today. Attached pictures are the efforts of 3 hours of futility, next attempt will yield better results.Rivnut 1.jpg
 

Attachments

  • Rivnut 3.jpg
    Rivnut 3.jpg
    27.4 KB · Views: 8,531
  • Rivnut 4.jpg
    Rivnut 4.jpg
    24.1 KB · Views: 8,497
  • Rivnut 5.jpg
    Rivnut 5.jpg
    31.4 KB · Views: 8,531
  • Rivnut 6.jpg
    Rivnut 6.jpg
    28.6 KB · Views: 8,497
Nice work. Really interested in what you are doing with the Rivnuts. I tried gluing nuts to the underside of the tabs, but of course they just broke off under torque of the screw.

So after you posted about it I ordered some rivnuts, which should turn up tomorrow or the next day. But I am so stupid I didn't realise there was a tool for their installation. :oops: I had thought I could just slide them into a tight drill hole in the tab.

This is sending me nuts (excuse the pun), because it is the last thing I have to do to get my bike going. Have all the wiring done (have even tested it with my 9C and she is going, just haven't ridden it as I haven't attached the cranks or brake cables, and am just waiting to be able to attach the plastics to be able to attach the cranks and chain etc..

Look forward to seeing your further efforts. I will post photos of mine soon when I get a chance, have been insanely busy with work and family lately.
 
Gerry,

Guess what is all machined up and ready to go?! :mrgreen:

I am looking forward to this build. Did you notice I am building a full suspension bike myself too?

Matt
 
Had another try at the Rivnuts with no sucess, drill and tapped a M4 stainless bolt into the mandrel but that sheared 3 times under pressure. New parts on order from Make Ends Meet to finish the canopy instalation.

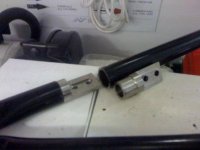
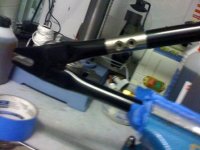
Split the frame for the belt drive, learnt a new phrase today "interference fit", apperently when you can just force one piece of metal into another so tight no other fixing are required, well it was new to me.

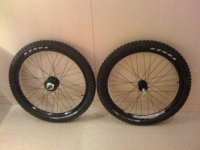
Wheels came back from LBS, going for the off road look, happy with the way they laced them up, will step up to thicker spokes if I end up putting more than 750 watts through the rear wheel but for now the plan is low power through the gears.
 

Attachments

  • Rivnut round 2 failed.jpg
    Rivnut round 2 failed.jpg
    29.5 KB · Views: 8,371
  • Frame Splitter Halfway.jpg
    Frame Splitter Halfway.jpg
    22.9 KB · Views: 8,371
  • Frame Splitter Installed.jpg
    Frame Splitter Installed.jpg
    29.5 KB · Views: 8,405
  • New Wheels.jpg
    New Wheels.jpg
    27.1 KB · Views: 8,405
I hope you plan on welding that splitter there! I would NEVER Trust a press fit on a frame component like that without SOMETHING else, even some bad ass epoxy or something....
 
Interference fit is also a threading term, loose, tight, interference. An M30 X 1 thread (small flip/flop freewheels) isn't generally found on old lathes. Sometimes you can get a M30 X 1.5 feedrate and then mate to M30 X 1 threads accepting an interference fit :p

Chinese stuff is mostly 'loose' fit.
 
Hi Whiplash, I was planning on using a chemical metal type epoxy if there was any play or room for it. Since there is no space for epoxy and I think the loads are compressive at that point of the frame I am willing to see how she goes. If I get some movement I will drill and tap a couple of grub screws to steady it. It took some whaling on it with a hammer, I don't think it would come out even if I wanted it to!

Hi Matt, looking forward to your full suspension project, if it is anything like the rest of your builds it will be awesome and the envy of many.

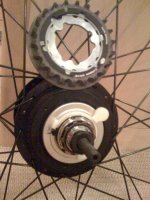
Next chalenge I seem to face is that I am not sure how to get the rear Gates Carbon Drive cog to mate to the Shimano Alfine rear hub. I bought the cog for the Alfine off of the Gates website but I am wondering if they changed things between the old 8 speed and the new 11 speed from a mounting perspective? hopefuly I just need to buy an adapter or something, any ideas.... and thanks in advance.
 

Attachments

  • Gates Rear Hub.jpg
    Gates Rear Hub.jpg
    100.8 KB · Views: 8,305
Hmm, just use a really big hammer. :mrgreen:

That is something Miles has to "Moogle" for you. :wink:

Your box shipped a few days ago.........

I am looking forward to this. This build has been a long time in coming.

Matt
 
Hi Matt

Over a year in the dreaming / planning and gathering stage, several thousand dollars later and the ball is well and truly rolling....

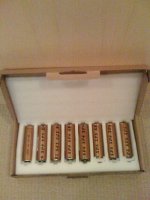
New Batteries arrived only last week, need to play with them once the frame is rolling, will definately be seeking expert advice on their wiring from the learned on the forum!

Look forward to your full susser, great looking frame to start with.... :mrgreen:
 

Attachments

  • Batteries LifePo4.jpg
    Batteries LifePo4.jpg
    82.2 KB · Views: 8,254
Whiplash said:
I hope you plan on welding that splitter there! I would NEVER Trust a press fit on a frame component like that without SOMETHING else, even some bad ass epoxy or something....


Where exacty do you think it is going to go? the belt will be tensioned tightly this alone
will hold it all together, together with the motor constantly pull the chain and seat
stays forward will prevent it ever falling off backwards...

KiM
 
I guess I am just a stickler for chassis stuff, if I did it like that, I guanty you it would break the first time I rode it! Lol!
 
comradegerry said:
Hi Whiplash, I was planning on using a chemical metal type epoxy if there was any play or room for it. Since there is no space for epoxy and I think the loads are compressive at that point of the frame I am willing to see how she goes. If I get some movement I will drill and tap a couple of grub screws to steady it. It took some whaling on it with a hammer, I don't think it would come out even if I wanted it to!

Hi Matt, looking forward to your full suspension project, if it is anything like the rest of your builds it will be awesome and the envy of many.

Next chalenge I seem to face is that I am not sure how to get the rear Gates Carbon Drive cog to mate to the Shimano Alfine rear hub. I bought the cog for the Alfine off of the Gates website but I am wondering if they changed things between the old 8 speed and the new 11 speed from a mounting perspective? hopefuly I just need to buy an adapter or something, any ideas.... and thanks in advance.

not sure if you have sorted this but this might help

http://thegoldenwrench.blogspot.com/2011/01/servicing-of-internally-geared-hub.html

Ian :D
 
ComradeGerry I have stolen your idea with the rivnuts and it has worked a treat. The rivnut gun I got looks like it has a much thinner head than yours, and has worked no problem. Mine looks exactly like a poprivet gun, just with a different mandrel. So the mandrel/head is as thick as/no thicker than the rivnut itself. Hence it worked great. Looks just like a poprivet gun, just cost five times as much....

That was my last hurdle, when I get the time for a day in the garage I will have it going I'd say, will post up photos when I do...
 
Wow, could not figure out why you split the frame - until the whole belt-drive-is-not-splitable reality set in.

file.php


That's some committed/hardcore sh!t, my friend :twisted:
 
Here is my efforts with the rivnuts, was a cracking idea BTW, thanks a lot for it, works perfectly.

rivnut.jpg

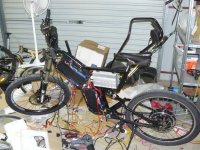
Here is where my bike is up to. I hope it isn't rude to post into your thread with my bike, but I thought it might be interesting to see where someone else is up to. I almost feel like I am wearing shoes in a mosque by posting a hub photo into the non-hub motor section. I await a scathing comment from Aussie Jester - and I deserve it, if I walked into a mosque with shoes I would await the abuse - or worse I guess.

It is a terrible photo I had to take in the garage where it stands, as it is too cold to take it outside for a photo tonight. The alumunium boxes are two boxes of 10S4P lipo (20S 20AH total). 24 Fet Lyen Controller, and a (*whispers under breath* 9C 8x8 - that I upgraded the phase wires on). Large screen cycle analyst, and the Halogen that plugs into the CA for power. To be done are tidy up the wiring, put in brake cables, attach cranks and chain, and plastic canopy and it is done.
 

Attachments

  • bike.jpg
    bike.jpg
    112.8 KB · Views: 6,562
Good progress, looks like she is moving along nicely, look forward to the reports when you take her for a test drive. I am off to the LBS to get the bottom bracket installed tomorrow as I do not have the special tool. I have to get some bushings for the shock to fit over the 8mm bolts and also need a lock nut for the rear disc that also seems like a project for a specialist, that will be my evening tomorrow. It's amazing I do not seem to have any spare time at the moment and my girlfriend is feeling neglected.... better get this finished quick before she leaves!!
 
Oh, no! I (wait for it)......... HUB MOTOR! String the guy up. Beat him with his own club! I cannot believe someone would be so daring as to post pictures of one of these abominations on this thread! :wink: :mrgreen:

It is good to see Greyborg frames being built up. It has been a long time in coming.

Matt
 
recumpence said:
Oh, no! I (wait for it)......... HUB MOTOR! String the guy up. Beat him with his own club! I cannot believe someone would be so daring as to post pictures of one of these abominations on this thread! :wink: :mrgreen:

It is good to see Greyborg frames being built up. It has been a long time in coming.

Matt


+1 !!! ...can a moderator please delete this frock immediately! :p Reason for deletion:- it's infecting the non hub section of the forum :mrgreen:

KiM

p.s couldn't you find a bigger controller? :p
 
it's infecting the non hub section of the forum

I know, I know, it is sick and unnatural isn't it? That is why God punished us Hubmotor riders with.....*trails off hanging head in shame*

Re the 24 Fet, I have found that is the only controller that can run decent current on the x5303.... oh, hang on, I've done it again, basically I have started talking about Easter with the Ayottola during Ramadan....

Sorry ComdradeGerry, I will get off your thread and take my filthy disgusting hubusexuality with me. Please continue, and do accept my apologies everyone. Maybe I can get trained not to like hubmotors any more, maybe then my father would start talking to me again....
 
bla bla bla.... anti hub motor... they make me laugh! :roll:

Dont worrie... you'll ove your 5303 with a 24 fets controller! :twisted:

I love it with a 18 fets... so i can easy imagine how it will be with a 24 fets!

20s with 26" wheel will be really similar to my Giant setup with 24s and 24" wheel ... except.. your controller WILL NOT BLOW like mine did dozens of times!! :lol:


Btw.. Recumpence, my etrike with a 5304 and 9kW seem to have similar acceleration performances than your 20kW twin RC astro motor :wink: 0-60kmh in 3.5sec :mrgreen: .. btw.. my top speed is now 79km/h.

Doc
 
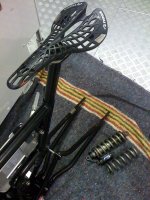
Small progress over weekend, installed the Thomson seatpost and Tiogra Spider seat, seat is surprisingly comfortable once you get used to it, even though it does not look it. Tube needed a bit of filing internally for smooth fit just where the cut out for the compression is.

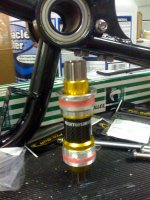
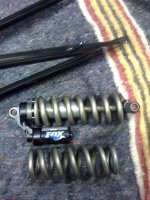
128mm bottom bracket from Tarty Bikes and shock from Ebay should get bushings today at LBS and installed, also getting 20mm spacer for steerer and extra fork tube cut down to size whilst I am there.

Shock has 600lb titanium spring installed, 400lb titanium spring next to it is just incase that it is too stiff for comfort.

Batteries in earlier photos are Lifebatt, forum member Armin hooked me up with batteries and BMS. Very happy with how they shipped and overall quality of product so far. They will be getting a thorough testing once I am up and running.
 

Attachments

  • Bottom Bracket.jpg
    Bottom Bracket.jpg
    101.1 KB · Views: 6,486
  • Seat post and seat.jpg
    Seat post and seat.jpg
    113.1 KB · Views: 6,490
  • Rear Shock.jpg
    Rear Shock.jpg
    94.5 KB · Views: 6,486
Back
Top