crossbreak said:
The bearings are fine. The strength of the BB shaft is my concern. The bending load rise exponentially (3rd degree) with shaft length. I am not sure it holds up if you do jumps with your bike. If it's a hardened shaft, it could break any time you don't anticipate it (due spreading micro cracks you can't see). Sadly I don't' have a better solution in mind yet. Till this is solved/verified you should not do jumps to much.
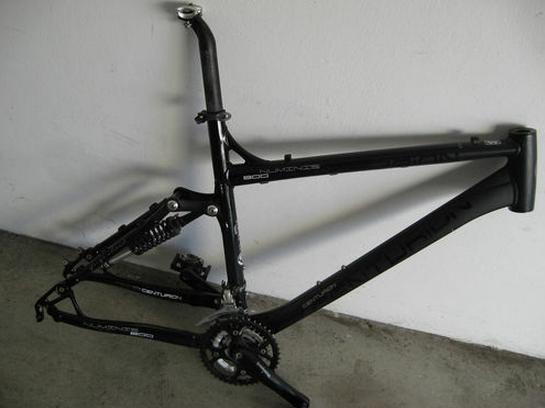
Nice to see that you already have ideas for reinforcing your seat post. I'm looking forward for your build. These racing saddle's came along when searching for a good seat post:
http://www.tribug.com/ism-adamo-racing-bike-saddle-p-132.html
The rewind job looks excellent. Thanks for this great documentation.
(I blew the main trace of my 12 FET controller with 3077 FETs today, series resistance seem to low for this controller)
If I am tired of messing around with delta wiring on my 6374 outrunner, I'll definitely give it a try.
Which halls do you use?
Hmmm, that is concerning that the load rises to the 3rd * with length! :| The cranks are 145mm, and I'm thinking of having them shortened even more..like down to 50mm or so, as they are annoying, in the way on off road trails like when they hit the dirt when I'm in a wheel rut made by other riders (quad trails) and at the top of hills. Dangerous IMO. I'm still injured and not practiced enough to take jumps with confidence at this point in time. The bike will evolve with me, if you know what I mean.
")
Yea, the seat is nice like this. I like the fact that I can change my seating position over a great area just by sliding my butt like a real dirt bike. I will be making a custom body/shell with integrated seat that should come out looking and functioning pretty good. I hope!
Thanks! The rewind took me several days as I was still pretty fragile from my injury. Using a wooden handle from a drywall pallet really helped to hold the wire so I could pull on it with good force.
Sorry to hear you blew your controller trace. Is that all that blew? did you get it back up and running? I've beefed up mine pretty good, I'll take pics next time I open it up to do things like the shunt mod for on the fly variable regen and current limit. So far I've added on top of the stock stuff..10AWG input and output wires, 12AWG solid copper (house wire) on the power traces, and an extra .005 ohm shunt. I've also added a heat sink to the side where the FETs are, though I don't think it needed it..as the controller STAYS COMPLETELY COLD! I can't believe it myself, but it doesn't warm up at all...! Crazy.
Here's some pics. Yes, that is the additional 10awg phase wires coming directly off the bottom traces and out of the bottom of the controller. They then meet up with the stock 14awg phase wires and are soldered to 4awg phase wires to the motor through 8mm bullets! Hehe

The motor on the other hand gets HOT at any RPM or current level (!?!), or got hot that is, until I got a cooling system on it. I'm pretty excited about this because it does such a good job and moves soooooooo much air through the motor, and anyone should be able to replicate it if they can find similar parts. So what is it you say?
I ditched the idea for the small impeller taken from a 120Vac handheld vacuum and decided to try an impeller from an industrial blower! This one is 4.2" in OD and has ~1.5mm clearance in its' ID for the magnet bell of the motor. I did have to take it ALL apart and reassemble it inside-out or backwards though, which was a PITA! But I did it so that the mount and fins worked best for the app. In this way the mount plate side is as close to the motor as possible but still has a contour to it that gives the air some extra room to come out of the end of the bell (awesome IMO), and the fins now work to pull air out of the motor "best" for the direction of rotation it spins. I will be adding a "tube" to the back of it to cover the skirt end of the bell that has holes in it to allow air in and a filter to keep dirt and rocks out. I will be redoing my motor mount (again) as well to eliminate air passing through it from the chain area, and to increase the aluminum at the base so more heat can flow to/through the mount.
Before I added any cooling, I was always trying to use as little current as possible, or spike the current up to 75amps for as little time as possible due to the motor ALWAYS being HOT and I was afraid to over heat it. I was a little disappointed to be honest. But now, I can start out in second gear, slam full throttle pulling 75amps, reach top speed, stop, repeat over and over, and the motor stays touch-ably cool! Now I'm HAPPY with that!
Edit: Oh, and for some reason, having this around the motor has reduced my no load current a whole Amp...from 6.5A to 5.5A! I don't know why, but I'm happy about it!
Check it out: It sounds sweet to boot! Whhheerrrr
Hey Thud, here is how I added the rubber portion of the love-joy coupler to give cush to the second gear clutch mech, it's working out great!
I cut it up to get the shapes you see 3 of here for a press fit, and then just superglued them in place. I acutually ended up using one thicker brass thrust bushing here, instead of the 2 thinner ones in the pics.
Top speed so far, I'm happy with this!
I have a few problems:
* I wonder if anyone else has encountered this before. If you look in the motor w/blower pics you'll see I'm using my OLD magnet bell with the new motor core. That's because my NEW magnet bell has been nothing but trouble due to it resonating like a bitch at a certain RPM, I'd guess at ~ half throttle or 3000rpm. It is vibrating like a crystal glass does when you wet your finger and run it around the rim, or like how a singer can break a wine glass with their voice. Under my fluorescent lights looking at the skirt of the bell when it's vibrating, you can seen the bell taking on a polygonal, probably 12 or 14 sided shape!!! On the bench I've tried everything, from reinstalling the skirt bearing retainer...to cutting off the portion of the bell that secures the skirt bearing retainer, to cutting off all the extra material below the magnets. Nothing helped at all! Also, the resonating was MUCH worse under load when I took it out for a test ride, making it MUCH louder and even extending the RPM in which continued to resonate..ie; it would be resonating so severely that it would continue to resonate even when out of (higher than) the RPM range that it resonated unloaded. In fact it wouldn't stop resonating unless I let off the throttle/dropped the load. In each of the 3 cases that I took the motor out for a short test spin with this "new" magnet bell...it threw magnets! Yep, the resonating was so severe it cracked the epoxy between the magnets AND even the plating off the back side of the magnets so they came loose. One of the mags is now cracked in half and I don't know if I can ever use this magnet bell. I'd like to as you can tell it is stronger than the OLD one that's on it now. Anyone have a clue as to what could be done?
* Where the hell can one download the software (parameter designer) for these controllers!?! I'm a little pissed this controller cost nearly $400 with all the extras I got with it...and NO DOCUMENTATION OR SOFTWARE. I know, if I bought it I should know and/or be willing to go and find it myself, but I've tried with no luck. Either links are broken or descriptions are short and incomplete/cryptic for those who "were there", ya know?! :? :wink: What about this "XPD"? In any case I have not been able to get anything installed or working. This portion of ebike'ing is very frustrating because of this.
* My CA reads a constant negative amp at idle, what to do about this?
* Acceleration is a bit jerky too, like da-da-da-da-da-da-da until my speed reaches the throttle position. Is this the current limit over shooting and dropping back down ~2x per second? That's my hypotheses. Is there something like a setting in programing that can help this? Has anyone else observed this?
* Also, I would prefer a current based throttle. I think it would be so much more controllable and efficient. Anyone done this mod successfully?
Thanks and TTYL,
Jay