Dear ES members, I finally decide to post my build … during the last year I learn a lot about e-bike thanks to all of you for sharing your knowledge, design and build … it’s now my turn.
You will see on my bike some design were directly inspired by ES member:
- TA from Kiwi
- Fiber glass Careening from Keyne
- Batt wiring from Doctor Bass and his friend for the Giant DH solidwoks drawing.
Special thanks to them.
The Story :
End of 2012 I started to be interested by e-bike as e-bike world look like moped world few decade ago (try to put the maximum power on something not design for it)
Beginning of 2013 thinking of Go /No Go in this project, which budget, which bike, time to spend on it as my daughter was less than 01 year …..
In march 2013 I had the chance to find a 10 YE used Giant DH Comp (2003) with a 135 mm Dropout in an acceptable condition for an affordable price (500€ delivered) … and this was the bigbang of my build.

07/April/2013 I broke my right knee (crossing ligament) in a ski accident …. So at this time I was able to spend some hours and days screwed in my sofa to define each parts of the giant e-bike puzzle … and then start the purchase process.
03/Jul/2013 surgery of my knee …. So definitively screwed and lot of time to spend on the E-project. Due to my condition the planning was to learn Solidworks and then start to design parts as far as possible.
September 2013 strong on my two legs I was able to start the real build.
Major Components and Configs
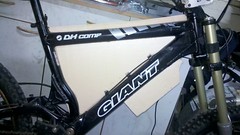
- GIANT DH Comp 2003
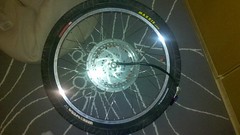
- Hub Motor HS 3540 laced in a 24” rim (Spokes washered, Temp sensor, Wires upgraded, Cover vented, Wires exit modified)
- Lyen 18Fet controller (PAS, TH, 3 Speed switch, Regen …)
- CA V3
- Foundingpower programmable EBS-BMS.24S (Tanks Eason for your support)
- 18S3P Lipo Batt composed by 09 turnigy 6S1P / 20C / 5000 mAh
- Bulk Charger 75 V / 10A
- Toshiba DC/DC converter
- Steel batt box
- Fiber glass Careening
- TA kiwi like
- Maxxis Hookworm 2.5 tyre and tube
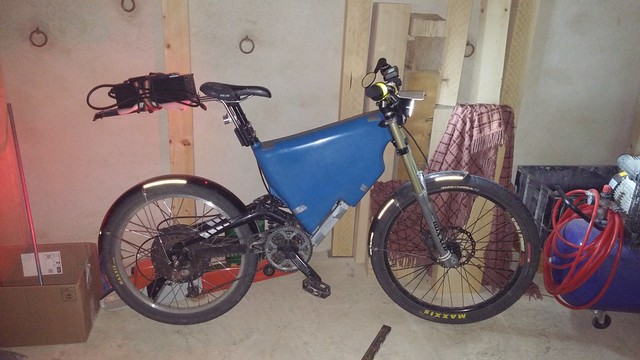
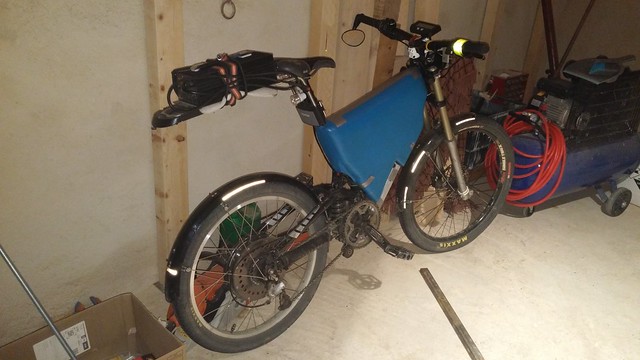
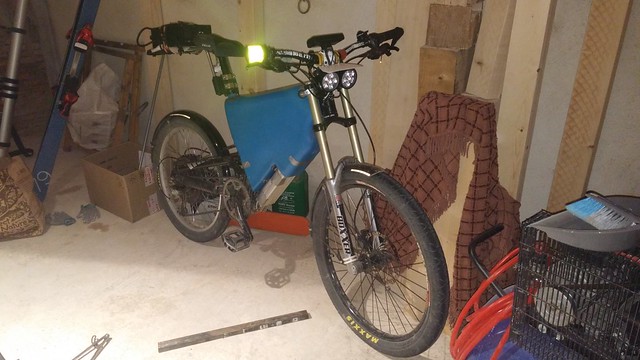
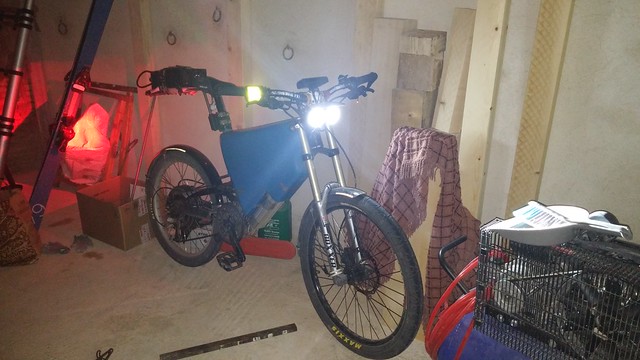
So now some picture trying to be self-explanatory
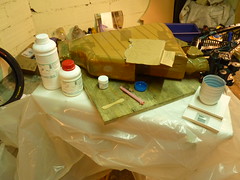
Chapter 01 : foam shaped (build from wall insulation + acrylic stick …. Really easy to shape and cheap)

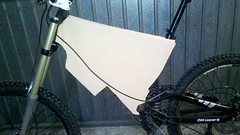


Chapter 02 : Sticky tapping (Really really long to obtain a good result … quite easy and very cheap)
Brown sticky tape is used to remove covers from the mould, epoxy don’t stick on this tape.
Mind to obtain a result flush and smooth after tapping it will help a lot for the next steep.


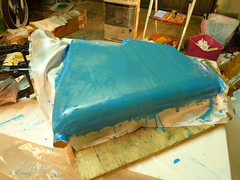
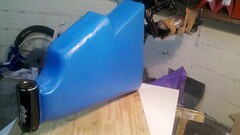
Chapter 03 : Epoxy Fiber Glass (1st time ever, finally not so difficult … stratification is a 03 Hours work by side … expensive).
I used the same method and material as for the surfboard. Covers are made of 04 layers 200 g/m², except for the controller area which is made of 08 layers in order to reinforce the step. Epoxy was tinted in blue for the 02 first layers Result is very nice without sanding if you work properly.
Both covers weight: 622g
1st side


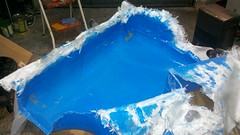
2nd side was stratified on the 1st one in order to obtain a perfect covering (mind to protect everything to avoid space where epoxy could stick.


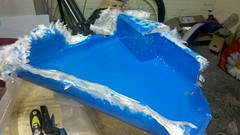

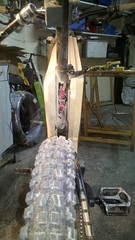
Chapter 04 : Covers adjustment (mind your eyes and nose with fiber glass cutting …. Easy with dremel wheel cut)
Perfect fit and full of room… happy bunny. Width 107 mm easy for pedaling.


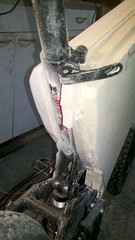
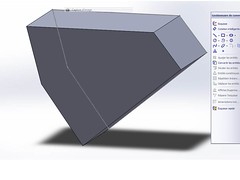
Chapter 05 : Batt Box (Fire proof, “drawing download”)
Made from a 1 mm steel plate, bended and welded. Why steel ??? …. Good protection from fire issue. Batt box will work like a biscuit box (Box + cover) to avoid air intake if fire happen.
Design was made in solidworks iaw frame dimensions.
1St Drawing in 2D
2nd Then add volume to obtain 3D
3rd Use sheet-metal works option with setting a 1mm plate
4th Open it
5th Print it (1/1) stick it on the sheet metal
6th Cut it with dremel wheel cut
7th Bend it with care
8th Weld it with TIG or MIG
9th Surprise it fit perfectly


Chapter 06 : Full of LIPO
At the beginning of the project my objective was to run the bike at 24S lipo but also to maintain the bike width around 100 mm. At 24S only 10 AH could be fit in the frame, then I decide to extend the range with 18S 15AH.
Using solidworks I did the simulation on how many batt could fit into my box. And at the end of the day everything could fit inside …. It’s a kind of Magic )
)


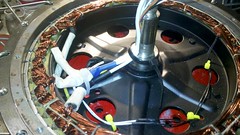
Chapter 07 : Crystalyte Chinese Motor Upgrade (“drawing download”)
After a lot of thinking HS3540 was chosen due to affordable price and motor is very well known on ES forum. Basic upgrade were performed + a little bit of tuning touch.
- Spoke washering
- Phase wire upgraded with aeronautical wires 12AWG
- Bearing change to SKF
- Wires exit modified
- Temp probe added
- Stator paint
- Axle un-sharp
- Cover vented
- Rotor flipped to fit into Giant DH Comp
- XT150 connectors


Chapter 08 : Perfect Chinese BMS (Spaghetti land)
Balancing is powered by a Foundingpower programmable EBS-BMS.24S. As far as I went it’s a very good component. Documentations are good enough for a noob like me and software is easy to use. Parallel wiring was made of 10AWG and 08AWG wires welded on 3mm copperware with a lot of tin heated with hot-gun to be able to melt everything.
A 40A Schottky diode + a fuse holder with a 20A fuse were installed on charger circuit.


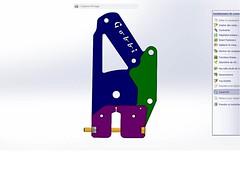
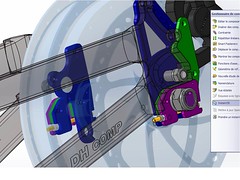
Chapter 09 : TA (Kiwi Like) (Drawing are not available in regard to Kiwi’s business)
As I had Giant DH Comp rear arm drawing in solid works (more or less accurate) I decide to create TA mainly based on Kiwi’s TA.
Major changes are:
- TA designed for a 24” without changing bike balance
- Mud guard holder provision
- Main link to frame (Stock axle cut and taped)
- Motor axle pinch modified
Then drawings were laser cut on 04 mm steel by one of my friend.
Final TA will be made of strong stainless steel


Chapter 10 : 1st puzzle assembly
- Controller modification / In order to avoid a lot of connector outside of the body frame I decide to install a 32 pins Russian circular connector (CCCP alloy made).
- Main plate holder is made of a 2mm alloy supported by both alloy beam of 4mm thick (sandwich design).
- Controller is fixed on 04 silent block screwed in the beams.
- BMS is installed on a composite plate (Carbon/fiber glass) reinforced by both stainless steel beam of 02 mm thick where 04 silent block are screwed.
- Battery is stuck in the frame and maintain by both Velcro strap
- XT150 connectors are used for the motor phase and battery
- PAS is installed to be able to show an authorized configuration
- BMS hall sensor installed between fuse holder and controller
- Pre-charge resistance installed.


A suivre ...
You will see on my bike some design were directly inspired by ES member:
- TA from Kiwi
- Fiber glass Careening from Keyne
- Batt wiring from Doctor Bass and his friend for the Giant DH solidwoks drawing.
Special thanks to them.
The Story :
End of 2012 I started to be interested by e-bike as e-bike world look like moped world few decade ago (try to put the maximum power on something not design for it)
Beginning of 2013 thinking of Go /No Go in this project, which budget, which bike, time to spend on it as my daughter was less than 01 year …..
In march 2013 I had the chance to find a 10 YE used Giant DH Comp (2003) with a 135 mm Dropout in an acceptable condition for an affordable price (500€ delivered) … and this was the bigbang of my build.
07/April/2013 I broke my right knee (crossing ligament) in a ski accident …. So at this time I was able to spend some hours and days screwed in my sofa to define each parts of the giant e-bike puzzle … and then start the purchase process.
03/Jul/2013 surgery of my knee …. So definitively screwed and lot of time to spend on the E-project. Due to my condition the planning was to learn Solidworks and then start to design parts as far as possible.
September 2013 strong on my two legs I was able to start the real build.
Major Components and Configs
- GIANT DH Comp 2003
- Hub Motor HS 3540 laced in a 24” rim (Spokes washered, Temp sensor, Wires upgraded, Cover vented, Wires exit modified)
- Lyen 18Fet controller (PAS, TH, 3 Speed switch, Regen …)
- CA V3
- Foundingpower programmable EBS-BMS.24S (Tanks Eason for your support)
- 18S3P Lipo Batt composed by 09 turnigy 6S1P / 20C / 5000 mAh
- Bulk Charger 75 V / 10A
- Toshiba DC/DC converter
- Steel batt box
- Fiber glass Careening
- TA kiwi like
- Maxxis Hookworm 2.5 tyre and tube
So now some picture trying to be self-explanatory
Chapter 01 : foam shaped (build from wall insulation + acrylic stick …. Really easy to shape and cheap)
Chapter 02 : Sticky tapping (Really really long to obtain a good result … quite easy and very cheap)
Brown sticky tape is used to remove covers from the mould, epoxy don’t stick on this tape.
Mind to obtain a result flush and smooth after tapping it will help a lot for the next steep.
Chapter 03 : Epoxy Fiber Glass (1st time ever, finally not so difficult … stratification is a 03 Hours work by side … expensive).
I used the same method and material as for the surfboard. Covers are made of 04 layers 200 g/m², except for the controller area which is made of 08 layers in order to reinforce the step. Epoxy was tinted in blue for the 02 first layers Result is very nice without sanding if you work properly.
Both covers weight: 622g
1st side
2nd side was stratified on the 1st one in order to obtain a perfect covering (mind to protect everything to avoid space where epoxy could stick.
Chapter 04 : Covers adjustment (mind your eyes and nose with fiber glass cutting …. Easy with dremel wheel cut)
Perfect fit and full of room… happy bunny. Width 107 mm easy for pedaling.
Chapter 05 : Batt Box (Fire proof, “drawing download”)
Made from a 1 mm steel plate, bended and welded. Why steel ??? …. Good protection from fire issue. Batt box will work like a biscuit box (Box + cover) to avoid air intake if fire happen.
Design was made in solidworks iaw frame dimensions.
1St Drawing in 2D
2nd Then add volume to obtain 3D
3rd Use sheet-metal works option with setting a 1mm plate
4th Open it
5th Print it (1/1) stick it on the sheet metal
6th Cut it with dremel wheel cut
7th Bend it with care
8th Weld it with TIG or MIG
9th Surprise it fit perfectly
Chapter 06 : Full of LIPO
At the beginning of the project my objective was to run the bike at 24S lipo but also to maintain the bike width around 100 mm. At 24S only 10 AH could be fit in the frame, then I decide to extend the range with 18S 15AH.
Using solidworks I did the simulation on how many batt could fit into my box. And at the end of the day everything could fit inside …. It’s a kind of Magic
) Chapter 07 : Crystalyte Chinese Motor Upgrade (“drawing download”)
After a lot of thinking HS3540 was chosen due to affordable price and motor is very well known on ES forum. Basic upgrade were performed + a little bit of tuning touch.
- Spoke washering
- Phase wire upgraded with aeronautical wires 12AWG
- Bearing change to SKF
- Wires exit modified
- Temp probe added
- Stator paint
- Axle un-sharp
- Cover vented
- Rotor flipped to fit into Giant DH Comp
- XT150 connectors
Chapter 08 : Perfect Chinese BMS (Spaghetti land)
Balancing is powered by a Foundingpower programmable EBS-BMS.24S. As far as I went it’s a very good component. Documentations are good enough for a noob like me and software is easy to use. Parallel wiring was made of 10AWG and 08AWG wires welded on 3mm copperware with a lot of tin heated with hot-gun to be able to melt everything.
A 40A Schottky diode + a fuse holder with a 20A fuse were installed on charger circuit.
Chapter 09 : TA (Kiwi Like) (Drawing are not available in regard to Kiwi’s business)
As I had Giant DH Comp rear arm drawing in solid works (more or less accurate) I decide to create TA mainly based on Kiwi’s TA.
Major changes are:
- TA designed for a 24” without changing bike balance
- Mud guard holder provision
- Main link to frame (Stock axle cut and taped)
- Motor axle pinch modified
Then drawings were laser cut on 04 mm steel by one of my friend.
Final TA will be made of strong stainless steel
Chapter 10 : 1st puzzle assembly
- Controller modification / In order to avoid a lot of connector outside of the body frame I decide to install a 32 pins Russian circular connector (CCCP alloy made).
- Main plate holder is made of a 2mm alloy supported by both alloy beam of 4mm thick (sandwich design
).- Controller is fixed on 04 silent block screwed in the beams.
- BMS is installed on a composite plate (Carbon/fiber glass) reinforced by both stainless steel beam of 02 mm thick where 04 silent block are screwed.
- Battery is stuck in the frame and maintain by both Velcro strap
- XT150 connectors are used for the motor phase and battery
- PAS is installed to be able to show an authorized configuration
- BMS hall sensor installed between fuse holder and controller
- Pre-charge resistance installed.
A suivre ...