Dee Jay
100 kW
- Joined
- Dec 11, 2007
- Messages
- 1,211
disassemble a generic steel cog from a press fitted chainring in 4 easy steps!
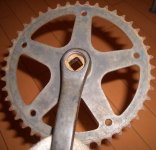
hold the chainring/crank up and inspect the crank side like-so and say "hhmmm.."

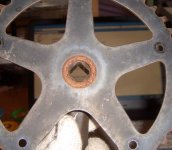
turn it and inspect the other side and say "fnck..."

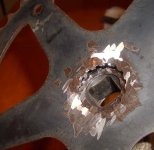
commence to grind (sorry no pic) with a handy-and-oh-so-dandy Ryobi bench grinder till you see a hairline separation between the crank and cog

then use a pulley puller to gently separate the pieces (sorry no pic)
View attachment 2
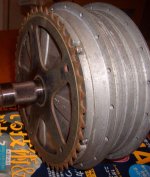
center the cog to the cover plate by inserting the axle from the outside,the stator portion of the axle won't fit through the splined inner diameter of the cog, it should rest around it. Spin the hub/cog to check the cog for high/spots

once it's centered, mark the cover where you wanna drill for mounting bolts (not sure if there's enough space for screw heads between plate and windings, you may have to the drill cog and the plate closer to the axle. washers should be glued on each side of the cover plate for aluminum reinforcement
bob's yer uncle 8)
hold the chainring/crank up and inspect the crank side like-so and say "hhmmm.."

turn it and inspect the other side and say "fnck..."

commence to grind (sorry no pic) with a handy-and-oh-so-dandy Ryobi bench grinder till you see a hairline separation between the crank and cog

then use a pulley puller to gently separate the pieces (sorry no pic)
View attachment 2
center the cog to the cover plate by inserting the axle from the outside,the stator portion of the axle won't fit through the splined inner diameter of the cog, it should rest around it. Spin the hub/cog to check the cog for high/spots

once it's centered, mark the cover where you wanna drill for mounting bolts (not sure if there's enough space for screw heads between plate and windings, you may have to the drill cog and the plate closer to the axle. washers should be glued on each side of the cover plate for aluminum reinforcement
bob's yer uncle 8)


