Show Us Your Homemade Battery Housing

jimw1960

10 kW
Joined
Jul 23, 2008
Messages
784
Location
San Antonio, TX
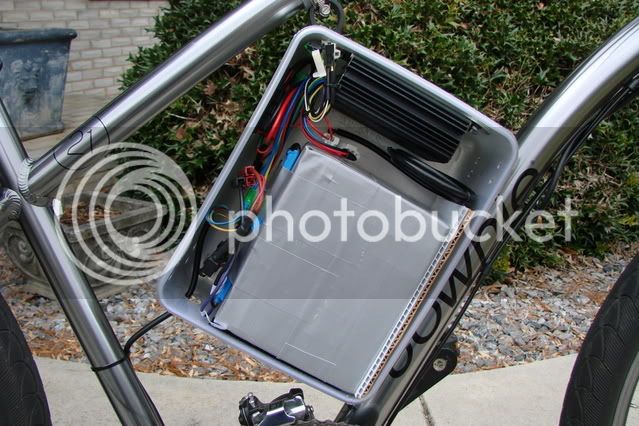
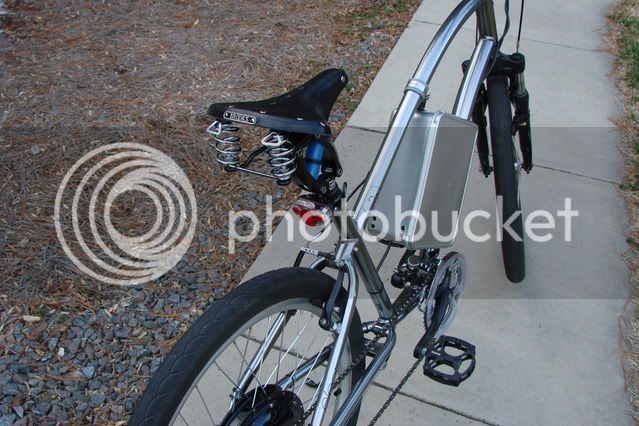
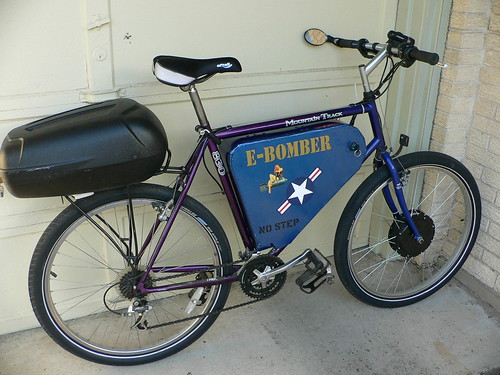
I thought I might start a thread so we can show off our innovative methods for housing a battery on an ebike. I'll start with the one I just finished. The blue box on this bike is the battery housing I just finished building out of 63 mil aluminum sheet stock. It mounts to the water bottle cage bolts and is quite sturdy. Inside is a Ping 48v 20Ah and crystalyte controller. Paint job is blue metallic rustoleum rattle-can special with three layers of clearcoat. The black rack trunk used to hold the battery and controller but it was too top heavy and broke a weld on my rack. Now it is completely empty and is used for hauling groceries, loads of mulch for the garden, etc. The bike handles much better with the lower center of gravity.
Now let's see what y'all came up with.


P1030181 by jimw1960, on Flickr
 
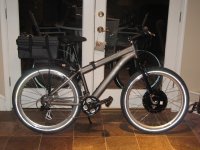
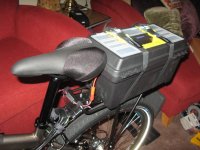
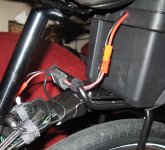
Here's my TF S-750 with a Home Depot Workforce toolbox mounted to the rear rack via cargo straps. Inside is a VPower.HK 36V 20AH LiFePO4 pack and BMS. The battery and BMS just about fill up the entire inside of the toolbox/battery case. I cut out a rectangular hole to mount the battery charger port and also a hole so that the battery outputs could be connected to my DrainBrain and the controller below the battery box. Looks bulky, but works well.
Profile.jpgBatteryBox.jpgBBIO.jpg
 
Nice work, Jim. How do you open it? Any pics of the inside with everything in it?

Mine has worked great. It's a rubbery plastic, so it acts as a shock absorber for everything in it. The battery stays put with a little bit of velcro.
SilverMachine3060.jpg


BatteryBox02.jpg
 
It's a food storage container like tupperware or something with a locking lid. I spray painted it with Fusion silver, and bolted it to the waterbottle holes with a lightswitch plate, and a pipe hanger from the top. It's sturdy. There are holes for air flow in front and back.
SilverMachine48v019.jpg
 
jimw1960 said:
I thought I might start a thread so we can show off our innovative methods for housing a battery on an ebike. I'll start with the one I just finished. The blue box on this bike is the battery housing I just finished building out of 63 mil aluminum sheet stock. It mounts to the water bottle cage bolts and is quite sturdy. Inside is a Ping 48v 20Ah and crystalyte controller. Paint job is blue metallic rustoleum rattle-can special with three layers of clearcoat. The black rack trunk used to hold the battery and controller but it was too top heavy and broke a weld on my rack. Now it is completely empty and is used for hauling groceries, loads of mulch for the garden, etc. The bike handles much better with the lower center of gravity.
Now let's see what y'all came up with.

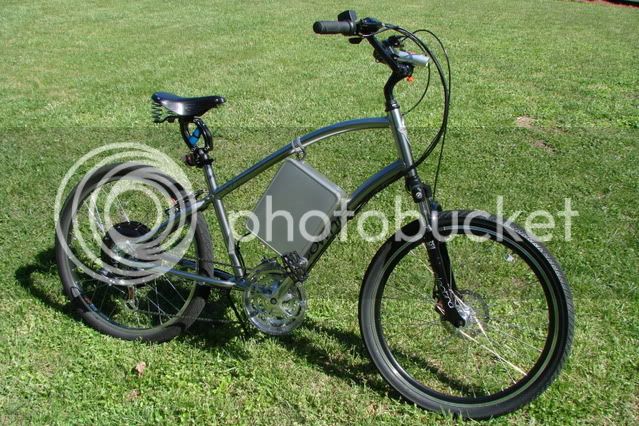
3901634145_8aa4d2784f_b.jpg
Gotta love those pouch packs if they fit between your cranks.
Did you reconfigure it or did Ping build it to spec?

If the box is attached only at the bottle mounts, that's about 23 lbs more than I'd feel comfortable with them holding.
I strongly suggest adding a few clamps around the top tube to carry the weight. Use the bottle mounts primarily for stabilisation and security.

You have to sort your priorities damn quick while your batt box is sliding down the road and your down tube is collapsing after the mounts rip out.
 
Vim said:
Nice work, Jim. How do you open it? Any pics of the inside with everything in it?

The panel on the side shown is riveted on, but on the other side I used 12 sheet metal screws. Charger connection and key switch are mounted on the panels so, hopefully, I won't need to open it very often. My battery is similar shape to yours, so it is in a similar configuration, but I put some side ribs that keep it from swaying.
 
broloch said:
jim, how much weight did you put on the rack to break it?

Battery plus controller and wires probably add up to 25 lbs. Hit a few hard bumps with 70 psi tires and that 25 lbs right over the wheel becomes a hundred pounds or more for a second. Having the battery lower down and between the wheels alleviates a lot of the stess as it tends to pivot when you hit a bump rather than be forced rapidly upward. The bike handles much much better.
 
Zoot Katz said:
Gotta love those pouch packs if they fit between your cranks.
Did you reconfigure it or did Ping build it to spec?

If the box is attached only at the bottle mounts, that's about 23 lbs more than I'd feel comfortable with them holding.
I strongly suggest adding a few clamps around the top tube to carry the weight. Use the bottle mounts primarily for stabilisation and security.

You have to sort your priorities damn quick while your batt box is sliding down the road and your down tube is collapsing after the mounts rip out.

Have you heard of this happening? I'm confident that it is very secure, four steel bolts into steel mounts can handle the weight. Gravity is doing most of the work to hold things in place and not enough clearance at the top to pull the mounts straight out. The biggest concern would be shear stress if impacted from the side, but if I get hit that hard on the side, I'll have other things to worry about than my battery box. Still, I'll be sure to inspect frequently to make sure things are holding.
 
For mine I found a soft cooler bag that fitted my 20ah 36 volt headway brick into it as a snug fit. I got some aluminium section around 150mm wide and about 5mm thick and bent up a little cradle to hold the pack.The cradle has a bit of spring -flex to it so you flex it back slide the pack in and it springs back to hold the pack nice and tight. I then tig welded welded two mounts to the frame of the bike and the cradle bolts to the mounts. I kept one side open to make the battery easy to take out by undoing some HD Velcro strapping.The cooler bag is reasonably water proof and the top can be zipped open when charging to let any heat out that the bms might give off.

The only thing I want to do is replace the velcro with a small solid lock for some security.

2980549992_46178b46e8.jpg

2980550796_fe9c5d1423.jpg
 
I have never liked the seatpost mounted rack. The batteries in the cloth panniers slap around when hitting the big bumps and I was never able to get it tight enough not to shift sideways and rub the tire when I gave it some body english. Plus all the weight over the wheels made the bike handle funky. So...

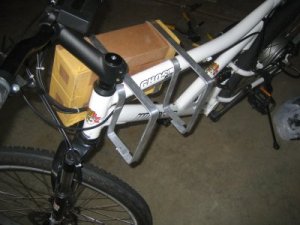
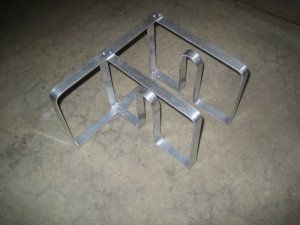
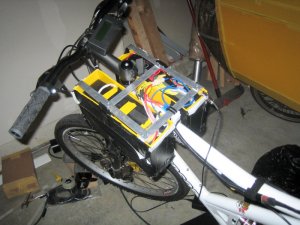
I'm building a mount for my 20Ah 48V split ping pack to mount the batteries up by the head tube.

I'm building it from aluminum strap that is pop riveted together with steel pop rivets. Here it is with one of my battery mockups in place.

IMG_1409_sm.jpg


I added one of the cross straps. I'm not done yet, but it should work nicely. The BMS will fit between the batteries, and the controller will fit in the frame. I'll cover it all with black coroplast.

IMG_1410_sm.jpg


Here are the Ping batteries in the rack. I made a black Coroplast panel to cover the top. The bike handles much better now. I used some wire ties to hold the rack to the frame, and it seems plenty sturdy.

IMG_1412_sm.jpg


I moved the controller to under the top tube, behind the batteries and covered it with some sheets of black Coroplast.

IMG_1414_sm.jpg


More here: http://www.recumbents.com/wisil/e-bent/zcommuter.htm

Ha. Something that I'm surprised to have not seen here is using a rear child carrier to carry batteries. They are pretty heavy duty, and especially in places where e-bikes are frowned on would be very stealth.

-Warren.
 
great thread!! i have been working very hard to get mine done. i'll post up some pics real soon.
 
www.recumbents.com said:
I'm building a mount for my 20Ah 48V split ping pack to mount the batteries up by the head tube.
I hope you don't mind if I borrow this idea for cargo area on my CrazyBike2 semi-recumbent <s>mess</s> bike. :) I've been trying to think of a lightweight way to make some *secure* pod holders out of material I already have, and this is better than anything I came up with so far.

I'm building it from aluminum strap that is pop riveted together with steel pop rivets.
If I am not putting heavy stuff in it, do you think it'll work using aluminum pop rivets? (that's all I have)

At some point I may need to put a pair of 17Ah SLA's on them, and that'll test their strength for sure, though. :(
 
steel pop rivets are better. i never use aluminum rivets myself. make sure you use the proper length so you get good expansion on the outside of the joined layers, and tight seating of the material together. JB Weld and epoxy helps. but you have to assemble fast if you set up with epoxy to supplement the pop rivets, but it is strong as welded then too.

i think you could have got away with more minimalist amount of framing for that pack around the head tube but it is well thought out as is. dogman used a cookie sheet, cut and folded, which i always thought was very strong for the weight and it protected the pack on the outside. but you need something underneath the ping pack to support it flat.

instead of more aluminum framing which you will need for the hangers for sure, why not take an old cookie sheet or from garage sales, cut and fold so it surrounds your pack with a layer of coroplast or something similar like the thick polethylene foam felt sheet used for packing furniture in boxes from china, for the vibration isolation and in case a sharp object tries to penetrate from the side in a wreck. if you can fold it neatly by cutting miters with the sheet metal shears and then you can pop rivet the cookie sheet case along its joints and it will be ten times as rigid as your aluminum frame. if you dry fit and get everything set up, maybe even run a bead of construction adhesive or epoxy in the laps before you drill the hole while locked in place with vice grips for the pop rivet. then build your aluminum frame around it and pop rivet the frame around the cookie sheet case.

if you use the ping BMS then you will need to dissapate the heat from the output FETs during operation too. so you need to keep the BMS out in the open but dry, and i can envision a section up front and across the front of the head tube where a blind ventilated box, which can be kept dry by having internal baffles to catch the rain before it reaches the controller or BMS inside, all out front in the air flow, maybe mount the lights up front on it, and all that would be attached back through your aluminum frame and you could connect across the bottom at the head tube to make it really rigid.

anyway would like to see how it turns out, pm dogman and see if he will post up some build pictures of his cookie sheet, but it seems straightforward.

you could even leave out the rear hanger assembly and put a brace across which rested on the downtube a little ways back, secured with a clamp, and the cross piece would just hold the weight of the battery case back there, run a gusset or strap across at the top to hold the pack together at the top and if it is removable there in back then you could always take your pack out of the two sided case all together, even though split. just disconnect the BMS sense wire harness from the BMS and pop the andersons on each end of the pack, and presto your pack is out of the bike.
 
dnmun said:
steel pop rivets are better. i never use aluminum rivets myself. make sure you use the proper length so you get good expansion on the outside of the joined layers, and tight seating of the material together. JB Weld and epoxy helps. but you have to assemble fast if you set up with epoxy to supplement the pop rivets, but it is strong as welded then too.
If I had steel ones, I'd use them, but all I have is a donated HF rivet kit with most of them left in a few different sizes. On some things I've used washers on the rivets to ensure proper expansion/seating. I found a long time back that if you ensure the faces of two things being connected together are fully flush and touching, then use the connecting devices (rivets, bolts, whatever) simply to compress them together, the faces themselves bear all the weight/tension and the connecting devices don't have to do so much work, as long as they *are* fully and evenly tightened to distribute the stress around the whole faces evenly. :)

But if you don't have them tight, they get cut thru or snapped by the vibration/flexing of the joined faces. :(

And they *do* have to be strong enough to deal with the tensions pulling across them, as I've found several situations in which aluminum rivets were a bad idea (holding my rack and cargo pod onto my DayGlo Avenger DF upright bike, for instance--that was a bad idea, given the 40 and 50 pound or more weights I was carrying regularly on bumpy road edges, big bags of dog food, etc).
 
1- First box was a lightweight Coleman toolbox. I took it apart, drilled off the plastic rivets, and cut about an inch of height off it. Put a thick piece of Plexiglas, ABS would have been better, on the flimsy bottom and screwed it to the rear rack. I had 12lbs of batts and the controller inside. Werqed great for the time I used it.

battinbox.jpg


bikeriverrtsm.jpg


2- I wanted more voltage so more batts were required and as I did not want the extra weight up high so put the batts in panniers with an ABS shell around them for protection and something sturdy to mount to. Werqed well and handled better although they weigh 16lbs total.

48vpairsm.jpg


48vlakesm3.jpg


3- Decided to use the a123s on the current Giant build and after agonizing over how to mount them decided to put about half what I intend to carry in a rear pack with the remote throttle. It has a thick ABS shield on the bottom and two sides. Only 5lbs and another 2lbs for the rack so not even noticed. Next set will go in the triangle. I am werqing on that now expect I will use an aluminum bottom plate with ABS sides covered in a thin sheet of carbon fiber for looks. Pics of the pack and bike to come in the next couple of days. I have seen plenty of work done in this area and some very nice looking battery installs.

60V 4.6 ah A123 and remote throttle
60Vandthrottle.jpg
 
i wanna build a midframe pack in that cannondale frame, with ABS sides formed over to mate to the tubes and then mount the cells inside but attached through the ABS, maybe glue them in place with adhesive, to one face and then wire it up and afterwards, then use foam to fit and hold the cells in place from the other side but use separator film to keep the foam from adhering to the cells, with bolts through the middle to pull the 2 sides together and to hang the strap over the top tube to. carbon fiber is too much, if i could just form the ABS i would be happy. maybe even use some wood as the cross framing and use screws int to the wood to hold the sides, with the straps attaching the screws over the top tube, maybe even grommets to look all natural. hehe.
 
The ABS is easily formed/bent with a heat gun and a bit of patients. I clamped my work between a couple of boards then just heated it alternately on both sides near the bottom. When it became pliable, I let it gently bend down to lay at the desired angle.
 
ABS forms well "by hand" using a shrinkwrap gun or other air heating gun (gotta be a lot hotter than a blow dryer), if you are just pushing it down (using welding gloves or similar) to a surface or shape.

You can also make your own vacuform molds out of wood, drill them full of lots of little vertical holes (about one every 1/2" is good, plus more around the edges or details). Easiest to make a "positive" mold, where you are just going to pull the plastic sheet over a protruding shape, rather than trying to get it down into a negative mold properly. If making a positive mold, just make sure you have a full rectangular shape for the thing that's smaller than the sheet of plastic you're going to use, with the flat "unused" area of the rectangle also drilled down at least around the edges of the molded area.

Bolt a 1/2" deep cookie sheet to the bottom of the mold, using foam, weatherstripping, rubber, cardboard, or your choice of gasket material to try to make sure as much air comes thru the drilled holes in the mold as possible. Hole-saw a hole large enough for your shop vac's or upright vac's stair/furniture hose to *tightly* fit into, and seal that if necessary, too.

Make a frame (metal is best) to clamp the sheet of plastic to, that is small enough to fit in your oven. Those flat-faced extruded-aluminum picture frames, a pair of identical ones, work well enough, with vise-grips or c-clamps trapping them on each side of the plastic sheet.

Take the whole thing to your preheated oven (check the temperature guides from plastic companies for whichever type and thickness you are using), and let it get hot enough to begin sagging. While you're waiting, which wont' be long, turn on the heat gun and begin preheating your mold surface. This works really well with plaster molds, but if you have any detail in them or they have thin edge areas, plaster molds don't last more than a couple of uses at most.

As soon as the sagging starts, then turn on the vacuum, and open the oven, and pull the hot plastic sheet in it's frame down over the mold, so gets sucked onto the surface. If it doesn't look like it's conforming, hit those areas with the heat gun fast and close, with the vacuum still running.

A better option than a vacuum if you have good seals on everything and you've got a hinged frame and built-in heaters instead of using an oven, is to reverse-attach an air compressor to it's tank, and suck all the air out of it. Then hook that to the vacuum plate on the bottom, and flip the valve open as soon as the hot plastic is seated on the mold.
 
Here's what I did on the nicad bike.

jimw needs to add some strapping like this at the top tube. Or not, if your bike will never ever fall over or get dropped. :roll:

And on the commuter for the Ping, I found toolboxes that fit. More detail on these bikes in the pics section, Dogmans bikes. I don't have the pic handy at the moment, the new computer doesn't have the older pix in it right now.
 
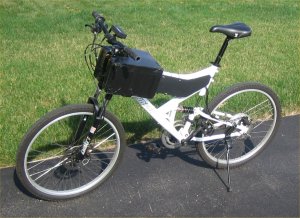
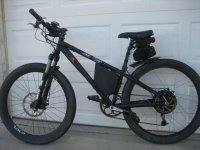
Here's my daily rider, my 35 mph, 36V Konion powered 1000W BMC direct drive with a modified 60 amp controller. I made the battery box out of ABS plastic. There are 3 Bosch fatpacks in the box and 1 more under the seat bag. The controller is mounted under the seat.

Despite being held by velcro straps, the box has held up so far after 500 miles; the bike can jump curbs and I have hit potholes at 25 mph.IMG_5238.jpg

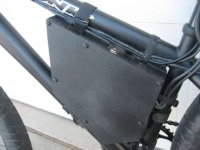
Close up detail.
View attachment 1

Showing charging port.
IMG_5243.jpg
 
Back
Top