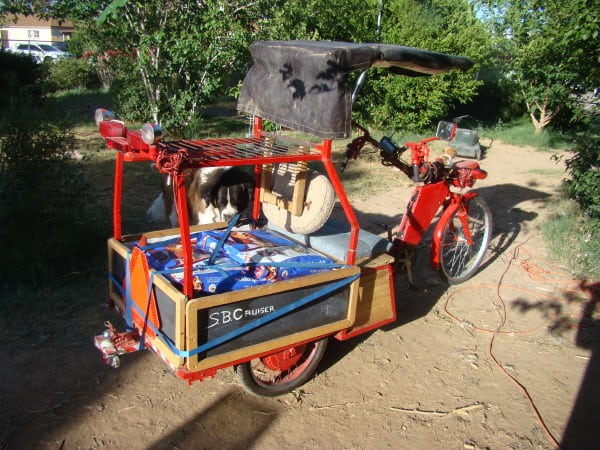
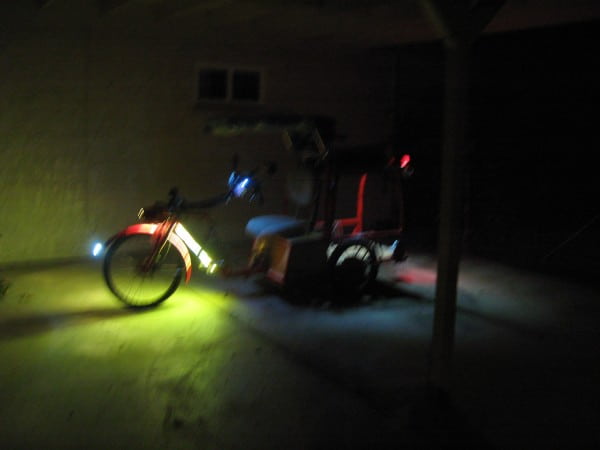
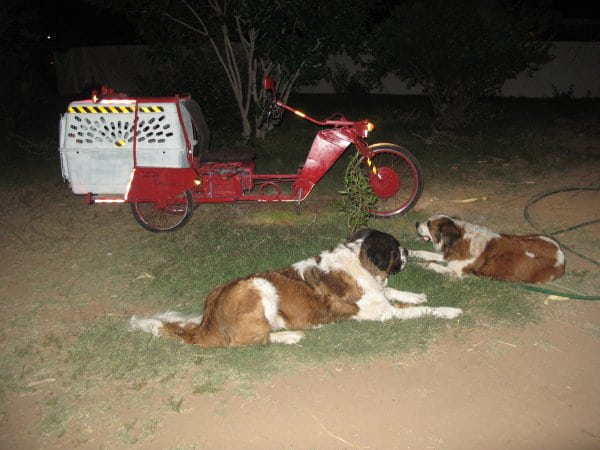
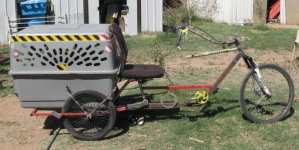
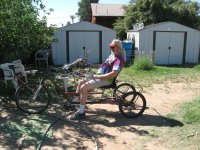
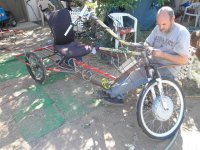
The SB Cruiser : Amberwolf's 2WD Heavy Cargo Trike & Dog Carrier

amberwolf

Administrator
Staff member
Joined
Aug 17, 2009
Messages
40,848
Location
Phoenix, AZ, USA, Earth, Sol, Local Bubble, Orion
This thing replaces Delta Tipper...er, Tripper v1.0, whcih was cannibalized to build it.
https://endless-sphere.com/forums/viewtopic.php?f=2&t=22720

It's mostly Dogman's fault ;) ...er, inspiration, as he suggested it as a joint build for his trip out here this year.


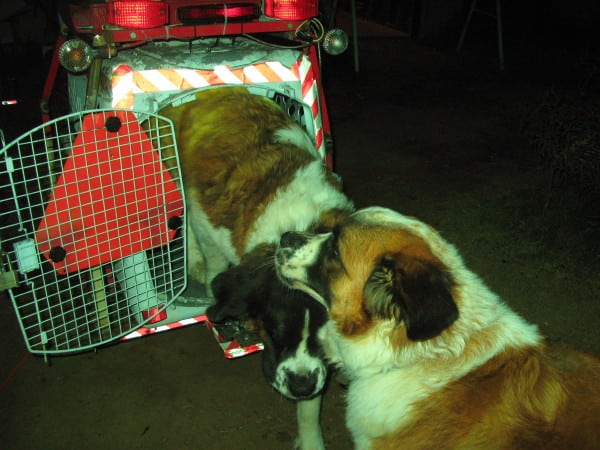
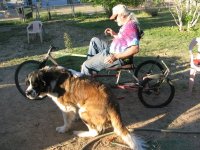
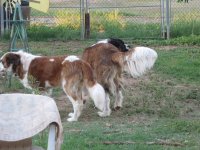
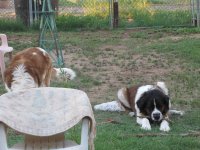
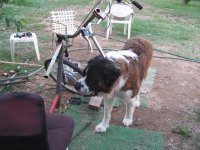
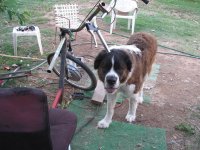
Tiny and Yogi discuss our state of mind amongst themselves:
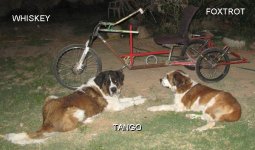
Copy of IMG_1118.JPG

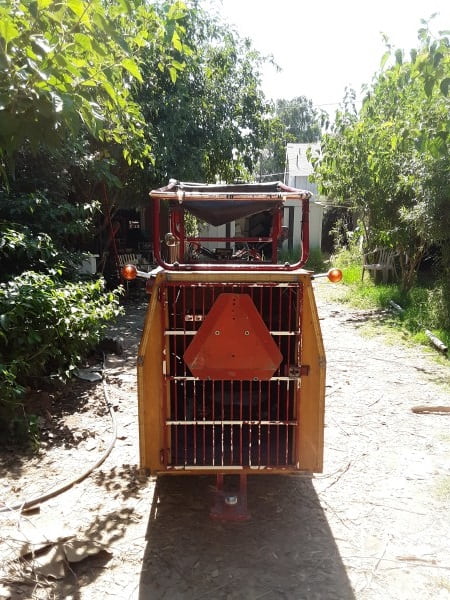
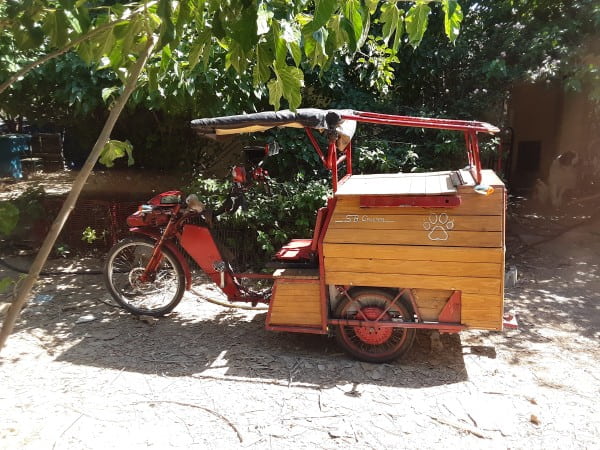
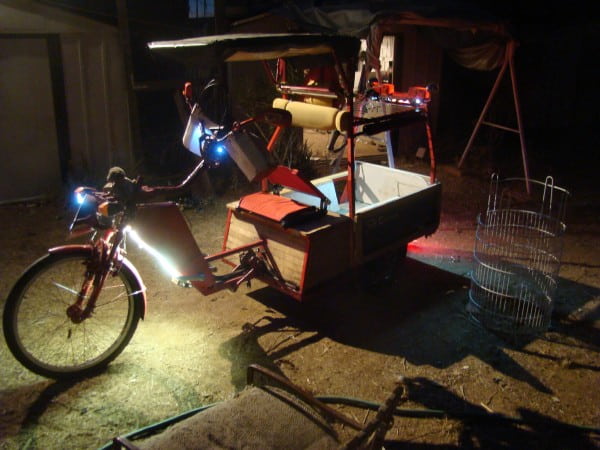
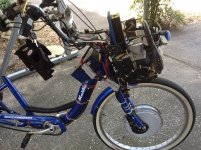
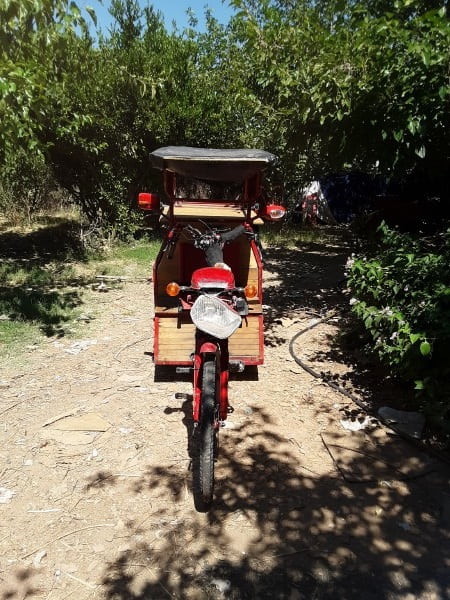
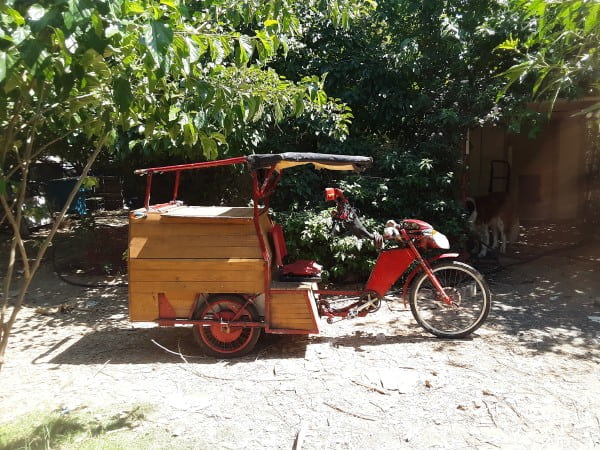
EDIT: (June 2020): Catchup for current look including custom fork, new turn signals, etc.
https://www.endless-sphere.com/forums/viewtopic.php?f=2&t=67833&p=1562028#p1562028
file.php

file.php

file.php

file.php


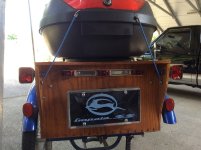
EDIT: (November 2018): Built the wooden cargo pod enclosure that's been "planned" for quite a long time now.
https://endless-sphere.com/forums/viewtopic.php?f=2&t=67833&p=1422821#p1422821

file.php

file.php

file.php

file.php

file.php

file.php

file.php


EDIT: (June 2018): Hauling a piano:
https://endless-sphere.com/forums/viewtopic.php?f=2&t=67833&start=725#p1387404
file.php


After taking the piano off the trailer:
file.php


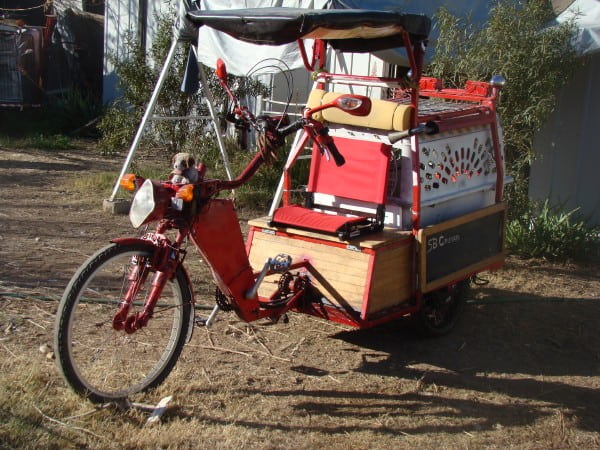
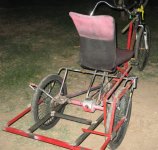
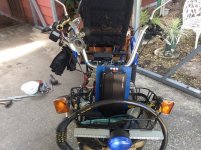
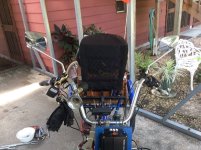
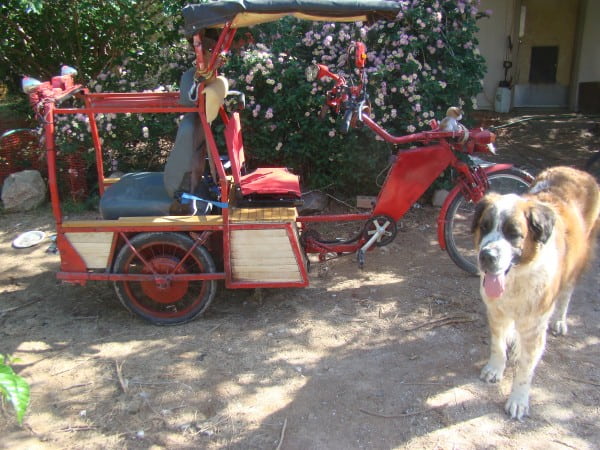
EDIT: (Apr 2018): Couple pics of an alternate configuration, with a seat mounted in the cargo area, to take my brother places (or help coworkers get home after we close, etc). Also shows some of the woodwork changes, etc:
https://endless-sphere.com/forums/viewtopic.php?f=2&t=67833&p=1374276#p1371158
file.php


file.php


file.php


EDIT: (Feb 2018): Pics of new present state, with the new seat and the found Kia headlight reduced to minimum housing and permanently mounted (instead of ziptied), among other changes:
https://endless-sphere.com/forums/viewtopic.php?f=2&t=67833&start=625#p1355631
file.php


file.php


file.php


file.php


file.php


EDIT: (July 2017): Some pics of present state, link to post of current configuration:
https://endless-sphere.com/forums/viewtopic.php?f=2&t=67833&p=1306890#p1306890
file.php


file.php


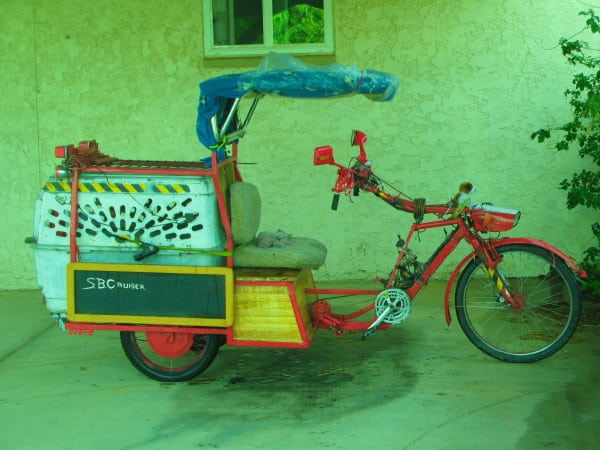
EDIT (May 2017) : Added in some pics of it's present state:
file.php


file.php


file.php


file.php


file.php


file.php


file.php


file.php


file.php


file.php


Pics of previous state:

file.php


file.php


file.php


His idea was a lot simpler, I think something sort of like the Schwinn trikes (merdian? I forget), or the ones DDK's trikes are based off of, etc. But those won't exactly do the sorts of stuff I need to do, and if I have a trike it might as well be able to do what CrazyBike2 requires a trailer for.

So, I came up with a much more grandiose design, which we didn't build, though I might sometime in the future, after I ahve some experience with this one.

There are some posts in the DT thread about that:
https://endless-sphere.com/forums/viewtopic.php?f=2&t=22720&p=1022251#p1020095
https://endless-sphere.com/forums/viewtopic.php?f=2&t=22720&p=1022251#p1020923
https://endless-sphere.com/forums/viewtopic.php?f=2&t=22720&p=1022251#p1020933
including bits about "in-hub" steering (not really in-hub in the traditional way, but not using a "fork and steerer" like normal), and a leaning trike front end.


Sicne that was too complex for a 3-day build, we went with essentially making a new front end for Delta Tripper's existing backend, and using 20" wheels on that backend, instead of 26", which lowers the seat significantly, and lowers all of the weight, and moves the front wheel a lot farther away from the seat, essentially moving the seat much closer to the rear wheels (without actually moving it at all).

This is all to make it much less tippy in turns, cuz DT got it's nickname from it's ability to tip over at the slightest thought of turning at any speed, or entering/exiting a driveway at any angle other than perpendicular.

It seems to have worked, though at present it's only been tested in the yard at a few MPH as a barely configured pedal trike (no brakes even), and on the road once we added a brake.

Video of Dogman riding it as soon as it finishes uploading. I think he got video of me rridng it too. the rattle is the chain touching the top edge of the axle housing--this was fixed later.
[youtube]1nM6tmcNKDc[/youtube]


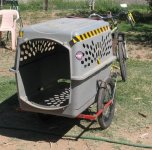
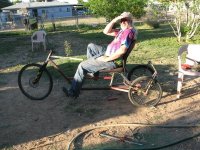
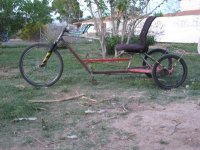
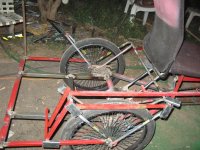
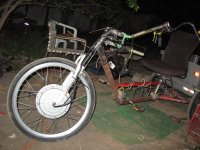
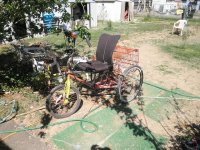
For now, what we built looks like this, except it has a front hubmotor now and no brakes.
IMG_1129.JPG

IMG_1128.JPG

IMG_1127.JPG


And without the kennel on the back, plus some magnetically-stuck-on frame over the tires, which will get welded on once it's decided exactly where they'll go:
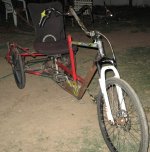
IMG_1116.JPG

View attachment 4

IMG_1117.JPG


And a top shot of the cargo area
View attachment 2


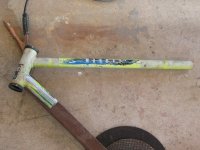
Basically, Dogman picked up this ReBike:
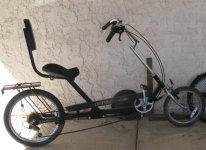
IMG_1076.JPG
and we copied the essential geometry except for using a 26" wheel instead of 16" in front, and made it a trike. We started with a steeper headtube angle, but due partly to something I chose to do and partly from factors we don't know, we ended up with a much slacker one. It does cause teh front end to flop over, though, so I might wanna do something about that (I think DDK has an answer for that on one of his trikes, I'm still checking).


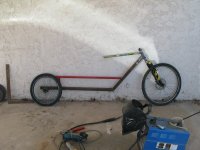
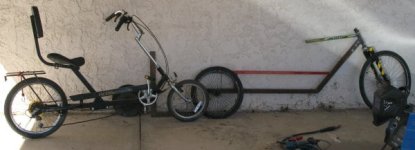
This became the front end of the trike. Then I cut Delta Tripper in half, removing the whole front end from just under the seat, in front of the seattube and BB. I remvoed the basket cage from it, and the "deck", all the grillework, and got the trike kit part down to just the bare axle and connection to the seat/bmx frame that DT started with.

That got trimmed, notched, and prepped for welding to the new front end. Then we bolted on wheels, and had a roller, though it took some more work and inspiration to get the steering, etc.


There's a lot of little details to it, to be discussed in other posts, with pics.
 
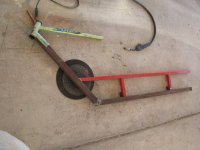
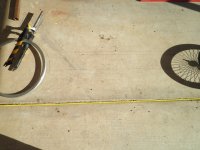
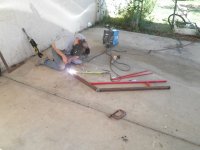
Ok, so, first Dogman did the sensible thing, and laid out the basics of the frontend on the driveway, drawing it up an dmeasuring it out, copying and modifying as needed from the ReBike (whose geometry seems to work great at low speeds and is low and long and easy to reproduce with stuff I have here).
View attachment 6
IMG_1074.JPG


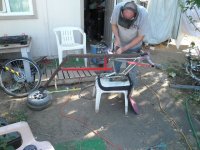
Once he'd got it laid out, he cut the metal for it out of scrap I had here, and between us we got it welded up. Then we needed a headtube that would fit a threadless fork (cuz I have at least 3 of those, and it's easier to do remote steering setups on them, and other stuff, whcih I thought I would end up doing with this due to the distance from seat to steerer).

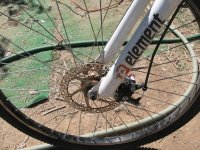
I found a bike Randall (local friend) had given me for parts/etc a few years ago, which I'd used bits off here and there, that had the right size headtube to accept the races off the alloy Mongoose Hatchet frame from Bill that goes with the crappy 29er Elements fork that's on the trike (for now, until I get something better, or fix the Manitou Skareb fork).
View attachment 10
View attachment 9
IMG_1070.JPG
IMG_1071.JPG

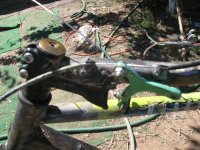
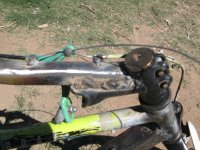
When I cut the headtube off teh frame, I left a good several inches of downtube to be inserted into the big square tube that forms the downtube of the trike's frontend, as it is a perfect fit, and should make the whole thing stronger there (as opposed to just fishmouthing the square tube to go right up to a bare headtube). I also left teh whole toptube, so that it oculd either be bent downward to make a triangulation, or left straight to go back to the top of teh remote steering pivot tube, or whatever. it's still uncut and unused, and will probably get shortened a lot and the area used as a controller space. That was all then welded to the main frame.


After some issues with fork height vs design, we went with the crappy element fork cuz it's taller (29er vs 26) but I may go back to a 26 later. Not sure. I also have a slightly better 700c fork that i might be able to get to work for rim brakes on here, but it's not a threadless type, complicationg steering setup, and it's also alloy so will probably break with an x5304 in there. ;)
IMG_1075.JPG


I have a lot better 26" manitou skareb fork, but I have to make a tube with dropouts on it to go over the bottom fo each fork leg, cuz I broke the droputs on it in the x5304 offground testing. :( It's also alloy.

I have a not-great suntour 26" fork, too, used to be on CrazyBike2, but it's wearing out and feels loose in the bushings around the fork legs. Buut it has rim bosses for brakes, and so it would simplify that part.

For now, the steel element fork will stay, and i'll have to add rim brake bosses to it. it's steel so they can be welded right on.


Have to add those cuz there's no disc mounts on x5304 I have, and no other brakes yet. Had used a promax 160mm disc on a regular bike wheel but since the easiest way to add the motor to the trike is a front hub....
IMG_1094.JPG


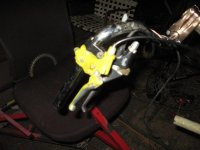
Brake handles...presently there is a locking lever taken from DayGlo Avenger (which hasn't been used in years, so it's getting cannibalized for this project, too), and a WuXing lever from Dogman, both on the right side. WX is used for ebrake handle, and will also run a mechanical brake if needed (but not disc cuz it's the wrong mechanical advantage). Locking lever did run the disc fine (correct MA), and will run the rim brakes so I can physically lock the wheel so the trike doesn't roll off on slopes.

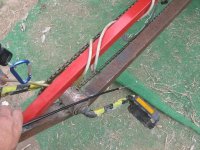
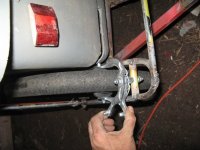
I didn't have a long enough cable for the brakes, so I "tied" two together by adding cable stops to teh steering tiller tube, and running housing up to those on each side, and no housing between, and using the pinch bolt off a junk bmx brake, drilled out for two cables, to clamp them together betwen the stops. It works ok so far, but i'll wanna get some fresh cables that are long enough before I really trust this thing.
IMG_1093.JPG
IMG_1092.JPG


There's a dual brake lever from AussieJester a few years back that will run the rear brakes.

Those will be a pair off a kid's BMX. Calipers, but better than most I've had off that type. Dunno how well they work yet, as I ahve to add mounts for them. Dogman already cut and fishmouthed a crossbar for them to bolt to on each wheel, but some mods to the bars those go on need to be made to ensure the kennel or cargo does not interfere with brake operation.


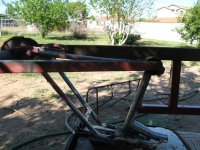
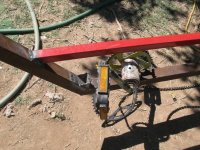
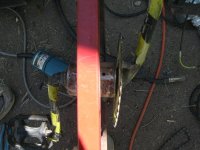
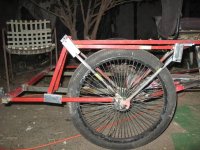
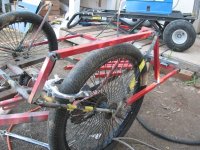
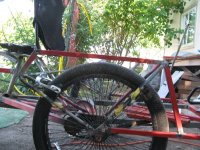
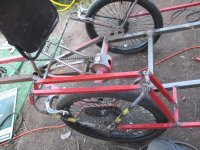
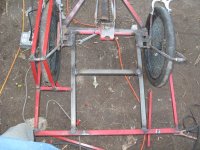
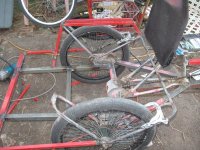
Cargo area: I got rid of the whole rack and only kept most of the frame around each wheel, and the front crossbar. This is to make the most of the volume back there, and to put that closest to teh ground I can, so COG stays low to improve anti-tipping.


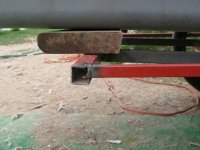
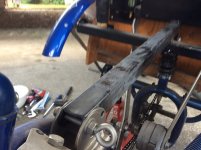
I added square tubing (as seen in OP of thread) to extend the cargo area out past the rear wheel some distance, to give a big volume without *too* much risck of wheelieing the trike with a big load back there.

Basicallly this carg oarea has about as much space as the original kid's trailer I started with, that Hachi's trailer (mkII) had been sometimes (or intended to; I forget) bolted to, and that I used for Tiny's kennel trailer (mkII) as well.

It still needs fenders around hte wheels so that cargo can't rub on them, desing for those is shown in OP, minus the coroplast that will get cut and bent and tied around them.

Also still needs a ball hitch to pull the trailer if it has to. (like if I wanna take both dogs somewhere, I can get or make another kennel to go on the trailer, and use the existing one on the trike, or vice-versa). But that hitch will have to go on an extension out around a foot from the existng backend, cuz otherwise it'll be inside the kennel.


Steering...have no handelbars or stems lng enough to reach the bars from the seat, so I made a tiller out of a piece fo toptube or downtube off antoher old bike that already had donated it's seattube to the delta tripper's hadnelbar pivot tube, which i left intact in case I need it for remote steering. The tiller has the dt's old bars on it, so that they are positioned like CB2's for ride comfort. But when i need to steer more than a little i'll have tost op pedalling and leave my legs even so my knees clear the swinging bars. I'm ok with tah for a more comfy regular position. would be better with remote steering butthis si simlper and quciker so that's what we get for now.

I couldn't bend the tiller bar so Dogman had to do that for me.


I was gonna use the black suntour forks but didn't hae a star washer in it to screw the top down into, and the whilte elment forks do, so thye got used.


sorry if this is disjointed i keep dozing off writing it. more later.
 
Relaced the x5304 back into it's 26" wheel after 3 tries of lacing and unlacing cuz I was so tired I screwed it up in various different ways.

it's nto trued but it's usable. Then spent 2-3 hours trying to get a cntroller to work on it. The 18Fet I'd used on it to test it's torque on teh BMX (by destroying the brakes on teh BMX tryng to stop it) isn't working now, though ti was fine when I finished that test and put everything away.

Tried a crystalyte and it seems tow rok but for some reason I can't find the right combo on it.

Tried another crystalyte with a note on it that it's fried, but since it was sensorless with a learning jumper I wanted to try it out anywa. Ran fine offground but onground with me on trike it wouldn't move unless pedalled first, then was still rough like it was running on two pahses instad of three. Guesssintg there's bad fets on one of hte phases?

But at least themtoor is tested on the trike, so i know it works there.

looking at adding a middrive too, but dunno for sure.

Still gotta add brakes cuz the fork only uses disc, and the x5304 don't have a mount. probalby tgonna add rim brakes to the fork like i did on the bmx fork on the old DT and on CB2's present fork. Also gotta add brakes to the rear wheels, but Dogman po9inted out a problem i didn't notice, where the kennel interferes with teh palce were were gonna put the brakes there--using the caliper brakes off one of the bmx bikes, till something better can be had, if needed.

Ideally the regen on the x5304 plus whatever front brakes shoudl be enough to stop it, but if it's got me on the seat and a dog in the back, plus batteries, motor, etc., ti's gonna be heavy and take better brakes or more of them to stop it.

am actually considering dual brakes on each rear wheel, and maybe even dual brakes on teh front fork--one set in front of the fork and one set behind it.
 
ReBike vs new frontend of frame:
IMG_1077.JPG


Frontend lined up sitting on the now-detached rearend of DT:
View attachment 22

Setup to be level with seat bottom, so that "downtube" meets the front of the trike's axle mount (to be welded to that for cantilever strength) and crosses under/thru the "BB" of the former DT BMX frame (to be welded there for primary connection), with the "toptube" fishmouthed and ready to weld to the "seattube" of the former DT BMX frame.
IMG_1080.JPG

Notching of that "BB" to hold the "downtube" for welding
IMG_1081.JPG


Note that somewhere in there I cut off the added width on the rightside wheelstays of the trike kit, which I'd had to put in there to make the Fusin rear wheel fit in the narrow dropouts and not have tire rub, etc. But that width also meant it wouldn't fit thru the front door, and this trike will need to do that, so back to original width it had to go.


Remains of DT, to be further cannibalized:
View attachment 19


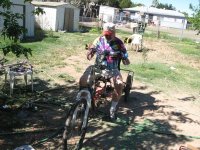
Dogman on the trike checking out the pedal placement vs seat placement
IMG_1085.JPG

Attempted to get pic of Yogi "helping" but he got up before I could snap it (makes him look like he's giving a crappy opinion of it instead ;))
IMG_1086.JPG


A while later, dusk (flash makes it look way darker out than it really was), Yogi poses with just-barely pedalable trike, temporarily using the bars off the ReCycle lowracer I never finished (I think most of that frame went away during the post-fire cleanup?).
IMG_1087.JPG


Trike by itself in pedalable configuration, with the old CB2 front fork 26" before we switched to the 29er elements fork.
IMG_1089.JPG


Next day middayish, trike with the 29er fork, disc brake front, broken-off BB (yeah, I do great welding :roll:) tiller steering (wires wrapped around tiller are the lighting that was still dangling from the DT bars now installed on this).
View attachment 14


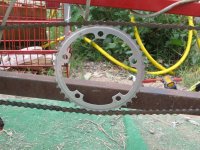
Note that at this point, we ended up using a really big ghost ring (52T?) to tension the floppy-loose chain, which we'd thought was not loose when we set it up, but turned out very loose, just not enough to take out links to fix.


The BB I broke off by testing out the brakes, by pushing as hard as I could against the pedals (which really isn't very hard, as such things go), while holding the handle down to the bars. It was enough to actually spin the left rear wheel (driven wheel, 20", slick worn-out BMX tire) a little bit in the dirt before it caught, and jerk the trike forward a bit just before yanking the BB off teh "downtube". :(
IMG_1095.JPG

View attachment 12


Since it was broken off anyway, we took the chance to do as we'd discussed and move the BB up and forward to fix the chain tension, which as a side effect also makes pedalling a hair easier. Still ended up needing a ghost ring, but much smaller.


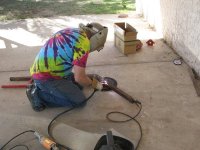
However, I managed to screw up the alignment badly the first time, even though I tacked it down while perfectly straight. Somehow during the heavy-current welding I had to do to get the BB securely welded on there, I must've "cut" thru the tacks and while the pool was still molten the chain weight must've pulled the BB out of alignment. It took around an hour or maybe more ot cut into the welds, pry it up, and eventually get it off of there so I could fix it, wiht Dogman's help. :( Probably would've been quicker but I didn't wanna take the cranks out, so I couldn't get to the welds on the chainring side to cut them.
IMG_1098.JPG


Dogman trying it out after the fixes:
IMG_1100.JPG

IMG_1101.JPG


Then we rode it around the street, and took it over to the front door for the critical test: If it doens't fit thru the front door, it's a problem, cuz I'll need to be able to bring it inside to keep it out of weather and from causing temptation to passing eyes. Eventually I may get one of my sheds emptied enough to use as a "garage" but until then, inside ti's gotta go, just like CrazyBike2.

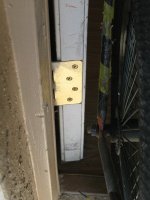
Thankfully, it has plenty of clearance, and I can get even more if I flip teh front door so it's hinges are on the right instead of left (which I've considered several times).
IMG_1103.JPGIMG_1104.JPG


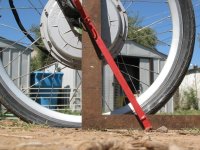
Since fenders are planned anyway, Dogman had an idea to use the fender material (probalby coroplast cuz I have it) to go down just past the axles, and to cut teh axle itself just past the nut face, which wlll both make the trike that much narrower, and also less likely to catch on the doorframe and thus be able to worry less getting it in and out of hte house.

Might also allow me to widen the trike a couple of inches (if I flip the front door) to improve anti-tipping.


For the fenders, since they'll basically wrap up and over the wheel, the wheels will need more frame than existing. Plus, if I have cargo like bags of dogfood, or other irregular shapes, etc., I don't want htem rubbing on the wheel, or forcing the fenders to. Or if I have big heavy stuff that is wide enough to have to go over the wheels...the framing below (not yet built, just scrap magnetically held on to see teh look) would do a lot to fix that.

IMG_1109.JPG
IMG_1110.JPG


Right then as I took those pics, Yogi came to investiagate; Tiny has pretty much stayd inside almost all the time we worked on this, partly cuz she didn't like the noises, and partly cuz she was still getting used to Dogman being here, so she tended to stay away from him like she did the last time he was here last year (though eventually she got used to him this time, whch she dind't last year). Now both Tiny and Yogi miss him and keep looking around to see where he went. :lol: I think Yogi is actually depressed. :(

IMG_1111.JPG


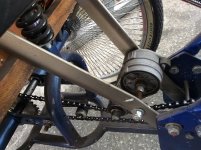
But you can see the ghost ring in there , it's smaller, like a 42T I think. I am not sure it's required but it looks interesting and should help with tension when hittng bumps during pedalling, in those emergency cases wehre I have to do that (hopefuly never, but it's there just in case).


This is the locking lever here. And the wuxing ebrake lever next to it.
IMG_1123.JPG


This is a 4pole brushed owerchair motor and wheel that I considered using for the rear wheels (I have a pair), though the hub on the wheel would need to be bored out a hair to fit this axle. These also have some bolt-on suspension "swingarms" btu I hven't run across them yet. (actually ahven't found the secnd motor either). They have quite a lot of torque, and were meant for smaller 6" or maybe 8" wheels, and these are closer to 12", so they'd have higher speed, especially if hte mtoro was overvolted. I'm not sure what voltage it would take to get up to 20MPH, though. (they are the motor sI originally meant to use for the big dogtrailer).
View attachment 2


I dunno if they'll ever get used on this trike, but they may well still go on a trailer. One catch is they have no clutch or freewheel, and the gearbox will cause a lot of resistance/drag, so they have to be powered at the speed I want the vehicle to move. :/


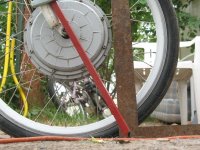
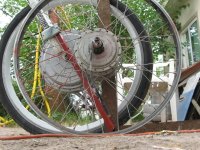
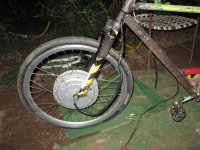
At least for now, the x5304 is what goes on here for power, as a front 26" hubmotor wheel.
IMG_1132.JPG


and a shot from the front tha tshows the dog kennel still on there, but with the top off (is upside down in the bottom). Could be used this way as a cargo tray for stuff that doesn't need to be secured inside a "box", or is too big to fit.
 
Dogman Dan here, finally posting my pictures.

The idea I had was to build something like this. Bmx frames for the front end, and the rear wheel dropouts, front hub. Initially no pedals, but eventually power one rear wheel with a jackshaft to transfer the chain to the right wheel.View attachment 10

But then the morning I left for Phoenix, I found this at the annual bike swap in Las Cruces. I immediately saw we could have the entire front end ready made easy.View attachment 9

One problem though, once I put a new tube in it, and test rode it, I was going "this thing is mine". Sorry AW, I'm keeping it. But no problem, AW had some of the same 2" tube in the yard. So the mission became to copy it.

Not hard to do at all, starting with a floor drawing of the same frame, but laid out for a 26" front wheel and fork.Floor sketch.jpg

Welding on the headset. The headset got slacker than we planned, but it was just too easy to put the frame tube down the throat of the square tube, then weld it for a very strong connection. Welding the headset.jpg

All went well, with Yogi supervising. View attachment 6

So we ended up taking a lunch break, with this much progress.View attachment 5

Next step is to remove the rear axle section from this. The old delta tripper. Too short, too tall, very easy to roll it.Delta tripper.jpg

Trying to eyeball where to cut the DT frame. Decided to cut just in front of the seat tube rather than a complete start over with just the rear axle assembly. View attachment 3

Here the two halves get joined for the first time. Notice the main beam goes all the way to the rear axle. No folding in half under a load for this rig.

Joining the two halves.jpg

Many of my pics duplicate ones already in this thread. Jumping ahead to the last day, AW is trying to get a 5304 to run for some more test rides. Still no brakes, since the fork on it doesn't have rim brake mounts yet. As shown before, the rear brakes we planned interfered with the dog crate cargo box. 5304 on it.jpg

But it's too good an idea, to put the dog crate on it. Carrying a dog, the bike doesn't even wheelie when the rider gets off.
 
This has been fun, especially day one, where we got it as far as rolling chassis that pedaled, but no brakes. After that, the less fun for me part, where you go OK because we did this yesterday, we have to fix that, which fix leads to two more things needing changing. The ol familiar one step forward, two steps back deal. :roll:

Example, we had the rear brakes all figured out, but then later realized that the dog crate was going to take up the same space as half the calipers. Very interesting to see how smooth the front half went, pretty much designed and built with few modifications from our plan to copy the recumbent bike. Then we go to making the existing back half work to do a new thing, and the "easy" already built part starts turning into a series of problems needing adjustments hard to foresee.

But in the end, I think the resulting utility trike is turning out to really be something ride-able and useful. Good dog hauler, good dog food hauler. A very usable spare for when crazy bike is not running. To be honest, looking at the delta tripper, It just looked like a trike that couldn't haul much, and would want to tip a lot. This trike still lifts a wheel in a sharp turn, it's still a delta trike after all. But the recumbent design using small rear wheels seems to make it easy to control in a tip up turn. VERY comfortable to sit on it compared to a Schwinn or other standard upright trike.

At first look, it would seem that a dog in the crate would wheelie the bike, even with a person in the seat. The solution is ballasting the front. A 5304 hub motor on the front wheel solved that potential problem easily. :)
 
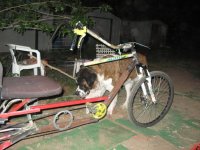
Yeah, we got Tiny to go in there, with no rider on it, and she didn't wheelie the trike, even when she got back out again. Dogman has pics whenever he gets back to post them.

I tried to get Yogi to go in but he wasn't having any of it; it took some doing to get him in the trailer too, so we'll have to work out this whole thing again for him.


Probably be easier once the kennel can be bolted in or tied down in some way, so it doesnt wiggle around, and once the trike has a brake I can lock with that yellow lever again so it doesn't roll around while he's getting in.


BTW, here's almost 5 years ago with this kit on CrazyBike2:
file.php


Still used NiMH back then on it; it was very tippy, 24" wheels in back, a little farther forward with seat vs axle, IIRC.


Dogman just left to go back home, and he and I were just going thru some last "hmmmm" moments on the trike, like the trailer hitch. He had a possible idea for one that swings out of the way, hinged left or right at the center, with a locking pin, to let it be stowed for when the dogs are going in or out of it, or when the trailer is not being used, etc.

Most likely though it'll just be a regular hitch bar straight back in the center, with teh ball just under/behind the door of the kennel. I guess tha'ts like 8-10" behind the frame of the trailer. Probably will use a single straight beam along the bottom of the cargo area to run to the hitch point, weld two tubes one on eeither side of taht just for the part past the rear beam, then maybe triangulate from that to the bottom of the rear beam, and put the ball at the apex of that.


Before he left, Dogman picked up a couple of Bell cable packs at Walmart for the trike; each comes with two shifter and two brake cables, each long enough to be used on the rear of most bikes, and so long enough for the front of this one for sure, and *almost* long enough for the rear of this one.

So what will probably happen for now at least is to use the cable-combiner clamp from above, to get the almost-long-enough cable from a single brake handle up on the bars down to a splitter off a BMX, whcih can then pull both BMX brakes on the rear wheels. Each of those brakes has its own adjuster, so theoretically I can make them pull the same to avoid brake steer.


One thing we talked about is runing the wires thru the frame, since it's a big emtpy sqaure tube, and there's the tiller tube too. The contrller's gonna go in the space abov e the epdals below the hedtube, with cover plates probably rivnutted to the frame, not to seal it up completely but just to hide the mess of wire that has to go thru there, really.


We also talkeda bout names, and paint, etc. "three dog trike" is one taht came up, but they'd ahve tobe a lot smaller to fit three in there--I don't think I can get more than one of these two in there; they might be ok getting in but they couldn'tturn around without stepping on each other and I dunno how well they'd ride together.

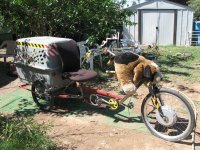
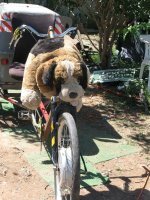
Paint...maybe get some brown, black, and white, and pianti it up like the dogs and stick a floppy stuffed animal SB i've got on the front of the bike.


Today is a lot cooler than yesterday, but cloudy and may rain. after i feed the dogs in an hour or so, I'm gonna take a nap (on purpose this time) an dthen see what i can get done.
 
More thoughts and pics:

This is the ghost ring close up
IMG_1137.JPG
Ever since I heard of them I wanted to use one on a bike but couldn't cuz every chainline always had interference with other stuff. (frame, batteries, etc., on CrazyBike2 primarily). Now, I can use one on here. :)


PEDAL GEARING:

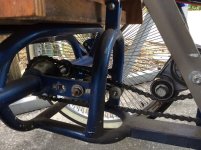
I forget exactly what teeth everything has, but I *think* it's a 34T front ring going back to a 24T rear on the center of the axle, then an 18T at the othe rend of the axle, to a 16T on the BMX freewheel just behind it. I don't know exactly what that works out to, but I know that on DT I could pedal relatively easily at a few MPH without motor power, as long as it was all flat terrain. On DT it was just the 34T front down to the 16T BMX freewheel, no intervening gears.
View attachment 4

View attachment 3


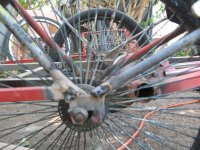
I can pedal this thing around at a few MPH, too, but once I get everything on there it's gonna be harder to get started cuz it's gonna be heavier. I'd like to add at least a 3speed hub to the chainline, preferably inside the driven rear wheel, but to do that i'd need to do some drilling on teh hubflanges, cuz I *think* those are 72-spoke BMX wheels, radially laced, and the 3speed IGHs I have are 36 (or 32?) hole hubs. If they are 36 and rim is 72, then I could just drill an extra hole between every existing one, and then it'd lace right up, cuz the flanges are similar enough diameter and spacing, I think.

I've never done that sort of thing, though considered it several times for different stuff, so it is an experiment I'm interested in trying.

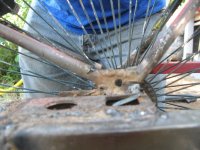
The biggest catch is that the spoke nipples are so very close togehter that I don't think I can get my spoke tool in between them and still turn them enough to do the tensioning. I'd probably have to make a wrench for them.


Edit: a thorough recount using hte picture above comes up with 67 spokes. :/ Maybe I just can't count, though, cuz it can't be an odd number.


STEERING / TRAIL

I measured teh trail and found a little over 6" of trail, which explains the flop-over wheel when let go.


IMG_1136.JPG
I can fix it either by redoing the headtube angle, or by adding an extension to the fork that moves the axle point out about to where the front edge of the hubmotor itself is, presently. Then I'd have about 1/2" of trail.
IMG_1135.JPG


But...having to do that means I then have the option of using the Fusin 26" *rear* wheel,
IMG_1144.JPG
because I can weld what amounts to a rear-end frame for 26" wheel onto a steerer tube. The angles things will be at will probably prevent a regular fork from working, so I could use a rear suspension setup instead, like that from the 29er frame, built into a "fork" made to go into the threadless headset on the trike.

Now, there's probably no particularly practical reason to do this, since it would be WAY simpler just ot redo the headtube angle...but it might be interesting to do it the hard way. :)

For now, it'll just stay the way it is, using the front x5304 26" wheel in a regular fork (probalby switch out to the black 26" one with rim bosses though).


ALTERNATE MOTORS
As noted above, if I build a rear setup onto a fork, I could use the rear Fusin geared motor on there.

Or, I could strip the Fusin out of the wheel, and use it to drive the chain via a sprocket bolted to the disc mount on it. It'd be a "funky" setup, cuz it would have to go to the right of the chain and just below the top of teh chainline, so the sprocket would drive that, pulling it along. It wouldn't freewheel directly when not motoring bu tonly pedallng (very rare case I hope), but the whole case would still freewheel on it's clutch inside the motor.

The same could be done with a DD motor, or even that powerchair motor.

Any of those methods only drives the left rear wheel, but I could modify the rear axle setup so ti drives *both* wheels, using a Peerless differential as Chalo described in the original Delta Tripper thread. I don't have one yet, or stuff to make one I don't think, but I could find one somewhere.

I do have a transaxle frrom the powerhcair that melted in the fire, and that may be a peerless style differential inside that--have to dig it out and open it up to see. (the motor on it doesn't seem tow ork, but I'm sure I can work out an input to it easily enough).


BRAKES

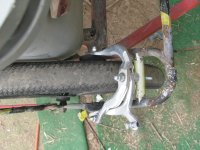
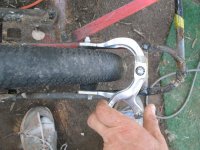
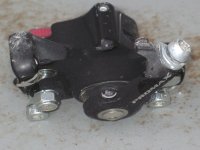
These are the BMX brakes to be used, kind of how they'd be on there, though presently they'd interfere with the kennel corner so gotta reshape the frame a little to mvoe them.
IMG_1140.JPG

and these are the cables Dogman got,
IMG_1148.JPG


and a couple pics of one on the frame--first to the front wheel for disc brake/etc, and then to the rear for the bmx brakes. They wont' reach all teh way back, so I'll have to make cable splicers like what I used on the tiller, or at least one split to two brakes. There might be an option for the splitter using the BMX headtube rng-splitter, but I'm nto sure exactly how to do it without mounting a piece of tube on there to put it on and react against. I'll figure something out.
View attachment 8

View attachment 7

IMG_1151.JPG


and the dual brake lever
View attachment 5


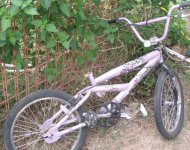
And the donor BMX for the brakes, cuz they're a lot better versions (adjustabilitywise, and pads) than any of the other ones. Was considering turning this thing into a deathtrap with the x5304 as a rear 20" and the monster 18FET and a frontmounted battery, just to have around to show people what ebikes *could* do for fun, but I'll probalby enver use it anyway, or at least not enough to justify having all that stuff tied up in a bike I don't use, when I could use the power in the trike. :)

IMG_1138.JPG


CARGO AREA / DECK
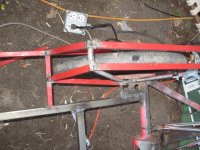
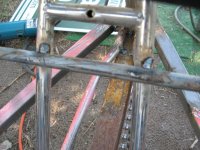
On the cargo area, I chose to put all the tubing in line with the axle and other bits for strength, and because it puts all the weight (if on the bed of the cargo area) another inch or so lower than otherwise. So that also means the "transmission hump" sticks up and gets in the way on the kennel's front end, causing it to slant down. Simply putting a 2x4 (or whatever) at the back end between it and the deck lifts the back end of the kennel up enough to be about level. Would also need similar supports along it's base when there's a dog or heavy stuff in there, so it's pretty likely I'll just bolt the lifters to the base of the kennel itself, as they won't interfere with it's use on the trailer, either, AFAICS.
IMG_1142.JPG

IMG_1141.JPG


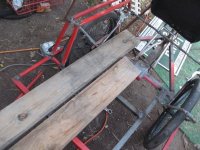
I'm probably going to make a plywood deck for the cargo area, since I have some around the right shape/size already. I was going to use thin aluminum, rivnutted to it, but it won't be as strong by far as the plywood, and it'll be noisier on bumpy road surfaces, whree the wood should help damp such things.

Also considered using 1x6 or 1x4 slats, as I also have some of each of those in short pieces, and leaving gaps between them that I can run cargo straps thru to the frame itself.

Havent' decided either way, yet.


I didn't get anything done yesterday othe rthan taking the pics above (dozed a lot off and on), or so far today (rain and drizzle all day so far). Since the drizzle is down to a sprinkle now, I'd be out there working on it anyway, but the rain is making my joints and bones all achey and hurty, so we'll see what happens later this afternoon (it's about midday right now) as it warms up to the low 60sF, or tomorrow, when there's a lot less chance of rain and it's supposed to be at least partly sunny.


(edit before submitting: I was adding in pics/etc to a post above, and typing this up, and dozed off and on thru both of those too...so now it's midafternoon already and still drizzling/sprinkling, so though I ache I still think I could do somethng if the rain would let up enough to use the electric tools out there....is tempting to dump stuff out of the shed DT had filled much of, to make room for working in there, but I could not do the welding there cuz the 220V cord won't reach, just the grinder/cutter/etc).


(edit again from dozing--now it's late afternoon, rain has stopped, is warmer out, so maybe after I eat I'll get a litle something done before it gets dark. More likely be tomorrow.)
 
My brother and I built a trike which broke in the end. It was intentionally broken after noticing a crack in one of the metal tubes.
While it lasted it was such a blast to ride. A 25A controller running to a 48V 25Ah Chinese duct-tape battery powered a cheap ~1000W motor, propelling the rig up to 45KPH (28MPH), using 15A to maintain that speed on the flats, on 20" BMX wheels with knobby tyres. Sitting so close to the ground made it feel a lot faster!

It was front wheel drive in both pedal power and hub motor (although it did have significant traction issues from standing starts). You could even wheel spin by just pedalling hard in a low gear. The rider seating position was just above the rear axles, while the ~20Kg battery sat in a shelf below. The result was a very short wheel base trike that was incredibly difficult to pick up a rear wheel while cornering, let alone tip.

Of course, the front pedals meant that the riders legs would have to turn with the corners but this was simple enough once you got used to it. The trike could easily turn around within the length of it's own wheelbase. By comparison our electric tadpole trike does a 6 point turn in the space that the delta would only take 1.

The entire thing was made from scrap from other projects (including the office chair), which is why the wheelbase ended up so short (ran out of metal!), but it worked out in the end.
Cargo carrying capacity is limited to what you can fit into a backpack that is then hooked onto the "shoulders" of the office chair backrest, which of course makes front traction even worse.

We plan on building another using the existing electrics, but will extend the wheelbase so the rider sits between the front and rear axles to increase weight/traction on the front wheel. Rear suspension is a possibility.


It's about 1 horse power...get it? Haha!
 
Cool rig, guys.. glad to see you two building crazy sh** again :)
 
good job fellas I like. it would be nice if you could add rear suspension it works good and makes it a smooth rider. I will try to remove the rear wheel on (BIG BLUESTREAK) and let you see how it works, anyway keep up the good work fellas.
 
I have an idea on how to do rear suspension if I use those powerchair motors and wheels...but it's not happening right now. That would also negate having the rear pedal drivetrain, and force me back into chain driving hte front wheel like Delta Tripper did.


There are some other options for rear suspension, but they'd require significant changes to the whole axle and pedal chaindrive setup, as well as the whole frame around the wheel. I haven['t fully worked them out so no drawings or pics yet. Most likely they would not be done on this trike, but on a future version--probably on a leaner since the suspension can be made in a way to help it lean. (I wish the second of the two crappy bikes I was gonna use to build a test case for that hadn't been stolen after the fire--I probably would ahve tested the theory by now)


In the meantime, here are some pics of today's work, interrupted by an approaching storm (which may or may not actually get here, but the thunder is audible and scaring Tiny and Yogi into staying in the bedroom, and the lightning bright, with wind picking up). Figured I better clean up and put stuff in the house in case it does actually rain again.


Last first, I changed the front fork to the black 26", from the white 29". This does two things---it gets me rim brake bosses, and brings the front down almost two inches, which decreases the trail some, though I haven't measured it yet.
IMG_1188.JPG

I did have to hammer the star washer down out of the white fork's steerer tube (using a seat tube and a mallet), spread the star back out a little, then hammer it into the black fork's steerer tube. Unfortunately I cannot really get the star washer to spread enough and it will not "latch" into the tube, so it slips upward again when I tighten the cap bolt. :(

But it does hold things together while I tightend down the stem clamp, which seems to be working ok.

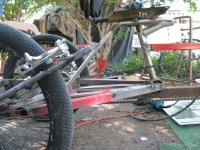
A last check with the kennel on there to be sure the brakes clear and frame fits.
IMG_1184.JPG
View attachment 3
IMG_1186.JPG
View attachment 1


I'm thinking about a wooden deck for the cargo area, out of 1x6 pallet leftovers. Dunno what I'll bolt it to the frame with yet. Will weld tabs to the frame for the bolts to go thru so I am not drilling thru loadbearing stuff.
IMG_1171.JPG


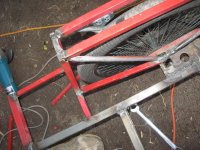
Before that, I tacked together the frame around the wheel on the left side. Took way way longer than I thought to cut and shape the ends of each piece; I just can't hold stuff right so I either screw it up or send it flying when it touches the grinder wheel. :/

Eventually, I got all the bits close enough, assembled and tacked them, ready to weld up when I am sure that's how they'll go. Still gotta do the right side, too, and make sure the kennel crate still fits right (it does so far).
IMG_1164.JPG
IMG_1165.JPG
IMG_1168.JPG
IMG_1169.JPG
IMG_1170.JPG
IMG_1175.JPG
IMG_1176.JPG


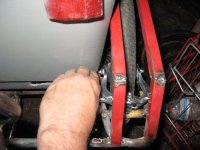
Before that, I test fit teh brakes on both sides, adjusted pads, and made sure they'd clear the kennel crate.
IMG_1157.JPG

Before that, I cut the tubes for the wheel frame forward part, down near the wheel axle, just a notch so I could bend the frame forward to meet the "seat stays", clamp and tack it there,, then make sure the brakes fit and cleared the kennel, which is the reason for doing this.
IMG_1158.JPG
IMG_1159.JPG
IMG_1160.JPG
IMG_1162.JPG
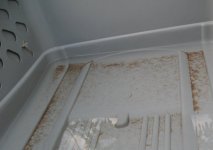
I also got some pics of the rainwater in the kennel--it's over an inch deep
IMG_1154.JPG
IMG_1156.JPG


I thought I took more pics than this, but I guess that's all. I must not have fully pushed the shutter button down on all of them.

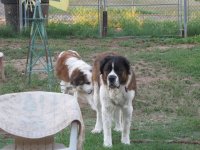
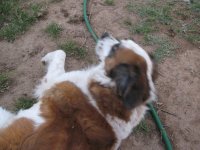
Then there's some pics of Tiny and Yogi, who came up for attention now and then, including a rare shot of Tiny begging for a belly rub (I hardly ever have a camera in reach when she does this).
IMG_1172.JPG
IMG_1173.JPG
IMG_1174.JPG
IMG_1177.JPG
IMG_1178.JPG
IMG_1179.JPG
IMG_1180.JPG
IMG_1181.JPG
IMG_1182.JPG
IMG_1183.JPG


Maybe tomorrow I'll get some more done. Was hoping to make it motorized for sure by tomorrow, and test it around the neighborhood at least.
 
These (2) guys (AMBERWOLF AND DOGMAN DAN) are true builders and can make something to ride out of other peoples junk. and it looks like they both just love to build things.keep it up fellas. :)
 
Thanks! :oops:


You mentioned rear suspension--does one of your trikes have it, and if so, how does it work? Probably just a few pics of the rear end would let me figure most of it out; you shouldn't have to take anything apart.

I gotta go do some yard work but when done with that it's back to figuring out the motor part of the trike (cuz I can't do much with it, practically, without that).
 
Dude, that's awesome. Your bikes are still some of my favorites.

You said this bike replaces the Delta Tripper. After I watched that video of Dogman tipping it up, I've now got the phrase "Delta Tipper" stuck in my head. :mrgreen:

Have you considered mounting those rim brakes even with or below the frame level? that looks like it would clear the kennel. They could face down instead of up for more clearance. Front forks have the brake after the frame during braking, so there's no reason the rear brakes can't be the same.
 
Drunkskunk said:
Dude, that's awesome. Your bikes are still some of my favorites.
Thanks! :oops: Many Bothans died to bring them about. ;)

If you havent' seen them, you might look up FreakBikeNation, if they're still around (they were changing forum software and I think they lost all the stuff from before, last I saw the new board there wasn't anything from the old one, which is a huge loss to everyone, and I haven't bothered going back). Some of them are pretty standard types of "custom" bikes, but some were pretty inventive. Philfine here on ES is/was a member there and has some interesting stuff, too. AussieJester, too, AFAICR (if he wasnt' a member, he probably shoulda been!).


You said this bike replaces the Delta Tripper. After I watched that video of Dogman tipping it up, I've now got the phrase "Delta Tipper" stuck in my head. :mrgreen:
That was my nickname for it, too, shortly after starting to ride it, hence the first sentence of this thread. :p :oops:


I've been tempted to rename the old one just plain Delta Tipper, and call *this* one Delta Tripper, but I think it deserves it's own individual name.

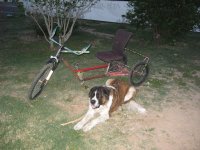
I still don't know what that is, but I'm still likely to go with the St. Bernard theme:
IMG_1189.JPG

IMG_1190.JPG


Have you considered mounting those rim brakes even with or below the frame level? that looks like it would clear the kennel. They could face down instead of up for more clearance. Front forks have the brake after the frame during braking, so there's no reason the rear brakes can't be the same.
Yeah, I thought about that, and Dogman and I discussed it, but these particular ones are designed to push on the frame (they have little stops on the arms just for that) during braking, cuz the pivot is way up there outside the tire circumference. I don't know if that would cause a problem eventually, but I can see how it might, if it repeatedly flexed the pivot bolt where it goes into the frame.

(remember that these brakes came from a small bike that's single speed meant for a few MPH and ridden by a kid, and I'm using them for something with a motor on it meant to go 20MPH with several hundred pounds of bike, me, and dog (or cargo). I expect I'm pushing them a wee bit beyond their intended limits as it is. :lol: )


Plus, more importantly, I'd've had to add a frame piece outside the tire in front and to the side to do it, and decided I would have a MUCH easier time of getting a wheel out for repair (especially roadside) if I don't have to lift the whole trike up to do it. With the mostly-open front, I can lift it just a little, and pull the wheel out that way, even with a load in the back, as long as I have a "jack" to hold it up. (that's something I'm still pondering, but thinking about adding to the frame itself).

Either way it's still easier than working on CrazyBike2's rear wheel, which is a pretty big PITA.


And I took a pic of the trail with the new fork...it's worse, not better. :? I must be doing something wrong measuring things, or else this fork is different in a way I am somehow not seeing that naturally gives it more trail, cuz AFAICT if I shorten the fork but otherwise change nothing then the trail should be less because the headtube angle is less, etc.
IMG_1193.JPG


Anyway, I"m still considering using hte Manitou Skareb fork, with what's left of the broken dropouts ground off and tubes with pinching dropouts put over the now-round ends. Have to take it off the Diamondback Coil frame, which used to be the Fusin Test Bike (funny, how I'm taking apart bikes that motor has been on, to make this trike--maybe it's a good thing I never had it on CrazyBike2. :lol:).

The Manitou has a leak, so it has to be re-aired-up frequently, but it's a better suspension than any of the others, and it'd be on CrazyBike2 if it werne't for that problem and it's alloy lowers (cuz I didnt' wanna break the dropouts, but I did that anyway without even riding on it, testing the X5304 off-ground without any nuts on the axle, like an idiot).
 
This is why the "Sphere" is not square!! I agree with Drunkskunk, absolutely some of my favorite builds in the "and now for something totally different" category....... and bringing in another professional metal mangling artist that will validate your cartoon-like design visions...... PURE GENIUS. I'll buy a ticket to the show so I can heckle your build with some semi-inspirational comedy from time to time? If you don't mind? LOL!

(yet to be named)
I think you ought to call it: "The Acme Products Inc Bike" ...........because it makes me wonder what kind of e-bike a collaboration between Micky Mouse and Wiley E. Coyote (Super-Genius) would produce?

Ha,Ha :) .....seriously, looks good so far guy's!
 
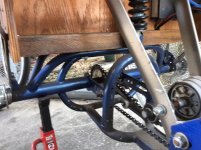
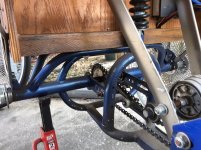
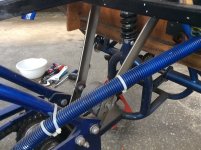
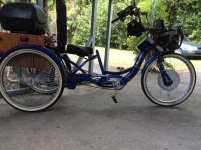
2015-03-21 13.35.25-1.jpg2015-03-21 13.35.25-2.jpgView attachment 2View attachment 32015-03-21 13.36.10.jpg2015-03-21 13.37.40.jpg2015-03-21 13.37.47.jpg2015-03-21 13.40.21.jpg2015-03-21 13.40.34.jpg2015-03-21 13.40.46.jpg2015-03-21 13.41.50.jpg2015-03-21 13.42.38.jpg2015-03-21 13.42.46.jpg2015-03-21 13.42.51.jpg2015-03-21 14.15.43.jpgHI AMBER, I took the rear wheel and the seat bottom off and took a few photos with my IPAD, but it's hard to hold with one hand and try and stay steady.but here they are.maybe later on I can remove more stuff and get better photos.BTW I used an old schwinn air-dine exercise pedal bike frame,there were a lot of good parts for making a long stretch trike with. it was from from a bike shop dumpsterI hope this will help.
 
BLUESTREAK said:
HI AMBER, I took the rear wheel and the seat bottom off and took a few photos with my IPAD, but it's hard to hold with one hand and try and stay steady.but here they are.maybe later on I can remove more stuff and get better photos.BTW I used an old schwinn air-dine exercise pedal bike frame,there were a lot of good parts for making a long stretch trike with. it was from from a bike shop dumpsterI hope this will help.
Thanks for those pics. :) If nothing else, they've started me thinking along lines I had not, before.
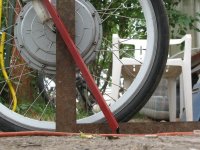
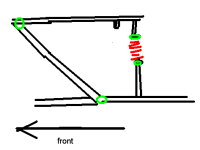
The crude drawing below is what I see in there for the suspension linkages, side view, front toward lefthand side, green circles are pivot points and red is the spring. I am probably missing some parts of it, have to go back and look at it again, or you can correct it and attach your edited copy.
Bluestreak's trike suspension.PNG
It would be relatively simple to make something like that with my trike, but it would not give the dogs or cargo any suspension, just me. :(

Since my main two purposes for suspension are to give the dogs an easier ride (whcih they don't have in the trailer) and to take some of the harshness of the road off the wheels' load, especially when there's mroe than a couple hudnred pounds of whatever on the trike's cargo deck, it's a little important that the wheels have separate travel from the deck itself, if I'm going to go thru the trouble of adding suspension at all.

They don't have to be independently suspended, but with teh design of the axle and stuff, and the way I built the deck around that, it's easier to do them separately than to rebuild the whole rear end to acommodate separating the entire axle and wheels, and suspending that. Maybe if I'd thought about it before getting so far along, but....


So I think I will have to go the more complex route of putting the suspension at the wheels themselves, somehow. I have a couple thoughts on that but both would make the trike taller, or require that I take off teh "fender frames" I'm building and move them up at least a couple inches to make room for wheel travel.


One idea is very simple in concept, and that's to just literally put the dropouts on a separate sliding plate that goes up and down inside a slotted frame, with a spring between the top of the plate and the bottom of the fender frame, on each side of each wheel (four springs total). I have some garage-door bearings and pivot rods that could conceivably be used for these to ride on. I don't have four identical springs, though, AFAICR.

Doing this would not add a lot to the complexity of the backend, but it has the potential for the wheel to "stick" in a position if outer plate doesn't go up or down at the same rate as the inner on either wheel, cuz the wheel could cant inward or outward and jam.


A second possiblity is a small trailer leaf spring, of which I have two. If I cut off all but one leaf (one has two, the other has three), I'd get *some* suspension out of them, but no damping. I dont really ahve any dampers I could use for either system.


Both of these would necessitate some rethinking of how the pedal chain gets to the wheels, though, becuase it is a very short chain and anything that gives me suspension would probably cause severe chain growth issues and require a really good tensioner, especially if I was using a middrive thru it.


It would be physically simpler to just suspend the whole axle, below the deck, but A) it would make the trike several inches taller at the back (and more tippy as a result), and B) it would require totally disassembling everything already built behind the seat, and starting over with a fixed cargo deck and putting axle below that.

I coudl avoid making it taller by altering the way the axle sits, so that the wheels are "above" the axle, rotating the axle assembly 90 degrees, but I would *really* have to watch for crossing speedbumps at anything other than perpendicular, and larger road debris, cuz that center section where the chain drive sprocket is would definitely be close to the ground.


More rambling later.
 
skWarDog said:
I'll buy a ticket to the show so I can heckle your build with some semi-inspirational comedy from time to time? If you don't mind? LOL!
Price of admission is one pile of old bikes to build this stuff from. ;)

Include a box of assorted old ebike junk and it gets you heckling rights, too. :p


I think you ought to call it: "The Acme Products Inc Bike" ...........because it makes me wonder what kind of e-bike a collaboration between Micky Mouse and Wiley E. Coyote (Super-Genius) would produce?
WECTrike? On teh back of it, paint a highway continuing into a cliffside? :p

FWIW, I think Goofy might be a better choice than Mickey. :lol:
 
Maybe another crazy idea. Mount the fork backwards to reduce the trail? Dunno if that would work or not.

Though the wheel flop is awkward in the parking lot, I don't see the huge trail as a problem when out rolling.

Remember the springs on the fork of the Re bike? That's what they do I bet, eliminate wheel flop from all the trail. Just do something similar with an old screen door spring.
 
HI AMBER,You got it right ,the drawing that you made is exactly what I have . it works good for me but the rear box and top trunk don't benefit from the suspension.keep going friend.
 
That's pretty awesome you guys were able to get together and collaborate on a build.

Awful nice of you Dogman. Makes me smile reading the thread.

NIce looking build. Looks like it has a lot of potential.

http://farm5.static.flickr.com/4010/4379263965_2b952db257_b.jpg - my yuba has that to keep the front wheel in line.
 
OHZEE ,Thanks for showing that spring -return system i need that on one of my trikes insterd of using bunggie cords.
 
Back
Top