Connector Difficulty

kudos

10 kW
Joined
Aug 2, 2011
Messages
629
Location
Guernsey, Channel Islands, UK
Does anyone else have the difficulty I do in making connectors for your ebike?

Anderson Connectors :

I started trying to crimp andersons with a normal universal crimper and the results were not good.

Proper anderson crimpers are not that easy to get hold of outside the US and are expensive, however, I shelled out for one and so now crimping is super easy and I'm glad I bought the tool.

http://www.powerwerx.com/powerpole-accessories/tricrimp-crimping-powerpole-contacts.html

..but then you have to insert the the crimped wire into the anderson housing. The first insertion requires a ludicrous amount of force.

The 45amp contacts simply cannot be inserted by hand, all that happens is you bend the wire where it connects to the spade. You have to use another tool of some sort to actually push the contact through and even then it's certainly not easy.

I ended up buying a powerpole insertion tool:

http://www.ebay.co.uk/itm/230956476196?ssPageName=STRK:MEWNX:IT&_trksid=p3984.m1439.l2649

Even then you have to ensure you leave a little space between the back of the connector and the cable outer casing otherwise you have nothing to push against.

JST Connectors

I need to swap the huge white connectors that come with the Mac controllers for jst 2.5 connectors. All the other controllers I have/see use the jst 2.5 exclusively and it would be nice if the Mac came this way too, I have asked Paul but no response as yet.

I initially thought that the JST pins would be soldered to the wires but as it turns out the JS in JST I believe stands for Japan Solderless ie you need to crimp the wires. The pins are very small and I didn't even want to attempt to try and crimp them with a standard crimper so once again shelled out for another crimp tool:

http://www.ebay.co.uk/itm/360713379136?ssPageName=STRK:MEWNX:IT&_trksid=p3984.m1439.l2649

However when I use this with the bigger gauge crimp section the jst pin doesn't actually get crimped to the wire, and if I use the smaller section then the pin gets jammed in the teeth of the crimper!

I seem to have to do a 3/4 crimp on the smaller section then try to release the ratchet stopper in order to get the teeth apart so I get get the pin out without breaking it.

I hate being beaten but does it have to be this difficult?

I could just buy the connectors with tails already attached and solder the wires but it's not as neat.

Anyone got any tips please?

Cheers,
Kudos
 
For the battery connection to the controller and the charger connection to the battery, I like the XT90's. Very easy to solder to.

Sometimes, if I hold the soldering iron onto the pin socket too long, the plastic housing will soften and the pin will sag a little. So now, I mate a male-female pair before soldering onto any of them. I have not had a problem with pin alignment since.

The XT90 shank accepts Turnigy 10-Ga wire easily (of course the smaller 12-Ga fits also), and the Turnigy 6mm heat-shrink insulation fits over the 10-Ga (with thick silicone insulation) and can fully insert into the connectors butt-end recess. The XT90 uses 4.5mm diameter pins.

For the smaller XT60 size, the Turnigy 12-Ga wire easily fits, and will accept 4mm and 3/16-inch (4.5mm) heat-shrink. The XT60 uses 3.5mm diameter pins.

yellow XT60 shown in pic, the XT90 is bigger. I have a bunch of both.

file.php
 
Thanks for that spinningmagnets, I do like the look of those XT connectors in that they can only fit one way around.

The reason I stick with andersons is that I bought a anderson block kit from Ice and it makes it really easy to switch between parallel and series. I have actually copied the design myself now for another harness, took a while but i got there.

It's the tiny JST pins I'm having the fun and games with now. Maybe I should lubricate my crimper with something to get the pins out easier?

Kudos
 
Crimping connections, even with the proper crimp tool requires a great deal of practice. Wire insulation often creates various obstacles while learning how to dress and prepare various gauges runs a gambut of nuances.

I find a light press with slim pick tool is all that's needed to seat 30/45A APP's. Extreme force is indication something isn't quite right (insulation interference, improper shape/angle) and should be carefully qualified before simply shoving it in and moving on.

20ga and smaller crimps often require a magnifying glass or macro cam to truly see what you're doing or not doing while crimping.

Sorry not more help but IMO it just takes practice, practice and more practice....
 
I tried connecting wires to RC pins a while back. Nothing but a time-consuming headache. Now, I just buy pigtails, or extenders and then cut off the connector I don't need. That way, all I have to do is butt-splice the wire ends to each other, easy and fast. (make sure to add 2mm heat-shrink to the order)

http://www.hobbyking.com/hobbyking/store/__462__408__Chargers_Accessories-Balance_Leads.html

The harness in the pic below costs $2...this may not be the JST connectors you need, but look for something similar that does have the connector you want.

27075.jpg
 
practice is the answer. And practice costs. Get extra because you will throw away your practice trys. After 5 or 6 I got good. after 5 or 6 more it became easy and quick. Good luck.
 
ebent said:
practice is the answer. And practice costs. Get extra because you will throw away your practice trys. After 5 or 6 I got good. after 5 or 6 more it became easy and quick. Good luck.

I had to replace the 5 pin JST's on my first build. If I had to do it again I might butt splice in new connectors, but I'm stubborn and wanted to learn to do it.

I ordered 3 sets of housings and pins and I think I destroyed 2 or 3 male and female pins.

The placement on the pin in the crimper is the key. Too far one way and you can cut through the wire. Too far in the other way and . . . well I forget what bad thing happens.

Those hall wires are tiny and can be frustrating. You'll get it.

Or just go with Spinning Magnet's advice and butt splice in new connectors.
 
45 A Andersons are too small and unreliable, use the 75A and fill them cups with silver solder before inserting the pre-tinned wire. No crimping necessary, but if you do crimp you need to heat them again to make sure the soldered joint is perfectly tight. I have 75 A genuine Andersons that have proved reliable feeding 3 times their rated spec day after day for 20 000 Km all weather. Alternatively if you find 75A Andersons too big, gold bullets 5.5mm and up can take current as well, but they don't offer a secured connection and wear much faster.
 
1. ander power poles for any high amp power connection work just fine
2. i use jst for balance leads but definately not a fan of these - i am thinking about replacing them with stereo connectors / or Standard DIN male cable connector
like these: http://www.hamradioexpress.com/catalog/index.php?main_page=product_info&cPath=13&products_id=2538
than use a chassis mounted female jack
 
Ykick said:
I find a light press with slim pick tool is all that's needed to seat 30/45A APP's. Extreme force is indication something isn't quite right (insulation interference, improper shape/angle) and should be carefully qualified before simply shoving it in and moving on.
What he said. :)

APPs don't have any extra clearance in the shroud when crimping 10ga. Depending on the crimper, it's can be easy to either misalign the contact in the crimper or over-crimp the part so that the result is not round but kind of squashed. The extra width from the squash prevents the contact from fitting into the plastic shroud.

JSTs contacts have three areas at the wire end that need to be perfectly aligned or trouble will arise: the little retainer tang that sticks out must be outside the die - if you squash it, the contact will seat but simply push out the back when you mate the connector. The wire crimp area and the insulation crimp areas need to be carefully aligned with the die or the adjacent flared areas get squashed which causes insertion issues.

You need to develop a technique that works for you and your tools, but here's some thoughts:
  • Take a few minutes and closely examine the contacts and the shrouds - identify the shoulders, slots, stops, and flairs that position the contacts, allow them to be inserted, and hold them in place. This sounds silly, but if you don't understand the clearances and retention mechanisms, you won't understand which fabrication elements are critical to allowing the contact to be inserted and having it stay in place.
  • Depending on your crimper die, it can help to first prep the contact by turning it sideways and using the end of the crimper to slightly close the spread of the contact arms so it seats completely in the bottom of the die. Since there are no tool stops for this use, be careful, but it's easy to do. Proper seating prevents the contact from twisting and misaligning as the jaws close. Ideally, the contact should have a snug fit in the die bottom so you can align it and it will stay in place while you bring the wire up and hold it aligned depthwise in the contact as you close the jaws with the other hand.
  • Examine an uncrimped contact and make special note of the needed exposed wire length. This is critical.
    • If the bare wire is too long, aligning the insulation will place the end of the bare wire too far down the contact body which prevents the contact from sliding into the should - it's a huge block that can't fit into the slot in the shroud that separates the wire and contact cavities. No matter what you do, the contact can never be fully seated.
    • If you don't have the end of the insulated region in the proper place (the insulation starts too far back, The contact arms that are supposed to grab the insulation won't hold the wire and will squash outward on the strand bundle instead of snugly around the fatter insulation - this can be problematic for insertion and loses the strain relief of grasping the insulation.
    • I find that the 'strip operation' should always follow the 'cut operation' - this gives you a nice round strand bundle with parallel strands. It's possible to cut down a too-long strip, but you will typically want to take the time to reshape the strand bundle - this is annoying, but it's the price you pay for messing up the strip. (This is a 'big gauge' problem and is not a problem with small gauge and JSTs.) If I mess up and have the available wire length, I usually just nip off the strip and try again. If you have a fair length of wire, you can also grab the wire a foot or two away and with your other hand, grasp the wire and drag it towards the end - this 'milks' the insulation down the wire and will shorten the exposed bare end.
As others have mentioned above, this is really a matter of practice - and knowing the potential trouble spots that need attention.
 
kudos said:
..but then you have to insert the the crimped wire into the anderson housing. The first insertion requires a ludicrous amount of force.

The 45amp contacts simply cannot be inserted by hand, all that happens is you bend the wire where it connects to the spade. You have to use another tool of some sort to actually push the contact through and even then it's certainly not easy.

I just use needlenose pliers to hold the contact end of the housing, such that the pliers are squeezing down the little spring tab a bit. Then i push the contact/wire into the housing, loosening the pliers' grip on the housing as I reach them with the tip of the contact, and voila---all done. Unless I'm using wire that's too big, and it or insulation is actually making contact/friction with the housing, it works easily.

If the insulation or wire is that big, the contacts can't float in the housing anyway, and connection problems can result, in my experience so far.


JST pins are another story--I have to jiggle and twist the contact very gently ti get it out of the crimper (which is acutally made for Molex pins like for RS232 D-SUB connectors, but works fine for JST, too). Maybe lubrication would work but I never tried that. i'd use dielectric grease or it i I did try it.
 
Thanks for all your input guys, i think the thing I've taken from this thread is there is no magic tool that just works, you have to practice with what you've got until it clicks and you get it.

I'm pleased to say that I came home tonight and sat down for a hour or so and just practiced attaching the male and female jst pins to some spare wire, must have done 12 - 14 or so.

I was able to learn how to hold the crimpers, how to pre-treat the pins so they are the correct size, how to hold the wire as I'm crimping, how far to put the wire into the crimp, how much wire needs to be showing, how to get the crimped wire out of the teeth with a jewellers screwdriver, how to re-shape the pin after crimping, how to insert the pins with another small screwdriver.

I've managed to replace the first of the white connectors on my Mac setup, it's only a two pin jst but that's four crimps to get right, one of which didn't first time.

I've tested and it's working so I'm pretty chuffed. The light is failing now so I'll do the rest tomorrow hopefully.

Thanks once again...

Kudos
 
Fortunately, at least with APP's, the metal contacts are cheap enough to buy extra for practice.

It's just one of those things that requires practice to develop the skill and experience for all the variables that accompany different wire gauges and type of insulation encountered for crimp connections.

Glad you worked it out before giving up. There are many excellent soldered power connector options but APP's offer flexibility that many power connectors don't. When assembled properly and used within capacity they're a popular choice for a reason.

Mixing battery capacity and voltages tends to be why I favor them....
 
MadRhino said:
45 A Andersons are too small and unreliable, use the 75A and fill them cups with silver solder before inserting the pre-tinned wire. No crimping necessary, but if you do crimp you need to heat them again to make sure the soldered joint is perfectly tight. I have 75 A genuine Andersons that have proved reliable feeding 3 times their rated spec day after day for 20 000 Km all weather. Alternatively if you find 75A Andersons too big, gold bullets 5.5mm and up can take current as well, but they don't offer a secured connection and wear much faster.

I really like the suggestion of filling the cup with silver solder and then plunging the wire in. I've used a similar technique for other massive connectors in other applications. It's kind of like something other than crimping or soldering, plunging.
 
FWIW, connectors are one reason why things like ES-member-made/upgraded controllers and wiring harnesses can cost a lot more than you'd expect: labor to do the crimping right can take so much time that it's cost *has* to be added into the final cost of the item. ;)
 
amberwolf said:
FWIW, connectors are one reason why things like ES-member-made/upgraded controllers and wiring harnesses can cost a lot more than you'd expect: labor to do the crimping right can take so much time that it's cost *has* to be added into the final cost of the item. ;)
i never would want anyone else do the cabeling. for me it's most of the fun. i have tons of connectors and tried them all ... xt60/90, app, deans, goldies 4mm, 5.5mm, jst-xh etc ... i always buy the right tools to do it right. the jst-xh tool from japan was €40+ but it's fun now to do it right.
i cut ALL cables to the very exact length and install new connectors. gives a much cleaner look.
 
izeman said:
amberwolf said:
FWIW, connectors are one reason why things like ES-member-made/upgraded controllers and wiring harnesses can cost a lot more than you'd expect: labor to do the crimping right can take so much time that it's cost *has* to be added into the final cost of the item. ;)
i never would want anyone else do the cabeling. for me it's most of the fun. i have tons of connectors and tried them all ... xt60/90, app, deans, goldies 4mm, 5.5mm, jst-xh etc ... i always buy the right tools to do it right. the jst-xh tool from japan was €40+ but it's fun now to do it right.
i cut ALL cables to the very exact length and install new connectors. gives a much cleaner look.

Izeman,

Can you link to the jst-xh tool you have. The one I have just bought isn't really good enough.

Cheers,
Kudos
 
Forget crimping on power connections. You need to assure too many factors to get it super reliable, and even then you can easily destroy the shape of the contact causing all sorts of other issues. Don't get me wrong, they are fast and reliable when done properly, but impossible if the wire / contact / tool fits are not correct. Been to movie a few hundred times. Solder is your best bet, at least you can see if it wets well and all looks solid.
 
kudos said:
izeman said:
amberwolf said:
FWIW, connectors are one reason why things like ES-member-made/upgraded controllers and wiring harnesses can cost a lot more than you'd expect: labor to do the crimping right can take so much time that it's cost *has* to be added into the final cost of the item. ;)
i never would want anyone else do the cabeling. for me it's most of the fun. i have tons of connectors and tried them all ... xt60/90, app, deans, goldies 4mm, 5.5mm, jst-xh etc ... i always buy the right tools to do it right. the jst-xh tool from japan was €40+ but it's fun now to do it right.
i cut ALL cables to the very exact length and install new connectors. gives a much cleaner look.

Izeman,

Can you link to the jst-xh tool you have. The one I have just bought isn't really good enough.

Cheers,
Kudos

this is the one i bought http://www.ebay.de/itm/Universal-Cr..._Computing_Kabelwerkzeuge&hash=item3cd46e68c2
pa-09 is a bit small. i would take the next bigger one (pa-20) if i bought one again. see this chart http://www.engineer.jp/en/products/pa09_20applicatn_chart.html
those crimping tools look very primitive, but are super precise and i don't need any high sofisticated one that may break sometime.
i quote the listing: "you think you're going to be crimping more frequently with thinner gauge wire - choose the PA-09 (AWG #32 to #20) or with thicker wire choose the PA-20 (AWG #28 to 16 wire)"
 
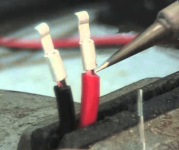
Acknowledge that connectors are a pain-in-the-fingers! So yea, if you've got a lot of them, get those crimping tools, etc. But for those of us just making our own ebikes, getting the tools is too much of an expense. So I use Anderson powerpoles and use a solder gun. I find that by placing the solder gun tip on the wire right at the juncture with the connecting strip, like so...
AndersonSolder.png
... I can accomplish several things at once:
  • solder some of the wire solid
  • solder the connecting strip to the wire
  • not get solder on the strip itself, which can make insertion more difficult
With some of the wire itself soldered, it becomes rigid and so can be forced in with greater ease. The other trick was investing in a good Weller 100 watt solder gun.
 
Arkmundi is right with the solder gun/iron thing. higher wattage soldering irons DEFINITELY make e bike work a LOT easier, especially when soldering huge wires like 10 AWG into 4mm bullet plugs. tiny wires like hall sensor wires (mine upgraded to 24 awg) isnt a problem with .064 solder and a 25 watt iron. I just cant get the 4mm bullet hot enough with 25 watts and the cold connection usually breaks or just makes the solder run everywhere.

You're blessed with all those crimping tools. All I have is a regular old crimper and I have to stand out in the sun and twist and turn it and hope that it fits when Im done. After about 100 ruined connectors, Ive got it down. Practice, practice, practice young master!
 
I think that was my grandfathers soldering iron :p
 
Like others have stated, it takes practice to get really good at it. I use a hydraulic crimper for all my crimps now (larger than JST) that I have the experience to know which dies to use for any application.

Also, I like the recommendation to buy extra metal contacts when dealing with Anderson PowerPoles . If you mess up, you only lose 10 cents or so. I've gotten to the point that I might only need to buy a set of metal contacts since I can scavenge the old plastic housings with a precision flat head screwdriver.
 
Back
Top