CroBorg Super Commuter

Thanks for the kind words, David!

The Crimp Sleeves are Ideal catalog 30-412, these appear to be nickel or tin plated steel. I got these from ebae, should be available from other industrial electrical supply sources.

The crimper I use is a hydraulic type with a set of different cross sectional area hexagonal shaped crimping jaws. Also from ebae as I recall. I'm using the #10 jaws for these larger sleeves.

The Heatshrink tube is "dual-layer" 1/2" type, the particular material I have is from Del City they call it "over-armor", but I see the same type of thing on Ebae and Amazon. It is lined with hotmelt type glue. It is commonly available in red or black.

I use a small tubing flare tool to flare out the sleeve's "turned-in" end so that wires can enter from both ends without encountering a sharp edge.

I will probably add another layer of insulation to these joints, perhaps using silicone amalgamating tape which sticks only to itself, is stretchy, and after a few minutes bonds into one continuous sleeve of tensioned silicone plastic. These joints are upstream of the circuit breaker, a short here is EBN (extremely bad news). Take no chances here.

Wire is Turnigy 200C finely stranded tin plated copper wire, for the most part. Charging cables are 12 gauge red/black zip type cable fine stranded copper.
 
This evening I made a scale physical paper connector layout from the batteries that are installed on the Borg. This is quite interesting as some of the connectors are closer together than their pigtails are long, so I'm going to revisit the harness design with this in mind and see if I can make it more compact.
 
I did some calculations of the areal capacity of the crimping sleeves, and icecube57 is correct. The capacity of the Ideal #30-412 sleeve is about 30 square mm (perhaps the catalog numbering means 30 square mm and wire sizes from 4 to 12). This compares to about 17 and 10 square mm capacity for the two sizes of Gardner Bender sleeves common in hardware stores around my area.

Based on 30 sq mm the sleeve should JUST fit a #8 and four #10's. I should test that to see how difficult it is to get the wire in. The finely stranded wire is both good news and bad news when crimping, it conforms well to the space, but it is easy to have a number of strands bend and go the wrong direction, so getting everything into place for the crimp can be quite fiddly.

Some people solder the strands, or just the tip to keep them in place. Soldering before crimping is not generally a good idea as soldered strands under pressure can creep and reduce tension in the crimp. Soldering just the tip and crimping further down might be a compromise. Soldered strands will reduce the fill of the sleeve, in which case it isn't a problem to get those strands in unsoldered, so the benefits are not there when you need them.

Interestingly a #8 and two #10's is 19 square mm, which is just more than the larger GB sleeve is rated to hold (17), it is possible that might fit as well. I'll do some testing on these fits and rate them for assembly difficulty. Having to fight to get the wires in the sleeve is not a fun thing to add to the already challenging process of making a harness.

I'm re-opening the design and looking at many possibilities. Saturday is build day, so I need to get the plans sorted out very soon. :)
 
I just tested an Ideal 30-412 crimp sleeve. The manufacturer rates it for 1 #8 plus 1-3 #10. My goal was 1 #8 plus 4 #10.

I can tell you that it is slightly difficult to get the third #10 into the sleeve. Getting another one for four is not going to be easy. The wires are pretty tight without crimping at all now, and that's just the three 10's and the 8 gauge.

So I'm not going there.

Following the factory recommendations is a good idea, and not following them would void the UL listing as well.

There is one way to get more in the crimp sleeve. This sleeve is long enough that it could be filled with wires from both ends and crimped twice. If the #8 wire traversed all the way through, and up to three #10's were inserted from each end, and the sleeve crimped on each end, that would probably work. It would void the UL listing, but it would probably work.

But I won't go there either, the sleeve is a little too short for two good crimps. One good crimp in the long tube will give the joint a lot of protection and strain relief.
 
striker54 said:
Hi Alan,

Why not soldering? See where a good method that you can adapt: http://endless-sphere.com/forums/viewtopic.php?f=2&t=66625#p1010665

Best Regards.

Hello striker54,

Thanks for the suggestion and the link to the good photos of the technique. I used that technique on my first ebike.

That works better on smaller wires, but not as well on large ones. It is difficult to do on large wires and takes a LOT of heat as the large wire wicks heat away quickly, it damages insulation, makes the splices very rigid and subject to force concentration and flexing failure at the edge of the solder. Solder is a poor conductor and adds resistance if the copper is not crimped tightly together. A good crimped connection lowers resistance, maintains flexibility and provides strain relief for the wire.

I was studying some electronics build standards recently, and solder splicing is not allowed. They require crimping or terminal strips. Not that we are required to adhere to quality build standards, but it might be beneficial if we did.

Still, solder splicing works and has the advantage of accepting whatever wires you put to it, but I don't plan to use it on this build.
 
1 8G to (4) 12G should have been doable and sufficient for the current you will draw. 12G can do 90A continuous
 
icecube57 said:
1 8G to (4) 12G should have been doable and sufficient for the current you will draw. 12G can do 90A continuous

Hi icecube57,

The XT90 pigtails are commercial (you recommended them) and came with 10 gauge wire. 12 gauge would have been even better, if you had made them for me I would have specified it that way. Four 12 gauge wires in parallel is equivalent to 6 gauge. Definitely adequate. :)

Where do you find a spec showing 90 amps continuous for 12 gauge wire? That's more than I generally see.
 
12g silicon wire can take 90A Continuous... http://www.buddyrc.com/black-12awg-silicone-wire.html
 
icecube57 said:
12g silicon wire can take 90A Continuous... http://www.buddyrc.com/black-12awg-silicone-wire.html

Thanks for the link!

Wow. That's higher than any wire table that I have found recommends. It will probably be one very warm (hot) 12 gauge wire at 90 amps.

To summarize from the link above, BuddyRC rates their 200C Silicone insulated wire:

12 gauge 90 amps continuous
10 gauge 150 amps continuous
8 gauge 200 amps continuous

I would guess that these ratings are for single conductor with plenty of moving air such as in an RC plane, heli or multirotor. On a bike with several conductors together and out of moving air the ratings would likely need to be lower. The highest ratings I can find are those for in-chassis service and for 12 gauge that is 41 amps.

http://www.powerstream.com/Wire_Size.htm

These ratings are likely for lower temperature PVC insulation, so if you don't mind hot wiring you can go higher. The silicone insulation allows the wire to operate very hot, if you want to do that.

I'm hoping to keep my wiring from melting into the batteries (which would not be happy at 200C), so I am planning to use #8 which is chassis rated for 73 amps, while my battery current is set to 80 amps max. The 10 gauge wires from the 4P battery bricks will have 1/4 of that current, or 20 amps, so they will be even cooler. I might want to try dialing the controller up some more, so I want some margin in the wiring.
 
It maybe warm but the jacket wont fail. PVC wire will turn in to twizzlers pull and peel. They melt together possibly causing a dangerous short. I love soldering connectors with my butane torch and the jacket just ashes over when the flame hits it.
.. rub it off keep moving. No melting or none of that. Hell my icharger input cable gets warm at 60A on 10AWG. I trust it to hold.
 
icecube57 said:
It maybe warm but the jacket wont fail. PVC wire will turn in to twizzlers pull and peel. They melt together possibly causing a dangerous short. I love soldering connectors with my butane torch and the jacket just ashes over when the flame hits it.
.. rub it off keep moving. No melting or none of that. Hell my icharger input cable gets warm at 60A on 10AWG. I trust it to hold.
Silicone insulation is pretty amazing. It handles heat and remains flexible at low temperatures much better than PVC. It is very soft however so it needs to be protected from abrasion and sharp edges, which is a good idea for any insulation.

Thanks for the info!

I usually err on the side of too much copper. Better than the opposite. :)
 
First 4P XT90 8 gauge section is completed, two more like this to go:

20150314_121318.jpg


12 gauge charging wires enter on the right. The 8 gauge mains go through both crimp sleeves. The 10 gauge from the XT90's joins to the 8 gauge in two places. It is not too hard to put this together, the hardest part is pumping the crimper while holding the wires in the sleeves. Need four hands.
 
Lots of progress. New harness built and installed. Methods HVC LVC boards installed. Bulk charging now, will check the voltages frequently as it charges up. Close to 3.90V on all cells to start.

This is 32 pounds of stuff in a 20 pound box. So I'm not happy with the fit. I'd like to re-do the whole thing but not now. Seems like there must be a way to fit it better, but that may not be possible.

There is more wire and less space for it. So it is a bit jammed in spots.

Frustrating day.

I did not get the precharge worked out yet. I have my doubts about that circuit breaker handling the cap charging surge without damage to the contacts. It is made to break a DC arc on opening, which is a different beast. So I would like to put a precharge pushbutton in the circuit.
 
GO for it Alan! The crimps look mighty fine! Put things together so you can give it a test run, then clean up over time.
 
The quality control of these Multistars seems to be a notch or two higher than any other Lipo I've used. Very consistent right out of the box, none of the bricks were different enough to cull any of the 13 I have.

Through the bulk charging cycle they are staying very closely balanced, and this is with factory initial charges only. Now up to 4.10V/cell at 9 PM (was 3.9V initially at about 6 PM). This is charging at 2 amps or so, so it is nice and slow.

10:30 PM stopped at 4.13V. Will check it and finish off tomorrow. It is pretty close to done, I usually end charging at 4.15-4.16V. Good for a test ride, but not tonite. There's still tiewrapping and precharge to do. :)
 
It is alive again. A few tiewraps and some split loom cleans things up a lot. Still more congested than I'd like, but we're road worthy again. Just in time, the weather report contains 70 plus degree days this week. This is a great place for ebikes!

20150315_094156.jpg


This is also the first test of the new 63 amp solar AC/DC circuit breaker, visible in the photo above. It is the flat black object with a big white sticker to the right of the rear shock, and the small white switch handle is on the breaker's left side. I did a manual precharge, will put a precharge circuit in later.

Charging leads come out under the seat to the rear (on the left in this view), and both lower sidecovers are now in place which makes the rig look better, holds the upper sidecovers better, and should keep the little road gravel out of the lower section. there is a little bit of friction on the chain from the cover.

A quick test ride confirms that everything works. Hard acceleration did not trip the breaker, it is rated to hold for a few minutes at well over 63 amps. I have the max battery current set to 80 amps, but it doesn't stay at that level for more than a few seconds, and rarely gets there at all.
 
The MultiStars charged without event. This charge at 12 amps rate.

I agree Christofer. The range is good. That's why we're onboard with this.

Alternate Wiring Harness Design

I'm documenting a possible alternate wiring harness here, I have not decided to make it at this point.

I was thinking about a wiring harness using four #14's in parallel which is equivalent to #8, but much more flexible and easier to make work in this bike. I don't know if I'll bother making another harness, but four #14's can handle more current than a single #8 due to the better cooling of four somewhat separated wires (not bundled). This would also facilitate better wire routing which could shave about 20% off the length of the wiring and the weight, and eliminate all the crimping sleeves. The whole harness would consist of four PowerPole 75 pair's, 12 XT90's, #14 Silicone insulated wire, and #12 charging lines. The PowerPoles would perform dual duty as the parallel crimping point and as the disconnect point. Each of the 4P banks could be unplugged. The PowerPole 75's take some space, but they are spread out and there is enough height for them in the Borg. I had this design some time back but the 10 gauge coming from the commercial XT90's wasn't compatible with it, so I adjusted for that.
 
The homeward commute was a bit rushed, the wonderful weather became quite ominous and a few raindrops fell. At the start of the trip the pack sustained 6kw load at about a 2V drop while climbing the "big hill". The rest of the homeward trip is less challenging, but pushing it along to keep ahead of any weather issues kept the total consumption to about 10 amp hours, more than I usually use on this leg of the trip.
 
While going up the grade with 6kw at the motor what is the bike speed?
The steepest section is the climb toward the hall of science.
 
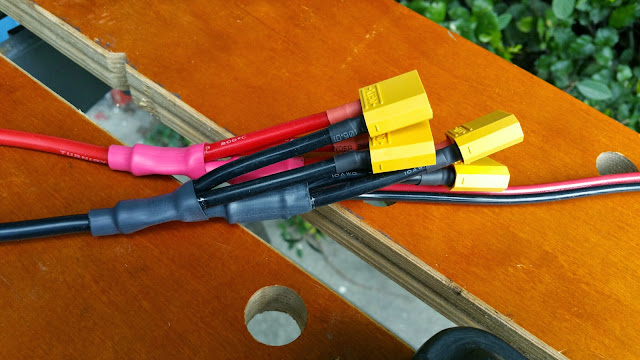
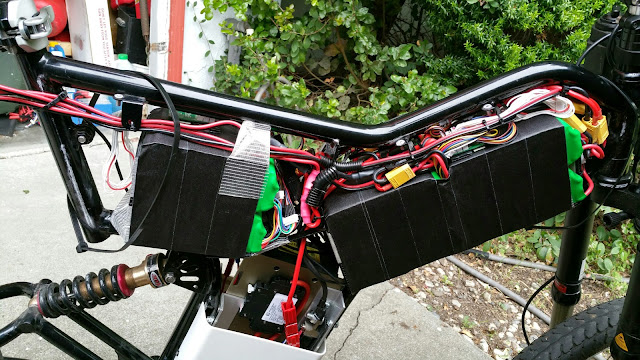
I come out of the building, maneuvering through the door and making an immediate 90 degree right turn to avoid the railing that prevents the kids from the training center exiting right into the narrow street just outside, called "Sally's Alley". The story is that "Sally" used to work in the building decades ago, one of the oldest on the site, and she would yell at drivers she felt were going too fast for this narrow street between the building and the ten foot tall cement retaining wall holding the hill back. This corner is tight, I have to pick up the hundred pound bike and hold the sprung door simultaneously to make the turn. Once outside I turn on the extra two rear Radbot 1000 tail light's, flip the kill switch to Run, clear the Cycle Analyst, reset the left handlebar mirror, start the GoPro, and mount up. I glide South through Sally's Alley, behind the Advanced Light Source and its outdoor 60,000 volt 20 amp RF Power Supply, turn left toward the "Big Hill" and go by the onsite Fire Station. Another left turn and we begin the climb, still on the site, roll on the power gently, 2,3,4 KW, sliding steeply up between the 115 KV power station and behind the medical building. No point in building speed here, there's another intersection and right turn at the motor pool but the uphill traffic doesn't stop, so we swing right and head uphill toward the back gate. I watch for traffic heading for the automatic gate, it won't reliably open for my ebike, I may do a small loop in the parking lot by the gate to fall in behind a car or several, if there's no traffic I'll have to stop and open the bicycle exit door next to the roadway, pushing the spring door open with one hand and pushing the battery heavy ebike through it uphill at the same time. The gradient is already steep, and it gets steeper up the driveway toward Centennial. This is the place where my 24 FET Controller failed a couple of times, while getting started after pushing through the bike gate. Starting up on a steep hill, with nearly full battery, the low impedance CroMotor, a heavy motor load from the steep gradient, and the uncontrolled current surge during the block time of the Infineon controller's firmware.

But the Sabvoton monitors the current, and always keeps the FETs safe, and we crank on 2-3 KW just to move the bike at all on this gradient, and perhaps pedaling also. At the top of the driveway is the turn onto Centennial, right in the steepest pitch of about 15%, which is about the same gradient as the drive was just past the gate. So we stop again, wait for traffic which can be considerable for this steep street, watching especially for bikes and the occasional crazy skateboarder (!) coming down as they reach considerable speeds and this corner has been the site of some fatal downhill bike crashes. We turn up the hill onto Centennial and accelerate, pedaling as we come out of the lean, careful to avoid striking the pedal on the pavement as the frame was designed for 26" tires but the 24" tires have reduced the clearance too much for pedaling while turning sharply. Rolling on the power we glide uphill at 2-3 KW, continuing to accelerate to get up to speed we roll it up to 5-6 KW and pedal hard, the CA indicates about 25 up the steepest parts, then the road flattens and turns slightly right in front of the Hall of Science and we roll off the power to 1 KW or less which is adequate for the level. We may have to stop at the pedestrian triggered stoplight in front of the Hall, which has a very long cycle time, then continuing past the parking lots the climb resumes at a lesser gradient of about 6 percent, and we pass the Space Sciences building and finally arrive at the top, at the crossing with the road going up the ridge, a 4 way stop that is frequently run by cars going uphill and bikes coming downhill, and where I took my spill a year and a half ago when watching the cars too intently and not my riding. At this point I've come about a mile from my office and consumed 2 amp hours in just a very few minutes, it will take about 5 more amp hours and another half hour to traverse the 12 remaining miles, with lots of moderate downhill and twisty curves along the golf course and through Tilden Park down Wildcat road, along the gently rolling hills by San Pablo Reservoir, down another good descent past the lake's earth fill dam on the aptly named "Dam road", and through the neighborhoods to our home, hopefully high up enough on the hillside to be above the flood plain should the dam ever break.

I like to enjoy the ride, but yesterday with the impending threat of rain I rushed, not enough to sacrifice safety, but enough to chop off a few minutes, and it started raining just about a mile from my destination, not enough to get anything wet, big drops but few of them, and then I escaped out of the weather and into the garage.

Someday I'll post a few of the many hundreds of GoPro videos I have of my commute, boring views of the front tire spinning and suspension working, and the wide angle view from the front fork down tube. From this low height it makes even slow ebike speeds look fast, and the world rotates for every lean and turn. My friend Eric tried to compress some of these videos and it didn't work well, every pixel in the frame is in motion, like the stars in space travel viewed out the front window, and compression algorithms can't find much to get traction on compressing.

It is four something in the morning, and I'm writing this on the laptop in bed, and I've annoyed the wife enough, so I better quit and try to get a little more sleep before the day begins. Hope I've answered your question, it was fun to write a bit, probably more than you wanted to read. :)
 
Alan B said:
The MultiStars charged without event. This charge at 12 amps rate.

I agree Christofer. The range is good. That's why we're onboard with this.

Alternate Wiring Harness Design

I'm documenting a possible alternate wiring harness here, I have not decided to make it at this point.

I was thinking about a wiring harness using four #14's in parallel which is equivalent to #8, but much more flexible and easier to make work in this bike. I don't know if I'll bother making another harness, but four #14's can handle more current than a single #8 due to the better cooling of four somewhat separated wires (not bundled). This would also facilitate better wire routing which could shave about 20% off the length of the wiring and the weight, and eliminate all the crimping sleeves. The whole harness would consist of four PowerPole 75 pair's, 12 XT90's, #14 Silicone insulated wire, and #12 charging lines. The PowerPoles would perform dual duty as the parallel crimping point and as the disconnect point. Each of the 4P banks could be unplugged. The PowerPole 75's take some space, but they are spread out and there is enough height for them in the Borg. I had this design some time back but the 10 gauge coming from the commercial XT90's wasn't compatible with it, so I adjusted for that.

PP75 are hard to deal with and have a huge retention force. I would stick to xt90s which technically by their rating deliver more current smaller and shouldnt be that hard to pull apart ...maybe
 
Back
Top