You are using an out of date browser. It may not display this or other websites correctly.
You should upgrade or use an alternative browser.
You should upgrade or use an alternative browser.
E-bike + carbon frame + 52V. 18650 + BMC motor
- Thread starter soaresdacosta
- Start date
soaresdacosta
10 kW
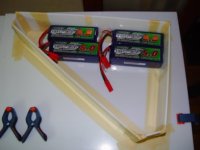
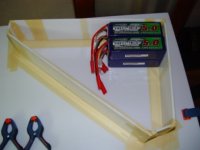
Try to see the space I have. For now, its going to be 24s2p. In the future, If I want, I can upgrade for 3p.
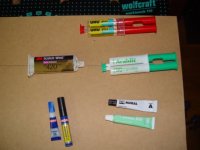
After check the space for the batteries, i start some tests on the best way to glue the box together. I believe the "3M 420" will win the contest.
Take care,
Luis Costa.
After check the space for the batteries, i start some tests on the best way to glue the box together. I believe the "3M 420" will win the contest.
Take care,
Luis Costa.
Attachments
soaresdacosta
10 kW
Hi guys,
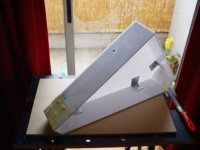
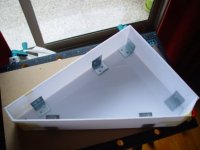
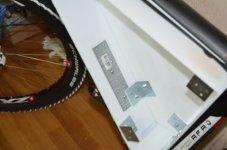
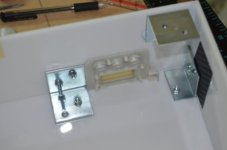
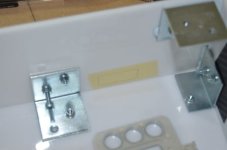
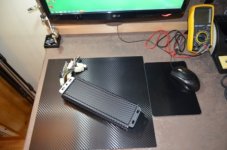
Still building my batterie box...a lot of cutting, grinding, sanding...put some brackets, and they give a lot of straight to the box.
For now, I'm happy with the result...still much work to do.
Take care,
Luis Costa.
Still building my batterie box...a lot of cutting, grinding, sanding...put some brackets, and they give a lot of straight to the box.
For now, I'm happy with the result...still much work to do.
Take care,
Luis Costa.
Attachments
soaresdacosta
10 kW
Hi guys,
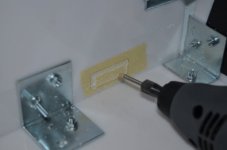
....the building of batterie box...part 135...
At least, its turning around ok. I never try Acrylic, and the result so far its god.
Still work to do.
Take care,
Luis Costa.
....the building of batterie box...part 135...
At least, its turning around ok. I never try Acrylic, and the result so far its god.
Still work to do.
Take care,
Luis Costa.
Attachments
Secret1511
100 W
soaresdacosta said:Hi guys,
....the building of batterie box...part 135...
At least, its turning around ok. I never try Acrylic, and the result so far its god.
Still work to do.
Take care,
Luis Costa.
Nice build! Maybe it is easy to use removable sidepannels. I found out that it is handy to get by the battery's on both sides
soaresdacosta
10 kW
Hi Secret1511,
One side-panel going to be removable. The screws in the picture, is just to sand and grind the acrylic.
Take care,
Luis Costa.
One side-panel going to be removable. The screws in the picture, is just to sand and grind the acrylic.
Take care,
Luis Costa.
soaresdacosta
10 kW
Hi Guys,
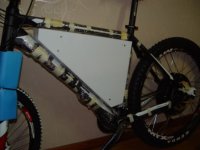
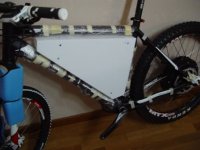
Just a little update...
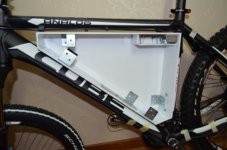
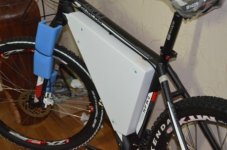
I secure my box in the frame. I have 2 bottle holders, and have use that, to put 4 screws and a steel plate. I still have to secure in the top of the box...maybe Velcro straps ? I don't no...
I cover all the screws with some "epoxy puti" and finish with some sanding. Still some work to do, before i cover everything with carbon-fiber vinyl.
Take care,
Luis Costa.
Just a little update...
I secure my box in the frame. I have 2 bottle holders, and have use that, to put 4 screws and a steel plate. I still have to secure in the top of the box...maybe Velcro straps ? I don't no...
I cover all the screws with some "epoxy puti" and finish with some sanding. Still some work to do, before i cover everything with carbon-fiber vinyl.
Take care,
Luis Costa.
Attachments
soaresdacosta
10 kW
Hi guys,
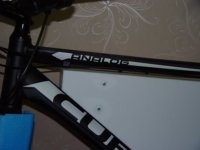
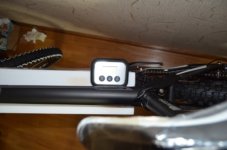
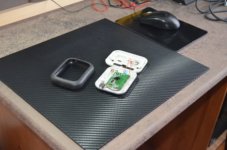
Like a lot of you, I install a temperature probe in my motor...a BBQ style. But for reading the temperature, I want a more discrete solution.
Since the batterie box, is still in the building process...now, its the right time.
I chose the location, because its the only place in the Top of the box, I don't need the add more wire. If I have to solder more wire, maybe more resistance, and the readings not so accurate ?
Take care,
Luis Costa.
Like a lot of you, I install a temperature probe in my motor...a BBQ style.
Since the batterie box, is still in the building process...now, its the right time.
I chose the location, because its the only place in the Top of the box, I don't need the add more wire. If I have to solder more wire, maybe more resistance, and the readings not so accurate ?
Take care,
Luis Costa.
Attachments
-
 DSC_0038.JPG61.1 KB · Views: 4,252
 -
 DSC_0043.JPG59.3 KB · Views: 4,251
 -
 DSC_0045.JPG61.4 KB · Views: 4,251
 -
 DSC_0048.JPG64.3 KB · Views: 4,250
 -
 DSC_0049.JPG61.1 KB · Views: 4,251
 -
 DSC_0051.JPG52.8 KB · Views: 4,251
 -
 DSC_0052.JPG51.8 KB · Views: 4,251
 -
 DSC_0054.JPG53 KB · Views: 4,251
 -
 DSC_0058.JPG55.2 KB · Views: 4,251
 -
 DSC_0059.JPG54.9 KB · Views: 4,251
 -
 DSC_0064.JPG57.6 KB · Views: 4,252
 -
 DSC_0065.JPG52.2 KB · Views: 4,252
soaresdacosta
10 kW
Hi guys,
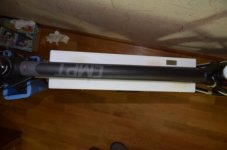
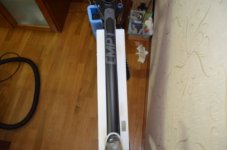
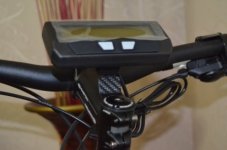
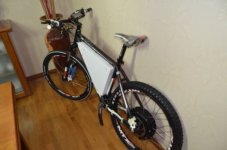
Time to start put some toys on the bike.
I want to put them, before i finish my battery box, because i want to put the cables, and make the connections inside of the box...just for a more clean look.
Take care,
Luis Costa.
Time to start put some toys on the bike.
I want to put them, before i finish my battery box, because i want to put the cables, and make the connections inside of the box...just for a more clean look.
Take care,
Luis Costa.
Attachments

Falco
100 W
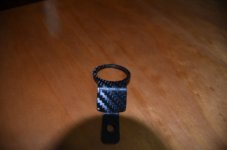
Your build looks to be coming across quiet nicely.
I was wondering where abouts you got the carbon fiber mount for the CA from?
I was wondering where abouts you got the carbon fiber mount for the CA from?
soaresdacosta
10 kW
Falco
100 W
Haha nice work! You Throw me off with the packet and it look just like the real think in the photos.
Lots of attention to detail which is nice
Lots of attention to detail which is nice
soaresdacosta said:With this batterie box, i try to achieve, an easy way to take the batteries out of the bike, and store in a safe place...
-the very best Lipo Safe ever seen
-very good and clean build, like a modeller!
-thanks for show the great pics.
-hurry, hurry we want to see more...
BR
ecross
soaresdacosta
10 kW
Hi guys,
Thanks for the nice words...its good to hear some complements, wen you put a lot of work and time in something. :wink: :wink:
For the first time I establish a deadline...to the end of the year...yes, this year.
I would like to build some parts in a different way, but...its the tools I have...and the skills of course.
Take care.
Luis Costa.
soaresdacosta
10 kW
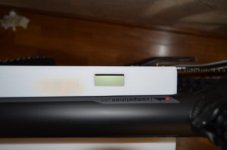
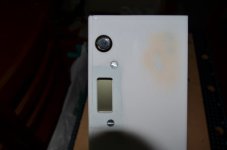
Hi guys,
"You look like you are doing a good job. Keep at it." Thanks veloman.
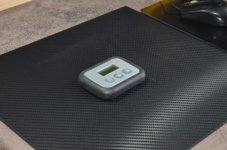
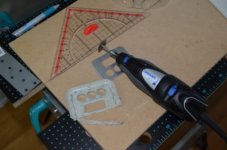
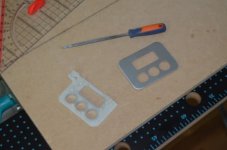
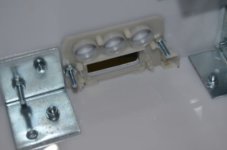
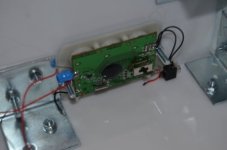
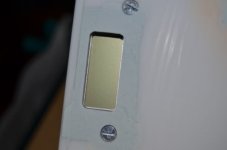
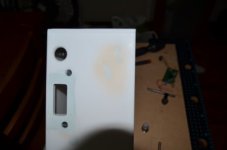
The work continues. I fixed my temperature reader to my batterie box, and install a better switch, to turn on and off...its powered by one 1.5 Volts batterie.
Still some work to do, before I 100% finish this task.
Take care guys,
Luis Costa.
"You look like you are doing a good job. Keep at it." Thanks veloman.
The work continues. I fixed my temperature reader to my batterie box, and install a better switch, to turn on and off...its powered by one 1.5 Volts batterie.
Still some work to do, before I 100% finish this task.
Take care guys,
Luis Costa.
Attachments
-
 DSC_0080.JPG57.6 KB · Views: 4,051
 -
 DSC_0082.JPG53.5 KB · Views: 4,051
 -
 DSC_0083.JPG56.2 KB · Views: 4,051
 -
 DSC_0085.JPG50.7 KB · Views: 4,051
 -
 DSC_0086.JPG53 KB · Views: 4,051
 -
 DSC_0087.JPG58.5 KB · Views: 4,051
 -
 DSC_0090.JPG52.1 KB · Views: 4,051
 -
 DSC_0089.JPG54.8 KB · Views: 4,051
 -
 DSC_0088.JPG63.6 KB · Views: 4,051
NeilP
1 GW
Did you lace the wheel with the 12 gauges spokes yet? Just wonder if the 12 gauge nipples will fit...maybe they will be too big and you WILL have to drill the rim to fit the 12 gauge nipples...I think if you have nto yet started to fit the 12 gauge ...I would remove just one spoke from your current wheel and and try and fit a single 12 gauge nipple.
If the rim you have has stainless steel inserts, then drilling them is difficult..because they will spin in the rim. I know
If the rim you have has stainless steel inserts, then drilling them is difficult..because they will spin in the rim. I know
soaresdacosta
10 kW
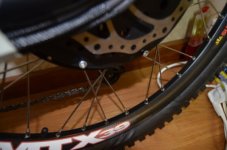
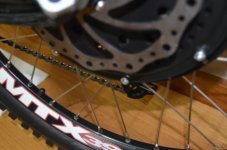
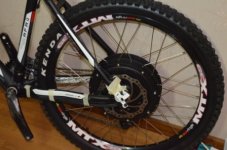
Hi NeilP
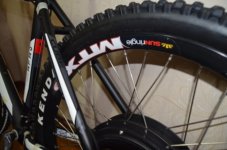
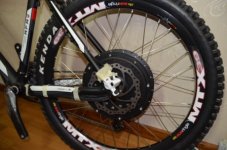
Yes, I already lace the wheel with the 12 gauges spokes. I use a round file, filed a little the stainless steel inserts and the nipples fit. I see this Technic, in a video from Ypedal. I just "screw" one...filed too much.
When I buy this wheel, I buy 2...just in case. It turn out ok, not perfect, but ok. The angle is acceptable.
Take care,
Luis Costa.
Yes, I already lace the wheel with the 12 gauges spokes. I use a round file, filed a little the stainless steel inserts and the nipples fit.
When I buy this wheel, I buy 2...just in case. It turn out ok, not perfect, but ok. The angle is acceptable.
Take care,
Luis Costa.
Attachments
NeilP
1 GW
That is good.
I only saw that video after I drilled my inserts...difficult as they keep spinning. had to push down on them and sometime flatten them beat them with a shaped punch
I only saw that video after I drilled my inserts...difficult as they keep spinning. had to push down on them and sometime flatten them beat them with a shaped punch
soaresdacosta
10 kW
Hi NeilP
If didn't work, my plane B was to use a DREMEL. Again, I see this in a video, this time from DoctorBass.
My plane C, was to drilled the inserts.
Take care,
Luis Costa.
If didn't work, my plane B was to use a DREMEL. Again, I see this in a video, this time from DoctorBass.
My plane C, was to drilled the inserts.
Take care,
Luis Costa.
soaresdacosta
10 kW
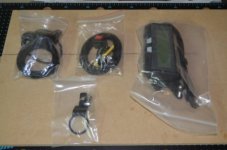
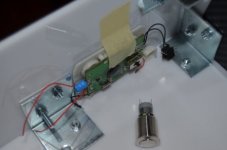
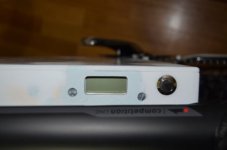
Hi guys,
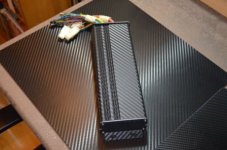
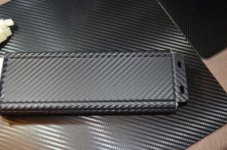
Just a little work today. I "pimped" my 18x4115 controller.
I install a temperature sensor on the inside, just to check if there is any changes because of the vinyl cover.
I believe its gone be ok, I see controller inside bags...
Take care,
Luis Costa.
Just a little work today. I "pimped" my 18x4115 controller.
I install a temperature sensor on the inside, just to check if there is any changes because of the vinyl cover.
I believe its gone be ok, I see controller inside bags...
Take care,
Luis Costa.
Attachments
sacko
10 kW
Love that!
Which wrap have you used?
Which wrap have you used?
soaresdacosta
10 kW
Hi sacko,
I buy it from eBay, its the 3M. I just pick a god seller.
Avoid the "no-brand" stuff...wen you apply heat they failed.
Take care.
I buy it from eBay, its the 3M. I just pick a god seller.
Avoid the "no-brand" stuff...wen you apply heat they failed.
Take care.
Motorman64
1 µW
- Joined
- Sep 15, 2013
- Messages
- 4
Second that looks great.:
soaresdacosta
10 kW
Hi guys,
"Second that looks great.:" Thanks Motorman64.
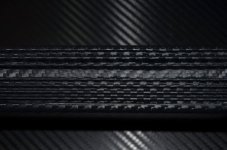
Not much work done. I'm waiting for some parts, vinyl carbon fiber and pp45 connectors for finish my batterie box.
In the meantime, just finishing some lose ends.
Luis Costa.
"Second that looks great.:" Thanks Motorman64.
Not much work done. I'm waiting for some parts, vinyl carbon fiber and pp45 connectors for finish my batterie box.
In the meantime, just finishing some lose ends.
Luis Costa.