First off, I would like to say this post should really go in Review and Testing or photos & videos, but I figured the information might be useful for everyone here who want to build high power ebikes. Moreover, no one really reads the review and testing or photos & videos sub-forum. : )
For references here are the three older posts of this same ebike. If you read them in their gory detail, you will better understand why I made the upgrade each time.
The initial reason why I wanted to build this bike was my slower ebike was struggling on the hills and had trouble getting up to 35mph+. Moreover going faster than 20mph and on USA roads without full suspension was a no go. Lesson Learned: Never build an ebike without suspension capable of going faster than 20mph
Here are the specs for each evolution:
Initial Build:
http://endless-sphere.com/forums/viewtopic.php?f=4&t=33528&hilit=temperature+K2
Bike: K2 Base 3.0 2008 Full Suspension.
Motor: HS3548 from Ilia at ebikessf laced on 26 inch wheel
Tire: Schwable Big Apple 26x2.15
Controller: Crystalyte 12FET sensorless mod to support CA connector and 74V
Battery: 74V13.5Ah nanotech Lipo Pack (6x10s each at 4.5Ah wired in 20s3p)
Charging setup: 2x icharger 1010b+ using one PRC500 Power supply
Rack: got it from Performance bike
********** Everything was good about this. However the battery pack on the rear was making the bike wheely happy and I didn't want to put extra stress on the rear suspension/motor/dropout/rack. The nanotech battery was repurposed on my slower ebike to 14s with a help of a few 4s packs. Detail located here:
http://endless-sphere.com/forums/viewtopic.php?f=4&t=29194&p=506191&hilit=Transeo#p506191
The pack is still running today, but it has lost quite a bit of capacity and have seen more than 5K miles on the slower ebike. It is suppose to have 22.5Ah after the conversion to 14s when new, but realistically it now can get 14Ah because of the degradation both in time and cycles and I only charge to 4.15V and stop discharging at 3.7V.
In summary the problems were:
1) Battery pack is located on the rear rack so weight distribution is uneven making it hard and unstable to ride.
2) Schwable Big Apple on the rear was wearing out fast due to the soft rubber it was made up of, regen, and weight all on the rear wheel.
3) Battery pack on the rear rack means I had to carry my stuff in my backpack. I do not like to carry any backpack during rides.
4) I did not like the sensorless controller one bit. It ran hot even at low speeds without regen and starting from a complete stop was too jittery. This might be the reason why it was running hot.
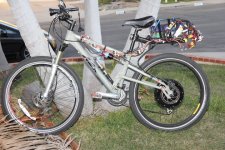
1st upgrade:
http://endless-sphere.com/forums/viewtopic.php?f=3&t=37597&hilit=battery+mount
New Battery Pack: 8 x 10s5Ah NanoTech 25-50C Lipo Stick (~1.5KWh of battery) Wired in 20s4p (74V20Ah)
Total weight of battery with wiring: 22-23lbs
Lyen's 18FET overclocked sensored controller. 1st Gen with voltage mod to switch from 74V optimized to 100V optimized.
DoctorBass' Torque arm
********** This first upgrade solved a few of the issues:
1) Controller is now sensored. This made the startup much easier and smoother. Also the controller was cooler during long distance rides. The sensor-less controller was relegated to a back-up controller I now carry everywhere I go just to get home if the Hall sensor(s) or main controller goes out. Lesson Learned: Get Sensored controller if possible, sensorless only for back up.
2) Battery pack is now located on the center downtube. The weight distribution was so much better for riding. Lesson Learned: ALWAYS place the battery at the center of the bike.
3) DoctorBass' torque arm added to make sure the regen and acceleration does not kill the dropout.
4) Rear Rack to hold my other junk I carry on my rides.
Update on the nanotech pack: I currently have around 300+ cycles on these. I had to replace 2 weak/bad 10s packs. So far they are still fine for short distance and they sag quite a bit. I have since passed them down to my brother's electric scooter. They are now effectively 80% capacity of original if used with the full voltage range specced for Lipo. However because I charge them to 4.15V and discharge them to 3.7V, they effectively have 12Ah out of the original 20Ah. Lesson Learned: Lipo, when treated well, can last a very long time! Just as long as you don't mind the reduced capacity.
However here were still problems:
1) Torque arm was coming loose despite using DoctorBass recommended DP420 epoxy. The epoxy was cracking after a few hundred of miles ride.
2) I have gotten a few flats and with the size and weight of this bike, there was no easy way to transport it. I had fix the rear tire on the road to ride home. Not fun!
3) Dropout nut was getting loose also contributing to the cracking of the DP420 epoxy.
4) No temperature gauge on the motor so I was just ball parking it on when I should slow down to cool the motor.
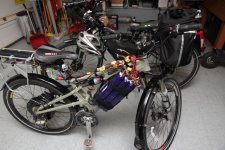
2nd upgrade:
http://endless-sphere.com/forums/viewtopic.php?f=3&t=48780
Bolt on the torque arm
Norlock washer
Lining on rear tires
Maxxis hookworm on rear
Rear wheel tire and wheel modded to make it essentially flat proof. I have not gotten any flats since using this design.
New Motor: HS3545 also from ilia from ebikessf on downhill rims. This was because my original HS3548 spoke broke and also I wanted a temperature gauge built in the motor.
********** These upgrades solved a few problems:
1) The Nut no longer got loose because of the Norlock washer.
2) I made the rear tire essentially flat proof. See the thread on how I did it. Lesson Learned: Use this method on all rear ebike motor wheel if possible to prevent flats.
3) The new HS3545 was on a stronger rim with thicker spokes so spoke breakage was less likely. There has not been on broken spoke even after 4K+ miles of hard riding on this motor.
4) The temperature gauge coming from the motor was pretty good, though I had to make an arduino mod to it to get it to work. Back then the CA V3 was in beta and was not ready yet. With this gauge, I was able to tell when to slow down.
5) The bolt on mod for DoctorBass' torque arm was critical to keeping it in place. Lesson Learned: Never use the DP420 without bolting on the torque arm. The DP420 would be OK if there were no vibration, as DoctorBass' demonstrated in his video about it. However with vibration and shocks from a typical ride, eventually the DP420 will crack and this is where it failed. It is critical to bolt it on so it prevents the DP420 from cracking. So far after thousands of miles, the bolt on with DP420 solution have kept the torque arm solid in place.
However new problems arose:
1) My new work place was now 22.5 miles away and 45 miles round trip. Moreover, I did not want my ride to last 1-1.5 hours each way, the limit of the HS3545 motor without burning out.
2) The nanotech battery was sagging quite a bit and no longer can supply the range to meet the new requirements.
3) I also didn't trust the safety of Lipo enough to charge at the work place unattended or have the pack exposed like I did.
4) Charging using 2x icharger and a weak power supply was not cutting it in terms of charge speed.
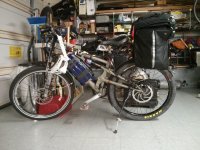
Overall the bike at this point was reliable, but with the advent of the new requirements of 22.5 miles @ 40mph+ and not burning out and possibly not needing to recharge at home, I was back at the drawing table.
This leads up to the 3rd and current upgrade:
To elucidate the requirements a bit more:
1) Use the current bike frame. (I didn't want to start from scratch. Moreover, I could not afford time, cost, and space in the garage of another big ebike).
2) 22.5 miles @ 40mph+. (This was a long, fast commute on open roads so I knew I needed to keep up with the cars. Going anything less than 40mph+ means a more dangerous commute for me)
3) Top speed should be 50mph. (to allow me to pass cars if needed)
4) Battery range should be at least 30 miles @ 40mph+
5) Battery chemistry should be safe!
6) Controller should be super reliable!
7) Charging should be relatively easy.
Here is how I solved most of these in my most recent upgrade:
1) Battery: 91.2V33Ah Li-Mn. It is really the Nissan Leaf Battery Pack 24s1p. You can read more about it on this link:
http://endless-sphere.com/forums/viewtopic.php?f=14&t=52162
It is wired in 24s1p. Each cell is rated to have 33Ah, but I found out my usage (3.6V to 4.15V @ 0.5-1.5C current draw) yields a solid 25Ah. I can get up to 29Ah if I use the full range, but I never gotten it past 30Ah. Moreover I got these cell used so I didn't expected it anyways. You can read more about it on the link about the Nissan Leaf Pack.
In my opinion there are the most cost effective, long lasting, safe chemistry currently available on the market that you can buy. Even the HobbyKing Turnigy cannot compete in terms of wh/$.
Lets diverge and do a quick calculation on the two: New Turnigy 4s5Ah Hardcase pack vs Used Nissan Leaf Cells
New Turnigy 4s5Ah pack, when available, can be had for: $25.47 assuming free shipping. 14.8V*5Ah = 74Wh, => 74Wh/$25.47 = 2.905Wh/$
http://www.hobbyking.com/hobbyking/...P_14_8v_20C_hardcase_pack_USA_Warehouse_.html
Used Nissan Leaf Pack 2s2p can be had for $109 + shipping. Being conservative on capacity and shipping cost of $10, 7.6V50Ah = 380Wh, => 380/$119 = 3.19328Wh/$
http://hybridautocenter.com/HAC4/in...leaf-battery-module-model-2012-new&Itemid=605
But you have to factor in a few issues about the two:
Turnigy Pros:
1) Small packs so if you only need a few Wh or high Voltage with minimal Ah.
2) Might be a tad lighter than the Leaf Pack in terms of weight.
Turnigy Cons:
1) Lipo is much more dangerous to keep around compared to Li-Mn in the Leaf Pack.
2) You need to buy 10-20% more than you need because you will surely get duds.
3) Dealing with HobbyKing is like dealing with crooks. Search HobbyKing problems on this forum.
4) Turnigy are only rated at 250 Cycles or less. Chances are, you will have to throw them out much sooner than that.
5) You don't really get 5Ah to use if you plan to use it for longevity. So your actually capacity is lower.
6) Made in China. I am not sure if everyone agrees with me that this is a cons, but most will agree there is a bigger quality control issue when dealing with chinese product.
7) Higher cost Wh/$
8 ) Higher long term operating cost because of more replacements packs required.
Nissan Leaf Pack Pros:
1) Made in Japan... for now. Later it might be Made in USA. We should be in consensus on how much better the quality control is in the USA/Japan compared to China.
2) Safer Chemistry
3) Longer Lasting Chemistry. Should easily last more than 250+ cycles even if it's used. I think they are rated for 600-1000+ cycles.
4) Lower cost in terms of Wh/$
5) Lower long term operating cost.
Nissan Leaf Pack Cons:
1) Larger packs, so it only works on bikes intended for long commute or fast, strong, powerful ebikes which can handle the weight.
2) will require mods to get from 2s2p to 4s1p which is much more usable form on an ebike.
From this digression, we can see the Leaf Pack is a much better buy and there will only be more of them as Nissan sells more Nissan Leaf Cars which will ultimately lead to more of them involved in a total loss collision ensuring a steady supply of these packs. Lesson Learned: Better to stick with safer and lower long term cost battery
Back to the initial discussion:
Battery is 91.2V33Ah Pack. However I can assure you it's really 91.2V25Ah Pack if you use it like I do.
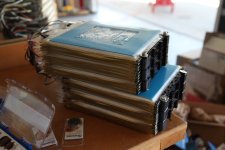
Because it's 100V topped off, I needed a 100V capable controller. I initially used my Lyen 18FET 100V modded 4110FET controller. However, I didn't like it because it was jittery, probably cause by running it near its limit.
I migrated to a 4115FET Lyen 18FET controller. However because of the poor design, the FETs kept shorting out.
After 4x replacing the FETs, I gave up and migrated to a Kelly Controller KBL96251, the best at the time you can get for my application at a reasonable cost. I would have tried the addapto, but they were not available at the time. Lesson Learned: Use a quality controller for the higher voltage/power application
Because of the extra weight of the 46lbs Nissan Leaf Pack, the HS3545 motor was getting bogged down. It was struggling to push the bike forward at any speed and it would get hot fast. Now imagine it climbing hills? I needed a more powerful motor!
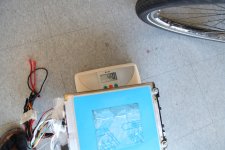
Since I didn't want to change my 135mm dropout bike frame, the cromotor was out of the question. Mid-drive was a hassle and I didn't want to deal with chains and noise. I went with the best motor available for a 135mm dropout at the time: the TC (The Crown from Crystalyte) Motor. I believe it is still true even now.
I opted for the TC-80 instead of the TC-100 because I knew my commute was long and didn't want to go with smaller wheel size making my bike look funky. I stuck with the TC-80 on 26 inch rim to reduce risk of burning the motor out on my long distance, high power commute. Moreover, it's cheaper and easier to get the Maxxis Hookworm in 26 inch size than 24 inch or 20 inch. I got the motor from ebikes.ca because of the great services Justin provides to the community. Moreover, he offered it with a rim while other places did not. This helped reduced the cost of the motor.
So in summary I had the heart of the bike specced out:
Battery: 91.2V25Ah Li-Mn
Controller: Kelly Controller KBL96251
Motor: TC-80 on 26 inch rim
Bike: The same frame as before.
The other upgrades are:
CA V3, 2x Grin-Tech Cycle illuminator, etc.
View attachment 7
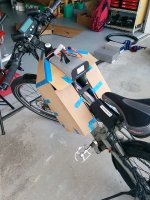
However there was a serious problem. I had no way of mounting the battery pack on the bike. It was too heavy for the rear rack. There was no way I was mounting these on the handle bars impeding my turning ability. The original mount I made was not going to support the heavier weight in its current form. I ended up sending it to my machinist to make a custom battery mount for me.
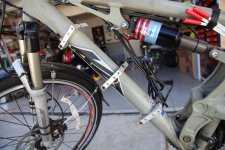
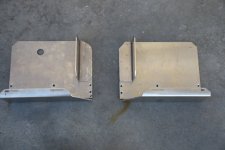
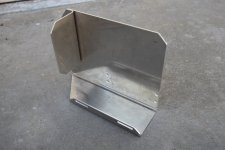
View attachment 22
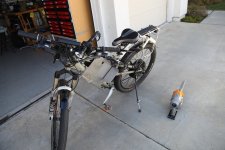
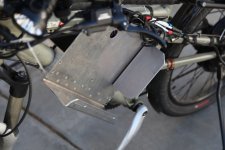
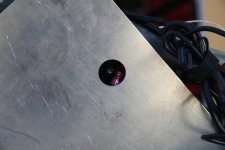
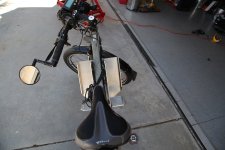
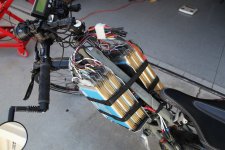
View attachment 15
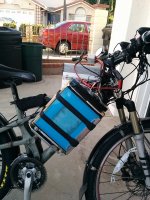
View attachment 13
Here is what I used to cover up the Leaf battery
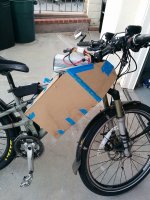
With all the pieces I was able to build my ebike for the new commute.
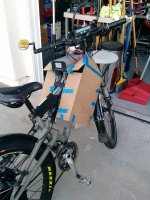
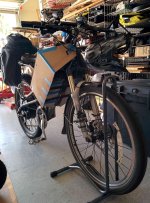
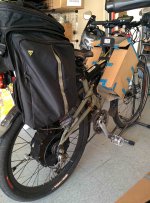
All was good until two of the spoke on the original rim broke around 2.5K miles. Justin was quick to send the replacement free of charge. However, because of typical chinese quality, one more spoke broke about 300 more miles after the initial fix. At this point, I didn't want to risk more spoke breakage especially at the power and speed I was going. So I went ahead and asked Justin to send me a complete set of new spokes and nipple so I can redo the whole wheel myself, which he did. GREAT SERVICE! I went ahead to replace everything and so far after more than 1K additional miles after the spoke replacement, It is still going strong. Lesson Learned: Build your own wheel or have someone who is an expert or have been doing it long enough to build your wheel
Here is my typical daily commute:
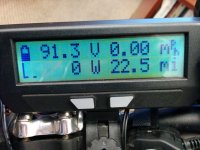
View attachment 4
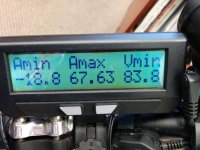
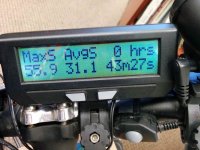
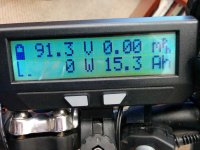
Nearly 4K miles on the latest system upgrade, everything is still going strong. I resetted the CA so I can gauge how well this new whole system upgrade did. Overall the bike frame have seen well over 10K miles combined with all the upgraded version, resetting each time. I have 127 cycles on the Leaf Battery and it's still going strong. Capacity have not dropped one bit, though I have noticed a hint of increase resistance around 100 charge cycle. If I had gone with the turnigy, I would have begun seeing the reduce range.
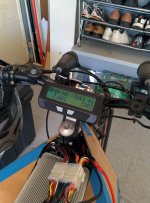
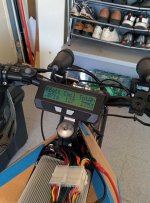
Charging was still a problem. I didn't want to use bulk charger and BMS because I don't trust them enough... Maybe never. Moreover, If I run my pack without the BMS, I have more control on when it should shut off. I opted to use the Hyperion 1420i because of it's 550W output capability at > 24V input. I was able to secure a few 24V Power supply created from Dell server power supply from icecube. They work great and I asked for the low fan speed mod so I can minimize the charging noise. Basically when I charge, I split the pack to 2 12s packs making it essentially 45.6V50Ah pack. But when I use it, it's essentially a 91.2V25Ah Pack. I then chose the connector for charging and discharging. The best I could come up with, at the time, was the computer 24 pins ATX. I set them to have 6 pins for the main outputs and 1 pin for the balance taps. Overall it works well for discharging. However on charging, I used a 20 pins version (to make it compatible with my other ebike charging setup). Because of this, I had to slow down the charging so not to over cook the connectors because I only have 2 connectors on the main power and ground.
So far, I love this bike. It has crazy capacity (I normally end my ride after using 2.3KWh which equates to typically 45+ miles when taking into account the slower, lower power rides in the mix). The acceleration is solid and the motor temperature is tamed. It is super silent and so far is super reliable. I feel safe when charging it, though it does take typically 4-6 hours to charge from empty to full.
More upgrades?
The only thing I would do now is work on a way to charge this thing faster. I was thinking of having duel Hyperion 1420i to charge it in around 1.5-2 hours at total input power of 1.1KW from empty, but I will have to put much more planning and work to make sure the wires and connectors can safely do so at that high rate of charging. This will be the next upgrade when I finally decide to retire this pack and create a new one.
For references here are the three older posts of this same ebike. If you read them in their gory detail, you will better understand why I made the upgrade each time.
The initial reason why I wanted to build this bike was my slower ebike was struggling on the hills and had trouble getting up to 35mph+. Moreover going faster than 20mph and on USA roads without full suspension was a no go. Lesson Learned: Never build an ebike without suspension capable of going faster than 20mph
Here are the specs for each evolution:
Initial Build:
http://endless-sphere.com/forums/viewtopic.php?f=4&t=33528&hilit=temperature+K2
Bike: K2 Base 3.0 2008 Full Suspension.
Motor: HS3548 from Ilia at ebikessf laced on 26 inch wheel
Tire: Schwable Big Apple 26x2.15
Controller: Crystalyte 12FET sensorless mod to support CA connector and 74V
Battery: 74V13.5Ah nanotech Lipo Pack (6x10s each at 4.5Ah wired in 20s3p)
Charging setup: 2x icharger 1010b+ using one PRC500 Power supply
Rack: got it from Performance bike
********** Everything was good about this. However the battery pack on the rear was making the bike wheely happy and I didn't want to put extra stress on the rear suspension/motor/dropout/rack. The nanotech battery was repurposed on my slower ebike to 14s with a help of a few 4s packs. Detail located here:
http://endless-sphere.com/forums/viewtopic.php?f=4&t=29194&p=506191&hilit=Transeo#p506191
The pack is still running today, but it has lost quite a bit of capacity and have seen more than 5K miles on the slower ebike. It is suppose to have 22.5Ah after the conversion to 14s when new, but realistically it now can get 14Ah because of the degradation both in time and cycles and I only charge to 4.15V and stop discharging at 3.7V.
In summary the problems were:
1) Battery pack is located on the rear rack so weight distribution is uneven making it hard and unstable to ride.
2) Schwable Big Apple on the rear was wearing out fast due to the soft rubber it was made up of, regen, and weight all on the rear wheel.
3) Battery pack on the rear rack means I had to carry my stuff in my backpack. I do not like to carry any backpack during rides.
4) I did not like the sensorless controller one bit. It ran hot even at low speeds without regen and starting from a complete stop was too jittery. This might be the reason why it was running hot.

1st upgrade:
http://endless-sphere.com/forums/viewtopic.php?f=3&t=37597&hilit=battery+mount
New Battery Pack: 8 x 10s5Ah NanoTech 25-50C Lipo Stick (~1.5KWh of battery) Wired in 20s4p (74V20Ah)
Total weight of battery with wiring: 22-23lbs
Lyen's 18FET overclocked sensored controller. 1st Gen with voltage mod to switch from 74V optimized to 100V optimized.
DoctorBass' Torque arm
********** This first upgrade solved a few of the issues:
1) Controller is now sensored. This made the startup much easier and smoother. Also the controller was cooler during long distance rides. The sensor-less controller was relegated to a back-up controller I now carry everywhere I go just to get home if the Hall sensor(s) or main controller goes out. Lesson Learned: Get Sensored controller if possible, sensorless only for back up.
2) Battery pack is now located on the center downtube. The weight distribution was so much better for riding. Lesson Learned: ALWAYS place the battery at the center of the bike.
3) DoctorBass' torque arm added to make sure the regen and acceleration does not kill the dropout.
4) Rear Rack to hold my other junk I carry on my rides.
Update on the nanotech pack: I currently have around 300+ cycles on these. I had to replace 2 weak/bad 10s packs. So far they are still fine for short distance and they sag quite a bit. I have since passed them down to my brother's electric scooter. They are now effectively 80% capacity of original if used with the full voltage range specced for Lipo. However because I charge them to 4.15V and discharge them to 3.7V, they effectively have 12Ah out of the original 20Ah. Lesson Learned: Lipo, when treated well, can last a very long time! Just as long as you don't mind the reduced capacity.
However here were still problems:
1) Torque arm was coming loose despite using DoctorBass recommended DP420 epoxy. The epoxy was cracking after a few hundred of miles ride.
2) I have gotten a few flats and with the size and weight of this bike, there was no easy way to transport it. I had fix the rear tire on the road to ride home. Not fun!
3) Dropout nut was getting loose also contributing to the cracking of the DP420 epoxy.
4) No temperature gauge on the motor so I was just ball parking it on when I should slow down to cool the motor.

2nd upgrade:
http://endless-sphere.com/forums/viewtopic.php?f=3&t=48780
Bolt on the torque arm
Norlock washer
Lining on rear tires
Maxxis hookworm on rear
Rear wheel tire and wheel modded to make it essentially flat proof. I have not gotten any flats since using this design.
New Motor: HS3545 also from ilia from ebikessf on downhill rims. This was because my original HS3548 spoke broke and also I wanted a temperature gauge built in the motor.
********** These upgrades solved a few problems:
1) The Nut no longer got loose because of the Norlock washer.
2) I made the rear tire essentially flat proof. See the thread on how I did it. Lesson Learned: Use this method on all rear ebike motor wheel if possible to prevent flats.
3) The new HS3545 was on a stronger rim with thicker spokes so spoke breakage was less likely. There has not been on broken spoke even after 4K+ miles of hard riding on this motor.
4) The temperature gauge coming from the motor was pretty good, though I had to make an arduino mod to it to get it to work. Back then the CA V3 was in beta and was not ready yet. With this gauge, I was able to tell when to slow down.
5) The bolt on mod for DoctorBass' torque arm was critical to keeping it in place. Lesson Learned: Never use the DP420 without bolting on the torque arm. The DP420 would be OK if there were no vibration, as DoctorBass' demonstrated in his video about it. However with vibration and shocks from a typical ride, eventually the DP420 will crack and this is where it failed. It is critical to bolt it on so it prevents the DP420 from cracking. So far after thousands of miles, the bolt on with DP420 solution have kept the torque arm solid in place.
However new problems arose:
1) My new work place was now 22.5 miles away and 45 miles round trip. Moreover, I did not want my ride to last 1-1.5 hours each way, the limit of the HS3545 motor without burning out.
2) The nanotech battery was sagging quite a bit and no longer can supply the range to meet the new requirements.
3) I also didn't trust the safety of Lipo enough to charge at the work place unattended or have the pack exposed like I did.
4) Charging using 2x icharger and a weak power supply was not cutting it in terms of charge speed.

Overall the bike at this point was reliable, but with the advent of the new requirements of 22.5 miles @ 40mph+ and not burning out and possibly not needing to recharge at home, I was back at the drawing table.
This leads up to the 3rd and current upgrade:
To elucidate the requirements a bit more:
1) Use the current bike frame. (I didn't want to start from scratch. Moreover, I could not afford time, cost, and space in the garage of another big ebike).
2) 22.5 miles @ 40mph+. (This was a long, fast commute on open roads so I knew I needed to keep up with the cars. Going anything less than 40mph+ means a more dangerous commute for me)
3) Top speed should be 50mph. (to allow me to pass cars if needed)
4) Battery range should be at least 30 miles @ 40mph+
5) Battery chemistry should be safe!
6) Controller should be super reliable!
7) Charging should be relatively easy.
Here is how I solved most of these in my most recent upgrade:
1) Battery: 91.2V33Ah Li-Mn. It is really the Nissan Leaf Battery Pack 24s1p. You can read more about it on this link:
http://endless-sphere.com/forums/viewtopic.php?f=14&t=52162
It is wired in 24s1p. Each cell is rated to have 33Ah, but I found out my usage (3.6V to 4.15V @ 0.5-1.5C current draw) yields a solid 25Ah. I can get up to 29Ah if I use the full range, but I never gotten it past 30Ah. Moreover I got these cell used so I didn't expected it anyways. You can read more about it on the link about the Nissan Leaf Pack.
In my opinion there are the most cost effective, long lasting, safe chemistry currently available on the market that you can buy. Even the HobbyKing Turnigy cannot compete in terms of wh/$.
Lets diverge and do a quick calculation on the two: New Turnigy 4s5Ah Hardcase pack vs Used Nissan Leaf Cells
New Turnigy 4s5Ah pack, when available, can be had for: $25.47 assuming free shipping. 14.8V*5Ah = 74Wh, => 74Wh/$25.47 = 2.905Wh/$
http://www.hobbyking.com/hobbyking/...P_14_8v_20C_hardcase_pack_USA_Warehouse_.html
Used Nissan Leaf Pack 2s2p can be had for $109 + shipping. Being conservative on capacity and shipping cost of $10, 7.6V50Ah = 380Wh, => 380/$119 = 3.19328Wh/$
http://hybridautocenter.com/HAC4/in...leaf-battery-module-model-2012-new&Itemid=605
But you have to factor in a few issues about the two:
Turnigy Pros:
1) Small packs so if you only need a few Wh or high Voltage with minimal Ah.
2) Might be a tad lighter than the Leaf Pack in terms of weight.
Turnigy Cons:
1) Lipo is much more dangerous to keep around compared to Li-Mn in the Leaf Pack.
2) You need to buy 10-20% more than you need because you will surely get duds.
3) Dealing with HobbyKing is like dealing with crooks. Search HobbyKing problems on this forum.
4) Turnigy are only rated at 250 Cycles or less. Chances are, you will have to throw them out much sooner than that.
5) You don't really get 5Ah to use if you plan to use it for longevity. So your actually capacity is lower.
6) Made in China. I am not sure if everyone agrees with me that this is a cons, but most will agree there is a bigger quality control issue when dealing with chinese product.
7) Higher cost Wh/$
8 ) Higher long term operating cost because of more replacements packs required.
Nissan Leaf Pack Pros:
1) Made in Japan... for now. Later it might be Made in USA. We should be in consensus on how much better the quality control is in the USA/Japan compared to China.
2) Safer Chemistry
3) Longer Lasting Chemistry. Should easily last more than 250+ cycles even if it's used. I think they are rated for 600-1000+ cycles.
4) Lower cost in terms of Wh/$
5) Lower long term operating cost.
Nissan Leaf Pack Cons:
1) Larger packs, so it only works on bikes intended for long commute or fast, strong, powerful ebikes which can handle the weight.
2) will require mods to get from 2s2p to 4s1p which is much more usable form on an ebike.
From this digression, we can see the Leaf Pack is a much better buy and there will only be more of them as Nissan sells more Nissan Leaf Cars which will ultimately lead to more of them involved in a total loss collision ensuring a steady supply of these packs. Lesson Learned: Better to stick with safer and lower long term cost battery
Back to the initial discussion:
Battery is 91.2V33Ah Pack. However I can assure you it's really 91.2V25Ah Pack if you use it like I do.

Because it's 100V topped off, I needed a 100V capable controller. I initially used my Lyen 18FET 100V modded 4110FET controller. However, I didn't like it because it was jittery, probably cause by running it near its limit.
I migrated to a 4115FET Lyen 18FET controller. However because of the poor design, the FETs kept shorting out.
After 4x replacing the FETs, I gave up and migrated to a Kelly Controller KBL96251, the best at the time you can get for my application at a reasonable cost. I would have tried the addapto, but they were not available at the time. Lesson Learned: Use a quality controller for the higher voltage/power application
Because of the extra weight of the 46lbs Nissan Leaf Pack, the HS3545 motor was getting bogged down. It was struggling to push the bike forward at any speed and it would get hot fast. Now imagine it climbing hills? I needed a more powerful motor!

Since I didn't want to change my 135mm dropout bike frame, the cromotor was out of the question. Mid-drive was a hassle and I didn't want to deal with chains and noise. I went with the best motor available for a 135mm dropout at the time: the TC (The Crown from Crystalyte) Motor. I believe it is still true even now.
I opted for the TC-80 instead of the TC-100 because I knew my commute was long and didn't want to go with smaller wheel size making my bike look funky. I stuck with the TC-80 on 26 inch rim to reduce risk of burning the motor out on my long distance, high power commute. Moreover, it's cheaper and easier to get the Maxxis Hookworm in 26 inch size than 24 inch or 20 inch. I got the motor from ebikes.ca because of the great services Justin provides to the community. Moreover, he offered it with a rim while other places did not. This helped reduced the cost of the motor.
So in summary I had the heart of the bike specced out:
Battery: 91.2V25Ah Li-Mn
Controller: Kelly Controller KBL96251
Motor: TC-80 on 26 inch rim
Bike: The same frame as before.
The other upgrades are:
CA V3, 2x Grin-Tech Cycle illuminator, etc.
View attachment 7
However there was a serious problem. I had no way of mounting the battery pack on the bike. It was too heavy for the rear rack. There was no way I was mounting these on the handle bars impeding my turning ability. The original mount I made was not going to support the heavier weight in its current form. I ended up sending it to my machinist to make a custom battery mount for me.


View attachment 22


View attachment 15

View attachment 13
Here is what I used to cover up the Leaf battery

With all the pieces I was able to build my ebike for the new commute.


All was good until two of the spoke on the original rim broke around 2.5K miles. Justin was quick to send the replacement free of charge. However, because of typical chinese quality, one more spoke broke about 300 more miles after the initial fix. At this point, I didn't want to risk more spoke breakage especially at the power and speed I was going. So I went ahead and asked Justin to send me a complete set of new spokes and nipple so I can redo the whole wheel myself, which he did. GREAT SERVICE! I went ahead to replace everything and so far after more than 1K additional miles after the spoke replacement, It is still going strong. Lesson Learned: Build your own wheel or have someone who is an expert or have been doing it long enough to build your wheel
Here is my typical daily commute:


View attachment 4


Nearly 4K miles on the latest system upgrade, everything is still going strong. I resetted the CA so I can gauge how well this new whole system upgrade did. Overall the bike frame have seen well over 10K miles combined with all the upgraded version, resetting each time. I have 127 cycles on the Leaf Battery and it's still going strong. Capacity have not dropped one bit, though I have noticed a hint of increase resistance around 100 charge cycle. If I had gone with the turnigy, I would have begun seeing the reduce range.


Charging was still a problem. I didn't want to use bulk charger and BMS because I don't trust them enough... Maybe never. Moreover, If I run my pack without the BMS, I have more control on when it should shut off. I opted to use the Hyperion 1420i because of it's 550W output capability at > 24V input. I was able to secure a few 24V Power supply created from Dell server power supply from icecube. They work great and I asked for the low fan speed mod so I can minimize the charging noise. Basically when I charge, I split the pack to 2 12s packs making it essentially 45.6V50Ah pack. But when I use it, it's essentially a 91.2V25Ah Pack. I then chose the connector for charging and discharging. The best I could come up with, at the time, was the computer 24 pins ATX. I set them to have 6 pins for the main outputs and 1 pin for the balance taps. Overall it works well for discharging. However on charging, I used a 20 pins version (to make it compatible with my other ebike charging setup). Because of this, I had to slow down the charging so not to over cook the connectors because I only have 2 connectors on the main power and ground.
So far, I love this bike. It has crazy capacity (I normally end my ride after using 2.3KWh which equates to typically 45+ miles when taking into account the slower, lower power rides in the mix). The acceleration is solid and the motor temperature is tamed. It is super silent and so far is super reliable. I feel safe when charging it, though it does take typically 4-6 hours to charge from empty to full.
More upgrades?
The only thing I would do now is work on a way to charge this thing faster. I was thinking of having duel Hyperion 1420i to charge it in around 1.5-2 hours at total input power of 1.1KW from empty, but I will have to put much more planning and work to make sure the wires and connectors can safely do so at that high rate of charging. This will be the next upgrade when I finally decide to retire this pack and create a new one.

