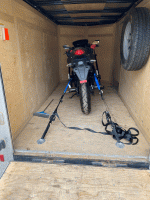
My humble little Gio Demon e-cycle/e-scooter Build/Mod Thread

dragon

1 W
Joined
Feb 2, 2023
Messages
58
Location
Calgary, AB
So here’s my modest build / mod thread for my (almost 1 yr old now) “electric mobility scooter” haha. Motorcycles were very taboo among my family elders while growing up. Nothing changed after I became an adult or after marriage as my wife was vehemently against motorcycles as well. I do not have a motorcycle license, nor am I even allowed to get one hehe.

This having pedals & restricted to 32kph as an electric bicycle or unrestricted to 60kph as a moped/scooter with no motorcycle license needed, it was easy to appease family members & keep my marriage intact haha.
There was no way I was going to ride this on the city bike paths & I didn’t want unnecessary attention from the police, especially since my daily commute would pass by a local police outpost.
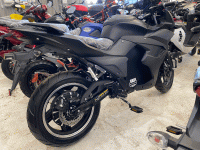
It had a VIN so the process wasn’t too painful to legally registered my “electric mobility scooter” as a 50cc-equivalent moped/scooter.tempImagepUZfS3.giftempImage6if1Lr.gif
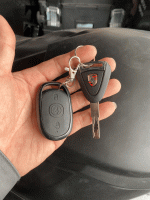
Cool point of interest: the key looks like a Porsche key haha
tempImagevi95A0.gif

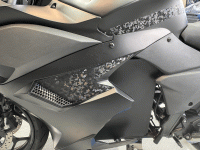
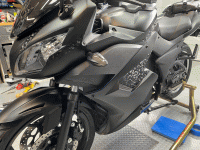
Me being me, I can’t leave things stock so I started my mods. First, applying some subtle artistic touches using black stealth camo patterned vinyl & replaced as many of the visible silver-colored screws & bolts to black ones.
tempImageIDCEG1.giftempImageEUwpfU.gif

Next, removed the pedals, crank assembly & chain as well as the chain guard/fender & added some reflective tape to aid with twilight visibilitytempImagebOFEHZ.gif
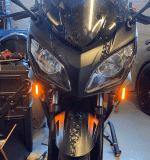
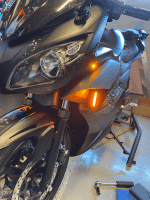
Installed LED marker bulbs, plate lights & sleeker sequential turn signals with the front ones relocated.
tempImagerfWsCR.giftempImagejSOW1H.gif

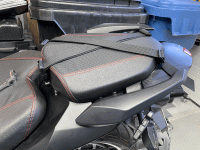
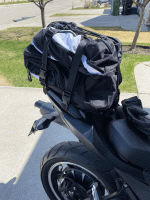
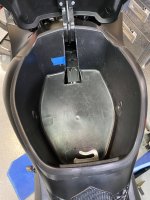
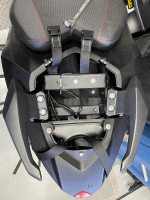
Tethered some luggage straps around a metal brace under the rear seat to secure a backpack or mini coolertempImageua83FX.gif
tempImageUmnip6.giftempImageOBDt1r.gif

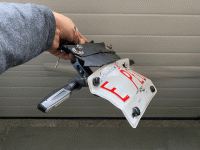
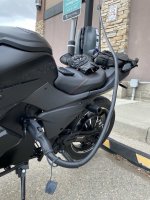
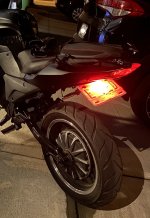
Added some GoPro & phone mounts & cut up the rear fender to mount a tail tidy
IMG_4144.jpg
 
Last edited:
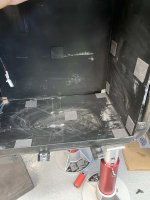
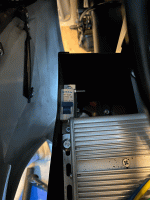
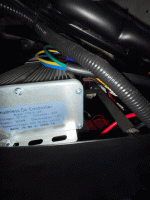
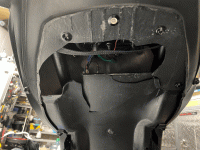
While replacing some warranty replacement panels, took the opportunity to get to know the insides of the bike.
tempImageK9Vv8j.giftempImagePhqaBv.giftempImagetTjSfi.giftempImageP7YveZ.gif

When I removed the speed governor, I got a useable top speed of 60-65kph but the speedometer only showed up to 32kph.
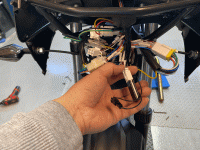
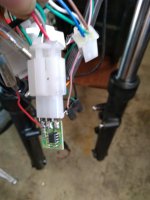
Here's the black wire connector by my palm I disconnected & got full readings off the speedometer that were within 1-2 of my phone's gps. Not sure what the white connector thing was, thought maybe it was a bluetooth module but no devices showed up when I tried scanning for bluetooth.
tempImagefe6cWL.gif

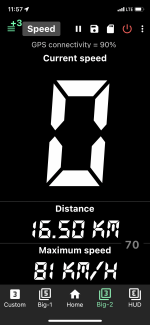
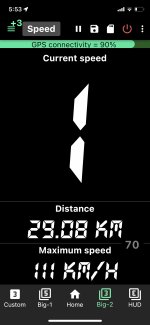
Top speed to date while drafting behind a truck on a flat stretch of road with traffic & lights working in my favour.
IMG_4499.PNG
 
Last edited:
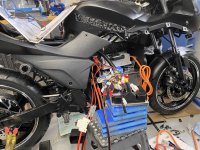
My 1st mishap (probably of many, haha) of modding my “electric mobility scooter”. Almost as bad as it looks but thankfully no permanent bodily harm incurred. The Tail Tidy I installed was apparently too heavy for the unsupported plastic fender liner & gave way after 5 months. The super bouncy suspension coupled with repeated jolts from not being able to avoid some potholes & raised manhole covers was too much stress for the plastic I guess. The entire assembly bounced off the rear tire & ricocheted off the back of my leg. I retrieved the battered bits & pieces & then Macgyver’d things back in place for now. Gaffer’s tape to the rescue lol! Flattened the license plate as much as possible, ditched most of the Tail Tidy mount & substituted some L-brackets that I bent to bolt into some existing steel brackets.
tempImage2Ve3z2.giftempImagesVNnLU.gif
 
Last edited:
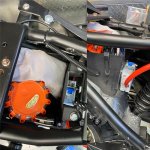
Now that I'm 100% positive I'll be keeping this for the long term, I've been finalizing some upgrade options.
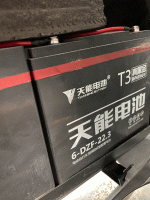
1st step is to replace the SLA battery set-up.
Since building my own battery pack was beyond my current comfort level, I looked for some local or national suppliers but prices were well beyond what I was willing to pay so scoured alibaba & aliexpress.
I finalized an order for a new battery pack with the following specs:
72v 50ah lifepo4 battery pack with bluetooth enabled 100a BMS
assembly notes 3.2v, 24S
I hope to receive it in 3-5weeks.

For a new hub motor & controller, thanks to Alan on here from QS motors, I've decided to go with the following:
5000w 17x3.5 inch QS260 45H V3 Hub Motor
FarDriver ND72680 controller
both the bluetooth adapter and USB programming cable
Will hopefully finalize that order within the next couple days.
 
Next decision is what tire & tire size to go with.
Current rear tire size is 140/70r16.
Since this bike is meant to be just a fun, short distance city commuter & will not see autobahn speeds or have me dragging a knee around a race track, literally any tire would be better than the no-name stock tire offerings.

I've done lots of custom +1/+2 wheel set-ups (inc. staggered awd/4wd) on my cars & trucks, so pretty familiar with the relationship of rolling circumference, overall diameter difference between front & back, etc but unsure of how much directly applies when it comes to my situation with 2-wheelers.

Similar bikes from other companies/retailers use a 17" hub motor & a 140/70r17 unknown brand tire.

With a new 17x3.5" hub motor wheel, I can go with a 130/70r17, 140/70r17, 140/60r17 or a 150/60r17 size tire & I've narrowed it down to Dunlop Sportmax GPR-300, Michelin Pilot Street Radial & Shinko 006 podium. Not all are offered in all the potential sizes.

A 140/70r17 tire's overall diameter would raise the back end & rake of the bike about 1/2" compared to my current 140/70r16 tire.

The Dunlops seem to be the best bang for buck option & therefore the most appealing. (all prices in Canadian dollars)
$98-142/tire
110/70r17 front tire
140/70r17 rear tire
150/60r17 rear tire

Michelin Pilot Street Radial $176-192
$176-192/tire
110/70r17
130/70r17
140/70r17

Shinko 006 podium
$139-183
110/70r17
140/60r17

Any user experience or recommendations with these tire sizes/models?
 
Liking the build.

I'd probably go with the 140/60/17 size to keep the diameter closer to the original wheel (and possibly for issues of fitting the larger wheel with the stock swingarm although you've probably already measured for that).

Will be interesting to see how the new wheel/hub motor and controller workout. I know these bikes with the 3000w motors get about 75-85kph so a 5000watter should get you over 100kph for sure.
 
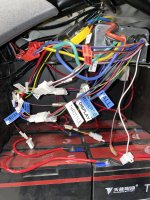
Time for a quick update. In preparation & anticipation of the arrival of new parts, I labelled all the existing connectors I could, so I don’t confuse myself too much when it comes time to swap in the new controller.
WireLabels.jpg

I got word my new lithium battery has shipped! Excitement disappeared quickly when I realized the shipping will take much longer than the originally estimated 3 week delivery date on the original product info page. 1stUPS tracking number was invalid. 2nd issued number seems valid, but it looks like UPS only handles the expedited shipping once the battery arrives in Canada. Aliexpress has the estimated delivery date of April 18. Boo! Had I known upfront the real shipping time, (or checked reviews) I would have went with a different company/supplier.

My new hub motor was also delayed in production & pushed back 15 days but it’s ready to ship, along with the new controller! Looks like I’ll get the motor & controller way before the battery (even though the battery was ordered at least a week before the motor & controller)

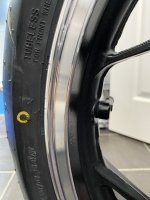
In the meantime, CanadaPost dropped off my new tires: dunlop sportmax gpr-300 (110/70r17 & 140/70r17). I’ve never mounted a motorcycle tire before but after watching a few videos, how hard can it be haha. Used the zip-tie method to dismount the old tire & mount the new one. The process was almost as easy as the videos I saw. Got the yellow dot as close to the valve stem as I could.
TireYellowDot.jpg

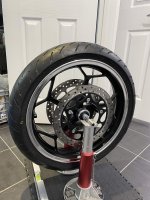
Cleaned the wheel & then applied 1 layer of CarPro Dlux on the front wheel. I also tried out the jack stand method to balance the tire. 1.5oz & the tire seems balanced.
FrontWheel.jpg
WheelWeights.jpg

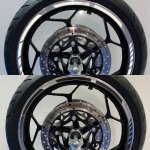
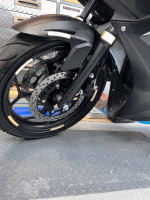
The final touch was adding some black reflective wheel stripes.

ABB1FB8D-6FD2-4ACA-8C10-2E370B6F9417.JPG
 
Last edited:
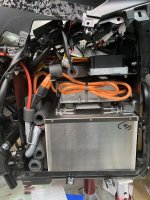
Good idea with the balancing, I'll have to do that as well. Do you have a link for the wheel weights and reflective tape?

I don't have the black connector you disconnected for the speedometer but I have a similar white connector with the black cover on mine, says "12v LED with some Chinese writing. I took the cover off and this is whats under it :

Harness module 12v led front without cover pic.jpg
 
Good idea with the balancing, I'll have to do that as well. Do you have a link for the wheel weights and reflective tape?

I don't have the black connector you disconnected for the speedometer but I have a similar white connector with the black cover on mine, says "12v LED with some Chinese writing. I took the cover off and this is whats under it :

View attachment 332062
hmmm, interesting. Maybe a led flasher relay?
 
A bit of an overdue update. Good news first, I received most of my ordered parts from multiple overseas vendors. Bad news, some issues with shipping damage & quality control, some resolved & some that I’ll probably have to live with because I don’t want to wait another 6-8 weeks for replacements.

While waiting for parts, I mapped out mounting locations for the controller & onboard charger with mock-ups I cut out of some leftover fitness mats.
IMG_4772.jpg

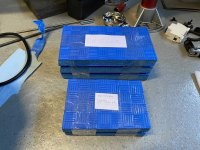
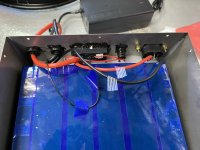
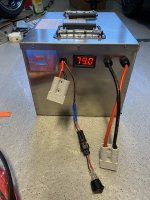
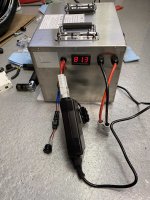
My new battery pack weighs in at 43.8lbs. The old SLA batteries weighed in at 15.2lbs/each so a hair of over 91lbs total. Weight savings to be negated a tiny bit with my new on-board battery charger & other additions. In hindsight I should have ordered the battery pack with 2 sets of Anderson connectors as the new 10a/20a on-board charger came with an Anderson connector. Took the top off the battery pack & swapped the c13 port to another Anderson connector. The little power button only turns on the voltage display.
IMG_4763.jpgIMG_4769.jpg

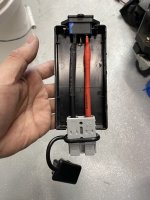
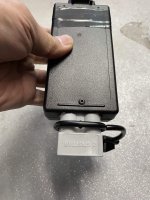
Also took apart an old laptop charger power block & scavenged the casing to house a c13 to Anderson connector adapter so I can use one of my old battery chargers to charge the battery pack if it’s off the bike.

IMG_4816.jpgIMG_4817.jpgIMG_4819.jpg
 
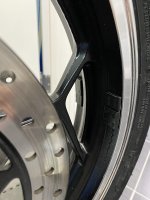
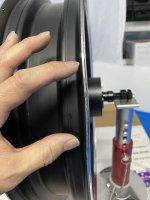
Motor & controller arrived so I was very excited to get into the heart of the upgrade. Once opened up, the box & packaging seemed worse for wear but didn’t give it too much thought as everything seemed okay. First step was to prep the hub motor for a layer of Carpro Dlux. While cleaning & prepping, my heart sank when I noticed the wheel had a dent.

BentRim.jpg

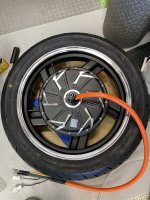
Damage claim initiated & still waiting to hear back from ups as to what or any compensation is available. I reached out to a few contacts with local wheel repair companies but no one would touch the wheel as there was no way to mount it on their machines. So rather than have everything at a standstill, I built a little platform to hold the wheel so I could massage the dent (hopefully without damaging the rest of the wheel). I grudgingly decided to heat up the bent lip & try to work it back into shape. I used a rubber mallet & some scrap pieces of wood that I roughly contoured to the curve of the wheel. I was able to reduce the bend slightly, so I tried mounting the tire. My diy wheel stand made the tire mounting easier.
IMG_4838.jpg

Filled it up with air & let it sit for a day to see if it held air. It held enough air to forge on with the build so got back to cleaning & prepping the wheel for the ceramic coating. It was still a bit cool in the garage so snuck the wheel into the basement (while the wife was sleeping hehe) to apply the coating. It's surprising how many little blemishes/imperfections you find when you're prepping for a coating (glue/epoxy residue, machining burs, etc) Due to the lighting, missed a few spots so did a 2nd layer of touch-ups. While waiting for the 2nd layer to dry, got the old controller & hub motor removed. The battery case cleaned & then stuck on some foam squares where the battery case would sit.

IMG_4843.jpgIMG_4755.jpg
 
Last edited:
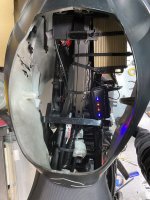
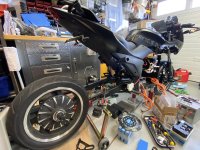
Swapped over the rear brake rotor & brought the wheel back into the garage. Triple-checked & compared the wiring from the old controller to the new one. Temporarily hooked up some wires before committing to changing a few connectors while trying not to get confused by all the different wire colors.
After a few attempts of trying to decipher various sets of instructions & error beeps, finally got the motor & controller to play nice enough to run the auto-learn. Yay but the motor runs in reverse. Tried the auto-learn several times but still ran in reverse. Found the setting to switch the motor direction so changed that. After some more musical wire-swapping, I got reverse & the 3-speed switch working. The speedometer display powered up no speed or odometer readngs. Boo but at least I felt comfortable enough to permanently start mounting stuff & finalizing terminal connections.
IMG_4861.jpg
 
Last edited:
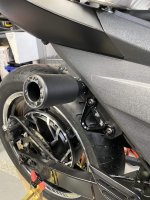
While mounting the hub motor, I couldn’t reuse the zip ties I had on the old hub motor wiring as the new phase wires were double the thickness. The hub motor wire sheathing was orange & sticks out like a sore thumb with my color scheme so covered it up with some wire loom.
For better security, moved the breaker from the battery box so the alarm can’t be defeated by reaching up & in shutting off the circuit breaker. B96D8F1A-3DCA-4F72-A30B-08A44DE865B1.JPG

Upsized the tiny battery wiring by harvesting some 4gauge booster cables (seemed more like 5 or 6gauge but still much cheaper than buying 4gauge wiring from an electronics store)
Decided to use some battery post terminals to connect the miscellaneous ground, power & ignition wires.

I wanted some more charging redundancy, so in addition to the original charge port, I added an electrical outlet receptacle so I can just use an extension cord to charge the bike through the onboard charger. I also permanently a J1772 connector that I ordered & received (much later than expected due to a lost package & poor service) from evseadapters.
I didn’t want to cut up the adapter wiring so took some 1ft extensions & cut those up & tied them into the onboard charger.
Shortened the 2m long discharge cable from the on-board charger & got it mounted.Had to trim down some support brackets & use a combination of spacers & L-brackets to mount the controller above the charger. Added stick-on foam & heat shrink tubing to the various brackets to minimize rattles & vibrations. Also used some leftover foam pipe insulation & stuffed copious amounts of it in any spots that could rub or rattle.
IMG_4924.jpg

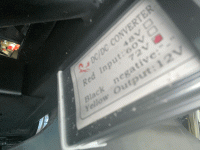
Ordered a new ProChaser dc-dc converter & a mini 12v fuse block from Amazon. The fuse block came but the converter was delayed. Eventually got those installed & wired up.
IMG_4925.jpg

Now all the components are fully mounted & connected. Double-checked my connections, said a little prayer & with my fingers & toes crossed, turned everything on. Yay no error beeping & everything kinda works! Well, the speedo was reading 199kph on full throttle haha.

I had removed the rear foot pegs so I added a slider & drilled & tapped another hole to mount a tie-down. Added a touch of the same stealth camo to cover the logos.
RearSlidertiedown.jpg
 
Last edited:
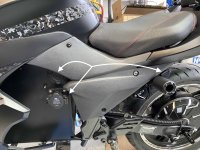
Probably.

That's too bad about the bent rim, hopefully they exchange it for you. Going from the 16" rim to the 17" rim how does it fit clearance wise?
I doubt I'll get a new rim without sending the current rim back. The upcoming riding season would probably be long gone before that whole exchange process was completed. Still waiting to hear back.

The 5k motor is wider than the 2k motor but it's the same 3.5" wheel width & the dropout's are essentially the same size, just had to play around a lot with spacers to get the wheel to sit right without the brake rotor rubbing excessively.
 
3 different charge ports!
ChargePorts.jpg

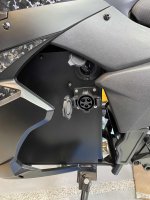
Here’s the left side of the battery box that has the noco ac port & the J1772 adapter mounted. Also used black bolt/nut/screw covers on all the exposed fasteners so they don’t stand out. There's 1 to the left of the charge ports (one of the onboard charger mounts)
ChargePortsCloseup.jpg


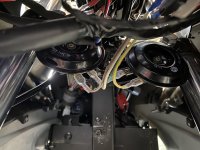
BEEP BEEP, I replaced the single horn to a dual Hella horn set-up. Should be easier to get other drivers' attention when needed.
HellaHorns.jpg

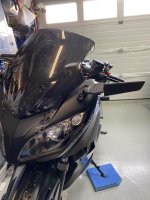
Replaced the fugly mirrors with some sleek blade mirrors. Still equally unusable but looks better!
BladeMirror.jpg
The battery cover panel took a bit of coaxing to install but got it on as well as the other panels removed during the initial teardown. Then just a waiting game for the weather to cooperate a bit so I could do some test riding.

In the meantime, figuring out how much I can expand the fake gas tank storage bin. Cut out the curved extrusion so that'll give me a bit more space once I cover it. Trying to see if I can harvest/source a free/cheap storage cubby pocket (like the little cubbies below old car radio decks) to slide into the front bottom after cutting a hole to match & still leave room for the lid hinge.
TankStorage.jpg
 
BEEP BEEP, I replaced the single horn to a dual Hella horn set-up. Should be easier to get other drivers' attention when needed.
Some thoughts from long experience:

Does it sound like a car or truck horn? If not, it may be ignored because it doesn't signify a potential threat to the drivers of such vehicles.

In my experiments over the decades of getting people to pay attention to me on the road as a bicycle, I found that using signalling devices and methods that are the same as those vehicles is much more likely to get their attention in those instances it is necessary.

So for a horn I use the pair of horns off a 1985 Ford LTD car, which work well in the rare times I need to get someone to look my way to avoid a problem. (for those that pay attention to anything outside their own head, anyway, which is not a problem exclusive to any group of people on the roads or sidewalks or paths).

(I also have a bicycle bell for those that can hear it and would pay attention to such a sound; it gets used much more often than the horn, but neither sees much use).

I also use large-surface-area automotive signal and marker lighting, as it works much better than small area or point sources, regardless of brightness.
Thanks for the sage words. The dual horns put out 2 different frequencies & does sound closer to a small car horn. It's listed to be 108db. I measured my old horn with a sound app on my phone & that horn was only 85db held an arm's length away. I intend to measure the new horn with the same app.
 
EV charging setup works great! My onboard charger is rated at 10a for 110v & 20a at 220v. I’m getting a hair over 16a! I’ve heard the max the EV stations will put out through these adapters is around 16a but will throttle that down to only a few amps with most battery chargers that come free with bikes or battery packs which is how some people can charge up to 3 e-bikes simultaneously off a single J1772 adapter. The closest charging station is 2.5km away at the local grocery store. The best thing is charging is FREE for the first 2 hours!
EVcharging.jpg


After endless fiddling with the settings on the Display section of the iPhone Fardriver app, I got the display speed & odometer close enough as my speed now is only 1-2kph different from gps & the odometer reading seems to be as accurate as can be.

Still trying to tune optimal settings. I had to keep turning down MaxLineCurr & MaxPhaseCurr because my battery kept shutting down. Currently MaxLineCurr is set at 105a & MaxPhaseCurr is 400a. I did find some semi-quiet secondary roads to test today & managed to max out at 111kph though I can’t sustain it for long I think due to voltage sag. I probably should have done a bit more homework on batteries & bms’s before ordering what I did. I’m more than content with the max speed but a bit concerned with the battery performance. I’m hoping after a few cycles, it improves a bit. The acceleration is good, so for the roads I’ll be on, no problems keeping up with the traffic & I don’t have to worry about the cars behind me when leaving the traffic lights. I was thinking of changing some parameters so with my 3-speed switch the 1st speed would have a low 32kph max (in case a non-rider family member wants to try the bike around the block) 2nd speed would be the normal mode I’d be riding around in & then have the 3rd speed as a hill climbing mode. Is this crazy-talk or is it doable?
MaxSpeed042323.jpg
 
EV charging setup works great! My onboard charger is rated at 10a for 110v & 20a at 220v. I’m getting a hair over 16a!
Keep in mind that if the charging station is regulating just the AC (by either shutting off the AC when the current limit is , it can't limit the output of your charger on the DC side. Unless you have DC-side control and current shunt connections from the charger-pack current path back to the station *and* the station is designed to monitor this and command the charger to limit itself, it can't actually limit what your charger does.

In that event, any limit in your current is either set at your charger, or is because the pack isn't empty enough to draw the full current from the charger.


I’ve heard the max the EV stations will put out through these adapters is around 16a but will throttle that down to only a few amps with most battery chargers that come free with bikes or battery packs which is how some people can charge up to 3 e-bikes simultaneously off a single J1772 adapter.
If the AC current of the station is limited to 16A, then that's 16A at what voltage? 220v? If so, then that's 220v x 16a = 3520w. Then if the DC output of the charger is say, 84v (for a typical 72v pack), then 3520w / 84v = 42A that a bigger charger could supply the battery at the full 16A of the AC-side input from the station. (it would actually be less than 42A because the charger is not 100% efficient, but not by that much).

What its' really drawing from the wall, even assuming 20A on the DC side, would be about 84v x 20A = 1680W, 1680W / 220V = 7.7A. So if the station can support up to 16A at 220V, you're only even using half it's capability. ;)


As an aside: if your charger is correctly set to a 20A max limit but is only supplying 16A to the battery even when it's empty then it means the battery itself isn't going to draw more than that 16A because of internal cell resistances, etc., and you won't ever get any faster charging even with a bigger charger or better AC supply.

If your charger is what is limiting to 16A and not the battery level/etc., then you could get faster charging by paralleling a second such charger with it--the station could support it, assuming the battery is safe to charge at that rate.


Regarding ebikes: Most typical ebikes only have a 2A (DC side) charger, sometiems 5A. If the packs they're for are typical 48 or 52v, that's 52v x 2A = 104W, or 52v x 5A = 260W. 104W / 110V = 1A, 260W / 110V = 2.4A, for the AC side current draw from the wall (or station). It's probably a little higher than that becuase of efficiency, as noted above.

Assuming that the 16A is the same for 110V as 220V (instead of being 32A for the same total wattage), then you could still have quite a few ebike chargers paralleled on the same station. If they were only 2A chargers, you could use 16 of them at once, and 6 or 7 of the 5A type. ;)

You can check any charger's AC-side current rating, and use that directly (instead of calculating) to figure out how many you could parallel.


Still trying to tune optimal settings. I had to keep turning down MaxLineCurr & MaxPhaseCurr because my battery kept shutting down. Currently MaxLineCurr is set at 105a & MaxPhaseCurr is 400a.
According to a post up above, your pack is "72v 50ah lifepo4 battery pack with bluetooth enabled 100a BMS" so you should set your MaxLineCurr down below 100A so you dont' stress out the BMS by running it at it's limit.

Do you have specs for the cells in the pack? That way you can verify that they are actually capable of 100A (if not, you want to run the controller at even lower current so you don't stress them, damaging them cumulatively over time whenever the current is exceeded), since it is unfortunately not uncommon for pack builders to use cells less capable than the pack is advertised for. (or for pack sellers to sell packs less capable than the ad claims).

The harder you push the pack, the faster it will age. Also, the higher the current you draw, the greater the voltage sag, and as the pack is closer to empty than full, the more the BMS will shutdown it's output completely.

Whenever the BMS actually shuts down for those situations, it's going to be when you're trying to accelerate or maintain speed, and those are likely to be when it would be bad for it to shutdown if you are riding in traffic. ;)

So setting the system up to do as much as you can to prevent those shutdowns, even if it limits your acceleration or speed, is probably a good idea. ;)

It's also easier on the pack, but that's probably less of a concern than total power loss in traffic/etc would be.
 
Last edited:
Keep in mind that if the charging station is regulating just the AC (by either shutting off the AC when the current limit is , it can't limit the output of your charger on the DC side. Unless you have DC-side control and current shunt connections from the charger-pack current path back to the station *and* the station is designed to monitor this and command the charger to limit itself, it can't actually limit what your charger does.

In that event, any limit in your current is either set at your charger, or is because the pack isn't empty enough to draw the full current from the charger.


If the AC current of the station is limited to 16A, then that's 16A at what voltage? 220v? If so, then that's 220v x 16a = 3520w. Then if the DC output of the charger is say, 84v (for a typical 72v pack), then 3520w / 84v = 42A that a bigger charger could supply the battery at the full 16A of the AC-side input from the station. (it would actually be less than 42A because the charger is not 100% efficient, but not by that much).

What its' really drawing from the wall, even assuming 20A on the DC side, would be about 84v x 20A = 1680W, 1680W / 220V = 7.7A. So if the station can support up to 16A at 220V, you're only even using half it's capability. ;)


As an aside: if your charger is correctly set to a 20A max limit but is only supplying 16A to the battery even when it's empty then it means the battery itself isn't going to draw more than that 16A because of internal cell resistances, etc., and you won't ever get any faster charging even with a bigger charger or better AC supply.

If your charger is what is limiting to 16A and not the battery level/etc., then you could get faster charging by paralleling a second such charger with it--the station could support it, assuming the battery is safe to charge at that rate.


Regarding ebikes: Most typical ebikes only have a 2A (DC side) charger, sometiems 5A. If the packs they're for are typical 48 or 52v, that's 52v x 2A = 104W, or 52v x 5A = 260W. 104W / 110V = 1A, 260W / 110V = 2.4A, for the AC side current draw from the wall (or station). It's probably a little higher than that becuase of efficiency, as noted above.

Assuming that the 16A is the same for 110V as 220V (instead of being 32A for the same total wattage), then you could still have quite a few ebike chargers paralleled on the same station. If they were only 2A chargers, you could use 16 of them at once, and 6 or 7 of the 5A type. ;)

You can check any charger's AC-side current rating, and use that directly (instead of calculating) to figure out how many you could parallel.


According to a post up above, your pack is "72v 50ah lifepo4 battery pack with bluetooth enabled 100a BMS" so you should set your MaxLineCurr down below 100A so you dont' stress out the BMS by running it at it's limit.

Do you have specs for the cells in the pack? That way you can verify that they are actually capable of 100A (if not, you want to run the controller at even lower current so you don't stress them, damaging them cumulatively over time whenever the current is exceeded), since it is unfortunately not uncommon for pack builders to use cells less capable than the pack is advertised for. (or for pack sellers to sell packs less capable than the ad claims).

The harder you push the pack, the faster it will age. Also, the higher the current you draw, the greater the voltage sag, and as the pack is closer to empty than full, the more the BMS will shutdown it's output completely.

Whenever the BMS actually shuts down for those situations, it's going to be when you're trying to accelerate or maintain speed, and those are likely to be when it would be bad for it to shutdown if you are riding in traffic. ;)

So setting the system up to do as much as you can to prevent those shutdowns, even if it limits your acceleration or speed, is probably a good idea. ;)

It's also easier on the pack, but that's probably less of a concern than total power loss in traffic/etc would be.
Thank you for reply amberwolf! I feel like I'm in science class (in a good way) when I read your replies!
The seller/manufacturer had told me the battery specs were 3.2v 50ah lifepo4, 24S.

I've already reduced MaxLineCurr to 95a.
Weather permitting, I will try it out tomorrow.
 
The seller/manufacturer had told me the battery specs were 3.2v 50ah lifepo4, 24S.
Unfortunately that only tells you what chemistry they are and how many in series, not what actual cell was used, so you can't verify what they are actually capable of. It's extremely common for sellers to not even know what's in the stuff they sell, so it's not surprising they can't (or don't) tell you any details about the pack. It's useful to know which cells they actually are because then you can dig up a spec sheet for them to know how to use and maintain them, and whether or not you actually got what you paid for, since it is not unheard of for packs to be built with stuff that doesn't actually support the specs the ad claims. :(
 
Unfortunately that only tells you what chemistry they are and how many in series, not what actual cell was used, so you can't verify what they are actually capable of. It's extremely common for sellers to not even know what's in the stuff they sell, so it's not surprising they can't (or don't) tell you any details about the pack. It's useful to know which cells they actually are because then you can dig up a spec sheet for them to know how to use and maintain them, and whether or not you actually got what you paid for, since it is not unheard of for packs to be built with stuff that doesn't actually support the specs the ad claims. :(
So the only way would be to take the battery out & apart, (which might confirm what I don't want to know haha). I think I'll tackle that next winter. For now, I'll just give up some speed & not tax the battery as much.
 
Back
Top