New Enduro/clone build

ZeroEm said:
Been reading your posts from the start. Your bike has come a long way, seems you have tackled any and all issues. Job well done.

Thank you Sir!
Yeah this bike has come a long way! It started out something to cruise around neighborhoods and sidewalks in the city and then turned into a full on dirtbike :lol:
 
Cut the bracket with a 3” blade Dremel saw. Then lots of filing to shape and give a profile. Still need to profile more then sand-paint.

The seat height is around 34” now! I can adjust the mounting bracket to raise the seat around 1” if needed. Did some testing in the neighborhood felt really good. Really curious to see how it will handle off-road now. Many changes :p
Typically, I like to change one thing at a time and then test but not this time
 

Attachments

  • 1BFDE724-07A7-45A7-A3F7-6C024894BDD4.jpeg
    1BFDE724-07A7-45A7-A3F7-6C024894BDD4.jpeg
    3.1 MB · Views: 226
  • 3DF9F4E9-4AA1-4403-82A6-DE1A915D5F4B.jpeg
    3DF9F4E9-4AA1-4403-82A6-DE1A915D5F4B.jpeg
    1.6 MB · Views: 204
  • 931ABE6C-ACCA-4594-8D85-3BBF638DEB74.jpeg
    931ABE6C-ACCA-4594-8D85-3BBF638DEB74.jpeg
    2 MB · Views: 204
  • 7CA7E2CE-5671-43BF-A39D-1ABD4E2C2416.jpeg
    7CA7E2CE-5671-43BF-A39D-1ABD4E2C2416.jpeg
    1.8 MB · Views: 206
  • D8BE79E3-AA22-4690-B1E9-07454BFBE89C.jpeg
    D8BE79E3-AA22-4690-B1E9-07454BFBE89C.jpeg
    2.7 MB · Views: 209
  • 4D45ACB8-B0DD-4010-81C2-5A6559B577AD.jpeg
    4D45ACB8-B0DD-4010-81C2-5A6559B577AD.jpeg
    2.5 MB · Views: 225
  • AFD31FD0-A173-46CB-8265-5EB6F1A3B53E.jpeg
    AFD31FD0-A173-46CB-8265-5EB6F1A3B53E.jpeg
    4.8 MB · Views: 229
Time for a wheel rebuild!
I broke 8 spokes on my last hard enduro ride :p The new suspension on this bike allows me to ride much harder through sketchy terrain but that’s partial of the reason I broke the spokes. The previous ride I had a flat, so the rim was spinning inside the tire for miles trying to make it out of the woods. So for sure that weaken the spokes from the flat tire ride. Then the moment it actually happened “ different ride” is when I hit a jump. The rear tire landed hard on a slab of rock and at the time I thought I popped the tube from a pinch flat because it was super loud. Well, I kept on riding because I didn’t hear the air leaking but eventually I could hear the tire rubbing the swingarm from multiple spokes broke on one side. So the tire was dished too far to one side because of the broke spokes. So yeah, I would’ve never hit that jump if it wasn’t for the new suspension so that’s why I say it kind of contributed to the broken spokes :lol:

Sidenote, I’ll be putting a softer spring in the forks. The first attempt the “extra firm spring” is too stiff with the added shim stack.

Also, will be remaking the rear mount for the rear shock to lower the bike in the rear just slightly. So vol.2 for the rear shock mount. I’ll post pictures once I get this finished up.

Also note, the spokes were a few millimeters too short from the last wheel build, so I ordered slightly longer spokes this time to have a better thread overlap between the nipples and spoke threads. If anybody’s curious with the QS205 16 inch pro wheel you need 93mm 10ga spokes :thumb:

Lastly, the rear suspension is perfect for this Enduro frame! I completely recommend this rear shock for anyone that uses a clone frame with a QS205 or even the QS273. Don’t even consider the Dnm If you haven’t purchased already!
 

Attachments

  • 69B95A14-F77C-4C75-AE37-1647F6B3E3F6.jpeg
    69B95A14-F77C-4C75-AE37-1647F6B3E3F6.jpeg
    4.6 MB · Views: 97
  • 43AA42D3-7A7C-49E3-BBFF-05103833AB93.jpeg
    43AA42D3-7A7C-49E3-BBFF-05103833AB93.jpeg
    1.8 MB · Views: 97
Eastwood said:
Also note, the spokes were a few millimeters too short from the last wheel build, so I ordered slightly longer spokes this time to have a better thread overlap between the nipples and spoke threads. If anybody’s curious with the QS205 16 inch pro wheel you need 93mm 10ga spokes :thumb:

A couple millimeters is way to short, but it looks like the failure points are at the J bend and not the nipple end. That must have been a big hit, and that big motor has a lot of inertia.
 
More pics, making progress
 

Attachments

  • 704E9CAF-8554-44FC-A1C9-512EE495D183.jpeg
    704E9CAF-8554-44FC-A1C9-512EE495D183.jpeg
    4.3 MB · Views: 88
  • F6317138-81F6-47B4-88A0-BB103FC691F6.jpeg
    F6317138-81F6-47B4-88A0-BB103FC691F6.jpeg
    2.3 MB · Views: 88
  • 591060E0-BB46-4C59-92DB-FE5E35066E02.jpeg
    591060E0-BB46-4C59-92DB-FE5E35066E02.jpeg
    2.1 MB · Views: 89
  • B6527A62-AC33-4FE9-B55D-8C11C5357E4F.jpeg
    B6527A62-AC33-4FE9-B55D-8C11C5357E4F.jpeg
    1.9 MB · Views: 89
  • E2EA5889-E39E-4502-9D7A-CFD447E16449.jpeg
    E2EA5889-E39E-4502-9D7A-CFD447E16449.jpeg
    1.9 MB · Views: 79
E-HP said:
Eastwood said:
Also note, the spokes were a few millimeters too short from the last wheel build, so I ordered slightly longer spokes this time to have a better thread overlap between the nipples and spoke threads. If anybody’s curious with the QS205 16 inch pro wheel you need 93mm 10ga spokes :thumb:

A couple millimeters is way to short, but it looks like the failure points are at the J bend and not the nipple end. That must have been a big hit, and that big motor has a lot of inertia.

When I originally ordered the spokes, I could only get 90mm and was wanting 93mm. My other QS205 with the street tire has 90mm spokes as well but those are holding up just fine with street use. And yes, as you pointed out the breakage was at the J-bend although there were a couple spoke nipples that actually pulled the threads out from not having enough overlap. But yeah, it was a really hard impact On the rear wheel. I typically don’t allow my rear wheel to make hard impacts being that it’s a hub motor and so heavy.
 
Feels good to get that fixed!! Only took a few hours to disassemble and rebuild the wheel.

Up next the rear shock mount. Vol. 2 for mount
 

Attachments

  • 9F06D251-8AA6-4D79-992C-0B31B944B17A.jpeg
    9F06D251-8AA6-4D79-992C-0B31B944B17A.jpeg
    2.5 MB · Views: 75
  • FD2C448D-95E2-4660-8D2B-455579B13A25.jpeg
    FD2C448D-95E2-4660-8D2B-455579B13A25.jpeg
    2.6 MB · Views: 72
  • 8E3F1941-4029-424D-BA01-D363E34BEB7E.jpeg
    8E3F1941-4029-424D-BA01-D363E34BEB7E.jpeg
    2.5 MB · Views: 74
  • 23641E1F-0130-43F2-BC41-D2C5E738DC72.jpeg
    23641E1F-0130-43F2-BC41-D2C5E738DC72.jpeg
    2.9 MB · Views: 75
Last edited:
Short little clip, just messing around
Shot this with my iPhone so it looks horrible lol I need to get an actual camera so I can do some real recordings on some of the gnarly Enduro trails I ride on. This spot is convenient because it’s close to the house.

Oh yeah and I finished the 2nd/vol.2 shock mount. The geometry feels great now! Have had some health issues recently so I haven’t been able to ride, this is the first time I’ve ridden in several + weeks.
 
Last edited:
She got a little muddy, not too bad. Added some spoke weights to balance out the rim lock on the rear. Still really enjoying the new rear shock! Get way less up-spring from the heavy hub motor. Feel like I wasted a lot of time with this bike when trying to use the DNM burner shock for enduro riding.
We live and we learn!
 

Attachments

  • 4B5193DB-A043-4121-84E8-BDEEF03E69E9.jpeg
    4B5193DB-A043-4121-84E8-BDEEF03E69E9.jpeg
    656.1 KB · Views: 36
  • A749B301-7C44-4AF9-BDDF-45352C622E10.jpeg
    A749B301-7C44-4AF9-BDDF-45352C622E10.jpeg
    176.6 KB · Views: 19
  • E94F99BE-0570-493E-A2FC-BA26973F5B8E.jpeg
    E94F99BE-0570-493E-A2FC-BA26973F5B8E.jpeg
    216.3 KB · Views: 25
  • 13DB342E-7F24-43C6-8E6B-8F6B6C34321E.jpeg
    13DB342E-7F24-43C6-8E6B-8F6B6C34321E.jpeg
    590.6 KB · Views: 33
  • 36B9B89D-81F4-4B1C-8D7E-4DED55862301.jpeg
    36B9B89D-81F4-4B1C-8D7E-4DED55862301.jpeg
    6.8 MB · Views: 43
  • 320D7155-6FD5-4B40-8859-C162908E0E41.jpeg
    320D7155-6FD5-4B40-8859-C162908E0E41.jpeg
    6.7 MB · Views: 44
Put on a new front tire today, also added a rim lock. Added the rim lock as I’ve been running 5psi on the front tire, and wanted the security that the bead is not going to slip off the rim. Went with the Bridgestone M203. This front tire has more air volume compared to the other 70/100 - 19” Front tires, which helps absorbing bumps going over rocks, roots, etc.
Also, the tire is about 1 inch taller than the Michelin star cross 5 so this should also help with the attack angle, rolling over objects.

Also, I removed the extra firm spring I recently added to the front fork tube as it was a little too stiff, but I did add a portion of the extra firm spring at the very bottom of the spring stack to make the front suspension a little bit more progressive when it comes closer to the end of the stroke. Also the stock springs that come with the DNM volcano, are not quite long enough, even when you fully engage the preload, so this helps with keeping the Fork tubes from sagging just from the weight of the bike. My most recent ride in the mountains, riding Enduro I could tell when I was descending down mountains the front suspension was sagging way too much due to the springs being slightly too short, although the spring rate feels about right in conjunction with the added the two stage compression and two stage rebound stack.

Will be hitting the same Enduro trails this Friday and getting that new front tire was a must because the bike has actually washed out a couple of times on me recently at slower speeds due to the knobby’s being rounded off.
 

Attachments

  • D67D47FF-A6C5-4109-AA7E-5A846D79C767.jpeg
    D67D47FF-A6C5-4109-AA7E-5A846D79C767.jpeg
    2.1 MB · Views: 20
  • 965BB7D3-CA19-427F-BE1F-E0DE40475B08.jpeg
    965BB7D3-CA19-427F-BE1F-E0DE40475B08.jpeg
    1.5 MB · Views: 20
Last edited:
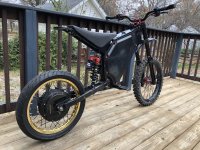
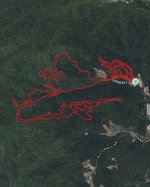
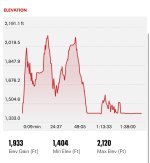
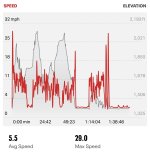
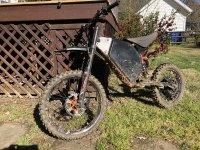
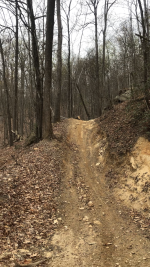
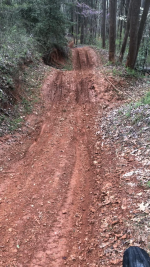
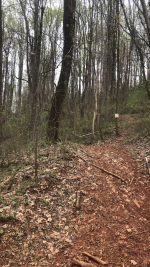
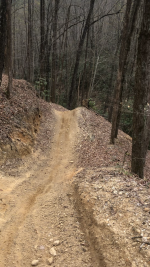
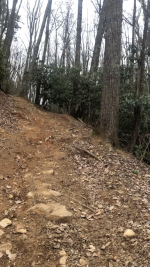
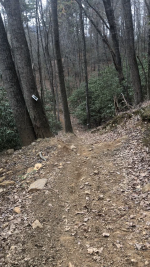
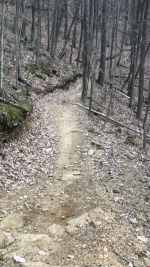
Just got back from my trail/Enduro riding in the North Carolina mountains. I was able to go further today than I ever had before while being super conscious of being efficient with throttle use E brake/regen use, etc. I was able to complete the entire 25 mile loop with my cheap UPP 72v 40 ah battery. Started with a full charge at 84v and ended the ride at 71v. Very satisfied that I was able to make it that far today, but I am most definitely feeling it all through my body lol 😂

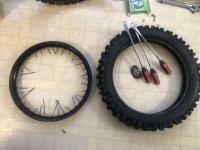
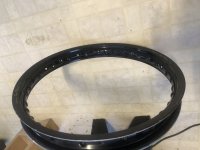
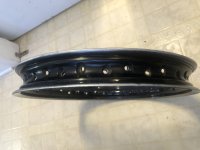
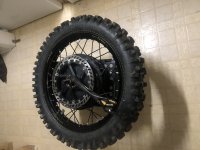
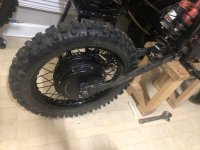
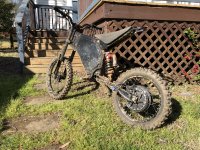
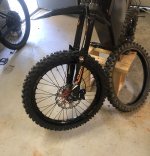
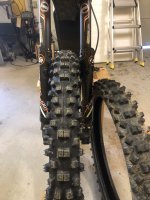
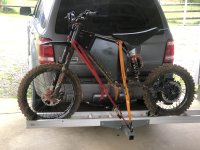
The new front tire felt great! The extra air volume from the Bridgestone, 203 smoothed out the ride tremendously compared to the Michelin star cross 5. The star Cross has a very short side wall so there’s not much flex or give that acts as suspension. Ran the front tire today at 6 psi And the rear at 5psi. I’m able to run such low pressure because of them being motorcycle tires and the light weight of my bomber build. Plus I don’t ride very fast on these trails because it’s nearly impossible unless you’re a pro level Enduro rider. Also, considering this is a hub motor build, and I have to take it easy, compared to having a Sur Ron or some other hybrid mountain bike/dirtbike with a mid drive.

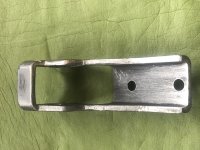
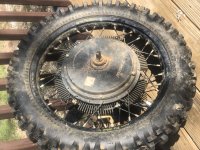
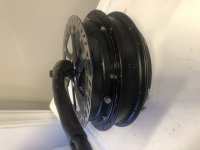
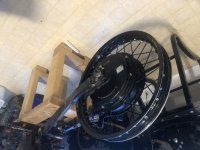
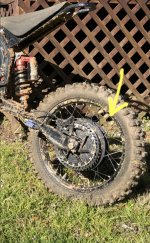
Added another 5 mL of ferrofluid and added my hub sinks back, which I had taken off when I recently rebuilt the rear wheel/motor. The motor barely even got hot today although the temperatures were not that hot, 55 degrees Fahrenheit.

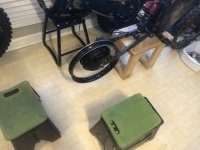
Snapped a few pictures today, but I should’ve taken more pictures of the gnarly stuff, typically when I see the very hard-core terrain I’m so ready to get through it don’t take the time to stop and take a picture lol. Really loving this E-bike build, but I’m even more excited about completing my Rmz conversion, because that will be way capable of extreme terrain.
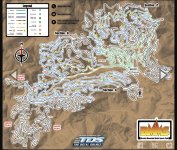
Edit: here’s a short little video I made yesterday. Just recorded with an iPhone. I was mainly just testing out the front tire before I made my way out to the mountains. Anytime I make changes to the bike I like to test it near some local woods I have access to just to make sure everything is working properly.
 

Attachments

  • FFE6952F-3FF0-43FE-BA2A-E10BB1DCB087.png
    FFE6952F-3FF0-43FE-BA2A-E10BB1DCB087.png
    13.4 MB · Views: 22
  • B025EAE2-ADEF-4DFD-88D5-60454D2D29D4.png
    B025EAE2-ADEF-4DFD-88D5-60454D2D29D4.png
    14.3 MB · Views: 19
  • 2A39CAE7-639D-423E-9035-8677375D5BF2.png
    2A39CAE7-639D-423E-9035-8677375D5BF2.png
    14.2 MB · Views: 16
  • F13A689D-20DC-41B6-8787-CF6E30A770BE.png
    F13A689D-20DC-41B6-8787-CF6E30A770BE.png
    13.1 MB · Views: 15
  • 12B3C864-385F-4742-BB41-70D52AB4944F.png
    12B3C864-385F-4742-BB41-70D52AB4944F.png
    13.3 MB · Views: 17
  • 5CEFF7F9-6A35-478D-B2A3-5528007FB778.png
    5CEFF7F9-6A35-478D-B2A3-5528007FB778.png
    13.4 MB · Views: 18
  • AAC208FD-E4D6-4931-9EA8-F393A3C6F3BB.png
    AAC208FD-E4D6-4931-9EA8-F393A3C6F3BB.png
    13.3 MB · Views: 20
  • F80AB4E6-4E35-435A-A879-BA36762289C0.png
    F80AB4E6-4E35-435A-A879-BA36762289C0.png
    12.4 MB · Views: 38
  • 38B2422A-F514-4EA9-B187-431D0888ACA1.jpeg
    38B2422A-F514-4EA9-B187-431D0888ACA1.jpeg
    2.9 MB · Views: 42
  • 77683393-101A-4BAA-8CDF-5A9026221A40.jpeg
    77683393-101A-4BAA-8CDF-5A9026221A40.jpeg
    634.1 KB · Views: 37
Last edited:
Update on this build. This bike is out of commission for the moment as I’m using the battery and controller for my Suzuki Rmz conversion. Just using the controller and battery temporary until I build the battery for my Rmz and receive the new controller.
👉 Suzuki RMZ 250 EV Restomod 👈

Will be building a custom battery pack for this Enduro clone and will retire the UPP batteries. Will also be installing 85cc forks, and getting rid of the DNM volcano. Probably YZ85 or RM85 forks.

So yeah, stay tuned for the battery build and moto fork upgrade, it’ll be a few months as I’m still working on my Rmz conversion, and need to let the wallet recover. I’m thinking 23S as the unlocked 72v200a Sabvoton is 96v. That should give me a little more TopSpeed, since I’m using the 6T winding. It’ll be super interesting to see the performance with the battery that can supply 250dc amps. The highest I’ve taken the amps I believe was 170A, but there was tons of voltage sag, so I only did that for a moment.


70F69847-A37C-4933-B9EB-C7D7517D566D.jpeg0B21FA08-B4EE-40BD-8133-AA19472E6FB4.jpeg
 
Back
Top