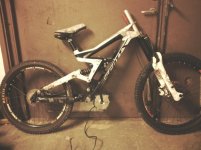
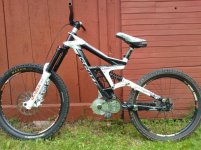
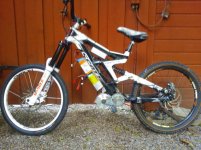
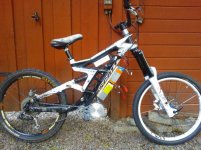
non-pedal GNG 4kw

Your right. 2-stage would be also an option ;)

Sry I messed around with phase amps on all 3 calcs :( no real comparison, i'll fix that if i find the time ;)

Anyway, if you have already machined your adapters, you can reuse them if you enhance your build, so if you already got your stuff, you may wanna try what you can push through your drive, but plz document your results, otherwise this may get a dead thread soon like so many others, that would be a pity since the idea is so nice
 
christerljung said:
...I do like your gearing options better as from a pure mechanical aspect. Gears will survive longer and probably create a lower noise.
But: The 80t sprocket on the BB-shaft gives no good option to fit the footpegs...


Why not put the Jackshaft where GNG originally placed it and fasten the footpegs through the BB hole? This way even a 95T sprocket would mean no hassle, not limiting ground clearance. No more struggle with small sprockets polygon effect, no struggle with over-stressed chains. And no more struggle with a wrong chain line, which definitely will influence your rear suspension, if your chain does not pass through the point where the original Kona-chainwheel engaged (which the suspension was designed for). Just design your jackshaft mount a way that all these necessities are met.

Just like the "dual freewheel jackshaft config" or "crossbreak style" like spinningsmagnets calls it :p http://endless-sphere.com/w/index.php/EBike_Motors_Middrive#Jackshaft_Dual_Freewheel_Config
Just without pedals and freewheels!

This should solve all issues the easy way... if you can make your own sprocket adapters, building your own mount should be no problem for you :p
 
So you bought the frame from Daniel in Skåne? I bought his 888 fork. Yours is going to be a mean machine.

Funny that it pops up more and more builds around in Sweden. Good luck with the build.
 
Thanks! Yes it's the one from Daniel. :mrgreen:
I'm having some problem to get the headtube insert in the correct size for that 1.5" fork. Suprisingly little information on the net about this. As scott specify, this frame gets delivered with two different headtubes, 1-1/8 and 1.5". There must be dozens of these 1.5 inserts laying around, doing nothing. But i can't find one.
Probably gonna put the 1-1/8 insert in the lathe when the headset has arrived to make things fit together,
 
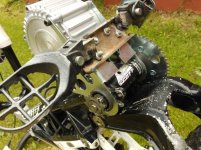
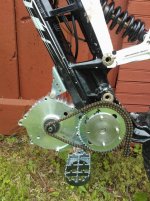
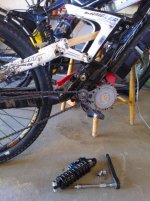
Finally som progress with frame and the first reduction/motor mount. This is a puzzle to make the bearings and things coming together in nice way.
IMG_20130602_190238.jpg
 
This is a puzzle to make the bearings and things coming together in nice way.

For inserting bearings in alloy sheets I use a holesaw for the sheet epoxy putty attech the bearings. This way, the bearings can be aligned while the putty has not got hard.
 
Thanks, that helped when fitting the spacers between the bearings in the bb.
Now i got the footpegs welded and found that this setup seems very rigid and nice, better than i first thought. The original GNG-bbmount was cut in two halfs. I wanted to use the LR-adjustable bb but it got too complicated to fit the footpeg mount.
WP_001263.jpgWP_001262.jpg
 

Attachments

  • WP_001261.jpg
    WP_001261.jpg
    141.1 KB · Views: 3,352
First ride today! :mrgreen:
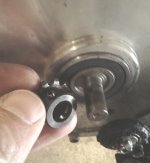
The gearing is ok but i dont Think bigger than 9 tooth on the second chain is possible. The small 9cogg doesnt have a strong fastening methothod to the shaft yet, Maybe i will just weld it to the shaft.
The chainline is very tight, there must be some guides and protection for the swingarm.
The frame feels extremely stable and rigid. It wants a big jump!
Only got a shuntmodded original gng-controller at 48v for this test. so jumping and wheelies will have to wait.WP_001273.jpgWP_001274.jpg
 
Hi Christerljung

Looks like great fun. Timely also as I am thinking controller upgrades now that my mechanical parts are working. Was thinking of starting a new thread just to ask for help /ideas on controller upgrade possibilities for this motor. Lots of info on ES but It is a bit scattered at the moment.
 
There are plans for chainguards, 3d-printed. Just need to upper my skills in solidwords first. Will ride with boots until :mrgreen:

Speedmd: I had the original GNG-controller upgraded with bigger caps, resistors and FET:s. When testing at 72v Everything worked fine for 5 minutes, then suddenly two FET:s where fried. It could have been me doin something wrong when mounting the FET:s, but im not gonna try it again.
 
Thanks Christerljung

I do not think I will mess around much with the stock controller on the bad boy commuter. I may have over shunted it already if that is possible. It has all kinds of added torque now at 12s. Need to learn much more before I mess with it. Need a CA also. Most likely will swap it out for a proven controller if I decide to hop up this build any more. Shopping for a good used performance Mtn bike now for my hot rod mid drive build. Your running 24s? I was thinking more in the 18s range. It must scream. :twisted: Sounds like great fun.

cheers
 
Today i had the first ride with full Power. The Lyen 12-fet controller pulled about 4kw when racing in the Woods. What a fun ride :mrgreen:
But!! Suddenly it stopped! Stone dead, i had to walk it home for the first time in my e-bike life :evil:
After som checking it seem to be the controller that died.
Allready mailed Lyen but maybe Another controller expert her got an advice. These are the facts so far:

The only different today was that i changed to a magura pot throttle instead of the hall-sensor type. (changed back when it died)
Tried a different motor, but nothing.
Volts read: 93 volt.
5v at ca-connector reads 4.9v
volts over R115 is 7.1v
The PCB area around 115 gets warm after about 3 minutes, R115 just a Little warm.
Maybe i shold try to communicate with a pc just to check if the controller is running?

Any ideas what could got wrong?
 
christerljung said:
Today i had the first ride with full Power. The Lyen 12-fet controller pulled about 4kw when racing in the Woods. What a fun ride :mrgreen:
But!! Suddenly it stopped! Stone dead, i had to walk it home for the first time in my e-bike life :evil:
After som checking it seem to be the controller that died.
Allready mailed Lyen but maybe Another controller expert her got an advice. These are the facts so far:

The only different today was that i changed to a magura pot throttle instead of the hall-sensor type. (changed back when it died)
Tried a different motor, but nothing.
Volts read: 93 volt.
5v at ca-connector reads 4.9v
volts over R115 is 7.1v
The PCB area around 115 gets warm after about 3 minutes, R115 just a Little warm.
Maybe i shold try to communicate with a pc just to check if the controller is running?

Any ideas what could got wrong?

First:
http://www.ebikes.ca/troubleshooting/BlownMosfets.pdf

Second:
K1600_IMG_1444.JPG
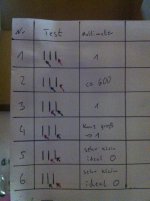
Multimeter in diode mode: in the left column is how to check the mosfet the arrows is the mulimeter tips
in the right column is what the multimeter must display- is anything different the fet is faulty.

I hope it helps.
 
I had the controller issue sorted out. It was the final chain sticking around the small 9cogg sprocket intermittently. When it happened the motor got stalled and blew FET:s.
Changed to a bigger 12t the last day bzhwind was here and it's been running flawless since.
Now im in wheelie nirvana and trying to optimize for supercontrol. The rear suspension was upgraded from fox dhx5.0 to a woodenblock. Control further improved :mrgreen:WP_001373.jpg
 
christerljung said:
Changed to a bigger 12t
finally :D this is a much better choice than 9t, your chain and me love you for this ;) Nice to see what finally came out! ATM i'm thinking about getting hands on a lebowski controller... must be even more fun to ride with flawless throttle control. Search for a good controller for years, maybe that finally is a solution.
 
Din cykel är jätte bra!

+1 subscribed!

Min svenska lärare säger det bara bensinstationsägare heter "Christer" har du en bensinstation ??? :mrgreen:

Varma hälsningar Susanne
 
Hi Christerjung

On the broken pin, the hollow spring ones are not very strong. Get your self some loctite 'bearing retaining compound" grade (green or super strong red) at the local auto parts or industrial supplier and it will keep this from shearing off as easily. If you put a screw or solid pin through the hole, when it starts to bag out, it could end up breaking the shaft. The loctite will help greatly to hold it in place.

I see riding the wheelies with the solid rear end is much better. Thinking of the ad campaign for milk.

got_milk-1024x447.jpg


Your wood "stud" :wink: bike could have printed on the side.

got_wood_aluminum_license_plate.jpg


:lol: Love it.
Cheers
 
Back
Top