Switch mode supply mod

2x48v units set to 1/2 voltage and limited for about 350 watts each, approx 12a safe charge rate.
Mike
 
Hi guys,
First time poster here and pretty newby concerning this electrical stuff, but gotta couple of questions or two concerning using these Power Supplies as chargers.

I'm planning to charge a 12S4P(44v nominal 20Ah) Lipo pack with, lets say two Meanwell S-350-24 Power Supplies hooked up in series and I adjust each power supply to 24.9v each giving me 49.8v.
That would mean each lipo cell is charged to 4.15v(49.8v/12=4.15v), which is a good cutoff point.
Now going to the CC side of things the power supply is rated to output 14.8A but I've read that they go up to 20A.
So questions are,
1.Even if it outputs 20A my battery pack can handle the charge current? (considering the turnigys are rate to 2C charging), or is it too high, or some other reason?
2. (Stupid question but I still need an answer) When charging with these Power Supplies do I need a BMS or something to stop charging when it hits HVC, or can I directly connect the battery pack(no BMS system or anything, just 12S4P) into the power supply and turn the power supply on, and then somehow the power supply turns off when the battery pack tops off at 49.8v (lol, still getting the hang of electronics).
3. Anything else that I need in order to charge off the power supplies??, and please don't tell me I need to create some crazy complicated BMS system or circuitry in between the batteries and power supply in order to charge.

Just hoping that I can use these to charge and not have to wait for 2-4 hour long charges using the hobby chargers(and cheaper to).

Thanks in advance, and a great forum btw, literally tonnes of information, will take a long time to absorb it all.

Martin
 
Welcome to the forum Martin. Check out the stickies and technical reference areas, you'll learn alot of useful info in a short period of time!

EV4LIFE said:
1.Even if it outputs 20A my battery pack can handle the charge current? (considering the turnigys are rate to 2C charging), or is it too high, or some other reason?
That'll be fine, even if they do pump out 20A that's still only 1C and these packs can take alot more. You may want to try and pull the current back a bit though because as we've shown most of them put out much more current than they're rated for and this can lead to their early demise (in my case above one blew up only a few minutes out of the box)

2. (Stupid question but I still need an answer) When charging with these Power Supplies do I need a BMS or something to stop charging when it hits HVC, or can I directly connect the battery pack(no BMS system or anything, just 12S4P) into the power supply and turn the power supply on, and then somehow the power supply turns off when the battery pack tops off at 49.8v (lol, still getting the hang of electronics).

I think a few of the guys here are working on a HVC or way to turn off the power when the charge is done, but IMO you can get by without it. By setting your charge voltage conservatively at 4.15v/cell you're leaving decent headroom if the packs did happen to get badly out of balance. These new lipo packs seem to be very reliable and maintain their balance incredibly well if you don't abuse them. Check out the mammoth turnigy/zippy thread for more info. You will want some sort of LVC though to prevent over discharging, and sooner or later you'll probably need an external balancer (mind you I put over 200 cycles on a 15S2P turnigy pack without ever balancing and the biggest delta v was only 0.06v)
 
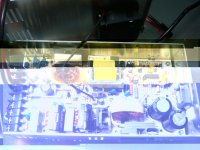
I pretty much agree with Hyena, except that you really do need to do the simple mod to at least one of the supplies to keep the current down to its rated output of around 13-14A. I have the same S-350-24 supplies and it took me all of ten minutes to open up one unit and tack on the extra resistor required to lower the current. You only need to do the mod on one the units, if they are used in series, but if you don't, you will fry one, and it won't take very long. These things are designed to be used in things like audio applications with average power needs below the rated output, but they set the current limit at 135% of this number so that it can handle current surges. When used as a charger, the fixed current limit needs to be set lower, so that it can run continuously at that level.

While I agree that you don't necessarily need to balance the cells with every charge, or even every 5-10 charges, there are a few cautions. I've found that as long as you don't discharge the cells down close to the end of capacity, the cells will stay pretty well balanced. They will eventually start to drift apart, over time, and if you do run the pack all the way down, the lowest cells will become farther apart. Without cell level low voltage protection, this drifting apart will quickly turn into dead cells, but even it the cells will get farther and farther apart, without balancing the cells, at least once in awhile.

Another thing I've noticed is that the higher the charge current, the higher the voltage will go for the cells that get full first. I have two 12s3p packs I've been using to test the new BMS stuff Richard and I are working on, and when I tried charging with two unmodified MW S-350-24s in series, set to 49.8V, or 4.15V per cell. The cells were fairly close in balance but there was enough difference that at least one or two cells in each pack hit the point that their voltages started to rise before the rest, which caused them to go way too high, too early. The voltages for most of the cells were down around 3.98-4.00V but the high cells got up close to 4.40V. That is extremely dangerous to let any cell go that high, even with healthy ones. Charging at 10A, I never saw one go over about 4.30V. The point is that if you are going to try and charge at high rates, without any sort of "help", you should lower the max voltage, to like 4.10V per cell, or lower. It may seem overly cautious but even this isn't going to be enough for cells that are weaker. In that case, the weak cells will have even less ability to accept high currents, as they get full, and their voltage will rise to the point they do go into thermal runaway, and the fireworks start. I have tried to put out fires started from exploding cells and it is just about impossible until all the cells have completely burned. The fire is white hot, enough that the Pyrex dish the packs were in exploded, and then the concrete underneath started popping off.

There are three functions a BMS will provide, at a minimum, cell level low voltage protection, cell level overcharge protection and cell balancing. If you want to keep your packs healthy for a long time, you really need to do all three, but without cell-level LVC protection, it is only a matter of time before you start killing cells. Even if you don't ever plan on running a pack down below 20%, if you have one cell, in one of the paralleled packs that is on its way out, it will pull down the others that are paralleled with it. If it is allowed to "fall off the cliff", and go down to zero, it will kill the other cells paralleled with it as well. With cell level LVC protection, the bad cell can't pull the good ones below a safe point,

What cell level overcharge protection does is simply not let any cell (or block of paralleled cells...) go over a set voltage point, during charging. In our design, what we do is generate a opto-coupled signal whenever this happens. This signal is used to "throttle" back the charge current, using the same sort of PWM circuit used in the power supply to limit the voltage (CV mode...), so that it keeps the voltage for the cell, or cells, that tripped this HVC signal, right at the set point. It is really like having individual cell CV modes. What happens is that this high cell, is going to control the current available for all the cells in the pack. Like any Lithium-based cell, what happens is that as a cell gets fuller, it can't accept current at the same level, so the voltage rises, and does so at a fairly steady rate. At a point where the cell is about 75-80% full, the voltage starts to rise at a much faster rate. For LiPos, this happens at around 4/15-4.20V, and for LiFePO4 cells, this point is at around 3.65-3.70V. What most chargers try and do is hold the voltage at this point (i.e. CV mode...), which then causes cell to start lowering the amount of current it lets in. When it gets down under about 100mA, the cell is about as full as it is going to get.

The problem is that although the first cell is full at this point, that is not the case for the rest of the cells. Once the full cell doesn't let any more current in, it is also blocking any current going into the rest of the cells. Lead acid cells are different, because they have a unique characteristic that will allow them to "absorb" a bit more current than the cell can use, so this allows the rest of the cells to have at least that much so that they can catch up, and eventually become full as well. Lithium-based cells can't do this, and the current will drop all the way to zero. This is where the balancing part of the BMS comes in. What we do is have a shunt circuit in each channel that comes on at the CV crossover set point, which is 4.15V for this LiPo version. This shunt will allow a set amount of current to be bypassed around the full cell, so that the rest of the cells will have this "extra" current in order to finish charging. With most of the Chinese BMS designs, this shunt current is typically only 100-200mA, which means for a 20Ah pack, it can take half-a-day, or longer, for the cells to all reach the same point. Our latest version will support up to about 2A shunt currents, but for 1A and above, it will need active cooling to get the heat out. We have a circuit that will control multiple small "muffin" fans, that is included.

What our BMS control board now does is monitor the charge current, until it detects that the current is down to the same level as the shunt current. That says that at least one of the cells is pretty close to full. If the cells are fairly close in balance, they will all be almost full. We now have a balance switch that if set to off, the charge current will be cutoff completely. If set in the balance position a timer started. This timer can be set with a jumper block to timeout after 15 minutes, 1 hour, 2 hours or 4 hours. Once a timeout occurs, the charge current is cutoff. This way you can let the pack balance and if you forget, it will shutoff after it times out. We also have one more saftey feature that will cut the charger off if the current ever dips below about half the shunt current setting, which would only happen if there was a malfunction, of some sort.

Anyway, this is way too long, but I hope useful in some fashion. The S-350 mod is in this thread somewhere, but you might want to PM mkeefer, and ask him. He's got lots of these 350W supplies, and might be able to sell you one that has already been modified.

-- Gary
 
Woah,
Yeah thanks guys, the help is much appreciated.
In regards to your BMS system I will try to get my hands on a couple if I can, but as I am aware your still finalising it so that's fine, but without the BMS I am still unsure how the charge is turned off when the battery is fully charged, unless the power supply can sense this and slowly reduce its current output? or do I just hook up a voltmeter and physically check and then manually turn it off when the batteries have reached the desired voltage??

So basically modify one of the power supply to its rated 14A output and leave the other one and then hook them up in series and I can plug that directly into my battery main pos and neg terminals and its good to go? why only one?.
And with that is it possible to hook up 2 6cell balancers at the same time, I have 2 sets of 6S4P lipo battery which is then hooked up in series in order to charge, so can I use the 6cell balancers to each of the two 6S4P batteries to balance while charging?
So when it is almost fully charged the cells will be balanced? ohh wait, its something about how hobby balancers don't discharge enough current to balance the packs within the charging span or something.

Edit- Probably should have read more of this thread before asking questions, seems like most of my questions are already answered.

Ok charging setup here (crappy but will do)-
View attachment Charging setup.jpg


Martin
 
GGoodrum. Two quick questions:
1) When your (v4) BMS cuts off the charge current it does that by disconnecting a FET switch in the BMS right? i.e the PSU/charger is still left on in idle mode? Anyone checked what the power consumption of two meanwells in this state is? Assuming that it's the usual 'few watts each' then I'd like to work out a way of actually turning them off/disconnecting them. Does the BMS put out a signal that might be used for this purpose?

2) Is it possible to get early samples of the v4 board and BOM yet? I don't mind being an early adopter and possibly having to do a bit of modding if necessary... (sorry if I've missed this info somewhere)
 
Its turned off with a FET and an scr latch. Easy to use this to turn off a meanwell supply with a shutdown pin (some have this).
 
wookey said:
GGoodrum. Two quick questions:
1) When your (v4) BMS cuts off the charge current it does that by disconnecting a FET switch in the BMS right? i.e the PSU/charger is still left on in idle mode? Anyone checked what the power consumption of two meanwells in this state is? Assuming that it's the usual 'few watts each' then I'd like to work out a way of actually turning them off/disconnecting them. Does the BMS put out a signal that might be used for this purpose?

I'm sure you could run a relay off of the fan circuit, or maybe the 12V line, to disconnect the AC line for the MW, but personally, I don't worry about leaving the supplies on, as there's little current flowing, certainly none through the BMS logic. The way this works is when there is about a 1V difference between the charger input and the pack, which can only happen if the supply/charger is on, this latches on an SCR which is in series with the input to the 12V regulator circuit. It stays on until the charge current drops to the level of the shunt current, if the balance mode is not active. This says that at least one cell/block of cells, is about as full as it is going to get. If the balance mode is set, a timer is started to allow the cells that weren't yet full to catch up. In either case, a signal is set that quickly grounds the SCR gate, which shuts it off. Power on the supply/charger would have to be cycled before the BMS charge logic would come on again.

wookey said:
2) Is it possible to get early samples of the v4 board and BOM yet? I don't mind being an early adopter and possibly having to do a bit of modding if necessary... (sorry if I've missed this info somewhere)

They might be available as early as the beginning of next week. I just posted an update in the BMS thread.

-- Gary
 
Gary,

Im holding you to the early next week - bud you have everyone waiting like MS for Win8 = )_

-Mike
 
Alright, so I have done my best to sift through this thread and find out exactly what i need to do to my power supply to make sure it doesn't blow up. It is a 48V 350W version. What I have determined, with a limited understanding of these things, is that I need to lower the current limit by lowering a resistance somewhere. I'm not sure which resistor. Also, there seemed to be an issue with the fan coming on, so i'd like to make my fan run continously. Is this right so far? If so, which resistor do I modify, and do I absolutely need to make the fan run continuous? If I were going to, I could tap the 48 volts on the output, use a linear voltage regulator like the lm317, and supply 12 V to the fan?
 
I don't think you need to worry about the fan at all. It is thermally activated, and seems to do the job just fine, if you do the mod to reduce the max current allowed from about 135% of the supply rating, down to 100%. These supplies are typically used in applications that have average power levels under the rating, but might need short duration high current peaks, which is why the supply's current limit is set at 135% of the rating. Since we want to use these as battery chargers, we need the current to be limited to whatever the supply can put out continuously, and not burn up, so that means it needs to come down to the 100% level.

The good news is that there is a single resistor that controls this limit, and the relationship between the current limit and the resistance is linear. The current needs to be 74% of the factory set level (1/135% = 74%...) and so the resistance for this part needs to be reduced to 74% of its current value. The bad news is that there are several versions of the PCBs used in these supplies, so the part numbers can be different and be in different places. On my S-350-24 models, the resistor in question is R33, and is in the location circled below:

View attachment S-350-24-01.jpg

I think in one of the other common layouts, this might be labeled R37. On mine, this is the only part anywhere around this section that was less than about 4k, I think.

The bands say the value is 750 ohms, but it measured 735 ohms. Taking 74% of this means the value needs to be around 545 ohms. Using this parallel resistance calculator, I found I could add a 2.1k resistor in parallel to the existing one and should end up with 545 ohms. the closest I could find was a 2k that actually measured 2050 ohms, so I tacked it onto the existing 735 ohm 1/4W resistor, and now the current limit is down around 13.5A. It was a bit over 20A before the mod.

-- Gary
 
Click for full size - and before you complain - these are from my cell phone :)

Mean Well
SP-320-24
24V 13A

-methods
 

Attachments

  • 2010-01-17 16.07.19.jpg
    502.1 KB · Views: 3,438
  • 2010-01-17 16.09.19.jpg
    2010-01-17 16.09.19.jpg
    414.8 KB · Views: 3,442
^^excellent...saves me taking mine apart ....again, for them pics you were after Mike :lol: thats the same model i have (albeit the 24v model)


KiM
 
That actually looks a better design than the old, some of it seems odd or out of place with regard to the old design and smps in general but, ill be receiving a few shortly and will check them out... if things are consistent with Meanwell design... the same resistor on each will be used to limit the current output to 130% as pointed out by Gary, adjusting this by a calculable factor will allow for various power output ratings... I've been asked about the voltage adjustments also and it seems those use the standard resistor + SVR1 for voltage limited in high end range with ZD1 so the same adjustment (or similar) should apply... What I am anxious to see is how far up these new models will go in voltage modification... Time will tell.

Methods asked an important question the other day about Dead Shorting these, unlike a true CC/CV I think dead short will engage hiccup protection (docs list all of these as 1 second short to be removed immediately, auto recovery) so it would seem on totally DEAD short load they would kick in protection mode.

That said, I have used these to go from 35v at connection (24s A123 packs) to 74v without issue and while the current maintained constant (darn close) through that process.... I think that drop alone is enough to demonstrate that these supplies should have no problem providing CC/CV even with cells < 2v per cell, although there will be no connecting 3 in parallel and using jumper cables and nickles for spot welding!

-Mike
 
I poked around a little - I think the current mod could go a little different with this model.

R33 is something like 1.7k (from memory) and there are quite a few resistors in the area that are sub 1k. Gary's suggestion to "look for the resistor that is under 1K" wont fly on this model. I think the best way to globally identify the location of the target resistor will turn out to be a nodal analysis - similar to what was suggested a few back - to go ind look for a signature of nets that tie together - triangulating the sweet spot - regardless of its value or marking.

So - who wants to sit down for 20 minutes and map all of the nodes that tie into either side of (in your case) R33 ? :)
Even something simple like "One side should tie to an electrolytic and a diode, the other side should tie to a ceramic and ....."

-methods
 
If noone else does, I will map this one out too when it finally gets here... just reverse from the TL494CN Error GND and + #1 and #2 to trace back, it looks like they have changed the package and gone to dual op amps and even embedded a thermal cutout or ? power reduction within the heatsink on the input diode(s). That unit looks more stout than the ones I have but the principal will be the same, back trace the circuit and find the feedback amp resistor network... measure the voltage present and adjust the network accordingly... In the normal config, one side of the error amp will require increased resistance to decrease the current... the flip side will require a reduction of resistance to reduce the current.

In the end, a formula will be acheivable for this unit also based on other existing components. Is there a reverse side (trace) macro of this unit yet?

-Mike
 
I have an idea that might be easier. If we can get Kim to take a picture of his 48V model from the same angle and framing as your 2nd picture, all we should have to do is look for the resistor(s) that are different. With any luck, there will only be one.

Gary
 
Dat one Gary is da smart guy!

Kim - get to it mate.
Take a good picture of the section in question - it is only 6 little screws - should take less than 15 seconds to pop the top.
Take the best picture you can - I will take another with my "real" camera.
We can then have a contest for who can find the differences first.

CHOP CHOP!!! :shock: :mrgreen:

-methods
 
click the higher res pic.

-methods
 
methods said:
Dat one Gary is da smart guy!

Kim - get to it mate.
Take a good picture of the section in question - it is only 6 little screws - should take less than 15 seconds to pop the top.
Take the best picture you can - I will take another with my "real" camera.
We can then have a contest for who can find the differences first.

CHOP CHOP!!! :shock: :mrgreen:

-methods

I took pics of that section of the board last week Methy... :?

View attachment sp320-48v.JPG

Both Gary and Mike have several pics of that section of the board i took.
I been a lil busy with other things so haven't taken it apart again for the pics Mike asked for the rest of the board, i am
topping off the batteries as i type this when thats done ill take it apart again and take more.

KiM

p.s mines doesn't have 'made in Taiwan" either mines "made in China" on the front...

EDIT:

Here you go more pics from the same angle...also pics of the rest of the board...

View attachment IMG_4359.jpg

View attachment IMG_4363.jpg

View attachment 1

View attachment IMG_4362.jpg
 
Aussie,

Did you send the macro shots of the bottom side of the PCB? Those would be most helpful, I check my email again and what I have there are the detailed shots from the top - I will need these even if I am just to make a stab at figuring out the proper / safe way of reducing the current and adjusting the voltage to various ranges.

Everyone,

As I previously posted there are a few aspects of the design which make little sense to me (unless the 48v unit has 4 input transformers each providing an isolated 12v)... - some other things I note, there seems to be a better method of securing single diodes or transistors for heatsinking purposes, the pictures I'm seeing (maybe methods is a higher end unit) are showing dual Input Diodes (not sure I understand that) or maybe it's just a better silicone based wedge to maintain proper pressure on the Diode/Fet, etc. One thing I haven't noted (I've looked) is a shunt? Is there a shunt?

Since I have no idea how long it will be before my sample units arrive (3x S(P)-320-48v, 3x S(P)-320-24v and 3x S(P)-320-12v) I would like to ask if anyone here from the USA on this thread / forums has a 48v unit or a 2 x 24v units (S-320 or even the lower powered S-150 models) ... and who could temporarily part with them (I know how we are, we buy what we need to 2-3 extra for spares ... especially at these price points) I would be willing to pay the cost of the units and express shipping from within the USA just to get test samples in my hands faster to conduct the testing / reverse engineering of the newer (current) models. I would then be happy to return the sellers unit free of charge and not only will I cover the return s&h (yes, express) but I will also modify it to whatever parameters (voltage, current, etc) they so desire - gratis (if I have the connectors, I will happily embed andersons or 3.5mm power connectors into their supply also).

If this is an option doable for someone, I would appreciate it greatly ! -
Please feel free to PM me (or email me if you have my email address)...

If this turns out not to be an option, if a few owners are willing to clear a few items up for me... I will see what I can figure out (but your own your own to test the modifications).

1.) What is the U1 (the 16 pin IC chip)... I can't make out the markings, identifiers?
2.) What are U3 and U3 ? - I assume opamps but I can't make them out properly either?
3.) Do these units have a shunt? - If so how many and where are they located?
4.) Can you remove the heatsinks and list the Diodes and FET part numbers (anything else that may be there) - manufacture (if specified) and any markings or numbers on them.

Thanks in advance!

-Mike
 
Just ordered a S350-48V 7.4A unit from china on ebay. I will follow this thread to make a charger for my lipo's at work.
at home i use 4 balancer chargers. it's fast but i cannot drag al 4 ballancers with psu to work to charge i over there to get home after work. :roll:

So this will be for a quick charge to 75% for my packs to get sure i will get home.

it will charge my packs unballanced but so far i heard it cannot do much damage to my turnigy lipo's.
I have 4 packs. 3 x 6S4P and 1 4S4P. so i have to mod this charger for two setups. one for a 12S charge and one for a 10S charge
Maybe i can connect the lipo 6S battery medic to balance them a bit while charging.
I think it will take 3 weeks to arive here but i will read all the mods you plan to make on them.
 
MrKang said:
Maybe i can connect the lipo 6S battery medic to balance them a bit while charging.
Trying to balance with a battery medic while a meanwell is belting current into your pack will be like pissing into a gale force wind!
I have one for monitoring purposes and as a token balancer if I really need one but if your packs get to the point where they actually need balancing the battery medic will take HOURS to balance them

Using a meanwell to top your packs up at work will be fine but don't worry about trying to balance them too. Especially running them 4p, they should remain very well balanced with such a low C rate of discharge. And with 20S4P worth of cells and a single meanwell, hell I'd charge that sitting on top of a 44 gallon drum of premium unleaded and feel safe :lol:
 
First of all, Mike you are talking about two distinct mods, the second of which I don't think is all that useful. The first is finding how to simply lower the CC limit, back down to around the 100% level. In the case of the S-350 series, this simply involved lowering the resistance of a single resistor. The second change you propose is to essentially change models, turning a 24V/13A into a 48V/6.5A, for instance. I think most here that either have a MW supply, or are contemplating getting one, are very interested in the CC limit mod, but I think very few are too interested in "changing models", so we don't need to make doing both mods a priority. I think we should concentrate on figuring out how to do the CC mod, and the CC mod only, to the newer SP-320 models.

To that end, Kim, you still haven't supplied a picture that has enough resolution, and is from the right angle, so that we can read the color stripes on all the resistors in the section of the PCB that has the PWM chip. You came close in this last one, but it is from a shallow angle, and there is much blocking lots of the resistors. If you can, please take one closer to straight above that section of the board, and please use as high a resolution as your camera has. If your camera has an optical zoom, stand back a little bit more and zoom it in to just that section. That should make the blowups have as much clarity as possible.

Patrick, you have some parts hiding as well. Specifically, R40, R32, R46 and R47 are either partially or completely hidden. One part in particular that seems like a possibility is C27. I can't really read the stripes on either picture, but it does look like the may be different values. Also, since they are blue-colored, they might be 1% parts, which would make sense if this is in fact the one that controls current, and they wanted it to be a bit more exact. Anyway, can both of you please verify the value or the stripes on these?

-- Gary
 
GGoodrum said:
First of all, Mike you are talking about two distinct mods, the second of which I don't think is all that useful. The first is finding how to simply lower the CC limit, back down to around the 100% level. In the case of the S-350 series, this simply involved lowering the resistance of a single resistor. The second change you propose is to essentially change models, turning a 24V/13A into a 48V/6.5A, for instance. I think most here that either have a MW supply, or are contemplating getting one, are very interested in the CC limit mod, but I think very few are too interested in "changing models", so we don't need to make doing both mods a priority. I think we should concentrate on figuring out how to do the CC mod, and the CC mod only, to the newer SP-320 models.

Hi Gary,

I agree with you, but up to a point. Lowering the CC limit by changing a resistor is a better method than one I came up with first - cutting a shunt. It has to be worth someone tracing out the various circuits round that current comparison area, because there do seem to be quite a few variations. I've even had nominally identical PSUs with different R values in places.

Where I disagree slightly is in the need for hacking the voltage around. True, turning a 24 V PSU into a 48 V one isn't needed; its better to get a 48 V one to start with. But the native tuning range on each model is only +/-10%; we need to increase that or move the centre around to cover all the voltages needed.

Nick
 
Back
Top