UK Giant DH Team eBike - CA advice needed

Hey all,

It’s been a little while since my last post I’ve been really busy the past few months with uni and karting so I haven’t lavished as much time on the bike as I would have liked to but thats all about to change. I’ve started working part time for Jozztek electric vehicles so I really can’t be riding around with my bike held together with gaffa tape anymore.

Just to bring you up to speed, in the last few months I’ve pretty much demolished my rear tyre it may have something to do with the fact that it’s a super tacky Maxxis highroller and I’ve now clocked up over 300 miles of mostly road use. Time to splash out on a new rear tyre either a Kenda Krad or a DMR Moto RT maxxis are too expensive

I had my first LiPo die on me last week on my way to work :cry: , when I’m commuting I tend to pedal all the time and just use enough throttle to make life easy so I hadn’t noticed that the bike was down on power till I got to a hill when I stopped to check out the problem a couple of miles later I found that the pack was completely dead. And as I pulled it out of the box it puffed and was really hot. I was worried it would burst into flames but I was in a busy public place so I couldn’t stash it away and pick it up later so I had to put it in my backpack and use one of the packs that I take to do the return journey. I guess the lipo might have been a discharged one and got mixed up with the charged lipos by accident when I loaded up the bike oops. :oops:

Apart from that I must say that the bike has been super reliable (touch wood) and the only issue at the moment is an annoying creaking noise that the bike is making and I’m finding it difficult to track down the source. I should be able to find it / fix it when I strip the bike down to make the battery box. and Its pretty good at alerting pedestrrians that I'm trying to get past.

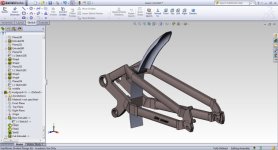
I’ve spent the past couple of weeks playing around with designs for the battery box in solidworks I’d been toying with the Idea of welding up fairings from sheet aluminium to enclose the frame but I wasn’t very happy with the complex angular look that it had so I’ve decided to revert back to the original plan of making fibreglass fairings similar to Keynes Giant DH http://endless-sphere.com/forums/viewtopic.php?f=6&t=26029&start=75

So in the meantime...
I’ve cut a load of foam blocks which I’ll use to mock up the battery pack for fiberglassing.
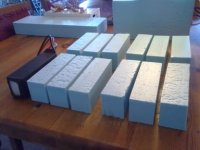
16042012091.jpg
I’ve got my 36V and 48V power supplies from china which I’ll wire in series and can adjust to give me a total of 83V which should work out at 4.15V per cell for the pack then I’ll be able to charge the whole pack in one go in around 2 hours.
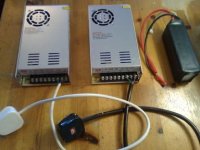
16042012093.jpg
I’ve made up some busbars and adapted a couple of busbars that Jozzer gave me so I’ll be able to build the pack in its 4S 3P. And I’ve made some parallel balance boards so the packs should remain balanced to the ones they’re paralleled to. I added a tail so I can plug into a cell monitor/alarm which should help me keep tabs on things.
View attachment 2
I ordered a 2m2 fibreglass kit this evening which should be more than enough to make the fairings.

Now should I replace the bearings when I dismantle the bike?... :?
 
Hey Richie

Good to hear from you and glad that the bike is running well also good news about Jozzer too, he is a top bloke for sure, I am sure you will have a lot of fun :) so easy to pick up a lipo that hasn't been charged, mine are all taped in to 1 block and harnessed together when charged, I always double check them to make sure each pack is fully charged before I set off, my pack is 2 years old now and still works great! although I am now periodically checking each one with a celllog interface to keep track of it, not used the logging function on them before but it works really well and you can weed out any dodgy cells easily as the pack drains down, you also get to play with graphs of it on your PC which is as near to telemetry that I get so that's cool!!

Keep us posted on the progress with the battery pack oh and if you think the bearings need changing then change them :) my main daily ride is sounding pretty rough these days, not sure if its the bearings or the one way bearing so I may also be doing the same very soon.
 
Cool stuff Richie!

RE : creaking bike - check your very lowest bushing on the shock. It's notorious for working itself loose (DH TEAM) so give it some grease, tighten it up a bit.

Do this every 5 rides.

cheers

Tom
 
knoxie said:
Hey Richie

Good to hear from you and glad that the bike is running well also good news about Jozzer too, he is a top bloke for sure, I am sure you will have a lot of fun :) so easy to pick up a lipo that hasn't been charged, mine are all taped in to 1 block and harnessed together when charged, I always double check them to make sure each pack is fully charged before I set off, my pack is 2 years old now and still works great! although I am now periodically checking each one with a celllog interface to keep track of it, not used the logging function on them before but it works really well and you can weed out any dodgy cells easily as the pack drains down, you also get to play with graphs of it on your PC which is as near to telemetry that I get so that's cool!!

Keep us posted on the progress with the battery pack oh and if you think the bearings need changing then change them :) my main daily ride is sounding pretty rough these days, not sure if its the bearings or the one way bearing so I may also be doing the same very soon.

Yeah its good to be back on the sphere and doing something that I love for a living.

lostrack said:
Cool stuff Richie!

RE : creaking bike - check your very lowest bushing on the shock. It's notorious for working itself loose (DH TEAM) so give it some grease, tighten it up a bit.

Do this every 5 rides.

cheers

Tom

Cheers Tom, I'll check that out. Just read up on your build... Sweet! looks like you've put a hell of a lot of work into that.

shorza said:
Richie, how did you make those jst parallel boards?

shorza, its really easy just get a bit of veroboard/development board a cheap packet of JST HX connectors from ebay or wherever and I used the balance leads from broken lipo packs to make the tails. solder it all together and run extra solder as you go to reinforce the tracks. Oh and once you've finished check using a multimeter that there is no continuity between the tracks then makesure you insulate then so they cant short out on stuff I'll be using a little bit of 2 part epoxy.
 
Tried bulk charging for the first time tonight, I bought a 48V and a 36V 360W switching PSUs cheap from Hong Kong £50 for the pair. simply wire them up with mains leads and wire the outputs in series then adjust the pots to get the total voltage to 83V (4.15V x20cells).

Initially when I plugged it all together and switched on the power supplies the ampage was higher than I expected it would be (around 9.2 amps or roughly 2C) but as the voltage climbed above 4V per cell the amps started to tail off nicely down to a trickle by the time it got to 82.9V Great!

The only weird thing was when the cooling fan kicked in on the 48V PSU it would shoot from 9A to about 11.9A!?! then as the pack got nearly fully charged the amps would drop considerably when the 48V ps cooling fan kicked in. Odd.

anyways the first pack was bulk charged, a few cells where a little out of balance but that’s life when you’re dealing with repaired lipos. So I stuck on another 4 (5s) packs for bulk charging. I took some Ampage readings and was monitoring the cell voltages and was sat there thinking this is going really well when..

BANG! :shock:

All the magic smoke started to escape from the 48V PSU, and the house breakers had tripped.

Ummm... :? well it was good while it lasted I suppose. I had a little poke around inside the blown PSU and the fuse in there had exploded. It was really hot but I'm guessing that the strange relation of the cooling fan to the output ampage might have been a clue that something was wrong with the PSU or maybe it just got too hot. I doubt the guy in Hong Kong is going to want to send a replacement and I'm worried if I shell out for another 48V PSU then the same thing might happen to that.

Anyone got any experience with bulk charging want to give me some ideas to stop that happening again?
 
knoxie said:
I am now periodically checking each one with a celllog interface to keep track of it, not used the logging function on them before but it works really well and you can weed out any dodgy cells easily as the pack drains down, you also get to play with graphs of it on your PC which is as near to telemetry that I get so that's cool!!

Hey knoxie, I've done a little bit of reading up on the cellLog and they seem really cool, just what I need for keeping an eye on my LiPos but I've searched google/ebay/amazon/Hobyking/Giantcod and cant find anywhere that has them in stock, Do you think that they might have been discontiued or replaced by something new?
 
Yes they have been discontinued from what I can tell, there is another logger that is available though just have a dig about on here or raise a new post, they do appear from time to time on Ebay, if you do see one make sure its the right one as one does the logging function and has a USB port on it and one doesnt and is simply a cell monitor although they look identical, I think one is the S model and one is the M model.

Sorry to hear about the PSU, I dont like bulk charging and generally never need to do it, I am still using my RC charger and its never missed a beat for me and my packs are in great shape after 2 years, unlike my hub motors which have needed lots of work lately :lol: the clutch went in my BMC and the wheel bearing went in my Xlyte X5 yesterday! luckily the X5 bearing is a std off the shelf unit, the clutch however cost 70 quid, which is still cheap when you consider the cost of a new motor these days.

I have never had to do so much ebike maintenance for a few years! I do enjoy it though so thats a good thing 8)
 
Dismantled the bike today in preparation for making the fibreglass battery enclosure and while its in bits I'm going to give it a respray and do a bit of servicing. If I'm feeling super keen I might even upgrade the phase wires going into the HT35 hub motor. the stock wires are a bit of a joke although I was thinking I could save myself some agro if I just cut the stock wires really short and then solder 10AWG from them to the controller this would surely help greatly reduce any resistance/votage drop as there would only be a very short section of narrow wire where the phase wires enter the hub. also the thicker 10AWG section would act as a heat sink to the overworked narrow stock wires.

Anyways I'll keep you all posted on the progress and I'll take some pics as I go.
 
Well this will be my first attempt at fiberglassing so lets see how it goes. If they turn out ok I can easy make a mold to produce more. :)
 
I know it must be on the sphere somewhere cos I'm sure I read it once but can anyone point me in the direction of a thread about modding the phase wires on the HT/HS35 I want to know if its 12AWG or 14AWG that will fit without having to go too crazy with the grinder.
 
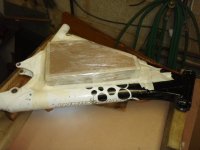
Started making the fibreglass panels today.

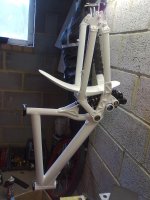
First job was to grind off cable guides from the frame to make room for the battery pack then I made a jig to hold the frame and dummy pack in the correct relation to each other.
P4280032.JPG

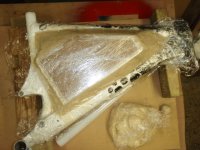
Whipped up a batch of playdough and used that to make smooth contours between the dummy pack and the frame then cover in clingfilm
P4280035.JPG

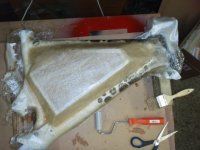
Then mixed up some resin and added a thick layer of fibreglass matt and then a layer of fine cloth to finish.
P4280038.JPG

Its cold and wet and horrible today so I stuck a couple of heaters in the garage for an hour or so to help the resin start to cure. it looks ok so far although this is my first time using fibreglass so we'll see how it looks tomorrow and hopefully do the other side.
 
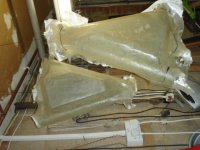
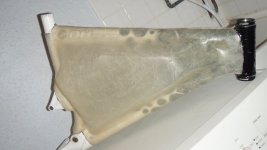
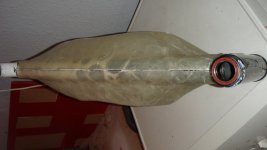
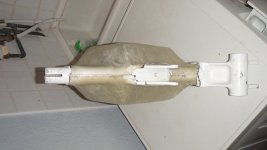
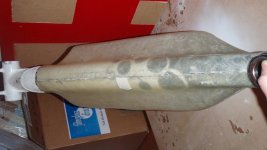
I managed to get the second panel done on Sunday and trimmed the two down to fit the frame. They've not turned out as symmetrical as I had hoped and there are a few bubbles and wobbles which I'm not too happy with but on the other hand I'm relatively pleased with the overall result for a first attempt. :|
P4290002.JPGView attachment 5P4290008.JPGP4290009.JPGP4290010.JPGP4290011.JPG

So what have I learnt and what would I do different next time?
Spend more time and effort getting the mould exactly right before you start.
Mix up a bit more resin than you think you'll need its a bit wasteful if you dont use it but its nice to have some extra to play with. the first side was a ver close run thing and I almost had to mix up a second batch.
Playdough is cheap and easy to make but I think I would have been better off using a block of modelling foam so I could have checked for symmetry also with the weather being so wet this weekend the playdough was pretty nasty and sticky when I used it for the second time.

I'll sand the panels down and maybe apply another layer of fiberglass is I have to sand away alot to smooth it all out. I'm still deciding exactly how I'm going to fix the panels to the frame so that it will be quick and easy to get access to the battery pack and look nice, what I'll probably do is weld up an aluminium box for the lipos and drill and tap some holes in the sides of the box so panels can be bolted either side which will clamp the whole assembly onto the frame. I might also fibreglass some strong points at strategic points around the perimeter of the panels so they can be bolted on the edges as well.

Since I've got a bit more fibreglassing to do and plenty of materials left I'm going to try making a rear mudguard to help keep the worst of the muck off the poor old rear shock.
mudguard.jpg
 
Since my last post i've mostly just been sanding the fiberglass panels since I didn't manage to get a perfectly smooth finish I decided to sand the panels right down smooth and then put a finishing layer of very fine fiberglass cloth over the panels as they were a bit thin in some places. Also I started sanding the paint of the bike frame ready for its new paint job. All this has been extremely messy dusty work that I really should have been wearing a dust mask for but have you seen the price of half decent dust mask!
Crystalyte controller mounting plate top and bottom views.jpg
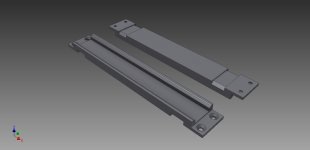
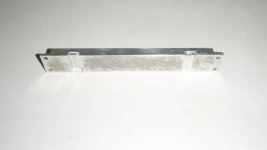
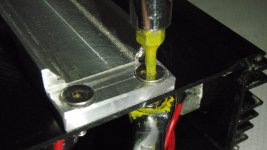
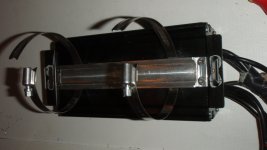
Anyways... I have come up with what I think is a nice neat way of mounting the crystalyte motor controller to the bikes frame by designing and making this aluminium controller mounting bracket which should help as a heatsink for the controller.
P6020096.JPG
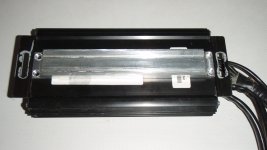
Simply place the mounting plate on the back of the controller and ensuring it is centralised mark through the holes in the plate as a drilling guide.
P6020097.JPG
Drill 4mm holes x4
View attachment 4
use M4 x 12mm countersunk allen screws with nylock nuts to bolt on the mounting plate and it would be a good idea if you have any heatsink paste to spread a little onto the mating surfaces to ensure good thermal conduction.
P6020108.JPG
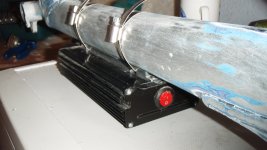
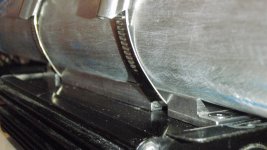
feed some suitably sized jubilee clips through the chanels.
P6020118.JPG
Then attach to your bike!
P6020124.JPG
P6020126.JPG

If you would like a mounting bracket for your controller enquire at Jozztek.com price tbc
 
Time for a long overdue up date... Sorry for the rubish pics I was using my phine camera.

31072012210.jpg
31072012214.jpg
31072012217.jpg


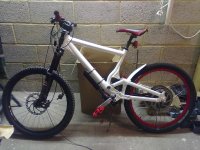
New paint job is done (the red doesn't quite match the new DMR red pedals - but thats a firstworld problem I'm willing to live with for the time being) might spash a bit more paint on at some point thinking front rim and stem.

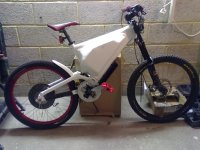
The fiber glass panels are just about done. need a little more sanding to get them silky smooth before painting and one of them is just fouling the swingarm so I'll sort that out tomorrow.

New bearings are in, one of them needed quite a bit of force to seat it in and I think I may ave damaged the race as I couldn't drift it in on the outer shell and now feels just a tad rumbly... good enough for the council!

So with a little bit more fettling to be done then I can build the battery pack into the frame make the wiring neat and tidy and then, if I'm lucky, go for a ride :shock: :D :twisted: :mrgreen:
 
RichiePA said:
BANG! :shock:

All the magic smoke started to escape from the 48V PSU, and the house breakers had tripped.

Ummm... :? well it was good while it lasted I suppose. I had a little poke around inside the blown PSU and the fuse in there had exploded. It was really hot but I'm guessing that the strange relation of the cooling fan to the output ampage might have been a clue that something was wrong with the PSU or maybe it just got too hot. I doubt the guy in Hong Kong is going to want to send a replacement and I'm worried if I shell out for another 48V PSU then the same thing might happen to that.

Anyone got any experience with bulk charging want to give me some ideas to stop that happening again?

You probably did not limit current while bulk charging. That means that the PSUs went high in current and you witnessed the results. Get a current limiter like this one and be a very happy camper afterwards.
 
RichiePA said:
Since I've got a bit more fibreglassing to do and plenty of materials left I'm going to try making a rear mudguard to help keep the worst of the muck off the poor old rear shock.
dang, i was gonna ask where you bought that! nice work!
 
Cheers mate.
soydan said:
very good project..

Its been way too long, but I haven't really had much time the lavish on the e-bike the last few months but now its dark and horrible here in the UK it sees like the perfect time to get back on with the build. I've got myself a cheap and cheerful charger 400w 83V(4.15v x 20 cells) from here http://www.bmsbattery.com/alloy-shell/26-alloy-shell-400w-lifepo4li-ionlead-acid-battery-ebike-charger.html gotta say I've only used it a couple of times but so far I am very impressed with it. I've also heat shrunk/shrank/shrinked the lipo packs and bus bars and bundled them up nicely with some gaffa tape so I can now think of it as a battery rather than a collection of smaller batterys which was always the case before. they seem to be staying balanced pretty well despite leaving the lipo alarms plugged in when I went on holiday which dropped some of the cells down to about 2v hours and hours of trickle charging those cells individually with a hacked phone charger seems to have restored them back to as near as I can tell full health.

been on a couple of rides locally just to get back into the swing of things, I'm going to make some repairs / improvements to the battery box fairings since they are a bit fragile where they fix together but I've got a fair Idea of how I'm going to fix that also next major improvement will be making an arduino based throttle interface so that I can have an onroad (street legal) and off road setting and I'm going to experiment with soft start aswell. anyways more info and pics on the way. Glad to be back on the sphere!
 
This may be best if I start a new thread dedicated solely to this but lets just see if it is a worthwhile endeavor first.

Arduino Throttle interface for speed limiting, soft start and possibly cruise control.

Having slightly over spec'd my bike for road use, I want to be able to limit its top speed and acceleration to make it conform to UK law for times when I want to ride on the road or for letting people who haven't ridden it before have a go without the risk of wheelies and so forth. then be able to switch to de-restricted mode for off-road fun. So on start up it would default to road legal mode and then I could have a push button to cycle through modes and a couple of LEDs to indicate which mode I'm in.

My plan is to wire up a Arduino nano or other small ardunio board in-line with the throttle wires. I'm running a Crystalyte 72V 40A sensorless controller with a Crystalyte twist grip throttle. But this should work for any simple variable resistance type throttle. The arduino will share the power on the throttle line and use the throttle signal as an input, do a simple operation (such as divide by a fixed value - for speed limiting) then send the output information to the controller.

so for speed limiting we'd simply take the throttle value and divide it by say 2 to limit the bike to half speed.

the code for soft start would be slightly more complex but I'm sure there there are plenty of sketches out there that can be tailored to me needs.

for cruise control I think just a non latching push button that I could operate with my left hand on the grip for times when I want to take my right hand off the throttle, so if the switch is being pressed it just keeps sending the same throttle signal as when the switch was originally pressed.

My main concerns are;

Will the 5v that the controller uses to power the throttle have enough current to run the arduino aswell? or will I have to use a separate power supply?

I think that my throttle is just a variable resistor but it's possible it may produce a PWM signal which I could work with but I expect it will be analog

Will it meet the requirements of the UK law? I read somewhere that they test the power of the bike by measuring the weight of the bike+rider and the time taken to cover a set distance from standing start and back calculate the power from that so a soft start will help a lot.

I want a soft start that dampens any increase in throttle signal but should the throttle closed quickly I want the signal the controller receives to also decrease quickly.
 
Evening all,
I'm up to around about 800miles of mostly trouble free riding now but it seems my nasty plastic crystalyte twist throttle is starting to die while riding when I fully close the throttle its not always coming back on when I open it up again which is far from ideal so I guess its time for an upgrade, the magura twist grip seems like the obvious choice but having read a thread about using it in conjunction with a CA to get a fly by wire throttle with ramp functions and the like it makes sense that I should invest in a CA since it appears to do what I've been trying to do with an arduino. So my question is will a CA be compatible with my crystalyte sensorless controller? I'm tempted to invest in a slightly more powerful controller but my crystalyte HT hub motor doesn't have halls so does that mean I'm stuck with the crystalyte controller?
Any advice on this would be much appreciated.
 
I fitted my new Magura throttle today, its a lot better looking than the crystalyte twist grip but is it worth the £49? time will tell...

wiring it was a bit of nightmare, I had to change the 4 pin connector on the controller for a 3 pin for reference the colours for the 4 pin crystalyte sensorless controller were

red = +6V
orange = Gnd
Yellow = throttle signal
White = full battery voltage (used for throttles with a power indicator)

the Magura throttle
Blue = +V
Black = Gnd
Brown = wiper throttle signal

I'm amazed I didn't kill the controller wile messing around with the throttle wires, I did short the signal to the +V at one point which made the bike go a little bit lively :shock:

I also added 4K7 trim pots to the magura +V and Gnd wires so that the dead spots can be adjusted. it all seems to be working ok at the moment but I've only been for a short ride so far.

Next up I think its time to invest in a CA V3 and a cadence sensor so I can make my bike a little more compliant. also it may well be time for some more pics or even a video I'll have to chat to some mates with goPros.
 
Back
Top