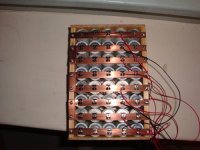
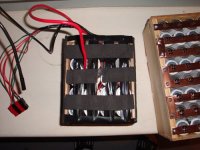
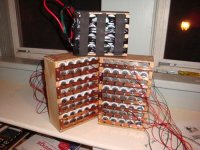
After spending tons of money buying several Ebay 18650 cylindrical batteries (ping and lau's) that went bad after 6 months of usage (Lau and Ping V1), I've decided to build a battery holder to see if I could re-use some of the left over cell from those pack. I'm now only building A123 cells but this will work for any cylindrical cells - Original thread is here,
http://endless-sphere.com/forums/viewtopic.php?f=14&t=8660&start=0&hilit=18650+holder
From that effort, I think I found a way for almost anyone with basic woodworking skill to build a battery pack in any configuration or shape. And when something is wrong with the pack, its easy troubleshoot and take out just the cell/string without disassembling entire pack.
Note - I'm building this pack at this point, so it will be work in progress and more details will be filled in...
----------------------------------------------------------------------
(Update 1)
Materials needed:
1) Battery Clips from Mouser.com (Part # 534-209) - I typically buy 1000 at a time but you only need 160 or so for 48v 12ah pack.
2) Copper Strip from McMaster.com (Part # 8964K721) - this is 1/2" x 1/16 x 6' strip. You'll need 3 or 4 strips.
3) Soft wood - From home depot or lowes. Make sure its soft wood (pine works great). The soft wood is easier to work with and you don't have to pre-drill holes. If you like to measure thing in n-th degree, go for it. But for those of use who like to eyeball thing - you could screw right into soft wood without pilot hole and it won't split the wood
4) #6 and #8 wood screws. Get bunch of these in 3/4" and 1" length.
5) Aviation Snip - to cut the copper strip.
6) Wires - I'll let you determine this but I like to use 24 gauge for single cell line as its easier to hide/fold. For main lines - I use 2 gauge wire or you could double it up. I forget where but I bought super flexible wire from some post from this forum.
-------------------------------------------------------------------------------
This pictures show the frame for this pack. I'm building 48v 12ah pack (I'll list the dimension later),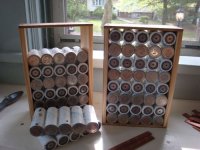
Here's picture showing cut copper strips. The aviation snip makes it easy to cut those. You'll also need a file to smooth the edges,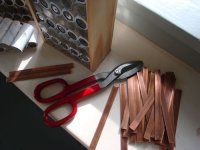
I've recently purchase a battery bracket from Electricrider.com (http://electricrider.com/crystalyte/battbrkt_detail.htm). Surprisingly, this pack fits nicely into that bracket. I'm not sure if I'll use the pack as I like to hide my batteries but its an option.View attachment 2
The copper strips are placed and is strong enough to hold 6 cell string. If you are going for bigger string, you'll need to put a spacer to pull the strips together. A 1/4" wood rod will work. The cells on this pictures are not clamped down or soldered - they are free floating and this will make it easy to troubleshoot or take individual cells if need be (I've rode this setup all last year and it works great).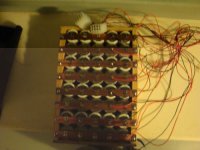
The wires shown here are soldered on back of the battery clips. On previous packs, I didn't soldered them and just duct tape them - works fine either way. Most batteries are hidden anyway, so whatever makes it easy wins! These wires are for single cell charging. You could also use the same wire for balancing if you are going that route.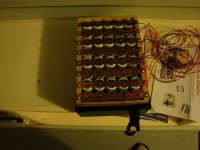
I'll post more as I move toward final configuration. I'm still deciding on where to put the battery. I was going to put it in the frame (its 3 1/2' wide) but I'm leaning toward Electric rider's bracket or rear pannier - we'll see.
cheers!
http://endless-sphere.com/forums/viewtopic.php?f=14&t=8660&start=0&hilit=18650+holder
From that effort, I think I found a way for almost anyone with basic woodworking skill to build a battery pack in any configuration or shape. And when something is wrong with the pack, its easy troubleshoot and take out just the cell/string without disassembling entire pack.
Note - I'm building this pack at this point, so it will be work in progress and more details will be filled in...
----------------------------------------------------------------------
(Update 1)
Materials needed:
1) Battery Clips from Mouser.com (Part # 534-209) - I typically buy 1000 at a time but you only need 160 or so for 48v 12ah pack.
2) Copper Strip from McMaster.com (Part # 8964K721) - this is 1/2" x 1/16 x 6' strip. You'll need 3 or 4 strips.
3) Soft wood - From home depot or lowes. Make sure its soft wood (pine works great). The soft wood is easier to work with and you don't have to pre-drill holes. If you like to measure thing in n-th degree, go for it. But for those of use who like to eyeball thing - you could screw right into soft wood without pilot hole and it won't split the wood
4) #6 and #8 wood screws. Get bunch of these in 3/4" and 1" length.
5) Aviation Snip - to cut the copper strip.
6) Wires - I'll let you determine this but I like to use 24 gauge for single cell line as its easier to hide/fold. For main lines - I use 2 gauge wire or you could double it up. I forget where but I bought super flexible wire from some post from this forum.
-------------------------------------------------------------------------------
This pictures show the frame for this pack. I'm building 48v 12ah pack (I'll list the dimension later),

Here's picture showing cut copper strips. The aviation snip makes it easy to cut those. You'll also need a file to smooth the edges,

I've recently purchase a battery bracket from Electricrider.com (http://electricrider.com/crystalyte/battbrkt_detail.htm). Surprisingly, this pack fits nicely into that bracket. I'm not sure if I'll use the pack as I like to hide my batteries but its an option.View attachment 2
The copper strips are placed and is strong enough to hold 6 cell string. If you are going for bigger string, you'll need to put a spacer to pull the strips together. A 1/4" wood rod will work. The cells on this pictures are not clamped down or soldered - they are free floating and this will make it easy to troubleshoot or take individual cells if need be (I've rode this setup all last year and it works great).

The wires shown here are soldered on back of the battery clips. On previous packs, I didn't soldered them and just duct tape them - works fine either way. Most batteries are hidden anyway, so whatever makes it easy wins! These wires are for single cell charging. You could also use the same wire for balancing if you are going that route.

I'll post more as I move toward final configuration. I'm still deciding on where to put the battery. I was going to put it in the frame (its 3 1/2' wide) but I'm leaning toward Electric rider's bracket or rear pannier - we'll see.
cheers!


