Fixing a (new) dud 36V10Ah battery pack.

kdog said:
15mins to 3.2 then 80mins to 3.5 is a positive sign... Fingers crossed.
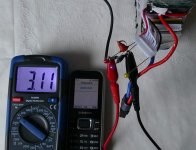
That's good to hear. Thanks.

BTW. I ended up using a yet different phone charger, this one a 3.75v@0.355A (which probably explains why I can't get beyond 3.52v), because I couldn't find any reliable way of getting the voltage from the 4.75v without cutting the plug off and it is still used. It has one of the micro-B plugs and I just couldn't make a good connection to the power pins.

The one I'm using is for an old Nokia feature phone. I cut the plug off and wire wrapped the leads around two tailor's pins, reflowed the solder and the insulated them. Made life a lot easier:
chargingSetup.jpg

You were right about this process needing patience. I've been on this for 12 hours today and nearly the same yesterday and I've still 5 p-groups to raise from 3.2 to 3.5. But the signs are at least good.

BTW. I don't 'spose you (or anyone following along) recognise the type of plug (white, 11 wires) used in the photo above? I'm considering putting a T-joint in the sensor leads to another connector of some kind mounted either externally or just inside the assembled case so that I can instrument the packs without having to disassemble everything again.

I've also thought about splitting the power leads to the BMS and putting some automotive style bullet connectors inline, just in case I need to replace the BMS at some point. Does that make sense to you?
 
Those automotive bullets are for trailer lights or 12v. I like rc stlye bullet connectors cheap and good. Be careful with the charging pins if to close use a piece of plastic to separate. Like plastic bottle. L shape self standing.
 
999zip999 said:
I like rc stlye bullet connectors cheap and good.

Good call. I wasn't aware of these. I've never done the RC thing.

999zip999 said:
Be careful with the charging pins if to close use a piece of plastic to separate. Like plastic bottle. L shape self standing.

I'm Not quite sure what you mean by this? Could you elaborate a little?
 
kdog said:
15mins to 3.2 then 80mins to 3.5 is a positive sign... Fingers crossed.

A week on and I have a working battery pack with no sign of any malfunction or other faults, essentially for free. My thanks to you kdog, hillhater and others for your patient explanations and giving me the confidence to try.

A summary of what I did.

Brought all the p-groups upto 3.60 volts via the sense wires.

Left the bms disconnected overnight and then checked that none of the p-groups was self-discharging at a higher rate than the others. After twelve hours, the biggest change was 0.01v and that was only flickering between 36.0 and 35.9.

Then I reconnected the BMS and watched it like a hawk for the first hour in case it had a short or other fault. After 4 hours there was no heat, no discharge, nothing to see.

Then I plugged in the charger, and 5 1.2 hours later the voltage went from 36.0 to 41.8 at which point the charger neon turned green and shut off. Again, the batteries and BMS stayed totally cool throughout.

My conclusion is: When the battery pack was assembled 11FEB2017 (when the hand-written QC sticker was attached) it was fine. Since then, it has been packed up in its box and sat on an boat or a warehouse shelf and no one has looked at it until I open the pack and it had self-discharged below the charger cut-off.

Now all I need to do is re-pack it into its hardcase and keep an eye on it until my motor arrives.

Many thanks to everyone who assisted me in this slow, careful but ultimately rewarding endeavour. I learned an awful lot that I would otherwise never have had cause to know.

Cheers, Buk
 
Would be good to check cell voltage 1- 10 . As 41.5v cold mean one at 3.59 and one at 4.99v or something. I just have know? Then button it up.
 
999zip999 said:
Would be good to check cell voltage 1- 10 . As 41.5v cold mean one at 3.59 and one at 4.99v or something. I just have know? Then button it up.

They are:
1:4.15
2:4:17
3:4.19
4:4.14
5:4.15
6:4.13
7:4.15
8:4.14
9:4.14
10:4.14
 
Hillhater said:
Great news !...pat yourself on the back for working logically through this.

Thanks. Not totally unlike debugging software, but oh for a symbolic debugger :)

Hillhater said:
Cycle it a few times to check LVC, HVC etc is all working well before you totally seal it back up.

That's a nice idea, but without a motor I'm stuck for something that can handle 250W @ 36V?

It'll be a while before my motor arrives -- I haven't ordered it yet as I'm trying to make sure I know it is definitely going to fit before committing this time as it is coming from China.

In the meantime I'll leave it unpacked as I want to replace the heat shrink, but I haven't located any ~130mm diameter heat shrink tube as yet.

I still like the idea of breaking out the sense leads to a more accessible test connector that has sockets that would allow the probes of my multimeter to be used directly, but a) I haven't figured out what type of connector attaches them to the BMS; b) Having read (most) of the Battery university articles (needed something to do while the cells crept up) and a few other treatise on BMS design, I suspect that adding any length (or removing it) from the sensor wires might screw up the balancing circuit/algorithm because of changes to the resistance of the sensor wires.

And if I did as I originally thought and just tee'd the wires to the test connector, I would only be able to test and still need disassemble to correct anything I found. Still uming and ahing on that idea.

Bottom line is I have a few weeks at least during which I can monitor the self discharge rate; even if I don't find a way of cycling the battery.

Cheers, Buk.
 
There are several threads on ways to discharge a pack.
https://endless-sphere.com/forums/viewtopic.php?f=14&t=90437&p=1318152&hilit=discharge+load#p1318152
daisy chained halogen lamps (3 ,x 50W in series) , are common, or an old toaster/heater element etc..
I found 100w , 24 v lamps in an Ebay store for <$1 each.
 
Hillhater said:
There are several threads on ways to discharge a pack.
https://endless-sphere.com/forums/viewtopic.php?f=14&t=90437&p=1318152&hilit=discharge+load#p1318152
daisy chained halogen lamps (3 ,x 50W in series) , are common, or an old toaster/heater element etc..
I found 100w , 24 v lamps in an Ebay store for <$1 each.


Would something like this be man enough for the job?

I've got an old CPU heatsink I could mount them on to help dissipate the heat?
 
Back
Top