Snikerdoodlz
10 µW
- Joined
- Dec 17, 2020
- Messages
- 6
I'm planning to build a 3-wheel electric skateboard (finished build thread coming later) using a Magic Pie 5 as the rear drive motor. I used the MP5 in a 26" ebike I built until I swapped it out for a lighter geared motor after my spokes snapped twice in two years.
To use it with a skateboard, I need it to have the smallest possible rim size - for the MP5, that is the 16" option. (I would ideally use the 12" Smart Pie, but I'm repurposing this motor that I have instead of buying a new one). So, I hit up Golden Motor Canada, who sold me the 16" rim for $100. That's pretty steep for a rim, but it's proprietary and has magnets attached to it. I couldn't find any info about how to perform the swap, so I went at it blind to figure out for whoever may need it in the future.
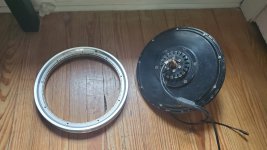
(motor and rim to swap)
The first step is to take off the fan cover. It is pretty straightforward - use 3mm hex to undo the flat-top screws, and the plate comes off.
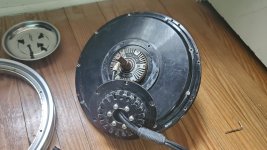
(fan cover removed)
Next, on the same side, remove the 9 m4 socket screws with a 3mm hex. You can then pry up the side cover with a thin shim, like a small flathead, and gradually make the opening bigger for larger levers.
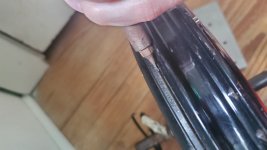
(screwdriver prying apart side cover)
Keep prying the cover around from all sides, and it will lift off.
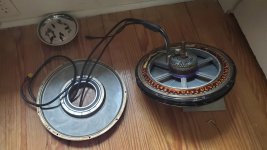
(exposed side cover - that's a big bearing!)
Do the same for the other side. Remove the 9 screws on the edge and pry the cover up.
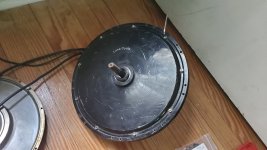
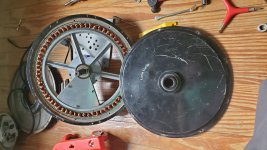
Now, the only thing holding the spoke hole flange rotor in place is the force of the magnets. So, you can place the assembly on the ground, place your hands on the flange, and push down pretty hard. Make sure to put cushions underneath your knuckles since they'll go flying into the floor.
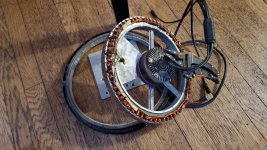
(separated flange)
The flange is asymmetrical. If you ever plan to put it back on, refer to the picture for the correct orientation. The wire will be coming out of the right side of the photos for reference.
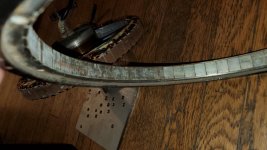

(the flange is asymmetrical)
Next is to insert the cast rim. For the 16" one, the valve hole should be facing the same side as the wires. Make sure that there are no magnetic debris that got attracted to the magnets. I almost left a small washer stuck to the magnets. The spoke flange came out with a lot of force, and the rim is going to get "sucked" back in place with just as much force. Carefully hold it from the outside, and keep your fingers out of the way as it moves into place.
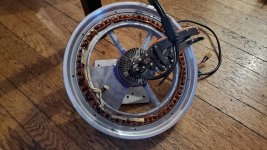
(new rim being held by magnets)
Now, follow the steps in reverse order. While the motor is apart, you may want to clean the pieces. I had some trouble getting the big bearing to go back in, it may help to clean grit from around that area and apply lubricant to help it slide on. I used a plastic mallet to keep the bearing moving along
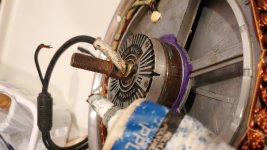
(I used Park Tool PPL-1 general-purpose grease)
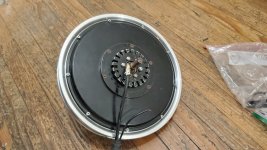
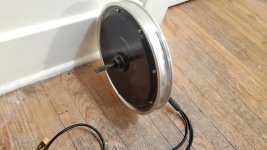
Once everything is back together, your motor now has the new rim attached.
To use it with a skateboard, I need it to have the smallest possible rim size - for the MP5, that is the 16" option. (I would ideally use the 12" Smart Pie, but I'm repurposing this motor that I have instead of buying a new one). So, I hit up Golden Motor Canada, who sold me the 16" rim for $100. That's pretty steep for a rim, but it's proprietary and has magnets attached to it. I couldn't find any info about how to perform the swap, so I went at it blind to figure out for whoever may need it in the future.

(motor and rim to swap)
The first step is to take off the fan cover. It is pretty straightforward - use 3mm hex to undo the flat-top screws, and the plate comes off.

(fan cover removed)
Next, on the same side, remove the 9 m4 socket screws with a 3mm hex. You can then pry up the side cover with a thin shim, like a small flathead, and gradually make the opening bigger for larger levers.

(screwdriver prying apart side cover)
Keep prying the cover around from all sides, and it will lift off.

(exposed side cover - that's a big bearing!)
Do the same for the other side. Remove the 9 screws on the edge and pry the cover up.


Now, the only thing holding the spoke hole flange rotor in place is the force of the magnets. So, you can place the assembly on the ground, place your hands on the flange, and push down pretty hard. Make sure to put cushions underneath your knuckles since they'll go flying into the floor.

(separated flange)
The flange is asymmetrical. If you ever plan to put it back on, refer to the picture for the correct orientation. The wire will be coming out of the right side of the photos for reference.


(the flange is asymmetrical)
Next is to insert the cast rim. For the 16" one, the valve hole should be facing the same side as the wires. Make sure that there are no magnetic debris that got attracted to the magnets. I almost left a small washer stuck to the magnets. The spoke flange came out with a lot of force, and the rim is going to get "sucked" back in place with just as much force. Carefully hold it from the outside, and keep your fingers out of the way as it moves into place.

(new rim being held by magnets)
Now, follow the steps in reverse order. While the motor is apart, you may want to clean the pieces. I had some trouble getting the big bearing to go back in, it may help to clean grit from around that area and apply lubricant to help it slide on. I used a plastic mallet to keep the bearing moving along

(I used Park Tool PPL-1 general-purpose grease)
Once everything is back together, your motor now has the new rim attached.


