
MarkBolton
1 µW
- Joined
- Nov 24, 2020
- Messages
- 1
When it comes to laminate flooring, the subfloor is often an unsung hero. Despite its importance in providing a solid foundation for your beautiful new floor, it's often overlooked or taken for granted.
But without proper preparation, your dream laminate flooring installation could turn into a nightmare of squeaks, gaps, and other issues that could have been avoided.
We know how frustrating it can be when your flooring project doesn't go as smoothly as planned, even if you already know how to repair laminate flooring. That's why we're here to guide you through the crucial steps of subfloor preparation.
Why You Should Prepare the Subfloor Before Making any Big Repair
Subfloors act as a crucial support system for all types of flooring, including laminate. They provide a solid, flat surface that allows the finished floor to remain stable and maintain its structural integrity. Ensuring a strong subfloor is key to the longevity of the laminate flooring installed on top of it.
A smooth, even surface ensures that the laminate planks fit together seamlessly, preventing issues like gaps or uneven wear that could lead to future problems or reduced lifespan.
Identifying and resolving these hidden dangers early in the process can save time and money, as well as protect the health and safety of your home's occupants.
The connection between its and the underlying floor joists is vital for a sustainable flooring repair. Inspecting and reinforcing this connection can prevent issues like sagging, bouncing, or flexing in the finished laminate floor.
By ensuring a robust connection between the subfloor and floor joists, you will create a sturdier foundation that supports the laminate flooring repair effectively.
Before starting any repair work, test the moisture levels in the subfloor and address any excess moisture by improving ventilation, fixing leaks, or installing a vapor barrier. Properly managing moisture in the subfloor will help maintain the appearance and structural integrity of the laminate flooring over time.
Assessing the Subfloor Condition
Keep an eye out for cracks, chips, or warping that could undermine the stability of your flooring. Doing this early on will set the stage for a smoother repair process and a more durable, long-lasting result.
You may also want to use a moisture meter to measure the humidity levels in the subfloor, ensuring they are within an acceptable range before proceeding with repairs.
If you discover any fasteners that have lost their grip, make a note of their locations and plan to address them during the repair process.
Preparing the Subfloor Surface
To start, ensure that your subfloor is free of any debris or dust. Sweep or vacuum the surface thoroughly, as even the smallest particles can cause issues when installing or repairing laminate flooring. A mop from the list at https://www.facebook.com/bestmopforlaminatefloors/ may also help.
To achieve this, address any cracks or damage that you identified during the initial inspection. Small cracks can be filled with a suitable patching compound, while larger ones may require more substantial repairs, such as replacing a section of the subfloor.
Use a long straightedge or a level to identify any dips or high spots in your subfloor. For minor unevenness, a self-leveling compound can be applied to create a smooth and even surface.
However, more significant irregularities might necessitate the use of a leveling compound in conjunction with a trowel or the installation of a new plywood layer to achieve the desired levelness.
Addressing Moisture Concerns
To do this, use a moisture meter to measure the humidity levels in the subfloor. Follow the manufacturer's guidelines for the specific moisture content that is acceptable for your flooring type.
If the moisture levels are too high, you'll need to identify and address the underlying cause before proceeding with repairs.
This might involve locating and repairing leaks, improving ventilation, or installing a vapor barrier to prevent moisture migration from the ground or a damp basement.
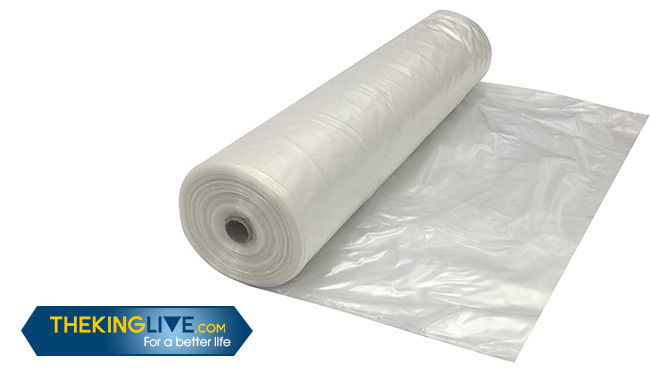
To install a moisture barrier, first, clean and level the subfloor as described in the previous sections. Next, unroll the moisture barrier across the subfloor, making sure there are no gaps, wrinkles, or overlaps.
Use the recommended adhesive or tape to secure the barrier in place, ensuring it remains undisturbed during the installation of your laminate flooring.
When choosing an underlayment, look for products that offer adequate moisture protection as well as cushioning and sound absorption. Some underlayments come with a built-in moisture barrier, providing an all-in-one solution.
Read the manufacturer's specifications carefully and choose an underlayment that is compatible with your flooring type and subfloor conditions.
Securing the Subfloor
Depending on the extent of the damage, you might need to replace a section of the subfloor or add support by installing blocking or sistering the floor joists.
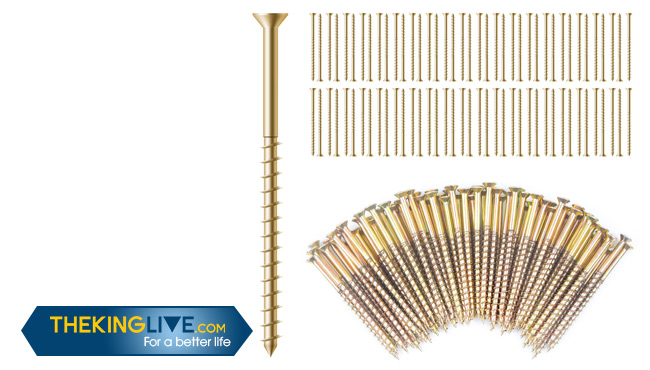
Space the fasteners evenly and use the appropriate length and type for your specific subfloor material. Solidifying the connection between your subfloor and floor joists will enhance the overall stability and performance of your laminate flooring repair.
Final Subfloor Checks
Use a long straightedge or a level to confirm that any dips or high spots have been properly addressed. This final check ensures that the subfloor is optimally prepared for the laminate flooring repair or installation, providing a solid base for the new flooring to adhere to and perform well.
Check that the moisture barrier is correctly installed, with no gaps, wrinkles, or overlaps. Additionally, verify that the underlayment you've chosen is compatible with your flooring type and offers adequate moisture protection.
Confirm that any additional fasteners used to reinforce weak areas or strengthen the connection to the floor joists are properly installed.
Summary
Preparing the subfloor is a vital step in any laminate flooring repair project. Ensuring the subfloor is level, free of damage, securely connected to floor joists, and properly protected from moisture will create a solid foundation for a successful repair.
After those steps, you can finally follow the guide “How To Repair Laminate Flooring: Comprehensive Floor Repair Guide” to address the primary problem with your floor.
But without proper preparation, your dream laminate flooring installation could turn into a nightmare of squeaks, gaps, and other issues that could have been avoided.
We know how frustrating it can be when your flooring project doesn't go as smoothly as planned, even if you already know how to repair laminate flooring. That's why we're here to guide you through the crucial steps of subfloor preparation.
Why You Should Prepare the Subfloor Before Making any Big Repair
Subfloors act as a crucial support system for all types of flooring, including laminate. They provide a solid, flat surface that allows the finished floor to remain stable and maintain its structural integrity. Ensuring a strong subfloor is key to the longevity of the laminate flooring installed on top of it.
- It Should be Level
A smooth, even surface ensures that the laminate planks fit together seamlessly, preventing issues like gaps or uneven wear that could lead to future problems or reduced lifespan.
- It Should Have no Hidden Dangers
Identifying and resolving these hidden dangers early in the process can save time and money, as well as protect the health and safety of your home's occupants.
- It Should Have Solid Connections for a Sturdy Foundation
The connection between its and the underlying floor joists is vital for a sustainable flooring repair. Inspecting and reinforcing this connection can prevent issues like sagging, bouncing, or flexing in the finished laminate floor.
By ensuring a robust connection between the subfloor and floor joists, you will create a sturdier foundation that supports the laminate flooring repair effectively.
- It Should be Moisture-Free
Before starting any repair work, test the moisture levels in the subfloor and address any excess moisture by improving ventilation, fixing leaks, or installing a vapor barrier. Properly managing moisture in the subfloor will help maintain the appearance and structural integrity of the laminate flooring over time.
Assessing the Subfloor Condition
- Inspecting for Damage and Unevenness
Keep an eye out for cracks, chips, or warping that could undermine the stability of your flooring. Doing this early on will set the stage for a smoother repair process and a more durable, long-lasting result.
- Identifying Moisture Issues
You may also want to use a moisture meter to measure the humidity levels in the subfloor, ensuring they are within an acceptable range before proceeding with repairs.
- Checking for Loose Fasteners
If you discover any fasteners that have lost their grip, make a note of their locations and plan to address them during the repair process.
Preparing the Subfloor Surface
- Removing Debris and Dust
To start, ensure that your subfloor is free of any debris or dust. Sweep or vacuum the surface thoroughly, as even the smallest particles can cause issues when installing or repairing laminate flooring. A mop from the list at https://www.facebook.com/bestmopforlaminatefloors/ may also help.
- Repairing Cracks and Damage
To achieve this, address any cracks or damage that you identified during the initial inspection. Small cracks can be filled with a suitable patching compound, while larger ones may require more substantial repairs, such as replacing a section of the subfloor.
- Leveling Uneven Areas
Use a long straightedge or a level to identify any dips or high spots in your subfloor. For minor unevenness, a self-leveling compound can be applied to create a smooth and even surface.
However, more significant irregularities might necessitate the use of a leveling compound in conjunction with a trowel or the installation of a new plywood layer to achieve the desired levelness.
Addressing Moisture Concerns
- Testing for Moisture Levels
To do this, use a moisture meter to measure the humidity levels in the subfloor. Follow the manufacturer's guidelines for the specific moisture content that is acceptable for your flooring type.
If the moisture levels are too high, you'll need to identify and address the underlying cause before proceeding with repairs.
This might involve locating and repairing leaks, improving ventilation, or installing a vapor barrier to prevent moisture migration from the ground or a damp basement.
- Installing a Moisture Barrier
To install a moisture barrier, first, clean and level the subfloor as described in the previous sections. Next, unroll the moisture barrier across the subfloor, making sure there are no gaps, wrinkles, or overlaps.
Use the recommended adhesive or tape to secure the barrier in place, ensuring it remains undisturbed during the installation of your laminate flooring.
- Choosing Appropriate Underlayment
When choosing an underlayment, look for products that offer adequate moisture protection as well as cushioning and sound absorption. Some underlayments come with a built-in moisture barrier, providing an all-in-one solution.
Read the manufacturer's specifications carefully and choose an underlayment that is compatible with your flooring type and subfloor conditions.
Securing the Subfloor
- Tightening Loose Nails and Screws
- Reinforcing Weak Areas
Depending on the extent of the damage, you might need to replace a section of the subfloor or add support by installing blocking or sistering the floor joists.
- Ensuring a Strong Connection to Floor Joists
Space the fasteners evenly and use the appropriate length and type for your specific subfloor material. Solidifying the connection between your subfloor and floor joists will enhance the overall stability and performance of your laminate flooring repair.
Final Subfloor Checks
- Verifying Level and Smooth Surface
Use a long straightedge or a level to confirm that any dips or high spots have been properly addressed. This final check ensures that the subfloor is optimally prepared for the laminate flooring repair or installation, providing a solid base for the new flooring to adhere to and perform well.
- Confirming Moisture Protection Measures
Check that the moisture barrier is correctly installed, with no gaps, wrinkles, or overlaps. Additionally, verify that the underlayment you've chosen is compatible with your flooring type and offers adequate moisture protection.
- Double-Checking Fastener Security
Confirm that any additional fasteners used to reinforce weak areas or strengthen the connection to the floor joists are properly installed.
Summary
Preparing the subfloor is a vital step in any laminate flooring repair project. Ensuring the subfloor is level, free of damage, securely connected to floor joists, and properly protected from moisture will create a solid foundation for a successful repair.
After those steps, you can finally follow the guide “How To Repair Laminate Flooring: Comprehensive Floor Repair Guide” to address the primary problem with your floor.
Last edited: