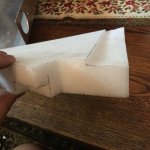
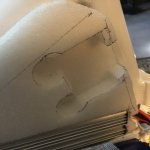
My Big Fat Giant

Hey this is an awesome thread. I'm having three of the same frames welded up as full battery boxes (bomber style) at the moment. I'll be doing a Mxus v2 from my stock with a 24 inch by 3 inch wide rim and shinko tyre.

Love the 4 inch look!
 
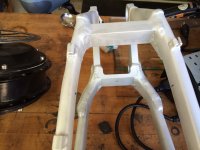
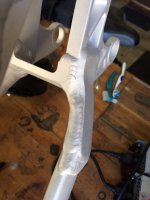
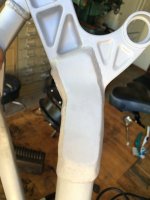
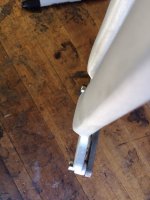
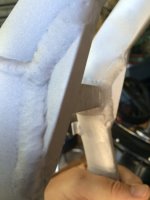
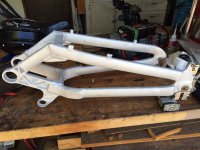
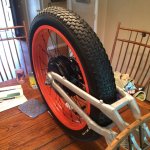
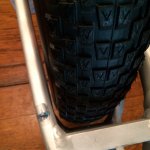
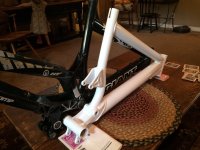
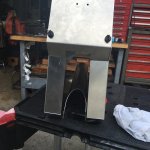
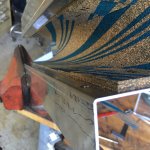
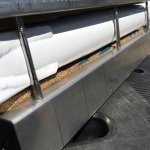
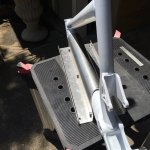
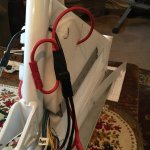
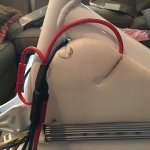
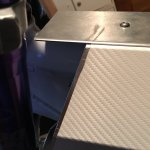
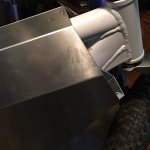
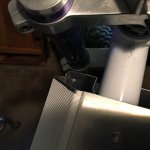
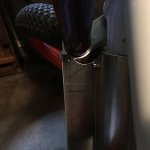
So I finally got my frame back from the welder. Took a while but the delay was unavoidable on his part so I'm not twisted about it. Besides it looks great!! Also I think it's going to work perfectly for my application. Here are some pics:
image.jpg
image.jpg
image.jpg
image.jpg
image.jpg
image.jpg

The first couple pictures show a sense of the width. At 12 3/8" from axel center (distance to the widest part of the tire) the width on the top arm I sight at 4.5" while the bottom arm is a bit wider yet so no problem fitting the 4" tires. In some of the photos you can just make out some variation in the smooth look of the tubing right by the drop outs where it was lengthened by 1" with solid internal sleeving. Also, where the front part of the swing arm was widened a strap was added at the transition point to add extra rigidity and stiffness. The corner gussets were replaced with solid material. As well as the hollow bridge that needed lengthening. I'll be spending a little time making everything pretty for powder including my Kiwi adapters and my front forks.
 
On another note, and as a public service I wanted to tell a little story. I just got out of the hospital after a two day stint for an e-bike accident. It was not really much of an accident, was not going fast (maybe 15 mph) on a dirt road while on vacation. Drove into a sun baked wheel rut that would not allow me to turn out of it and I tipped over sideways. It happened quick and I hit pretty hard on my right side. Whacked my head pretty hard but since I was wearing a helmet there was absolutely no head injury. So after taking inventory of my body parts and brushing off the dirt I felt OK but we decided to head back. By the time we got home I had some torso pain and suspected a broken or cracked rib. After washing out the wounds from the road rash I found that I was having a little difficulty breathing that I chalked up to the rib pain. A couple hours later the breathing difficulties could not be accounted for by the rib pain and I decided to go to the only ER with 100 miles. It was a little 2 bed affair with a country doctor. They had to get their radiologist out of bed to come over and take x-Rays. Sure enough, I had a broken rib that had punctured my lung and deteriorated into a pneumo-thorax (collapsed lung). I needed a chest tube right away. They brought in the Chest Tube kit that looked like they got it off a back shelf and blew off the dust and proceeded. So long story short (I know, too late) they tried to put in the chest tube twice and failed at the ER there before they put me in a helicopter and flew me out to Sutter Roseville medical center near Sacramento California. There they successfully put in a chest tube which allowed my lung to re-inflate. Two days of observation later and they released me. So in the end I guess what I am saying is that even if you are keeping it slow, and even if you are never in traffic, you can easily have a life threatening accident. If I had not been wearing my helmet I am sure I would have had a concussion or worse (and I know what I'm talking about as I have been an EMT for 30 years). So WEAR YOUR HELMET...EVERY TIME! I will admit that on a time or two I have gone on test rides and such without mine and now, looking back, I am horrified by what could have happened for the single purpose of vanity. Now, down off my soap box. Carry on. OBiwan.
 
Sounds like you need a helmet for your chest.

We are pretty good, most of us, at protecting our heads when we fall down.
A lot of us have low-sided at much higher speeds than that, on bicycles and motorcycles, without helmets, with and without bumps to the head, but without making extravagant claims like "who knows how badly I would have been hurt if I hadn't had long bushy hair? I might be DEAD! If you're smart, you'll never get a haircut again!"
 
Wow, that is a little scary. I'm glad you are ok. Get well soon.
 
Chalo you are telling us that is just your long bushy hair ?
Two of my worse accidents where at 2 miles an hour and eight miles an hour. The second the chain got jammed and flipped myself over the handle bars.
The other stop on a flat plastic bottle while turnig and braking and slid out at 1 mph. So sometimes it's like something dropped out of the sky and your just locked in. Get well and sometimes you have to take the pain meds just to sleep at night.
 
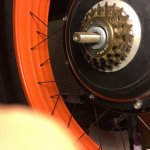
So I know it's been a while but I HAVE been making progress. With the frame back from the welder I am now able to take proper measurements for the amount of dish I will need in the rear wheel build (not much as it turns out). Ordered up the spokes and laced up the motor. Here is a pic of it bolted into the rear swing arm:
image.jpg
Plenty of clearance side-to-side although this picture does not show it very well:
image.jpg

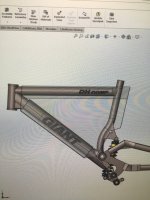
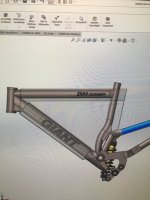
This then allowed me to get the frame into the powder coat shop where they did the frame, swing arm, bottom suspension linkage and both of the Kiwi adapters in white. While it was there I pondered how to approach the new battery box design since I was never able to get my point cloud file converted into a manipulatable SolidWorks file. But I came up with an alternative plan when I found a Large size (19") DH Comp frame for sale. I bought it for a song. Now since we have the formerly produced Solid Works file for the large sized frame then I will have my nephew design the battery box on that model. And then make some modifications by placing both frames side-by-side to measure the differences. I put them together just to see how much difference there was between the 18" And the 19" and found it less than I thought. I lined them up at the bottom bracket shells and the shimmed the head tubes up until the down tubes were parallel. Like this:
image.jpg
I found that the top tubes still hit the seat tube in the exact same place but that the top of the seat post was 1" shorter.
image.jpg
The head tube was moved back 1" closer to the seat tube but still on the same plane.

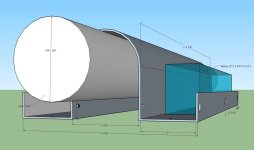
Moving the head tube rearward caused a VERY minor angle change in the top tube (maybe 1/4" over the entire length) and the shock strut is also in the same place. Overall very little difference. I also worked out a reasonable saddle design in Sketchup (by saddle I mean the bottom tray of the battery box that will sit astride and clamp to the down tube). This saddle will allow battery placement along the side of the down tube and result in much more interior real estate for batts and wiring. Got the whole mess to my nephew who is now designing the rest of it in Solid Works to run through the shop. Hope to get it back soon as that will be the last major piece of work before I begin final assembly. I'll try to get a pic of the Sketchup drawing up here soon so you can see it and maybe offer some critical thinking.
 
Cool design. Thanks for posting the extra info about the medium and large frame differences. Have you made any further progress? Also, what did the shop charge total for the swinger mods?
 
Well there are really two mods available for this swing arm. The first one can be found in the build thread in my sig called "Giant DH comp/Cromotor build". In this one the rear of the swing arm is widened to 155-160mm but the front stays the same and the swing arm gets centered. I quoted prices and contact info in that thread. This, more extensive, mod for the fat bike widens both the front and the rear of the swing arm, lengthens it by 1" and also centers it up. As for pricing, well you will have to work that out with Rob at Quality Heliarc since when I had mine done we did a bunch of horse trading for machine tools and the like so no cash was exchanged. My progress has been slow since my shoulder surgery (immediately following recovery from a collapsed lung). Battery box is supposed to be done in the next couple of weeks but I'm not holdin my breath. After that, it's just wire harness and assembly.
 
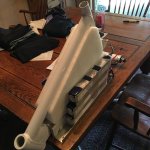
So yes it's been a while and I been tearing my hair out but it looks like I'm finally getting my battery box tomorrow. Here are a couple of the Solid Works drawings that went into the final design:
image.jpg
image.jpg

These two photos show the swing arm travel and how it will interface with the box. Note that the box extends to the BOTTOM of the down tube rather than the top like my previous build. The total width is just slightly wider too allowing room to fit batteries in the space next to the down tube. This will allow lots of extra real estate for batteries since the space along that line goes forward and rearward past the joints to the top tube and the seat post. It also allows battery placement considerably lower too for a lower CofG. Added a few more mods and details that will make the rear panel easier to remove and more secure, and the whole box more secure on the bike. I still need to get inner foam lay-out designed and some other odd details but when I have the frame and box in hand there will be no mor barriers. Another cool thing is that we made this box to fit both the 19" and 18" frames. The other great outcome is that we now have a complete working Solid Works model that ES users will have access to of the Giant DH comp frame. More to come (better images of the model and the actual box)
 
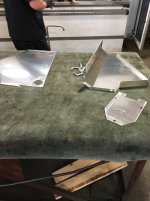
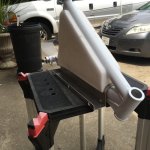
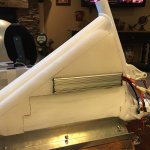
Ok enough complaining about the tins not comming back from the sheet metal shop! I finally got them. It took a couple of tries to get them right but finally a usable product. There are a few more minor tweaks that I will have built into the model to make it even easier to use and install but, for now I am moving forward with this one. First pic was taken at the shop after lazer cutting and during the CNC forming:
image.jpeg
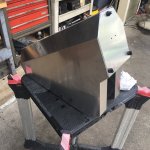
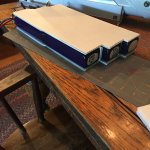
Here is the whole thing buttoned up:
image.jpeg
image.jpeg
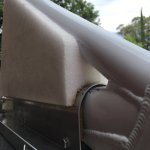
Front and back:
image.jpeg
image.jpeg
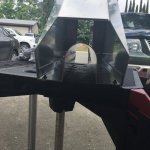
Lined the channel with rubber cork and since the down tube tapers near the top I filled a bit for better clamping like this:
image.jpeg
It clamps like this:
image.jpeg
And looks like this installed:

More to come. Next up...foam infill and battery packs.
 
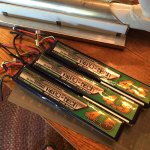
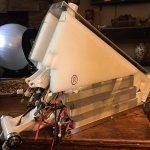
Some further progress. Made up battery packs:
image.jpeg
image.jpeg
image.jpeg
Then a little foam work:
image.jpeg
image.jpeg
image.jpeg
A little space for the controller:
image.jpeg
image.jpeg
Some infill for the top of the batteries with air gaps for controller cooling:
image.jpeg
image.jpeg
image.jpeg
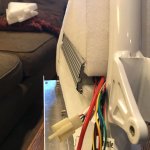
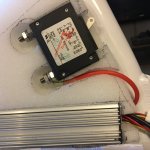
Now a spot for the circuit breaker and some wire routing:
View attachment 1

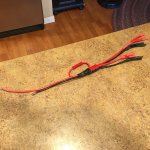
Working on wiring harnesses right now. Figured out a pretty cool way to make triple parallel cables in 10 AWG silicon wire with supplies from Home Depot. Check this thread
https://endless-sphere.com/forums/viewtopic.php?f=2&t=80810
More to come, I'm on a roll now.
 
Spent a lot of time getting the wiring harness just right. It's designed to parallel the three batteries in two separate packs. It then combines these wires into an Anderson four-gang plug. The mating plug jumpers these four wires to series the two packs together and also contains an in-rush control side circuit. The positive and negative wires then connect to the controller with a marine 80amp circuit breaker in between. Here:
image.jpeg
image.jpeg
image.jpeg
image.jpeg
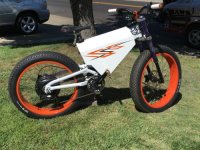
After that I tore the whole thing down to the frame and did the final prep on each part (breaking sharp edges and adding viny color and decals etc.) and began reassembling everything for, hopefully, the last time. With the frame back together and the swingarm, linkage and rear shock installed, I went ahead and put the front fork on the bike for the first time. Since I was that far along I figured I should go ahead and install the wheels. Here is a first look at what the finished bike will look like...well at least shaped like:
image.jpeg
image.jpeg
View attachment 1

Notice that there is no freewheel yet. I have not decided exactly how I want to play it this time. Also note the cool flip-flop sandwich disc mounting system. And finally the tires have much less clearance in the front fork than I thought. I may have to upgrade my crowns because apparently Risse Racing makes those now...cool! Next up brakes, bars and vinyl. Obiwan
 
Been putting in some time on the bike and I have had to do a bit of surgery on the battery box. After installing the forks it was clear that the front of the box was contacting (and limiting) the swing of the forks. So I began cutting it back a bit at a time to get the clearance I needed. In this pic you can see the cut back while the lower channel remains un-altered:
image.jpeg
This one shows how far forward the side panel was initially since you can see the uncut panel on the other side:
image.jpeg
The next photos are various stages of trimming back the channel and side panels.
image.jpeg
image.jpeg
image.jpeg
Even after all of this I still needed to go deeper but had been trying to avoid cutting out the pem insert you can see in the front of the channel. I decided to quit jack in around and trimmed it back aggressively and just relocated the front panel attachment rearward. The angled mark seen in the tray of the channel is where I cut to:
image.jpeg
View attachment 1

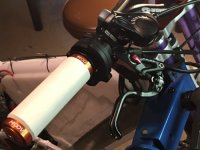
This last pic shows how the forks fit partially inside the box when turned to the extreme. There was some further trimming after that but it now has full range of motion and it's time to do some other stuff. Getting the stem and handle bar situation worked out. Making up custom grips to interface with the Domino throttle. Patching up the white vinyl carbon fiber, and arranging the wiring. Next up wiring, wiring and more wiring.
 
Not sure what you mean Boomer. The swingarm and linkage are nice and tight. I have yet to tune the suspension but when I do it can go from ultra plush to very firm.
 
Oh, I get it now. This is a really high quality DH frame. Won several world cups in its day and played a big part in revolutionizing suspension systems. The stiffness of the rear shock is primarily dependent on the weight of the spring. I have a 500lb Spring on this one since I intend to ride it less aggressively. My other DH comp is a more aggressive DH build and I used a 650lb spring for greater potential stiffness. Combined with the dampening I have found that it can be dialed in to just what you want. That said I use this bike on the road and in the dirt and have tuned it to a happy medium for responsiveness in both environments.
 
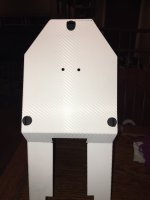
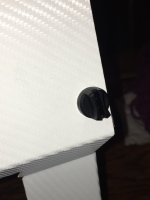
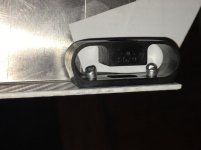
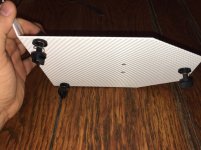
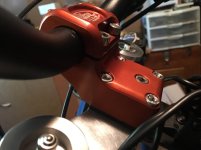
Well I have been waiting for a new custom stem from Risse Racing for these front forks. Turns out the original stem (Risse direct mount) which came with the forks had been bored out to accept motorcycle bars...of all things. I briefly considered using some moto bars until I got my hands on some and those suckers are HEAVY. They have a lot thicker walls. So the good people at Risse are making me up a custom direct mount stem in anodized orange. It's going to look great. But the stem and how it fits is going to determine a lot of other issues for mounting other stuff like the CA and the ignition switch, etc. so I'm at a bit of a stand-still on that front. In the mean time I got all of the panels covered in the white faux carbon fiber vinyl. Boy does that crap ever get dirty easily! Also mounted the rear latches for the removable panel that will cover all the main wiring and provide charging access. I used the Drus Dart system and I'm really happy with how it turned out. Here are some pics:
image.jpeg
image.jpeg
image.jpeg
image.jpeg
image.jpeg
image.jpeg
View attachment 1
Thes provide a good positive lock but allow just a bit of flexibility. I decided early on that I was going to use these fasteners so we went ahead and included the through holes and the rivet mounting holes in the solidworks drawing and cut them out on the lazer along with the panel shape. Made it nice and easy to install. Also got the three-speed freewheel mounted and all of the wire routing finalized before re-mounting the rear wheel (hopefully) for the last time.

Getting close now, can almost feel the wind in my hair.
 
Sorry for the delay in posts been building and working on other projects too. Finally got the stem in from Risse and it nice
image.jpeg
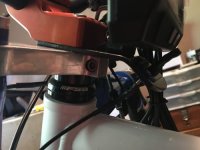
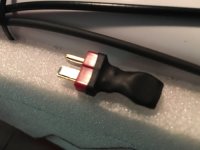
Made mount that fits under the stem sandwich style that provides a centered mount for the CA and my little ignition "key" (deans plug flush mount with the male plug as a key that has the two leads bridge soldered together). Just plug in the deans key and the ignition is hot. Remove it and the controller can't be activated unless a thief has a deans plug with the leads connected. Not the highest level of security but it looks nice.
image.jpeg
image.jpeg
image.jpeg
Customized domino throttle
View attachment 1
Handle bar set-up and dashboard arrangement


More to come soon
 
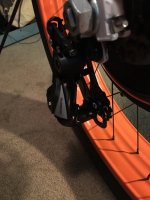
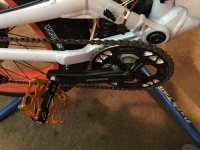
Mounted the derailleur and the crank arms and pedals.
image.jpeg
image.jpeg
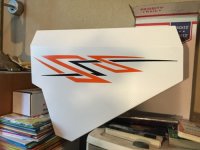
Applied the battery box graphics
image.jpeg
Put on the chain and checked clearance for the 3-speed freewheel. Turns out I needed one more washer between the freewheel and the frame.
image.jpeg
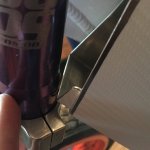
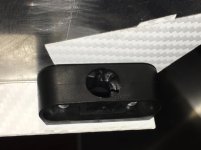
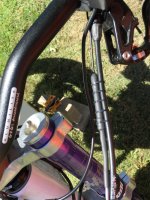
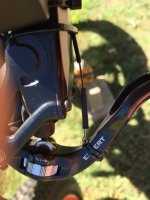
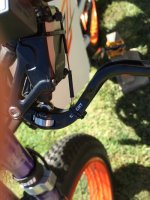
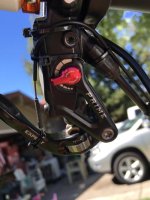
Then I installed the new stealth/universal brake switch. I began developing this switch a couple years ago and it is now ready to go into production. i have been working in conjunction with a VERY prominent e-bike company to test and modify it to get it just right. It is completely universal in that it will work for mechanical, hydraulic and rim brakes and can be installed without any disassembly or draining of your brakes hydraulic fluid or cutting cables etc. Additionally, it is very small and stealthy so it can be mounted in a variety of locations. It's plug-n-play with the Cycle Analyst or direct to the controller depending on the controller plug style. If the plugs don't match up you can just change out either the controller plug or the brake switch plug. It also uses a connection scheme that will allow you to use it connected to either one or both brake levers in a plug-and play fashion and to interconnect other brake initiated systems like PAS or brake lights. Our first short run of these is going to be for beta testers and bike shops to test on their products. Here are some pics, look for these in the near future from the best e-bike component retailer anywhere. Look for the more info soon from Grin.
image.jpeg
image.jpeg
image.jpeg
And some shots from underneath the brake lever to show the cable housing path which is very flexible allowing many different customized mounting methods.
View attachment 1

In these pics you can see that the switch actuation cable is mounted to the lever with tiny zip ties. This is our no-modification option. There will also be a mechanical attachment method included in the kit that can be entirely hidden beneath the brake lever that will require drilling a very small hole. Don't worry though the drill will be included.
Finishing touches and final assembly next.
 
Now I put everything together and programmed the CA for a first ride:
image.jpeg
image.jpeg
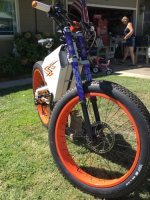
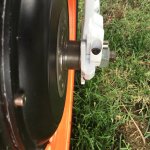
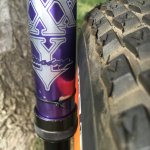
First ride went well with one big problem...the front forks are not wide enough for the tire! I knew it was going to be close (100mm wide rims!) but in the end they lacked about a 16th of an inch and rub on both sides. All will be well however because the good folks at Risse Racing are sending me some wider clamps that they developed for their "Fat Air Trixy" forks and spacers for the hub. Should be here soon. In the mean time I need to re-flash the controller since the stock settings are a little tame for my set-up. In the pictures you will note the clashing colors of the forks (purple anodized?). Once the forks are refitted with their new clamps and the head angle is set to my liking, the visible purple will be clad in the same white faux carbon fiber vinyl as the battery box. After that there will be a few minor wiring issues to tidey up and streamlining the charging method? But this is one more project pretty much in the bag. I'm sure I will be jones ping for another one soon. But for now I will rest a bit. So in closing let me just say thanks to all who contributed and helped me out along the LONG path that led to this projects completion. ES is awesome!
 
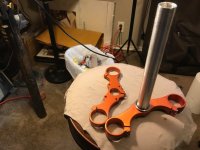
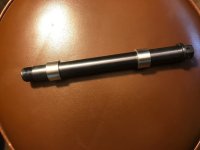
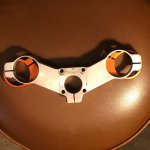
Ok, got the wider clamp kit in from Risse Racing and it pretty great! It includes:
The upper and lower clamps (anodized orange)
IMG_1432.JPG

The longer axel with spacers.
IMG_1433.JPG

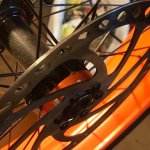
And the disk spacer.
View attachment 3
IMG_1435.JPG
IMG_1436.JPG

Here you can see that the new clamp is about 1" wider than the old one (a little over kill on width unless I decide to go to a bigger tire at some point.)
IMG_1437.JPG

One problem though, the new clamp kit has standard holes drilled for the direct mount stem rather than the old Risse hole pattern which I had the stem made to back when I had bar fit problems. No worries though since really, this allows me to use any stem on the market. I already have one ordered. And expect it to arrive in the next day or two. Then I can get the controller tuned in and Robert will be my father's brother.
 
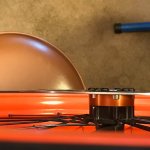
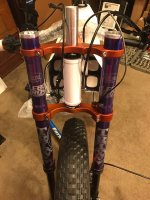
Did an initial install to determine the steerer tube length and make sure the brake disc lined up properly. Here is what it looked like:
IMG_1438.JPG

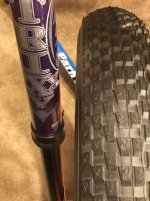
Now that is some clearance! It could definitely fit a 5" tire.
IMG_1439.JPG
IMG_1440.JPG

The brakes lined up perfectly :D

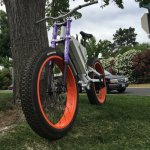
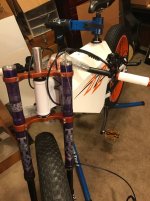
I'm kind of starting to dig the purple on orange color combo. I was originally going to make the forks the same white color as the battery box but the wife now thinks the purple looks good. I think I do too. Maybe call it the "Joker Bike". Probably going to have to trim some more material off the front edge of the battery box to get clearance for the wider fork swing but it does not look like much. Just waiting on the stem now and then final assembly. I could swear I have heard that somewhere before...
 
Back
Top