Planning/build thread, DH frame, Mini-E, QS 205 w/ LG HG2

apparently phase wire length is the most critical when it comes to losses.
the main battery leads to controller are less of an issue.

seatpost zone controller can work well.
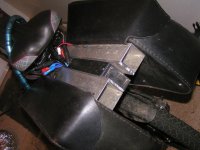
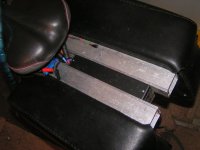
heres my max-e stuffed between my diy pannier rack.
because of the alu flatbar and square tubes w/airflow in good contact with it, it now rarely gets above 35c :p
thats with 10+kw
 

Attachments

  • PICT0065.JPG
    PICT0065.JPG
    57.3 KB · Views: 1,157
  • PICT0066.JPG
    PICT0066.JPG
    44.4 KB · Views: 1,157
The QS Motor 205 50H V3 arrived! It's a beast. About 16 kg in the rim?

https://imgur.com/a/umuww

Also some updates to the battery box design. It is close to being sent out for fabrication, I found a good sheet metal place. It will be 2mm aluminium, anodised black, with a form-fitting lid screwed on. All the holes/connectors have been located in the diagonal rear section.

Current hole configuration:

3x 13mm holes for waterproof cable glands for phase wires
1x 22.5mm hole for a waterproof charge connector
(Shenzen Linko 4-pin, http://cnlinko.en.alibaba.com/product/60126619045-800792386/4Pin_Quick_Plug_Flat_Electrical_Plug_and_Socket_Connector.html )
2x 20mm hole to allow display and hall sensor plugs to pass through
2x 12mm holes for on/off key switch and goretex vent

Now that I have taken a look at the motor and stock wiring, I am considering ditching the separate phase and hall connections, and running the entire sheathed motor cable section into the enclosure. The supplied cable is 1.8m long! I could very well just lose the supplied flat lugs and hall plugs, along with a great deal of cable length, and terminate directly into the Adaptto-supplied XT150 and hall connectors, and run it into a single large cable gland (I have a nice selection of sizes with beautiful camera-shutter seals).

The welder lives! I made up some spot welding probes from 8mm copper rod stock, and threaded them to accept a 1.25 metric thread. Easy to change if I need to take them off to sharpen. I was able to weld 0.3mm nickel (through-strip only so far however) using a 20V capacitor voltage. They will go to 50V if needed (6x the stored energy). The tests so far have just used a single 10 ms pulse from a digital signal generator, I will need to sort out the proper double pulse timing, program my arduino, sort out a footswitch of some kind, and possibly braid the welding cables together to get a lower inductance and hence lower the energy requirement for absorption by the snubber caps and FETs.
 
Great work! I'm really liking the look of that connector, if you're ordering I would be keen to take a couple and split costs if it's not too late?

What did the qsmotor end up costing you landed here? My cromotor appears to have had the epoxy affixing the magnets fail and under peak phase current they move rather than me! Wondering if I should bother to repair or just upgrade
 
Motor + 19x1.6" rim + 18T freewheel was $596.70 USD with FedEx shipping to NZ and paypal fees.

Nifty connectors huh. I am currently down for 3 sets, I can bump that up to four if you want a couple of sets. It should be $48 USD for four sets, plus whatever the transfer fees are. I wasn't able to complete a Western Union transaction online, I will have to either go into a physical location or do a telegraphic transfer, and I still haven't worked out if that will eat any of the balance along the way.
 
Ohbse said:
Great work! I'm really liking the look of that connector, if you're ordering I would be keen to take a couple and split costs if it's not too late?

What did the qsmotor end up costing you landed here? My cromotor appears to have had the epoxy affixing the magnets fail and under peak phase current they move rather than me! Wondering if I should bother to repair or just upgrade

i just had that happen with my x5404.

if the magnets are intact, its very easy to repair.
i used 2 part loctight speedbonder, recommended by Stealth bikes. https://www.google.com.au/imgres?imgurl=http://www.ellsworth.in/uploads/110706/1-110F60914292I.jpg&imgrefurl=http://www.ellsworth.in/product/adhesives/anaerobic/987.html&h=500&w=375&tbnid=IB5zVztpF7p-mM:&docid=TsO_CA41Bbn7RM&ei=H5xzVujcNobNmwWs94eoBQ&tbm=isch&ved=0ahUKEwio6JaI2eTJAhWG5qYKHaz7AVUQMwgeKAIwAg

you could get spare magnets from zelena vosila if they are broken, pretty cheap.

you just have to be super careful handling the magnets. store them with cardboard between to stop them clacking together and breaking. keep a good grip on em as they tend to fly across to another one and smash on impact....believe me i found out the hard way :roll:
 
http://i.imgur.com/oEG2aZf.jpg

Mounted!

Small hiccup, the space between the motor and rear disk is too small for the Hope 4-pot caliper. I suppose the solution will be to go up a disk size (not really enough room from the mounting bolts to the phase wires to use a spacer, or else it would quickly destroy the cable).

Where to find >203mm rotors?
 
Crossposted from the torque arm thread:

Soliciting input on torque arm design.

https://imgur.com/a/QfttC

I have removable dropouts that are 150mm wide on the inside. My model of the original dropouts is shown, a 7.5/15mm thick bit of aluminium. For details of the build/frame, my thread is here: viewtopic.php?f=3&t=73499

The plan is to buy some extra inner width by offsetting the lower part of the dropout. It is currently planned to be a similar 8.0 mm thickness as the original (and some kind of SS alloy), but it could be anything without affecting the internal width, as the plane is the same as the internal face of the swingarm where the dropouts connect to it.

My concern is whether seam welding around the edge of the mating surface of the two pieces would be able to provide enough strength, and also getting the dimensions right for the clamping section. Will the 8x15mm end-pieces be large enough, and is there enough overhang at the end for a clamp bolt?


I'll be looking for a place to get them laser/waterjet cut, as well as possibly also cutting a custom 250mm brake rotor.
 
I love the capacitor bank. Looks like it does a fine job welding. I also like how you split the copper strips so the weld current doesn't get shunted. Should be an awesome ride when finished.
 
Shenzen Linko connectors arrived, they are really nice! Come with a little packet of screws and a screw-on dustcap, same threading as the male connector. Nice seals all round, should be hurricane-proof.

https://imgur.com/XlfP95k

It would be a good candidate for a standardised Adaptto charging interface (with offboard charge coil, onboard might as well use the XT90). I will force anyone who wants to buy a connector to use the same pinout, and then develop my worldwide network of charging stations... :twisted:

Speaking of which, if anybody nearby is interested, I have four sets that cost a total of $84 NZD landed. I can pass them on at cost.
 
Thread necromancy, I have started a new build thread here:

https://endless-sphere.com/forums/viewtopic.php?f=3&t=79669

A lot of the stuff in this thread is no longer relevant as I have a Q76R frame. More juicy spot welder details also.
 
Back
Top