Shineray 125 E

EVOXY6768

100 mW
Joined
Jun 28, 2020
Messages
45
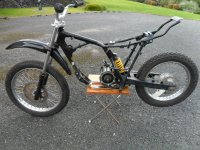
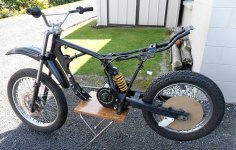
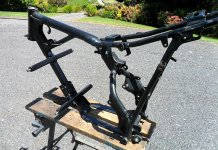
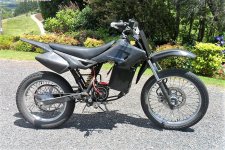
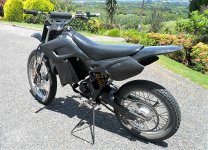
I have picked this bike up for my first ev conversion. The bike is a shineray xy 125 cg 2006 vintage which had blown motor and been sitting outside in the weather
Shineray.jpg

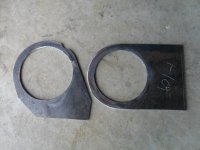
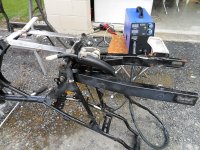
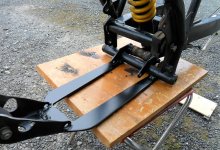
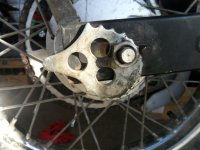
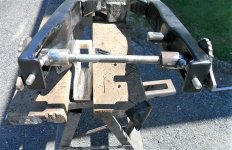
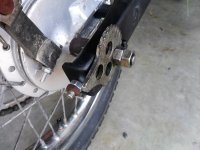
So got it back home and started to strip down. Everything seems in pretty good shape frame is straight , swing arm bushes all good, wheel bearings ok and even front brake is working
SAM_2271.JPG
SAM_2273.JPG

I have got the weight down to 50kg which leads me to the first discussion what motor kit combination to go for
The bike specs
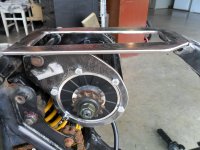
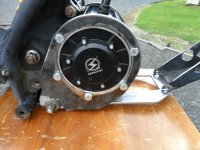
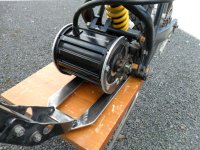
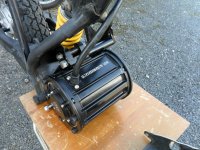
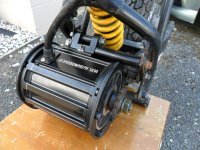
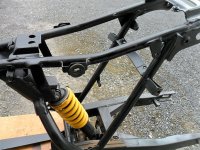
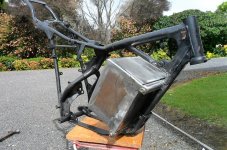
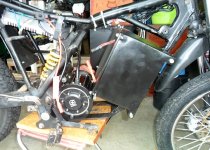
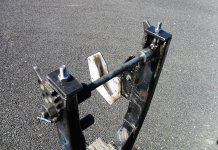
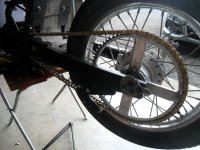
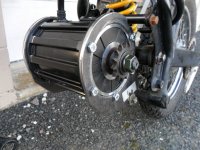
It is going to be a mid drive set up.
At the moment it weighs 50kg, wheels are 16 inch rear/ 19 inch front. Rider weight 80kg ( on a good day :wink: )
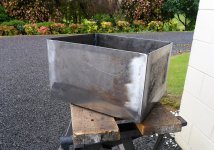
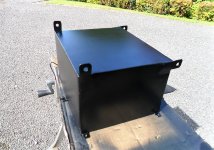
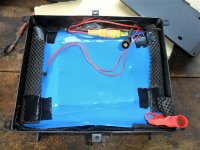
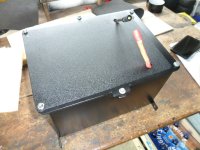
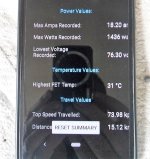
The conditions the bike will be used for is mostly flat ground on grass and trails with about 10 degrees hills and i only looking for about 50kph and ideally 30km / 50km depending on the battery i can fit in the frame ?
Have come up so far with 2 options as i want a plug and play
First, QS 2000W / EM 100 72V Kt or the QS 3000W / 150 EM Kit 72V .So basically I would like to get to top speed quickly.
I probably forgotten some details but this is where I at the moment. Look forward to any suggestions
Cheers
 
So its time reach out for some advice or pointers. I seem to have more questions and answers at the moment. My intensions with this build was to run the QS 2000W/EM 100 mid drive kit and after being in contact with qs they said it would be doable ? and run a 72v 40ah battery. But they also suggested running the 3000w/EM 150 as that would give me more acceleration. So now I am wondering would the 2000w setup work in my bike or would I have or could have problems with over heating and being under powered, I know changing the gearing on rear sprocket will help.
I have worked out that weight of the bike and Motor and battery plus the rider will be about 155kg
Cheers
 
Bit of an up date
After quite a few emails to QS I went for the 2000w em votol 100 plug and play combination and after 6 days it was at my front door in NZ which was a bonus as thought I might be waiting for a while. QS even sent me a video of the set up running before shipping which was nice.
First job was to get 2x 6mm plates cut so I could start mounting the motor to the frame plus another plate cut to tie the frame together so after drilling and grinding got it all mounted
On my to do list now
Make brackets to mount the controller ( going to mount under the seat )
Get everything welded up
Sort out a 70t rear sprocket ( will have to get one cut up, water jet )
Start researching a battery that will fit in the frame.
 

Attachments

  • SAM_2308.JPG
    SAM_2308.JPG
    166.6 KB · Views: 2,126
  • SAM_2328.JPG
    SAM_2328.JPG
    189.1 KB · Views: 2,126
  • SAM_2330.JPG
    SAM_2330.JPG
    261.7 KB · Views: 2,126
  • SAM_2332.JPG
    SAM_2332.JPG
    198.1 KB · Views: 2,126
  • SAM_2335.JPG
    SAM_2335.JPG
    240.9 KB · Views: 2,126
Have finally finished up the motor mount plates and spacers and have given them a coat of paint. Motor mounted into the frame
( hopefully this is the final version ) In other news I have ordered my sprocket 70t which should be cut next week. Cut out a template just to see how it looks ( big ) then I can get on with getting the chain bought and fitted. Will have to come up with some way of making chain guides. On my still to do list, Finsh up welding of controller brackets, Get a battery ( still have not finalize ) and come up with a way to mount battery in the frame. Cheers
 

Attachments

  • SAM_2367.JPG
    SAM_2367.JPG
    239.2 KB · Views: 2,026
  • SAM_2364.JPG
    SAM_2364.JPG
    214.7 KB · Views: 2,026
  • SAM_2363.JPG
    SAM_2363.JPG
    271.5 KB · Views: 2,026
  • SAM_2368.JPG
    SAM_2368.JPG
    224.4 KB · Views: 2,026
SAM_2378.JPG
Just another up date. Been able to get a few more jobs done plus a few speed bumps along the way. My sprocket turned up but it was so warped so in contact with the water cutter company they couldn't guarantee if they cut another sprocket would be warped so gave me a full refund and told me to keep the sprocket. I had a go at straighten it at first couldn't so decided to do the cut outs and have another go, its not perfect but running fairly true ( about 1mm out ) so hopefully be ok
In other news I picked up a gasless welder so could get on with welding up my frame and mounting brackets for the controller.All came out pretty good
Jobs to do now
Chain guard for the rear sprocket ( just ordered )
Still haven't purchase a battery
Build a battery box
Start on all the wiring
 

Attachments

  • SAM_2388.JPG
    SAM_2388.JPG
    227 KB · Views: 1,760
  • SAM_2396.JPG
    SAM_2396.JPG
    314.3 KB · Views: 1,760
  • SAM_2404.JPG
    SAM_2404.JPG
    278.8 KB · Views: 1,760
  • SAM_2407.JPG
    SAM_2407.JPG
    286.5 KB · Views: 1,760
hi
nice work.
good info on the custom sprocket coming back warped. im currently looking at getting a custom sprocket made poss laser cut if water is not suitable
matt
 
mattg37 said:
hi
nice work.
good info on the custom sprocket coming back warped. im currently looking at getting a custom sprocket made poss laser cut if water is not suitable
matt

From my experience ( mine is alloy ) getting the sprocket cut using water jet cutting didn't work ,it might work if you are getting a steel sprocket cut but not sure though, would think laser cutting would be better.
 
Time for a catch up in what been happening. I finally been able to purchase a battery from a local battery builder in NZ, very happy
72v 30AH 20S12P Using Panasonic UR18650NSX (2600mAh ) combined with non spark Amass 150 connectors. All connected up with the ANT Bluetooth 20s BMS 160A
Once the battery arrived time to measure up and build a battery box. Have gone with using 1.6mm panel steel for the battery box.
Cut, welded and cleaned up. Next on to a way of mounting to the frame have gone with 25 x25mm box section welded to the frame, have also welded 8mm nuts in the end of the box section so will be able to remove the battery box without taking battery out of the battery case .Next to do is to get everything painted and start on the wiring, Happy Days :D
 

Attachments

  • SAM_2456.JPG
    SAM_2456.JPG
    214.3 KB · Views: 1,516
  • SAM_2490.JPG
    SAM_2490.JPG
    233.3 KB · Views: 1,516
  • SAM_2493.JPG
    SAM_2493.JPG
    235.6 KB · Views: 1,516
  • SAM_2502.JPG
    SAM_2502.JPG
    232.4 KB · Views: 1,516
  • SAM_2506.JPG
    SAM_2506.JPG
    287.9 KB · Views: 1,516
Well the weather here hasn't been to great for spray painting but have managed to get a coat onto the frame and battery box
Have fitted battery in the box and made up a lid for it and mounted into the frame. Started on the wiring, have to solder up the elock wire to the battery positive on the controller and the key switch wire. all so close now :thumb:
 

Attachments

  • SAM_2510.JPG
    SAM_2510.JPG
    329.2 KB · Views: 1,451
  • SAM_2531.JPG
    SAM_2531.JPG
    266.7 KB · Views: 1,451
  • SAM_2533.JPG
    SAM_2533.JPG
    222.3 KB · Views: 1,451
  • SAM_2535.JPG
    SAM_2535.JPG
    219.7 KB · Views: 1,451
  • SAM_2537.JPG
    SAM_2537.JPG
    256.9 KB · Views: 1,451
If you're on the lookout for another sprocket manufacturer, check out rebelgears:
http://www.rebelgears.com/

I've had some bike gears made and the quality was excellent.
 
Awesome project, thank you so much for sharing! Can I ask why you chose a mid-drive motor instead of a hub motor? QS sells the 3kw hub motor laced to 16" rims so that would have worked. But it requires modifications to the rear fork dropouts and sometimes the rear forks need to be widened as well.
 
mannydantyla said:
Awesome project, thank you so much for sharing! Can I ask why you chose a mid-drive motor instead of a hub motor? QS sells the 3kw hub motor laced to 16" rims so that would have worked. But it requires modifications to the rear fork dropouts and sometimes the rear forks need to be widened as well.

Thanks for the kind remarks, its been a fun project so far plus a steep learning curve. Reason I went for the mid motor set up is I wanted the bike to look as original as I could and for a trail bike I think its the best option ( didnt want all the weight on the rear end ) plus as you say all the modifications with rear drop outs :thumb:
 
Well after 4 months the Shineray is alive and Kicking. Was a bit nervous after hooking up the battery and turning everything on but it was all good and very happy. I am very surprised how the first test run went, didn't have any problems except for the chain catching on the rear sprocket guard which was an easy fix. Got the vbs ap working and far as i know everything looks fine. Managed to get close to 15 km in mainly going up and down the road and on the gravel. Top speed was on a bit of a downward slope but on the flat the bike would sit at 50 kph no problem, this is with all the standard settings that came from QS ( 2ND speed gear ) So overall couldn't be more happier :bigthumb:
Next on my list is to get into the programing of the controller to access the 3 speed switch and see what that does only problem don't have one at the moment but I still have the indicator switch block so might be able to do something with that.
 

Attachments

  • SAM_2582.JPG
    SAM_2582.JPG
    300.4 KB · Views: 1,311
  • SAM_2587.JPG
    SAM_2587.JPG
    288.2 KB · Views: 1,311
  • SAM_2572 (2).JPG
    SAM_2572 (2).JPG
    162 KB · Views: 1,311
Well these chain adjusters suck big time. I needed to adjust the chain so thought no problem just go up to the next notch but that was no good chain to tight. So took out the swing arm to make some adjusters. First cut up some 5mm plate to weld on to the end of swing arm. Next some 8mm bolts welded onto the wheel spacers. Paint and put all back together and can adjust the chain to how I want it, job done :thumb:
 

Attachments

  • SAM_2604.JPG
    SAM_2604.JPG
    170.2 KB · Views: 1,252
  • SAM_2605.JPG
    SAM_2605.JPG
    322 KB · Views: 1,252
  • SAM_2613.JPG
    SAM_2613.JPG
    245.9 KB · Views: 1,252
  • SAM_2616.JPG
    SAM_2616.JPG
    192.8 KB · Views: 1,252
Have added some bling lol, new heavy duty gold chain. Have finally been able to get into the controller via my lap. First thing i notice in default setting the bus bar was set at 40 so changed that to 100 and disengaged the soft start and set that at 12. Also default gear setting was set at 2 so have now wired up an indicator switch so have all 3 gears. Its is WAY so much better now. Tested again did about 18km. I only have one of those hand held infrared temp guns and had a reading of 39 degrees C when I got back which I think is ok ?. Will upload my settings when I hook up the lap top to see what you guys think. Cheers :thumb:
 

Attachments

  • SAM_2622.JPG
    SAM_2622.JPG
    232 KB · Views: 1,121
  • SAM_2624.JPG
    SAM_2624.JPG
    183.8 KB · Views: 1,121
  • SAM_2625.JPG
    SAM_2625.JPG
    202 KB · Views: 1,121
So over the holiday period here in NZ the bike has been given a work out with my nephews riding it and had no breakages or electrical problems so very happy. The Battery has being performing well and been getting 48km per charge of mixed riding and changing of the 3 speed switch for the riders so nearly getting 2 hours of ride time. Highest temp seen on the motor ( using a temp thermal gun ) was 45 degrees C
I have gone into the programing software for a good look and at the moment only have changed the bus bar to 100 and the disengaged the soft start and upped that to 13.
So now comes my first of probably many questions
1/ I am looking for a bit more altercation from low throttle in high speed setting, so i guess that would relate to the rate of incline setting ? I have not set up the sport mode yet and have not change anything in the port settings
Here are my settings and would appreciate any comments and pointers
Cheers :thumb:
 

Attachments

  • SAM_2633.JPG
    SAM_2633.JPG
    238.4 KB · Views: 993
  • SAM_2634.JPG
    SAM_2634.JPG
    254.4 KB · Views: 993
  • SAM_2635.JPG
    SAM_2635.JPG
    246.8 KB · Views: 993
  • SAM_2636.JPG
    SAM_2636.JPG
    216.7 KB · Views: 993
  • SAM_2637.JPG
    SAM_2637.JPG
    269.3 KB · Views: 993
Got a little bit testing today. Have now wired up sport switch and tried that. Throttle response is a lot better but a little disappointed in the engage at the start, kind of feels like riding a 2 stroke nothing when first on the throttle. I think it could be one of 2 things.( 1) being a newbie i might be getting lost in the settings in the software ( could anyone have a look please ) 2 Could be the gearing . First just want make sure I am setting everything right in the software before moving on
Cheers
 

Attachments

  • SAM_2640.JPG
    SAM_2640.JPG
    223.6 KB · Views: 936
  • SAM_2641.JPG
    SAM_2641.JPG
    246.7 KB · Views: 936
After a bit more testing and changing some more settings with the controller I think I have got it pretty well set for the moment
Now I think I need to look into changing the gearing as would like some more pick up and lose some of my top speed.
I want to change the motor sprocket from 14t down to 12t or 13t. But I have the taper sprocket set up ( seen in pic attached ) so went on line and all I can find is replacement 14t sprockets. Have asked the sellers on line but seems none of them do a smaller sprocket. I have read here somewhere that you can machine off the sprocket and weld a new one on ? has anyone done this if so please advised how its done. My only other option would be to go with a bigger rear but not really want to do that just yet
 

Attachments

  • SAM_2319.JPG
    SAM_2319.JPG
    195.5 KB · Views: 803
Back
Top