TricycleMichael
100 mW
- Joined
- Oct 16, 2020
- Messages
- 37
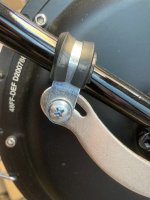
Have had some issues with the commonly available two piece torque arms. I prefer single piece like the photo.
Can't find them, can anyone help?
Can't find them, can anyone help?

TricycleMichael said:Have had some issues with the commonly available two piece torque arms. I prefer single piece like the photo.
Can't find them, can anyone help?Torque Arm right.JPG
TricycleMichael said:This is the photo of the second fork. The clamp has been pulled and the arm seems to twist against the drop-out.
The first fork was worse, threw it away.
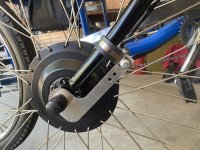
I'm using two torque arms.

motomech said:Ok, I looked at the one piece TA's that I have and they have a different shape than yours, they are more of a J-shape, so they are different.
I also looked around for one piece TA's and couldn't find any either, so no help on your original question.
And although I don't know if this applies to your install, but I might take this opportunity to comment on 2-piece TA install techniques that I have found to work.
I have never used a rubber bushed clamp on those and I think part of their strength is the hose clamp holding snugly and flat against the fork leg. If I am worried about scratching the leg, I wrap it a thin strip of rubber that comes with handlebar mounted accessories.
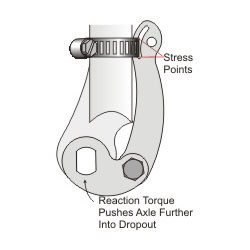
I do not use the commonly supplied "castle" washer that has a tab as I have had that tab break off. I always use the C-washers.
I also install the torque arm so it "pushes" against the leg rather than pulls away. that would be the force that is applied opposite the direction the whl. rotates.
These "tips" are not meant to lecture you, but for the benefit of any other readers approaching a hub motor install.
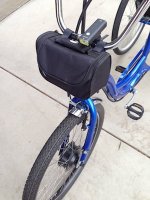
The one piece install that is working for you looks very neat.