E-beach, Harbor Freight Tools is an excellent source for cheep ebike stuff.
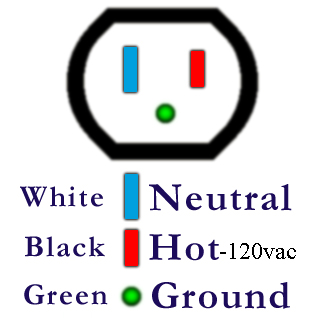
To wire your power supply you will probably need a voltmeter and be careful to keep the wires from touching. Any computer cord should do. I am not an expert but this is what I was told. The “L” wire should show 120vac to/across both the “N” and “G” wires. I was lucky because the “G” wires on my three power supplies all had green markings, which is usually standard. If this is not correct let me know. Here are 2 of my power supplies/chargers:
View attachment 3
View attachment 2
I also recommend these connectors because if you move your unit around the wires will break off.
View attachment 1
I found that these power supplies vibrate (fan) and the screws will come loose. You need to check them on occasion.
Good luck!

")