Zibby front wheel friction drive RC

zibbby

10 mW
Joined
Jul 13, 2008
Messages
30
Hi!


First, I would like to thank you for help me started on the rc stuff in my post “Recommendation for new build rc
It took a while to build this drive, mostly because waiting for parts from hobby king.
Originally I was planning to use HXT 63-64 but after waiting six weeks I decided to change to HXT 63-74.
The build was pretty smooth and the only problem I had was the sliding mechanism .
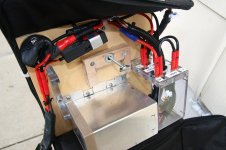
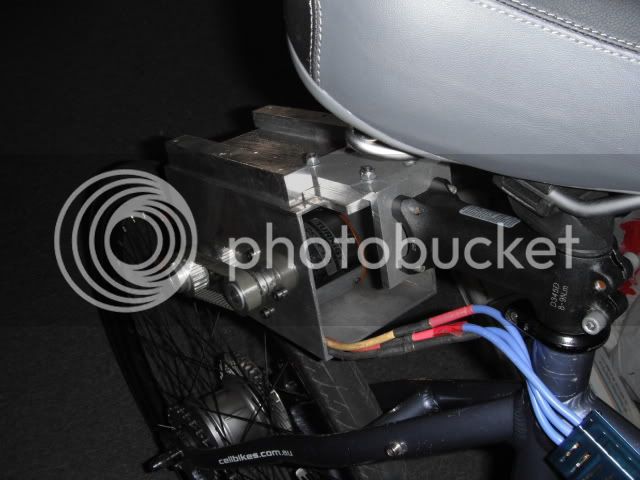
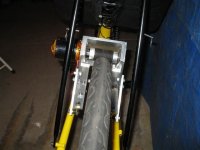
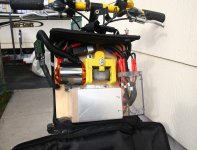
My main idea was to be able to remove the whole system from the bicycle in minutes and be able to install the bicycle on the Rv rack without the weight of the battery, motor itc.
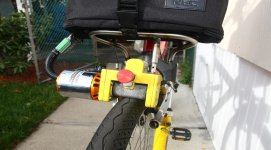
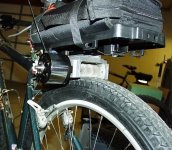
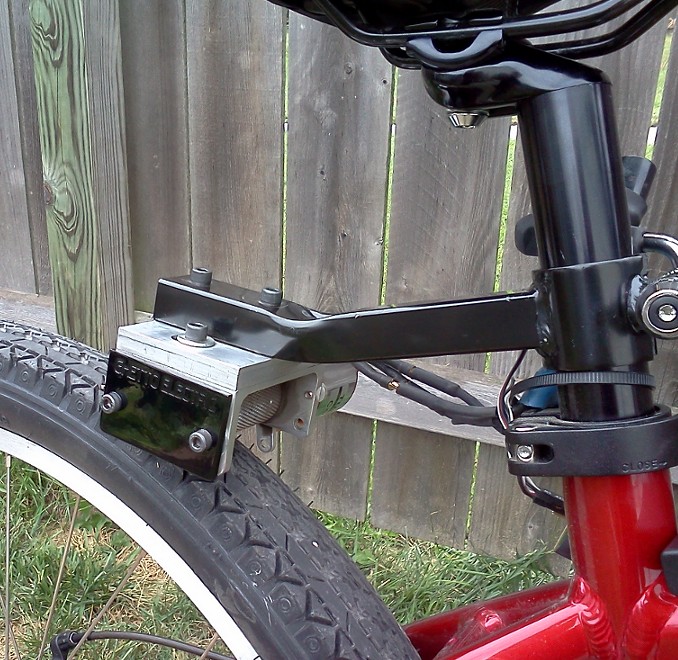
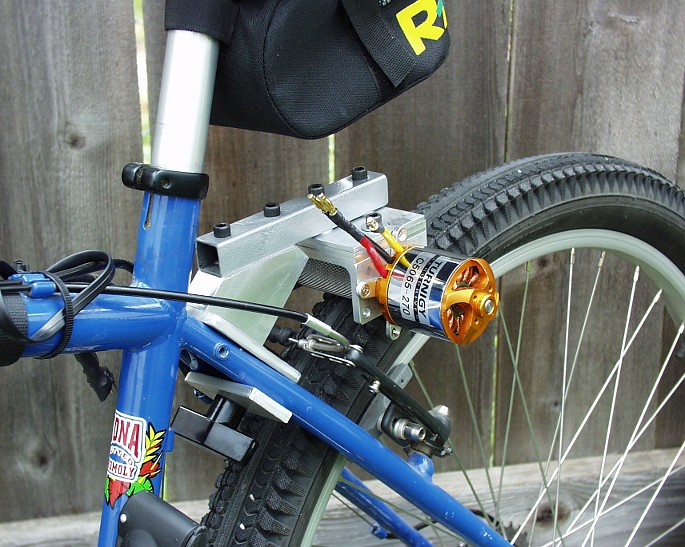
So I decided to mount the friction drive housing on the stainlessteel bar. It worked very nice until I installed the motor. The weight of the motor tilt the drive housing and did not slide easy. Because I had all done include painting I did not want to redesign.
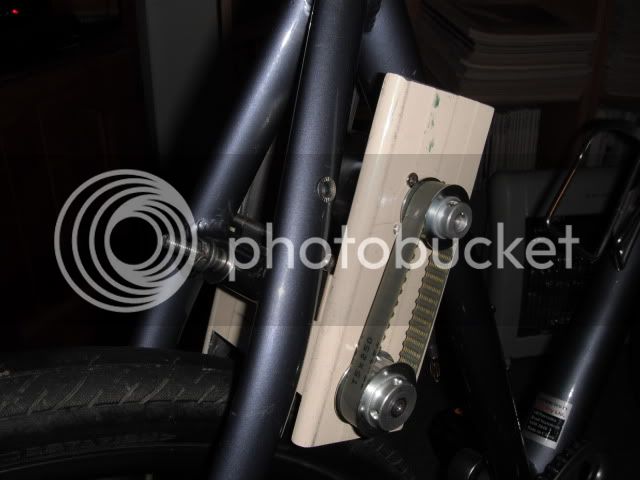
To fix that, I installed little spring loded roller on the other side to compensate the weight of the motor.
The whole system works awesome, lots of power. The roller slide as much as need. the more resistance, the more it slide and digs in more.
I did install some adjusting so I can regulate how much it slide, also I can adjust my free roller idling. The is also possibility to disengage completely while riding.

I did only 30 miles on it, and the the top speed is 20mph.
The battery 8S2P 10APH . On flat without pedalling 10 miles.
The most fun is driving up the hill, it does not slow down too much.
The esc I use ICE 100. It does not get even warm. The motor gets pretty warm up the hill but not to bad. On flat it get light warm.
The sound is also very acceptable, it gets little louder when accelerate .
I can remove the hole system for the bicycle in less then two minutes.
For the best grip and the least vibration I use Innova Swiftor City Tire 2.0
The whole system include the rack is 14lbs.

View attachment 6

View attachment 5
inbag.JPG

View attachment 3

View attachment 2

inthebag.JPG
rightside.JPG
 
Zib, I hope you don't mind, but I'd like to link another RC-friction-drive in this thread (from EVTodd). Every E-bike configuration has its benefits and drawbacks, and these should be a good solution for some situations...

http://endless-sphere.com/forums/viewtopic.php?f=28&t=9652&start=0

EVToddRC_FrictionDrive.jpg

Todd calls this his "Ghetto Electric drive" (pic unavailable)

http://endless-sphere.com/forums/viewtopic.php?f=28&t=21097

Also, from kepler in Australia:

http://endless-sphere.com/forums/viewtopic.php?f=28&t=16550

file.php


From Solar Motion

http://endless-sphere.com/forums/viewtopic.php?f=28&t=14387

Drive.jpg


From Drifter

http://endless-sphere.com/forums/viewtopic.php?f=28&t=21380&start=0

Belt-3002.jpg


Drifter is very busy!!

Belt-5003.jpg


Drifters version 7.1

http://endless-sphere.com/forums/viewtopic.php?f=28&t=22583

DrifterFD_Ver7.jpg

From Bluefang

http://endless-sphere.com/forums/viewtopic.php?f=28&t=22108&start=0

file.php


From Adrian_sm

http://endless-sphere.com/forums/viewtopic.php?f=28&t=22187&start=0

file.php


from Snath...
http://endless-sphere.com/forums/viewtopic.php?f=28&t=19032
http://endless-sphere.com/forums/viewtopic.php?f=28&t=9652&start=225#p293220

file.php
 
spinningmagnets
Sure, I do not mind.
Why you picture shows up and mine need to be open?
I have one video on this setup but I do not know how to insert properly
 
Your pictures are very large, but sometimes that is good to see important details better. I copied your pic, I used MS-Paint to crop some of the edge away, and then resize to a smaller image. The picture is now 600 pixels tall, and 500 wide (as an example).

If you try "preview" just before posting, it will show you what the post would look like, so you can make changes right away if you want.
 
Great work, Zibby :D

I love the cradle for storing the drive inside the bag, what a great idea!

Very tidy wiring work as well, I also like the perspex bulkhead for connecting the batteries.

One thing I didn't quite get:
To fix that, I installed little spring loded roller on the other side to compensate the weight of the motor.
I was looking for something else hanging off the (opposite to motor) side of the knurled roller, but nothing there?

(BTW, if the width of your pictures is 800 pixels or less they will show up)
 
:shock: :shock: :shock: 8) 8) 8)

That is one cool setup Zibby!! I have a feeling this incarnation will get copied more than once. Stealth AND removable, talk about security.

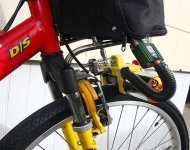
It appears that your crown is split there Zib, Is that safe? I also saw alot of chewed up rubber on the brake arch, is that from the tire? Will it eat it that fast in 30 miles, or is that tire just gettting broke in? :twisted:

Very nice, a video would be killer.
 
Grinhill
This is the spring loded roller to compesate the waight. If I was making this again I would propably use two bars to slide or wider bar so the roller would not be necessery. The problem with this bar is that is so small when the waight is on one side it just jammed.

Thank you on advice with the picture size. How would I do the video?

 
Nice work Zibby! Very cool design. It's nice to see someone else enjoying friction drive.

I agree though, that fork crown is scary. I hope it just looks funny in the picture but it looks like it's ready to let loose any time. I don't want a fellow friction drive fan taking a fall before he gets to enjoy the fruits of his labor.
 
The crown is not split. I had to cut little from the top of the crown so I added some aluminum to it. It actually little stronger now.
The shock are blacked because the way I mounted the sliding bar, by the way.
The dust of rubber is from setting the idler roller to light. So as it wants to slide it just spin on the tire make some dust.
Befor I took it for 10 miles trip I set it right and there was almost no dust. I just do some epermental setup up now how light I can set the free roller.
 
Zippy,

Really nice work man... is that right you have font and rear wheel setup now?

That is a bit klunky but damn if it's not lightweight and probably very effective.

Well done (who needs a gearing reduction, just use friction drive) what's the reduction work out to: 26.5:1 or somthing?

I have a friend with a similar installl to the rack version but he uses a pair of shocks with high rate coil springs from 1/5th scale RC car to provide tension (adjustable and all, almost better than my forks) and it serves him well...

I need to get him to shoot pictures and post, he came up with multiple friction wheels for different conditions, including one for wet weather which is made of rubber - a custom cast layered (bonded) to a small roller skate wheel, the cast is an exact negative of his tread pattern of the rear tire. When he said he solved the issue of slippage in the rain I thought - yea sure, but to my surprise... I poured water all over the rear wheel and roadway and the slip issues weren't between the drive and the tire but between teh tire and the pavement! Best hookup I've seen, drawback is they wear over a winter / rainy season and must be "resoled" but it's fairly simple.

How is your experience with slippage - any issues with wet riding?

That would make a great bolt on system for front wheel drive with appropriate fork reinforcements/clamps to distribute a bit more load - I mean you could do quick release clamps on the fork tubes to mount reinforcement rods and move from one bike to another in minutes (or less)...

Truly excellent job!

-Mike
 
Thank you for comments.
So far I did not tested in wet condition.
Next month I will take this bicycle to Florida for couple weeks , we see how it works.
 
Came back from Florida trip, did 50 miles
The motor and drive was asome ,going strong . The best was to go on those bridges pretty steep, and no complains from motor.
I almost lost the bike , withot the drive installed.
When Parked in Miami I put the bike on the rear rack behind my Rv. There was no battery and motor installed , because I remove every time it is on the rack .
So I was sitting in my Rv with door closed, then .. tthe Rv start to shake , I tought it was gust of wind. Quicklly run to the rear and pull the shades up and what I see ? The thief is stealling my bike. He cut cheap cable lock and it could be seconnds and the bike would be gone. I scare him away And try to chase him ( on the bike he was trying to steal :D ), . It is not expensive bike but I spent lots of work for the motor mountings itc. Fom now on I install heavy duty lock..
 
somehow i missed this build earlier.

i like it. very simple. do you also have an adjustment for the amount the drive roller goes into the tire?

rick
 
Yes, I can adjust how much is the idler digging in the tire. With this usefull adjustment I can disgauge completly when the battery is low, or adjust exacly right pressure for optimium performance.
 
justlooking said:
how quick do the tires wear with these setup ? i get the impression that they would last half the time than normal ?

That's a myth. A good friction drive setup (with no slipping) doesn't wear a tire very fast at all. Don't let the word "friction" scare you. lol :lol: Your tire has "friction" on the road too.

My last back tire (using friction drive) lasted about as long as my normal front tire. About two years in my case.
 
At first, I was getting unacceptable wear on my round-profile tire (fairly smooth tread, of course). All of my drives power was being focused on a thin strip down the center of the tread.

Once I took EVTodds suggestion and switched to a square-profile beach cruiser tire, everything improved. The roller was engaging across the entire tread face, instead of just in the middle of the rounded tread. My occasional slippage went to NO slippage, even under hard acceleration.

As Todd said, my rear tire seems to be wearing at the same rate as the front tire now...check the pics of his drives to see the type of square-profile I am talking about.
 
Back
Top