1st time winding a hub motor any tips

Joined
Jan 21, 2021
Messages
17
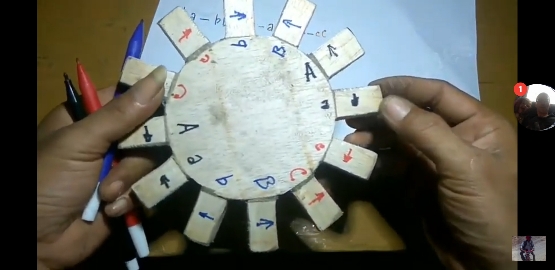
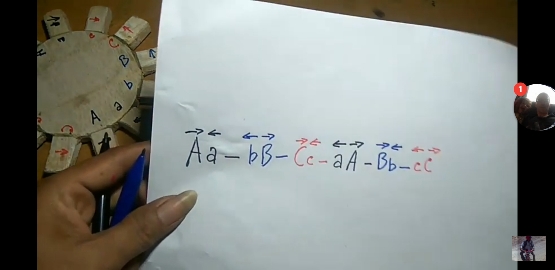
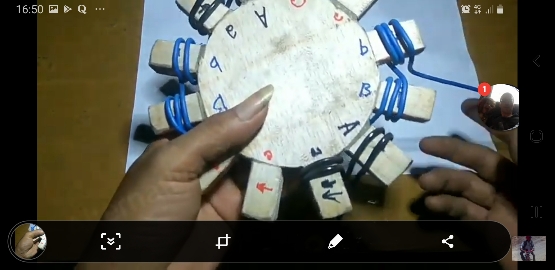
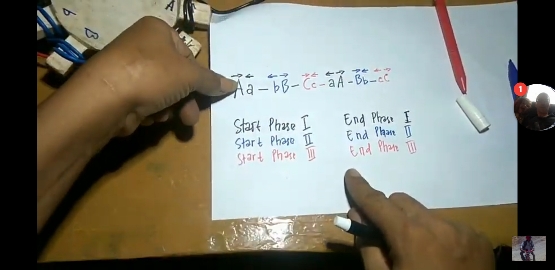
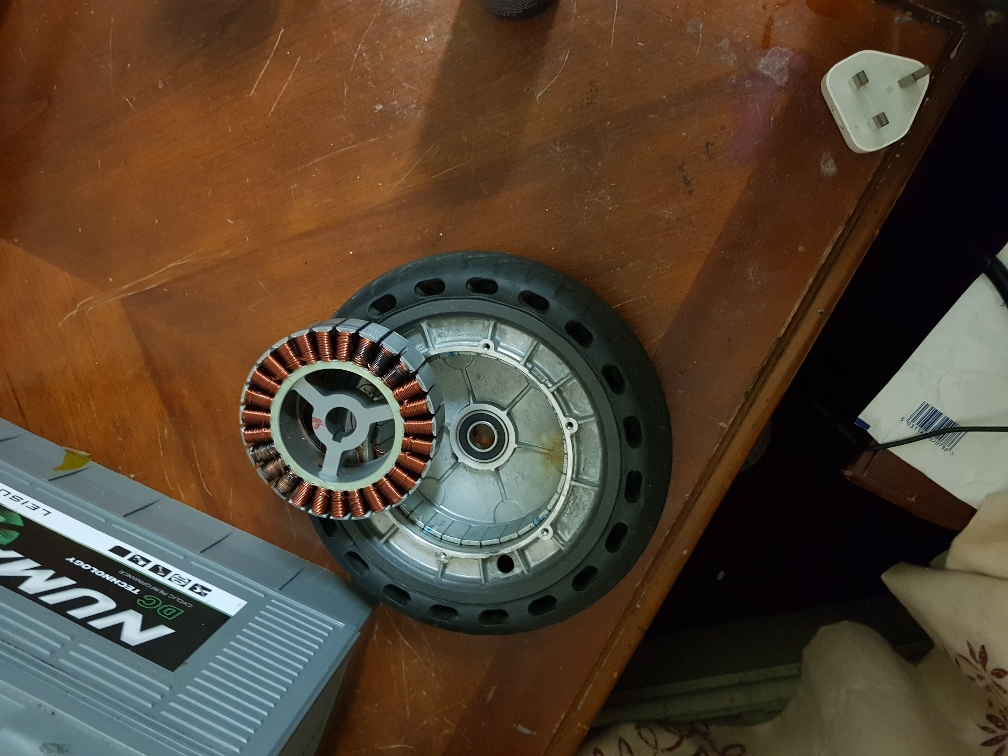
Hello guys this is my 1st post and I'm new to ES I've done a lot with my ebike built my own batteries learned about throttle manipulation(yet to try) I've done all manner of experiments with my controllers connecting switches the various switches together on my 2 controllers (I have a 2wd bike)had all manner of strange results I've fed 10awg phase wire into my front voilamart 9c hubmotor cant do rear till I make new torque arms as the rear 9c tore out a few times ... along with all manner of things and now I've decided it time to learn how to wind my hubmotor put a fast wind in there I've watched some videos and read a lot of threads and information I have a very good idea what k want to do maybe a 9 or 10/6 and was going to run with a very basic wind pattern 1 forward 1 backwards( or vice versa without checking the video couldn't say which) skip 4 teeth rinse and repeat all way round then doing the same for each of the remaining phases and terminate in wye.

Thats the process I was going to begin with as it's simple from what I've researched a good turn count is 6 so it should be quick with my 60v liion pack along with the 10awg phase cable. If I'm happy with what I've wrought I plan to rinse and repeat on the rear.

The reason I made this thread is like I say I'm still noobish and have loads to learn which includes wire sizes for winding and if there are better winding patterns than I have already learned about as like I say it my 1st go and any constructive criticism is welcome
 
Ďrãgøn~Fírë said:
learned about throttle manipulation(yet to try)
What is "throttle manipulation"? Haven't seen that term before in this context.

I've done all manner of experiments with my controllers connecting switches the various switches together on my 2 controllers (I have a 2wd bike)had all manner of strange results
? This sounds like a good way to damage controllers, if what was done is actually what is stated above. I expect you mean something different, but you would need to post complete and exact details to be sure.

now I've decided it time to learn how to wind my hubmotor
This part I don't have information about; it sounds like you have already read around the forum/etc and know what kind of work you're in for, though. ;)

The only thing I can point you to that you may not have used yet is the https://ebikes.ca/tools/simulator.html . To use it, first read it's entire page so you know what it is and how it all works, then setup a system similar to your own (they have several windings of the 9C motors listed), and experiment with differnet windings to see which system changes make it respond the way you want it to in the riding environment and situation you will use it in.


any constructive criticism is welcome
My best recommendation is to write up your posts and questions systematically, ensuring they contain all the information you already have about whatever it is you want to do, in an easily-readable way, and then all the questions about what you want to do, in an easily-readable way.

Many people write posts in a way that assumes the reader knows everything that they do, but that is almost never the case, so if the writer doesnt' include *everything* they are thinking when they write the post, the readers themselves must then make assumptions about what the writer meant, or knows, or doesn't know, etc. And those are not always correct or complete. ;)

So for the best help, list what you have, what you want, how you want to do that, how you think you should do that, and what you want help with, as specifically and as completley as possible. :)

You've provided a fair bit of info, but it isn't complete, and some of it is confusing, using terminology different from that being used by many (most) others, which makes it harder to communicate.
 
Hello amberwolf and thank you for your reply I dont know if I always have the correct terminology for things and sometimes name things from what they do unfortunately my best friend whom I shared a lot my my learning with tends to name things in a way he remembers I do apologise for inconvenience this may cause others but hes the only person I've really spoken to about these things. Though i have read hundreds or thousands of threads n blogs and papers this as said is my 1st thread etc etc I will try and better learn the lingo and terminology

Throttle manipulation I learned about while I was learning about hall sensors what they do and how they work. There's 2 parts to throttle manipulation theres the physical and the electrical...... the physical side of throttle manipulation is to physically move the hall sensor in the throttle slightly to achieve better acceleration or speed. To be honest the physical side holds little to no interest for me.

Electric throttle manipulation. Ok so the throttle itself is made up of a hall sensor and 3 wires red-5vdc black-ground green-signal (depending throttle type could be either green or white in my experience) ....... ok so to manipulate the throttle you need a 10k trim pot a multimeter (the article I read the guy used 3 multimeters as to provide protection all the way around) there is several combinations that I saw if I recall correctly you can jus connect the black wire to the trim pot and alter the resistance to eliminate throttle dead spots and jerkyness........ to adjust speed I think it black on 1 pin an red on 2 pins most likely variable resistance and out put then adjust the trim pot slightly once happy with adjustment take reading and replacing trimpot with correct value resistor which would give u a higher output and all of the motors power.

That I know is the very simplistic view of things and I'm sure there were 4 combinations shown surprisingly this was not an ES post I do have a link to the article somewhere and will share it both on this thread and make it it's own thread. I have not tried this yet as my rear hub has torn loose a few time and gorged chunks out the rear drop outs so my hubs I chucked on a spare small frame and strapped my smallest batteries n controllers on a clear example of how not to make an ebike(everything moves rubes is exposed and gaining shorter life expectancy)

Experiments with my controllers= ah yes loads of fun learned some really unexpected results. So when I bought my bike off a mate it had 2 hubmotors 2 batteries 2 controllers and 2 throttles. Ok so next 2 paragraphs go a little of topic but

So I had 2 new battery packs made for it. Same 13s 48v already in use but with better discharge cells an almost 3000mah per cell. Then used 8awg solar wire to run the battery power to the controllers and the performance increase was phenomenal and right there I was hooked and the research began.

So keeping to budget and bounds of my research I ordered a pair of dual mode controllers 1800 watts 28-32amps I think it goes 48-60v 28amps and 64-72v 32amps and new thumb throttle with volt display key lock 200 Sony us18650v3's and everything i need to build 2x 60v battery packs.

I'd learned through its original build that you can pair the brakes on controllers 2wd bikes unfortunately 1st time I had everything disconnected to fit the 2 biggest batteries I had I connected both brake clips 1 controller n fried the wires. Me mate borrowed me a controller till the new ones arrived.

So everything came in the post and I removed all the old throttles and controllers and replaced 2 for 1 throttle and a key lock so my first experiments were with the key lock. But before that I had to get both wheels spinning from 1 thumb throttle and using 2 separate batteries you have to link control wire typically green/white and most importantly ground black. Then I joined the door lock wires to the key lock and everything seemed happy enough. My throttle wiring was temporary so occasionally a wire would pop out and hers where things start to get interesting as I noticed how 1 battery would drop to a level then feed from the other battery. Took me ages to figure that 1 out but then I had smash n totalled my forks where I learned removing ground from throttle gives you W.O.T n limped home in wot on 1 wheel in some serious pain pmsl.

Around this time I'd been learning about the 3 speed switch function. so front end rebuild new throttle no key lock hard wired door lock function to main power wire as told not too in the 1 page no translation instructions. and surprisingly my bike seemed to have more power n speed hitting 42 mph on starva was well impressed and decided to try linking the 3 speed switches for convenience and to see jus what would happen if they were linked. Cant say they were linked for more than 6 maybe 7 rides but the results were absolutely crazy and really what's is a pair of £25 controllers that I love and think are mint compared to knowledge!

So the 1st ride went over to me mates took the beach to test my new 2.3in tires on the sand very happy we took his 8year old lad on his jetson to the bike track an I had a great time but suddenly I noticed the front us dropping in power 1st (normal battery consumption rear drops 1st it has 35amp bms to the fronts 20a also both batteries on a rack over the rear wheel and my weight so the back works harder) it wasn't a massive difference to begin with I charged it n went by gf,s 10 mile ride and again front battery was a bit more than the rear went home charged it up and thought nothing of went out with friends on a 40 mile ride next night and my front battery was dropping at an alarming rate to the rear we rode wot for a bit and it was close getting home shouldn't of been. Charged up n rode to my gfs next day and my rear battery consumption was 1% where my front battery was 40% so my rear battery was still 99% full and I new exactly what was happening! I cut the switch straight off........

And what I learned is 1 controller will happily feed off the signal current from the other controller when joined by the switches bear in mind both batteries were independent of the other at the time an the only logical answer is 1 fed from the other through the speed switch. I know it's a lot to get ya head around especially if you dont see with your own eyes my mates give me loads over it but wont open there minds its simple if you understand that theres a signal voltage and 1 controller can eat that signal voltage of the other what surprised me the most is that each time I turned it on and took it out it got better at it to the point of 1%battery consumption

I have a curious mind and like to see what happens when you do different things. I'm partially through an experiment to feed power for lights directly out te controller having soldered 4 wires into my poor 1000w original controller 2 of those wires go directly to a led symbol and the other 2 to 5vdc and ground. But haven't had chance to try it as it's now on my bike while I await either repairs to hard tail mtb. Or I get a custom frame made

Wow I dont think I ever wrote this much in school essays ok so back to the reason I started the thread lol

I have looked at the simulator a couple of times an dont quite understand it yet and once finished this post will take another look!

You are correct in saying I've read more than a few threads on the topic but they dont really mention wire thickness and that's the part I'm struggling with most is determining the wire gauge I should use as stated I plan on using the most basic winding pattern I've seen to start with but that doesn't make it the correct or most appropriate pattern though it is stated to be powerful which is what I am aiming for I shall find the video and take some screenshots and learn how to post them to give better detail and if people know a better way I'm all ears or eyes as the case may be
 
I have found the link to the throttle manipulation

https://electricbike.com/forum/forum/kits/golden-motor-magic-pie/70584-guide-to-hall-sensor-throttle-operation-testing-and-modification

Ok so this is a famous first for me and I hope this is the correct way and works if not let me know and will try different options
 
Ok so going back and watching the YouTube video wasn't a bad idea. So it turns out the winding pattern I want to use is star-delta and I want to terminate in wye and may not work for me in what I'm trying.

So the plan without any further input! is to test this winding style and terminate in wye on a little scooter hubmotor and if that works out I'd then planned to do the same to my voilamart hub motor 10strands to 6 turns and I'm struggling with what wire thickness to go with on most threads people only ever comment to strand numbers and turn count with all the reasoning down to kv n kt. Before October and losing my job I'd have spent 50 or 60 pounds and ordered 4 or 5 sizes but now I have no job money's tight and getting it correct 1st time is more important.

I do know when I come to unwind the scooter motor I will learn a lot about standard winding pattern and same with my 9c's and though the winding pattern I have chosen and the manner I plan to terminate it in principle theory looks good from what I understand and what I want it to do so rather than rush in blindly i thought I'd reach out to those with experience. I hope the pictures add the correct details as what I'm trying to do
336b3054dd77d4cb29e9c502180f1a68.jpg
361b35d846fb599fa79bc42e92d88dc3.jpg
79f20eaa5124673347eca3b1b3cb086a.jpg
6a2e27592e1ba8db80e2b46b5eec3983.jpg
de9cda01cc46451fbc98b3746c33bfce.jpg


Sent from my SM-G950F using Tapatalk

 
Back
Top