C Cab Hot Rod Power Advice

Nice find.

LED lights don't play nice with most flashers. Seems like they could make a flasher that didn't care, but it would take an extra wire to ground. I had to add resistors to the signal lights on my Sur-ron to make the flasher work. Downside of all that is you can't really tell when one of the lights quits working. With the old-school flashers, the flashing rate would increase if you burned out a bulb. With LED lights, they don't burn out so often.
 
fechter said:
Nice find.

LED lights don't play nice with most flashers. Seems like they could make a flasher that didn't care, but it would take an extra wire to ground. I had to add resistors to the signal lights on my Sur-ron to make the flasher work. Downside of all that is you can't really tell when one of the lights quits working. With the old-school flashers, the flashing rate would increase if you burned out a bulb. With LED lights, they don't burn out so often.

I pondered that for a moment and I will be designing mirrors or mounting a camera on each light that will monitor their function via an overhead screen in the cab. Solve a problem - create a problem. :lol:
 
Two possible methods, one mechanical, one electronic:

If the LED fails in a way that prevents current flow thru it, then having a second LED set (of whatever kind) wired in parallel with a slightly higher voltage drop on it, with this LED installed in your dash, will then light up brighter when the primary LED fails open.

Since you have two (one front and one rear) in parallel on the same blinker, it may only work well if both of them go out, but it may still work partially if only one goes out.

Measure the voltage drop during blinking of the primary set, then setup an LED or LED set with a dropping resistor that totals a higher voltage drop; it will tehn blink dimly when wired in parallel with the working set, and brighter once the working set causes less voltage drop (pulls less current).

More complicated sensor schemes could be cooked up, but that one is pretty easy to do.


Mechanically, you could drill a small hole in the part of the turn signal casing that faces you, for any of the stem-mounted types, as long as you can see them either directly or in your mirrors. Fill the hole with clear or diffuse-clear plastic, colored to be the same as the direction it's facing (red for rearfacing holes in the front signals, amber for the frontfacing holes in the rear signals). When you can't see the blinking in the little hole, but should....
 
Regarding the flasher problem: I use this one:
Novita EP35 Flasher
https://www.amazon.com/dp/B00064LQL2
with my LED lighting on SB Cruiser, and the old CrazyBike2, and it works perfectly with any LED or incandescent, or combination, that I have tried so far. (I think I bought my first one at Checker or Autozone, but it's the same thing as the amazon link.)
 
Just_Ed said:
I pondered that for a moment and I will be designing mirrors or mounting a camera on each light that will monitor their function via an overhead screen in the cab. Solve a problem - create a problem. :lol:

We can design a microprocessor that monitors the current draw of each lamp and gives an alert when one burns out :wink:

Luckily, it's the last thing you need to worry about.
 
Time for an update.

Took some time away from the build. Other matters needed taking care of.

Now the earth is on fire🔥, literally. Temps at my house is hovering around 101-102 (F) with 105-107(F) in the shade at times.
The humidity is up as well so my shop cooler isn't very effective. Inside the shop is +/- 98(F)

In an effort to rekindle some thoughts of progress, I started working on the body.
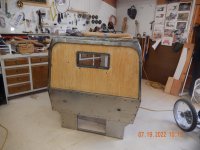
Welding seams, and finally getting the back enclosed, (courtesy of my neighbor throwing away a sheet of plywood).

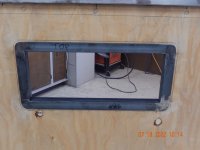
Hand-formed window frame out of 1" x 1" angle.
DSCN5466.JPG

Next is to form the outer 1" x 1" flat bar frame that will hold the panel in place.
The panel and the frames will be covered in tan cloth/vinyl.
They should make a nice contrast against the Candy Cherry metal flake paint...don't you think?

DSCN5467.JPG

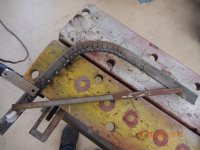
Cutting and slicing to make a curve. Need one on each of the top curves.
Thirteen, 1/2" kerf cuts in the middle, and a couple of 1" kerf cuts for the outside.
Made the first cuts, bent them into shape, and then recut the inner kerfs a second time. Perfect after-minute adjusting.

DSCN5468.JPG

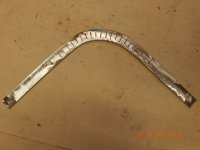
Completed right corner. Next is to connect the straight pieces that will bring it all into shape.

DSCN5469.JPG

I have also ordered some paint.
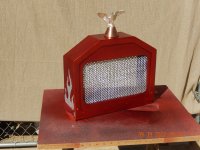
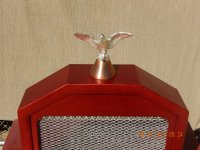
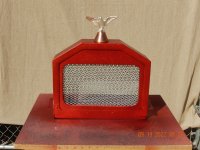
I will be practicing on the radiator cover and the battery cover, before attempting the body.

https://rothmetalflake.com/collections/rattle-bombs/products/rattle-bomb-flake-kit-br-cherrie-pie

RATTLE BOMB CLASSIC KIT - Cherrie Pie
RBCKIT-CHE RATTLE BOMB FLAKE KIT Skidmark Black Base Cherrie Pie Flake Spraymax 2K Clearcoat Check out all the Rattle Bomb Kits!

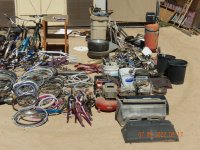
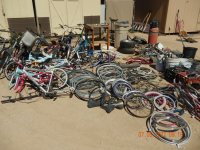
Out with the old...It is time to have a clean-out. I kept some of the better rims (just-in-case).

DSCN5461.JPG
DSCN5462.JPG

Oops!
In my eagerness to clean out and make room, I think I threw out the front wheel/tire for the Inferno.
I'm thinking of electrifying that project down the line.

DSCN5463.JPG
 
Just_Ed said:
Now the earth is on fire🔥, literally. Temps at my house is hovering around 101-102 (F) with 105-107(F) in the shade at times.
Mmm, nice and cool! :flame:

(compared to here, anyway :lol: ; it was only 111F in the shade at my house when I got home sometime after 430pm today, for instance, and over 45% humidity, I don't know what it was before that while I was at work; my under-trike temperature reading on the CA screen was 54C while I was riding on the streets on the way home; the sensor is a few inches above the hot pavement under the shaded wooden deck).


The panel and the frames will be covered in tan cloth/vinyl.
They should make a nice contrast against the Candy Cherry metal flake paint...don't you think?
Yes; I found I like the cargo area / seatbox's wood color against the red metal frame parts of my trike on the SB Cruiser.
 
No joke! Maybe do some kind of rebuilding day? I know I didn't begin to understand how to build bikes until my stepdad spent time teaching me; maybe someone could use the same?
 
Brace yourself for this next step!

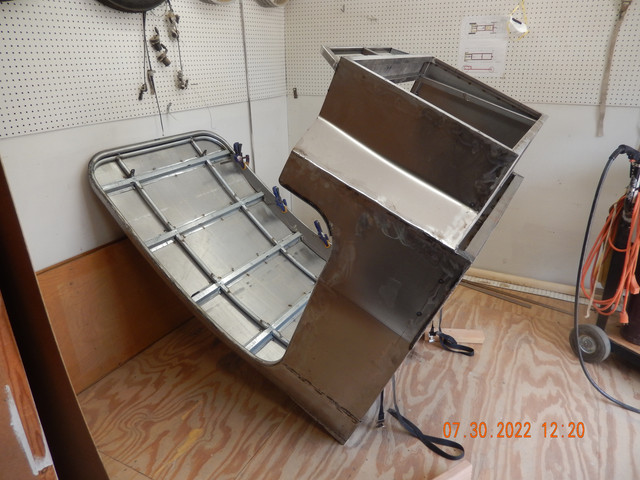
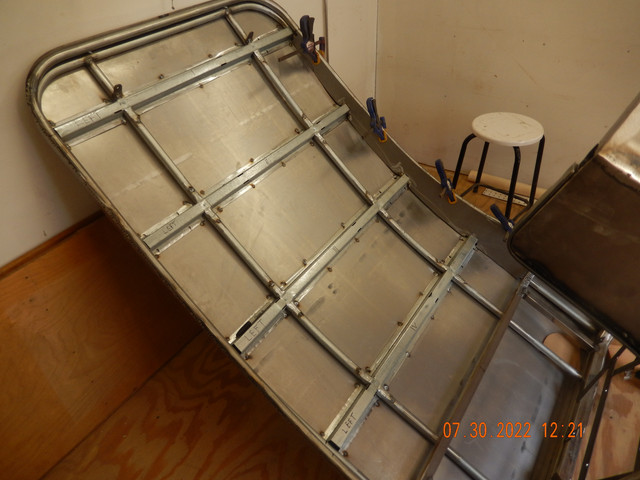
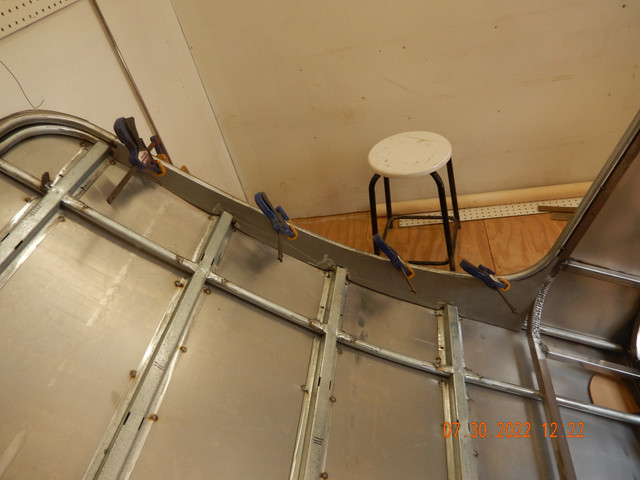
Resting in a very undignified position the top 'bows' are installed.
Salvaged from old metal shed floor framing that never got used, these make perfect braces for the top.
They also provide a means of attaching the interior headliner.
DSCN5470.jpg


Because of the heat and the close proximity to the top while in running mode, I will glue in 1" form insulation.
DSCN5471.jpg


In the following picture, I'm cutting out and fitting the side pieces.
Picture this if you can. The side pieces will be painted the same red metal flake as the rest of the body.
From edge to edge will be a (tan/sand/beige?) upholstered (button tufted) headliner.
Maybe 8" +/- wood grain on each side, with tufted down the center?
Hmmmmm, need to think about that.
The contrast should be striking.
DSCN5475.jpg


For those that may be thinking about the weight. Well so do I.
My answer to that possible problem,...BIGGER MOTORS! 😁

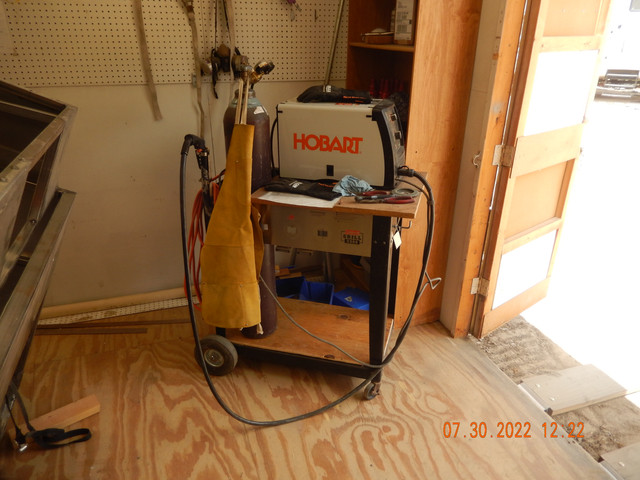
Welding cart redo

I obtained a second gas bottle and wanted to have it available for use away from the shop.
Enter an old BBQ cart.

DSCN5473.jpg
 
Just_Ed said:
Because of the heat and the close proximity to the top while in running mode, I will glue in 1" form insulation.
DSCN5471.jpg
I use a batting, I think it is fiberglass, in my canopy--works great even in the Phoenix summer midday sun. (within mm of touching my balding head, can't feel a thing).

Not sure where you can get the same stuff, but mine comes from insulation in frozen-foods shipments (intended to keep stuff hard-frozen, shipped with a block of dry ice in the box, works even in summer here; I think it comes from california to here overnight, IIRC). If you have a pet store near you that gets frozen fish or reptile food shipped in, it might have this kind of insulation and they usually just throw it away, and might give it to you if you ask. :)

You can also buy similar stuff from lowes or homedepot etc; I just like this other stuff cuz it's bagged in 1/2" thickness by about 3-4 feet long by about 1.5-2 feet wide. I just folded it over double and tucked it into my canopy and taped it in place with clear packing tape; you'd be putting it between your liner and canopy.


I used to use 1" styrofoam but this works better, has more air gap in it so less conduction of heat thru it, I guess.


Some pics that sort of show the insulation under my canopy; it's the yellow stuff:
20210401_192801[1].jpg
dsc07854[1].jpg
dsc06398[1].jpg

old version on crazybike2
DSC05628[1].JPG
 
I could have done that. I have a half roll of R30 left from previous insulating jobs. But I already had 80% done with the foam board. I had one, 1" board left from ????, so it fit the build nicely.

I will have to sacrifice my shed door of its remaining foam to finish the top and sides.
I may even have to buy one more board. It's going to be close.

DSCN5480.JPG
 
Adding a bit of color to this project.

I'm using Rustoleum silver 'textured' metallic for a base coat.
It is a very rough paint, which I have chosen to leave rough.

In the first trial, I sanded down (lightly) the silver and lost much of the brilliance.
After experimenting with the color coat and two-three coats of clear,
sanded with 400 grit and finally clear coat it again, it comes out smooth as glass.


Battery cover prepped waiting for color coat


The color coat with Duplicolor 'Metacast' from

https://www.jbtools.com/duplicolor-mc200-metalcast-red-anodized-11-oz-aerosol/

The price is fantastic @ +/- $6 per can less than local retail.
Bought 12 cans which got me free shipping.

I will be 'decanting' the cans and spraying the paint through my paint gun. (Better spray pattern/control)


This photo doesn't truly show the brilliance of the color or the metal flake sparkle.

This is with only four coats. I think I want it to be a bit darker, so will look to add one-two more heavy coats.


How sweet it is to see some color. Not without some setback and redo.

A mishap with the spray gun, ruined the first basecoat, requiring a complete repaint.
Then the spray gun spattered on the second go requiring another basecoat repaint. (My bad for not cleaning the gun well enough)

So this was sprayed directly from the can. 5 coats to get it all to match.

Next step after a few days of letting the color coat cure will be 3-4 coats of crystal clear enamel.

I practiced on another small piece and clear coated it.
This looks great but the clear coat makes it burst with color and sparkle.

DSCN5495.JPG

I used Rustoleum Silver 'textured' to achieve the metallic look I wanted.
It takes 4-5 coats of clear to achieve a smooth finish.

Enlarge the photo and you can see the sparkle.
DSCN5496.JPGDSCN5497.JPG


Needs some silver touch-up from tape bleed, but overall it looks great.
DSCN5498.JPG
 
I'm Back! I really never left,

Sorry folks for being away so long. I've missed keeping everyone up on my progress, or lack thereof.
I just took some time away from the project. Finished enclosing the inner walls of my shop, and put up badly needed shelves.
The weather has turned nice, and enthusiasm has returned.

My lithium battery went bad and I had to have it repaired. All is back to normal now.
The turn signal problem took a while but it's been solved, It works but there is no indicator light on the switch.
That's going to be fixed by adding an external light and/or buzzer.

Nothing new to see, (no pics) but a jumbled mess of wiring to show that I am working on it.
I only blew about ten fuses while trying to figure out what worked and what didn't. Most of the blown fuses resulted from unseen connections shorting out against the frame.

I got the brake problem solved and the wiring is virtually done. It turns out that when the fluid level on the cup says MAX, it doesn't really mean stop at that line.
As a last resort to try and understand why the brakes wouldn't move, I overfilled, (above the MAX line), and voila! we have brakes. Who knew?

Waiting until Tuesday to pick up some 1/2" square tubing to use for a raceway on the bottom of the frame.
All the wiring and switches are 'roughed' in place and each one works as desired.
The next step is to do one more test drive and then it's time to tear it all apart finish welding, prep, and paint it.
The body prep is about 50% complete.

Currently, I'm looking for a business within a reasonable distance, that does 'spray chrome'. Found only one so far, but they are booked for at least a full year.

I will get some pics shortly showing some progress.

Anyway, I'm glad to be back working on it, and I might actually get it done before Christmas. Yeah, I know I've said that before.
 
I'm Back! I really never left,

Currently, I'm looking for a business within a reasonable distance, that does 'spray chrome'. Found only one so far, but they are booked for at least a full year.

Great to see you're back!
Seeing the quality of your own paintwork, why not try your hand at doing the 'spray chrome' yourself?
 
Or see if electroplating is an option--if the parts are small enough to put in a tank.
 
Great to see you're back!
Seeing the quality of your own paintwork, why not try your hand at doing the 'spray chrome' yourself?
Or see if electroplating is an option--if the parts are small enough to put in a tank.

Hi guy's

I have been looking into doing the chrome spray myself. But the cost and the infrequent future use may not be worth it. I do have a friend that is restoring (sorta) a 1926/27 T. He needs some similar bling as I do. Maybe there is an option to go together on a spray kit.

Can't use regular chrome plating on most of the parts, because they aren't metal.
I have also thought about having some parts anodized. But that process doesn't come in a chrome look. At least none that I have found. And anodizing may clash with my theme.

I'm going to contact some painters/chromer's in my area in hopes they know of someone that does that sort of thing.

I'm really flying high at the moment, due to finally getting the wiring figured out, and working. All that remains is tidying it up and securing it. Tomorrow I'll buy the square tubing for the wiring raceway.
 
I think this project should be renamed to StreetCrawler, not StreetRunner. It really has been a slow pace getting this completed.
But things have been moving along nicely recently. I've been motivated and working on it for a couple of hours or more each day.

I finished the wiring to the point that I got everything working.
I got a sound system that works, and now I've decided it is time to tear it all apart and finish the welding and any other minor fab work that is needed.

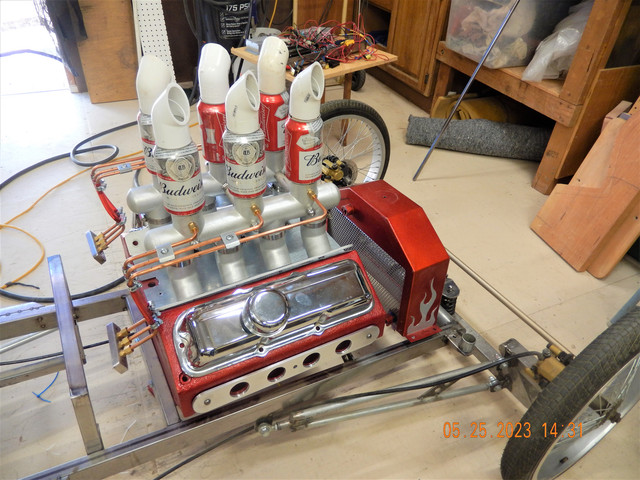
I started with the 'mock engine'.( see pics )
Then I will be removing the drive components and front steering etc.
Paint them all and then reassemble them
.

 
I think this project should be renamed to StreetCrawler, not StreetRunner. It really has been a slow pace getting this completed.
But things have been moving along nicely recently. I've been motivated and working on it for a couple of hours or more each day.
Still around?
 
Back
Top