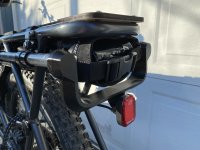
Rear-Loading under deck battery mod Mongoose Envoy

nervagon

1 kW
Joined
Nov 18, 2020
Messages
357
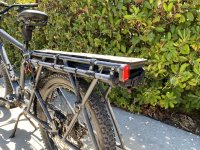
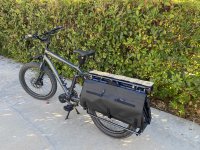
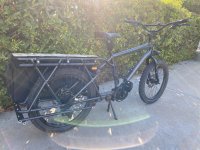
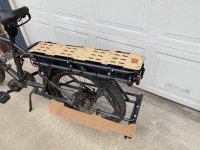
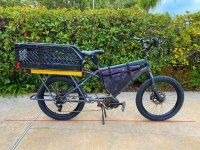
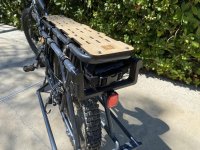
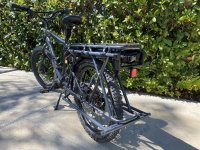
I decided to update my under-the-cargo-deck battery setup on my Mongoose Envoy. I really wanted to easlily remove the custom battery when needed.
IMG_6276.jpeg
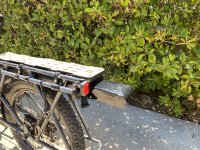
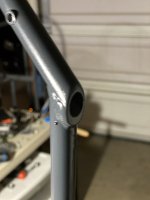
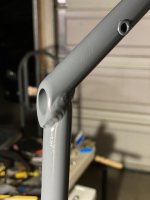
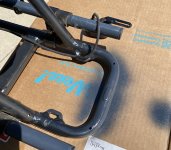
The first order of business was grinding off the bracket for the rear tail light/reflector. And then a quick paint over the scene of the crime.
Screenshot 2023-08-14 154114.png
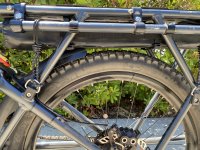
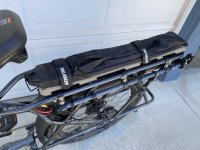
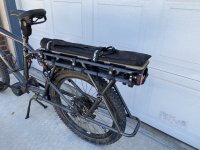
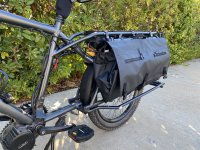
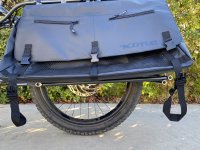
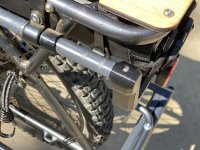
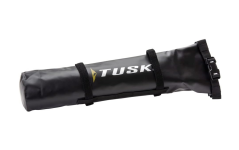
This TUSK bikepacking tent bag is exactly the size I need. It is attached to the Envoy frame with 3 ultra heavy duty zip ties through the original attach points for the OEM panniers (which I don't use). 2 of the zip ties slot perfectly through the webbing on the 2 sides of bag preventing any forward/backward slippage.

IMG_6277.jpeg
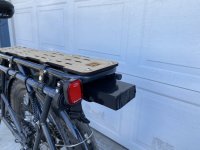
The top buckle on the bag perfectly secures the battery pack in place.
IMG_6278.jpeg
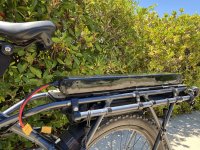
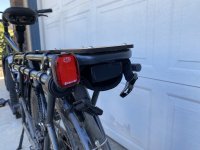
Unbuckling the top buckle reveals the battery pack.
IMG_6279.jpeg
Now the battery pack can be slid out from the back. I'm super happy with how this turned out! The pack is a 52V 14s 2P built with Samsung 50S cells. 10Ah, and capable of powering a BBSHD in 2P.
 
With some adjustments, I was able to get my 20Ah pack to fit under the deck as well.

IMG_6286.jpg
IMG_6282.jpg
IMG_6283.jpg

Just Barely fits. Fortunately, this is the thickest tire I have. The bottom of the battery bag over the tire is reinforced with plastic shielding.

IMG_6285.jpg

The thicker 20Ah pack was built by AffordableEbikes.CA, and it was built very poorly. Under-spec 20Amp BMS, 14 awg wires throughout, including an over 2ft run of 14awg. A poorly 3D printed enclosure that had sharp screws pointing into the battery chamber. And the 3D printed enclosure was PLA that started to melt after 1.5 hours in the sun on an 85 degree day.

So I just finished rebuilding that pack with a 30Amp BMS and 10 Awg wires. For the casing, I cut open the OEM Envoy pannier bags. They have a very sturdy shielding under the nylon fabric that can be repurposed for a custom battery enclosure. I cut the plastic paneling to size and built a hard shell over my battery pack. I even used the foam layer from the Envoy bags. I had shrink wrap on hand that fit perfectly, so I finished the exterior with a shrink wrap over the plastic shielding.

I told myself I would only rebuild the crappy affordableEbikes pack if I had the supplies I needed laying around the house. Fortunately, I did have everything I needed, including exactly enough solder to finish the pack.

IMG_6289.jpg
IMG_6290.jpg

Now the 10Ah Samsung 50S slim pack can strap to the top of the deck when I need a combined 30Ah for a long haul.
 
Nice bike, looks like a lot of fun. Do you want more then a rigid fork?
What seat post you using?
 
Nice bike, looks like a lot of fun. Do you want more then a rigid fork?
What seat post you using?
Thanks! Seatpost is a suntour NCX. If I could find a super robust 24" 100mm suspension cargo bike rated fork, I might be interested. I'm running 24" wheels which gives me a little more room without effecting geometry too much.
 
If the bike was originally 26", converted to 24", then you need a 26" fork. I switched my rims to 24" from 26" and my bike handles the same.
 
If the bike was originally 26", converted to 24", then you need a 26" fork. I switched my rims to 24" from 26" and my bike handles the same.
No, suspension forks have a much longer axle to crown length than a rigid fork that just barely fits a 26” with no travel. Switching to a 26” suspension fork would raise the front of the bike by a lot. A 24” suspension fork would still raise front end a little but not as extreme as a 26” suspension would.
 
1251746723727-1wycgljh27iyl-04fca5e-standard-scale-2_00x-gigapixel.jpg

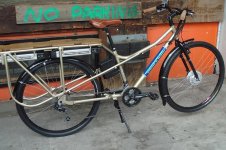
I found this old photo of the first ebike version of the Kona Ute. I think I prefer my setup with the one long battery that I can just slide out in one go. It's strange to me that I am the only DIY ebike builder that I have seen do this, and it's also weird that cargo ebikes no longer mount the batteries under the deck.

If this Ute design had gone with a more cargo-conventional 24" or even 20" wheel in the rear, that rear deck and those batteries would sit lower to the ground.
 
No, suspension forks have a much longer axle to crown length than a rigid fork that just barely fits a 26” with no travel. Switching to a 26” suspension fork would raise the front of the bike by a lot. A 24” suspension fork would still raise front end a little but not as extreme as a 26” suspension would.
The geometry change with a long wheelbase is lessened. But, depends on what you're trying achieve. For me, slacker is better, more stable for ebike speeds. I tried 100mm on my previous frame (originally rigid), and 140mm, and 160mm on my current frame and 160mm works best for my riding, and with short wheelbase frame.
 
IMG_6291.jpg

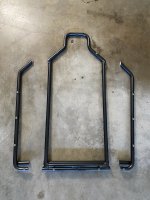
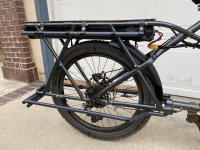
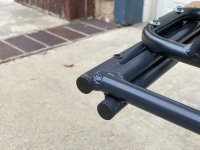
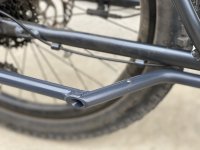
I never installed the lower rails on the Envoy because they were just too wide. So I thought I would cut them down and test fit them at half the size.

IMG_6292.jpg

Now that is much more reasonable.

IMG_6293.jpg

Now I just need a quick paint-over. I might also have some custom foot panels laser cut from bamboo to match the custom top deck.

IMG_6295.jpg

Lines up perfectly with my Kona Ute bags when they are opened up.

IMG_6296.jpg

Once I deal with the raw aluminum cut ends and design some bamboo runners, it will look great.
 
IMG_6297.jpg
IMG_6299.jpg

Quick sand and paint. Next, I'll design the foot runners out of cardboard as a template.
 
It's strange to me that I am the only DIY ebike builder that I have seen do this, and it's also weird that cargo ebikes no longer mount the batteries under the deck.
Possibly for better balanced weight placement f/r? Although maybe not as relevant on a long john cargo bike.
 
It's strange to me that I am the only DIY ebike builder that I have seen do this, and it's also weird that cargo ebikes no longer mount the batteries under the deck.
I expect that it is because there are a few disadvantages to it:

The rack has to be built for either a specific battery size and mount, or big enough to handle however big a battery one might ever need to use...if the rack is part of the frame, that means the frame itself isn't necessarily useful for batteries other than those (except for DIYers able to modify the frame or battery or mount...which is not most people).
The thickness of the battery moves the cargo deck on the rack that much higher, which moves the cargo COG higher, in addition to the battery's mass being up there. How that affects handling depneds on the bike design overall, and the riding style and cargo loading.

The mass of the battery is at the rack level, instead of lower, *and* it adds to the cargo mass on the rack and rack mounts / connection points to the frame. If you have wag of the rack tail already, the extra battery mass can make that worse.

The battery and it's connections have to be well-waterproofed (for any ride that this is an issue) to prevent ingress from tire splash that gets around any fender. (it might have to be waterproofed this well in other places on the bike, too, of course).


In my experience with medium-long cargo bikes so far, especially the many variations / modifications of CrazyBike2 over the years, the ride has been more stable with the battery approximately in the frame between my knees--but almost all my variations have been with a low rider COG, semi-recumbent. With a higher rider COG and rider not seated like that (but rather more vertical, on a saddle) it might not make as much difference where the battery mass is (but I suspect it would still be better below most of the rider mass).

When I didn't have it in the frame itself, the other place it worked well was just to the sides of and below the seat, equivalent in height to the frame location but slightly more rearward and outboard (but still not much more outboard than the rider mass).

Similarly, having hte cargo itself as low as possible (center of mass round about the axle height seems to have worked best of the various setups I have used on any bike style or shape) has helped handling.

I don't have any maths or science to back this up, but I think the reason that my Envoy remains so stable to ride with a 20Ah battery over the rear tire is that it is at or below the fork crown height. This is purely anecdotal, but I've noticed that it is loads above that crucial point that begin to throw off the handling of the bike. I wonder if there is any science to back this observation up. This is what chatGPT has to say on the matter:
--------------------------------------
The front fork crown is a crucial point in terms of bicycle physics and handling because it's closely tied to the concept of "trail," which is a key factor determining a bicycle's stability and steering behavior. Let's break down the physics involved:
  1. Trail: Trail is the horizontal distance between the point where the front wheel touches the ground and the intersection of the steering axis with the ground. It's essentially the distance between the contact point of the front tire and an imaginary line extended from the fork's steering axis. This geometry affects how the front wheel responds to steering inputs.
  2. Stability and Self-Correcting Behavior: A bicycle's stability is influenced by the combination of trail and the rotational inertia of the front wheel. A larger trail tends to make a bicycle more stable, meaning it's less likely to wobble or veer off course on its own. This is because the front wheel's contact point acts like a pivot: when the bicycle leans to one side, the trail causes the front wheel to steer in the opposite direction, automatically correcting the lean.
  3. Load and Leverage: When a load is added to a bicycle, its weight and position affect how the bike responds to various forces. A load placed above the front fork crown introduces an additional lever arm in the steering mechanism. This means that any shift in the load's position will have a more pronounced effect on the front wheel's steering due to the increased leverage.
When a load is below the fork crown, its leverage on the steering mechanism is minimized, and the bicycle's inherent stability is less likely to be compromised. On the other hand, when a load is positioned above the fork crown, it can introduce additional steering inputs that can impact stability, especially at higher speeds or when making turns.
In essence, the front fork crown height serves as a reference point that helps determine how a load's position will affect the bike's steering dynamics. Loads placed above this point can introduce destabilizing forces due to increased leverage, potentially leading to less stable handling. Understanding and considering the relationship between load height, trail, and steering dynamics is crucial for maintaining a bicycle's stability and safety.
--------------------------------------

batteryLine.jpg
 
I don't have any maths or science to back this up, but I think the reason that my Envoy remains so stable to ride with a 20Ah battery over the rear tire is that it is at or below the fork crown height. This is purely anecdotal, but I've noticed that it is loads above that crucial point that begin to throw off the handling of the bike.

If it works, it works. :)

I don't know the science behind it, either, just my direct observations while riding, and my lifetime of evolving cargo-bike solutions for my needs (until I got here on ES I didn't even realize there were already premade cargobike solutions, and by then I was already doing my own (and couldn't have afforded any prebuilt ones anyway) from other people's scraps).

I'm sure I still have a lot to learn about bike solutions to my needs, as there are many variations I have not explored for various reasons.

I'm still learning about trike solutions, having only built and used three (one of them continuously evolving since around 2015 as I experiment). (technically five but one I never road-tested as it was a definite failure and another only lasted one few-hundred-foot ride before being certain it was not useful).


This is what chatGPT has to say on the matter:
It could be true...but that program is pretty well known to not always be accurate, so if you really want to know about something you would need to do research on all of it's points to verify them *and* that they actually apply together to make the conclusion it may draw. ;)

As for what it actually gave you, it sounds more or less right from my experiences, but I wouldn't necessarily take it as complete (I don't know if it is).
 
The mass of the battery is at the rack level, instead of lower, *and* it adds to the cargo mass on the rack and rack mounts / connection points to the frame. If you have wag of the rack tail already, the extra battery mass can make that worse.
.
The trail at the bottom of the hill has a rush hour in the morning and afternoon. E-cargo bikes, with one or two kids out back, commuting to daycare/school, and then to work. Afternoon, same thing, opposite direction. I think the long wheelbase compensates for a lot, and at least the battery pack isn't a shifting load, like two kids kicking their legs and waving their arms around. With the battery, two kids might be too much, but one should be fine.
 
The trail at the bottom of the hill has a rush hour in the morning and afternoon. E-cargo bikes, with one or two kids out back, commuting to daycare/school, and then to work. Afternoon, same thing, opposite direction. I think the long wheelbase compensates for a lot, and at least the battery pack isn't a shifting load, like two kids kicking their legs and waving their arms around. With the battery, two kids might be too much, but one should be fine.

My 10Ah battery weighs 5lbs, and my 20Ah battery weighs 10lbs. Rear deck rated capacity is 130lbs. Neither pack really makes a significant dent in the carry capacity. The 5lb pack is barely even noticeable by any metric.
 
If it works, it works. :)

I don't know the science behind it, either, just my direct observations while riding, and my lifetime of evolving cargo-bike solutions for my needs (until I got here on ES I didn't even realize there were already premade cargobike solutions, and by then I was already doing my own (and couldn't have afforded any prebuilt ones anyway) from other people's scraps).

I'm sure I still have a lot to learn about bike solutions to my needs, as there are many variations I have not explored for various reasons.

I'm still learning about trike solutions, having only built and used three (one of them continuously evolving since around 2015 as I experiment). (technically five but one I never road-tested as it was a definite failure and another only lasted one few-hundred-foot ride before being certain it was not useful).


It could be true...but that program is pretty well known to not always be accurate, so if you really want to know about something you would need to do research on all of it's points to verify them *and* that they actually apply together to make the conclusion it may draw. ;)

As for what it actually gave you, it sounds more or less right from my experiences, but I wouldn't necessarily take it as complete (I don't know if it is).
All I know is the the Mongoose Envoy is the most stable ride I've ever experienced. Even on rutted gravel paths, the bike just plows straight though sketchy terrain. With that long wheelbase, and the wide surly sunrise handlebars, where ever you point it just glides through like an arrow. It just feels so safe at 30mph.

Also I do have extremely wide shoulders and wide bars, so it's not hard to keep control loaded up.
 
EnvoyRunner_v02.jpg
The running boards are designed and sent off to ponoko for laser cutting. There will be 6 more screw holes that secure the boards to the rail with three 19mm strap clamps. But I will drill those holes on my end.
 
EnvoylightBar.png

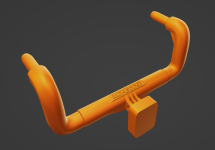
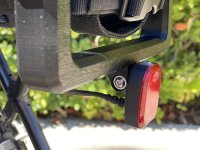
Almost finished designing the new tail light bar to mount the tail light centered underneath the battery.
 
IMG_6315.jpg
IMG_6312.jpg
IMG_6313.jpg
IMG_6311.jpg

I have a functioning prototype of the tail light bar that is working well and is very easy to print. It might be a tad overbuilt. Laser cut runners haven't arrived yet.
 
IMG_6318.jpg

Test fit of the final design for the tail light bar. The final print will be done with eSun ABS Pro filament for it's impact resistance, durability, and nice matte finish.
 
Back
Top