This project is going to be going under a large change in direction. I recently purchased a Beachman Second Edition and it is exactly what I was looking for in an "ebike" that has a motorbike frame and can carry a passenger, once the snow melts. My new plan for the Greaser is to keep the current motor and battery at 36v, add an additional and larger battery, create a new shell that will contain everything with access to the batteries for charging, and create a mount for the cafe racer seat I have.
You are using an out of date browser. It may not display this or other websites correctly.
You should upgrade or use an alternative browser.
You should upgrade or use an alternative browser.
Upgrading Prebuilt: Michael Blast Greaser
- Thread starter Laird_Mac
- Start date
AGS
100 W
- Joined
- Feb 13, 2023
- Messages
- 284
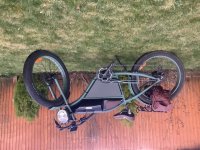
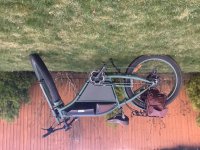
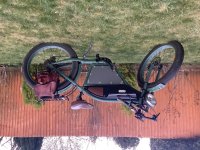
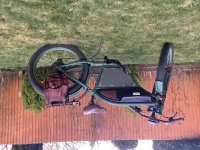
Resurrecting an old thread with my first post. I just bought a second hand greaser and it certainly attracts some attention. I fitted a 52 volt battery and 30 amp KT controller with a KT03 lcd display to give it a bit more grunt. This is an early example, notice it has two 100mm bottom brackets, there is only one on the newer models.
Being an early import into the UK it came with a Wuxing 76X left hand half twist throttle and a 500 watt bafang geared motor with 135mm drop out. It was restricted to around 20mph with an integrated controller in a hailong battery holder, which I think was Lishui and a 36 volt battery. It also had a basic display called “good times” which didn’t allow me to change any of the P and C settings. It has Tektro single pot hydraulic brakes 180mm front, 160mm rear which are adequate for the weight and they were set up American style with front on the left and rear on the right. So I immediately swapped the hoses around. There aren’t any brake switches fitted.
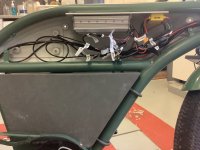
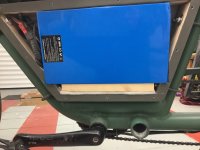
I built the new battery box and the new controller is mounted on an aluminium plate inside the fuel tank where the old battery used to sit together with all of the wiring, so it has a clean look. The rear rack and panniers are not Michael Blast accessories, but put on by the previous owner and I think they suit the image of the bike very well, so I’m going to leave them on.
The rear spokes need some attention because the rear wheel is a bit wobbly and they probably haven’t been tightened since new. I’m going to open up the motor to check the plastic drive wheels and I’m thinking about oil cooling the motor with automatic transmission fluid, but haven’t made up my mind on that modification yet.
I feel like I need to dress for the occasion when I ride it. So a new period style bike helmet is required and I’ll have to dig out my old leather jacket from the back of the wardrobe.
It’s definitely only a tarmac bike. It rides lovely on the road and the saddle is very comfy. But when I took it on a gravel track that huge aluminium frame was bone shaking and didn’t handle at all well off road. The down turned handlebars means the riding position is not efficient, but I tried them up turned and the bike just didn’t look right. And it’s all about the looks.


AGS
100 W
- Joined
- Feb 13, 2023
- Messages
- 284
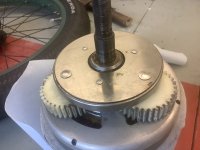
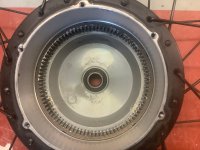
The motor is a BFSWX02 (10) with a 7 speed freewheel. The date marked on the circuit board is 27th May 2015. I stripped it down today for an inspection to see what condition it is in and was pleased to find it looked as good as new with no apparent wear on the planet gears. So it’s going back together as it is. I have decided against drilling through the disk brake holes to oil cool it. I’m not sure it’s necessary, but time will tell.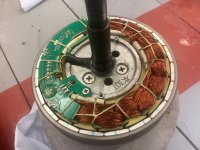


Last edited:
The motor is a BFSWX02 (10) with a 7 speed freewheel. The date marked on the circuit board is 27th May 2015. I stripped it down today for an inspection to see what condition it is in and was pleased to find it looked as good as new with no apparent wear on the planet gears. So it’s going back together as it is.
Nice clean look! Did you add any grease to the greaser while you had it apart?
AGS
100 W
- Joined
- Feb 13, 2023
- Messages
- 284
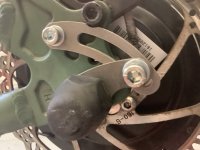
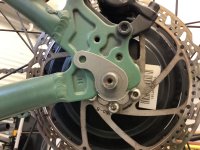
I have seen videos of people smothering the motor gears with grease but that just flicks off all over the place, so I reassembled the motor without adding any more. I looked in my cupboard but didn’t fancy using the stuff that I have, so I’ll have to order some proper grease for an e-bike motor. And I did spend an hour or so this morning cleaning grease off the chain and sprockets. I‘ll post up some more photos in a day or two with the tank covers off because I need to fit an on/off switch for the controller and it’s still in the post. It also needs a pair of torque arms which also haven’t arrived yet.
Last edited:
How would you go about oil cooling a geared hub motor? Drilling thru a disc rotor mounting hole is a well-known process to add Statoraid or FerroFluid to help dissipate heat in a DD hub, but for a geared hub?I have decided against drilling through the disk brake holes to oil cool it. I’m not sure it’s necessary, but time will tell.
afaicr this is one thread with info

 endless-sphere.com

Oil cooling your hub- NOT snake oil!
Ok, so here’s my story. I cooked my poor little MAC by putting way too many amps through it. It still works, but gets hot real quick so whilst waiting for another stator to rebuild it, I decided to try oil cooling as a band aid solution. Without oil, the motor gets up to 120 celcius and is...
 endless-sphere.com
AGS
100 W
- Joined
- Feb 13, 2023
- Messages
- 284
I fitted an extension lead for the charger and a 125v ac marine switch to power off the controller so I don’t need to keep removing the cover to charge the battery. I’m currently looking for an appropriate bung to put over the end of the XLR connector. I used the hole that was for the original battery charger connector to mount the switch, so I didn’t need to drill an additional hole in the battery cover.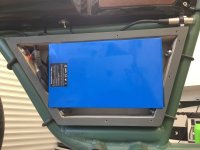

Similar threads
- Replies
- 6
- Views
- 997
- Replies
- 3
- Views
- 1,823


