What shall we do with a 3D printer...early in the morning!

amberwolf

Administrator
Staff member
Joined
Aug 17, 2009
Messages
40,859
Location
Phoenix, AZ, USA, Earth, Sol, Local Bubble, Orion
Or late at night, as the case might be.

Thanks much to Nicobie for getting me started in this evil hobby, after years of being inspired by this thread

There's two parts to this thread, one of which might get split off to it's own, which I'll start in the next post, about recycling plastics to make new filament. (not a new idea)

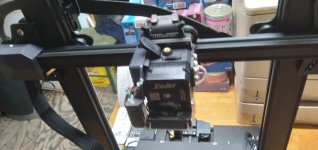
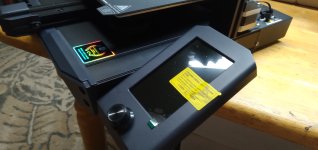
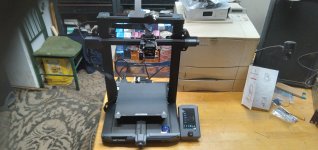
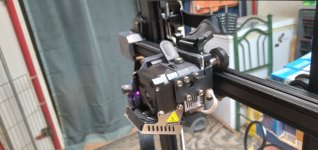
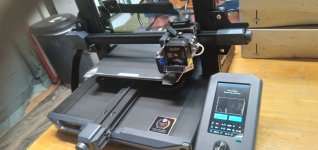
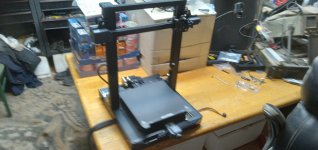
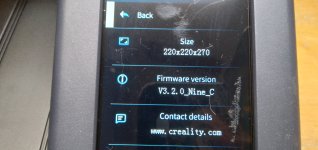
What I've just finished putting together and levelling before I ran out of steam and went back to bed (where I'm posting this from) is a Creality Ender 3D S1.
(Was going to attach the manual for future reference, but the server says "the uploaded file is too large for the server to process", so here's a link for those interested:
Info: Ender-3 S1 3D Printer
Manual: https://img.staticdj.com/176a642244a56d133e30883492628d47.pdf
(it's also on a huge sale right now (september 2023) if you're looking to buy one, usually $329.00, sale $246.75, saves $82.25)

There are even options for a laser etching head, which sounds very interesting, but is probably something I would have to wait until I have a specific need for it before getting (whcih might never happen.)

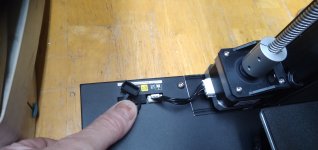
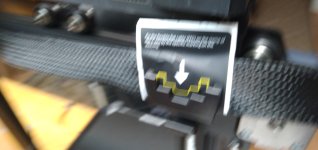
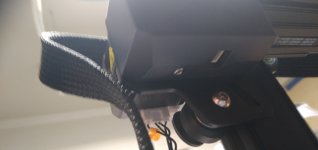
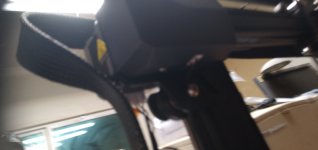
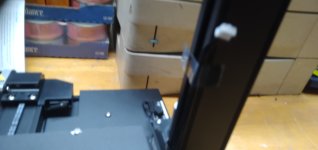
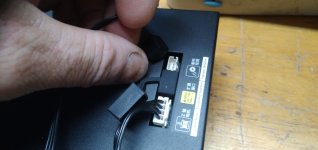
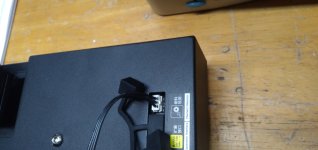
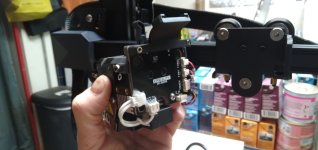
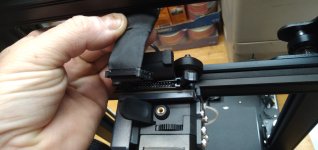
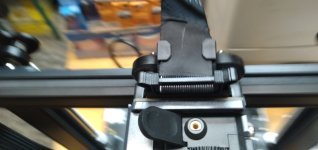
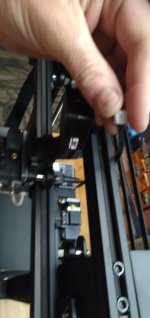
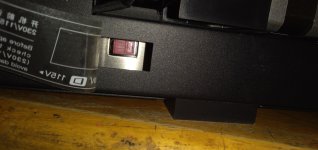
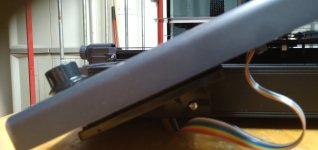
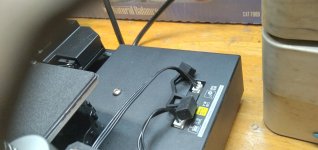
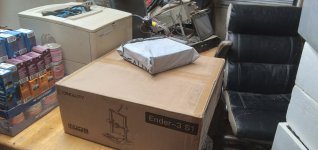
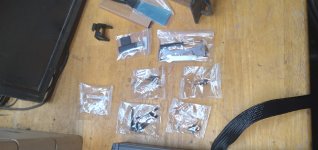
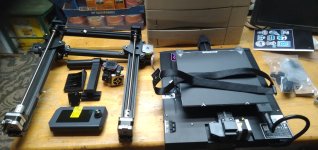
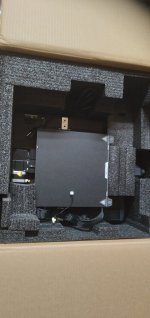
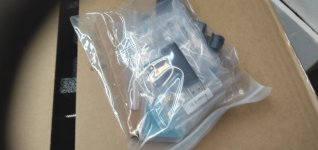
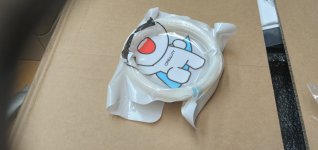
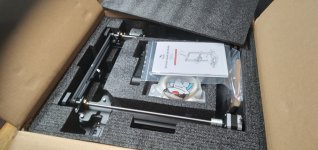
All the pictures are attached at the end of this post and the next, etc (won't take them all in one), and at some point I might label them but right now they're just there, too tired and lazy to do it now. :oops: They start with the unboxing, then some steps of the assembly.

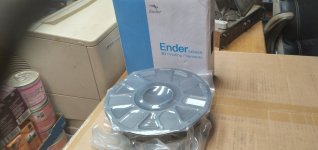
It's fairly obvious how it must be assembled and plugged together, even if you don't read the instructions (though I did cheat and do that before it even arrived), and it comes with all the necessary tools, and one extra screw of each kind just in case. It also comes with some snips for the filament, and a scraper to help remove prints from the bed. (Nicobie suggests a purple glue stick applied to the bed prior to printing to help release better, too; haven't acquired one yet). It comes with a short length of white filament, but it wouldn't be enough to do more than some testing, most likely, so I also have a 1kg spool of some black PLA.

At this point, I just have the printer assembled and levelled, and the Creality versions of a modeller and slicer installed (also have FreeCAD Portable installed because I've been very slowly poking at it, learning it's differences from the ancient Lightwave3Dv6 that I have previously used (which only has a parallel port dongle so I can't use it on my main computer, which is a usb-only laptop, have to fire up the old less-powerful desktop for that). I have Prusa3D and Cura downloaded, but not yet installed. I'll probably put them in then play with their interfaces, and see which one is easiest for me to adapt my existing 3D modelling experience to. It may turn out that the ancient LW3D is easier, in which case I'll probably use it, then export into a format one of the slicers can read, and use that set of steps to make the Gcode to put on the SD card for the printer itself.

The printer can take a straight USB-C connection, too, but the computers I use are in the bedroom, and the printer is in the back room at the other end of the house...there's also an old Win7 laptop on that workbench, but transferring files around to that is less efficient than just sticking it on the card and walking it back there, since I'd have to uncover the printer, turn it on, etc etc anyway.

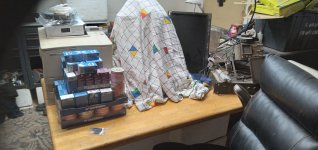
Covering the printer is required because JellyBeanThePerfectlyNormalSchmoo is always wearing her St Bernard disguise, which means there is still daily slobber-slinging and fur-shedding, all best kept off of the machine. ;) At some point, probably sooner rather than later, I will build a cabinet around it to keep that stuff out, and probably also to vent the fumes outside via a hose to the nearest window with a little fan. There are probably even projects out there to do exactly these things for this specific printer, so I likely won't have to completely design it myself. :) For now, it just gets a bedsheet over it when not in use.

More in a bit.
 

Attachments

  • 20230916_204156.jpg
    20230916_204156.jpg
    2 MB · Views: 6
  • 20230916_210316.jpg
    20230916_210316.jpg
    2 MB · Views: 5
  • 20230916_205315.jpg
    20230916_205315.jpg
    2 MB · Views: 5
  • 20230916_205139.jpg
    20230916_205139.jpg
    4 MB · Views: 5
  • 20230916_205016.jpg
    20230916_205016.jpg
    979.9 KB · Views: 4
  • 20230916_204448.jpg
    20230916_204448.jpg
    2 MB · Views: 5
  • 20230916_204445.jpg
    20230916_204445.jpg
    2 MB · Views: 6
  • 20230916_204417.jpg
    20230916_204417.jpg
    4 MB · Views: 6
  • 20230916_204307.jpg
    20230916_204307.jpg
    2 MB · Views: 6
  • 20230916_204302.jpg
    20230916_204302.jpg
    2 MB · Views: 6
  • 20230916_222323.jpg
    20230916_222323.jpg
    4 MB · Views: 7
  • 20230916_222548.jpg
    20230916_222548.jpg
    2 MB · Views: 6
  • 20230916_222721.jpg
    20230916_222721.jpg
    2 MB · Views: 7
  • 20230916_223522.jpg
    20230916_223522.jpg
    2 MB · Views: 5
Last edited:
One of the subprojects of this is to make a plastic-recycler that will make new filament.

There are already machines built to do this, you can build them from opensource projects, or you can buy them as kits, etc. Here's one (of several) that "automatically" recycles water bottles by shredding them in a spiral and feeding that into what amounts to a printhead to create filament and then spool that up:
Polyformer

Others are Filabot
and ReDeTec,
and many others


I'm still researching all the variants, so one probably already exists like this, but what I would like mine to do is have a grinder (possibly made from a crosscut paper shredder, might have to modify with a more powerful motor) that feeds a temperature-controlled heated "hopper" in which I can melt "any" plastic. As long as I know what kind of plastic it is, I would set the hopper controls for the temperature that best softens that plastic just enough to be processed, probably by "oozing" it out into a striplike form, that would then feed a filament maker based on one of the existing machines.

This is likely to be a complicated machine, but it would give me the versatility to make my own filament for many different kinds of projects, and recycle any failed print or incorrect design back into filament for new projects.

The end of this post has more of the pics from the first post (limit 10 per post, so...).
 

Attachments

  • 20230916_210351.jpg
    20230916_210351.jpg
    2 MB · Views: 3
  • 20230916_210408.jpg
    20230916_210408.jpg
    2 MB · Views: 2
  • 20230916_210419.jpg
    20230916_210419.jpg
    2 MB · Views: 2
  • 20230916_210820.jpg
    20230916_210820.jpg
    2 MB · Views: 2
  • 20230916_210825.jpg
    20230916_210825.jpg
    2 MB · Views: 2
  • 20230916_210848.jpg
    20230916_210848.jpg
    2 MB · Views: 2
  • 20230916_210859.jpg
    20230916_210859.jpg
    2 MB · Views: 3
  • 20230916_210922.jpg
    20230916_210922.jpg
    2 MB · Views: 4
  • 20230916_210940.jpg
    20230916_210940.jpg
    2 MB · Views: 4
  • 20230916_210947.jpg
    20230916_210947.jpg
    2 MB · Views: 4
  • 20230916_211031.jpg
    20230916_211031.jpg
    2 MB · Views: 3
  • 20230916_211238.jpg
    20230916_211238.jpg
    2 MB · Views: 3
Last edited:
Most of the things I already have ideas for printing are bits for mounting things, and to cover up connections on the SB Cruiser and other projects, to neaten up wiring and the like, not just for my own use, but for anyone else that would like to do the same thing.

A mount for a microswitch on the disc brake caliper for ebrake/brakelight activation, for instance, which is presently just glued on with silicone. (which is functional, but ugly and not adjustable without redoing it, and replacing a bad switch would require cutting it off and gluing the new one on, and it also isn't all that easy to position right, so is harder to suggest to someone to DIY their own).

I also will make molds to cast other parts out of platsil (platinum-cure silicone), for ebike and other projects. For instance, waterproof "hoods" for various non-wp connector types, grips for tools, handrests, etc. (presently I hand-carve those molds out of plaster, as negatives, which not infrequently means casting a positive with it then modifying the mold and recasting the correct version, which wastes expensive platsil that doesn't recycle easily.


The end of this post has more of the pics from the first post.
 

Attachments

  • 20230916_211241.jpg
    20230916_211241.jpg
    2 MB · Views: 3
  • 20230916_211554.jpg
    20230916_211554.jpg
    2 MB · Views: 2
  • 20230916_211758.jpg
    20230916_211758.jpg
    2 MB · Views: 2
  • 20230916_211817.jpg
    20230916_211817.jpg
    2 MB · Views: 2
  • 20230916_212017.jpg
    20230916_212017.jpg
    843.9 KB · Views: 2
  • 20230916_212026.jpg
    20230916_212026.jpg
    2 MB · Views: 2
  • 20230916_213029.jpg
    20230916_213029.jpg
    3.3 MB · Views: 3
  • 20230916_213400.jpg
    20230916_213400.jpg
    2 MB · Views: 2
  • 20230916_213510.jpg
    20230916_213510.jpg
    2 MB · Views: 2
  • 20230916_213517.jpg
    20230916_213517.jpg
    2 MB · Views: 2
  • 20230916_213524.jpg
    20230916_213524.jpg
    2 MB · Views: 2
  • 20230916_213640.jpg
    20230916_213640.jpg
    2 MB · Views: 3
Last edited:
Once I know what I'm doing with this, I'd also be willing to print parts for other people here, perhaps with them buying the filament spools of what's needed for their print, sending that and the model to me, and I'll print it and send the print to them (they'd need to pay the shipping, most likely) and then keep the unused part of the spool(s) for use in my own projects. Just has to be something they're not in a rush for, since I am not exactly fast at doing anything. :oops:

Guess we'll see have to wait and see how it works out for my own stuff first. ;)
 
Last edited:
You've finally turned to the dark side!

Good printer choice. Ender's aren't always the highest performing machines, but they're probably the most prolific, and as such there's a huge community for any issue you run into. Also the most commonly modded machines. Very DIY friendly.

You'll want to upgrade to a glass bed, you could get the Creality bed for $20, or you could go to your local hardware store if they cut glass and get them to cut a square mirror 235x235 for much cheaper. Plus extras for if it breaks.

The make-your-own filament venture is a noble enterprise, but if I were you, I'd get more comfortable printing your own things first and getting set up, before you switch to tricky homemade filament.

PET is relatively common and easy enough to filament:
 
I'll look into glass beds; I should have glass around here I can use for that in various thicknesses, and a simple score-and-snap style glass cutter tool. It is one option I have considered for the printer enclosure, recycling the shelves out of an old fridge, for instance.


Since glass is an insulator (thermal and electrical), how is that going to affect the heated bed for the base layer? The sensor is on the bottom of the bed, underneath, and the heat reflected from the glass underside is going to make it think it's heated up faster than normal....


The recycled filament venture is a medium-term project, because it is likely that to be able to afford to make some of the things I'd like to with it I'll have to do this. Some of the casting molds I will need to make will be quite large, in sections, and would use a lot of plastic, which would be very expensive, especially since it's likely I'll screw them up at least once during creation. :oops: The cost of the stuff to cast in them is bad enough, but can't reycle that from anything else. :( Plaster is cheap which is why I use that for hand-carved molds...but it's fragile so doesn't work well to make negatives from a positive with any detail or undercuts in it, whcih is why I have to carve the molds as negatives. (If I had the budget I'd carve the positive originals instead, which would be far easier, then use a harder but still flexible version of platsil to cast a mold of that, that could then be used to make the actual objects...but that is prohibitively expensive at up to several times the already-expensive cost of doing it the way I am).
 
Since glass is an insulator (thermal and electrical), how is that going to affect the heated bed for the base layer?
For performance, it works great:
The sensor is on the bottom of the bed, underneath, and the heat reflected from the glass underside is going to make it think it's heated up faster than normal....
It's possible that heat reflection is happening to some degree, but in practice I can tell you, and you'll find, that the bed's heating element just takes longer to heat up the thick glass bed as compared to the thin stock bed. So it takes longer to preheat, but as you know, since it's an insulator, once it's warm, it stays warm, for longer and more consistently. Neither will you have hot/cold spots from the heating element unevenly heating the aluminum bed base. If you want, you can just preheat the glass bed for 5 minutes longer than when it says it's at temp. But you probably won't even need to do that, because you're going to be printing for several hours anyway.

The real advantage to the glass bed is that it's a perfectly flat and smooth surface for your first layer. You'll see online that if you use a glass bed, people say you have to use the official hardened glass bed, or something resistant to temp swings, like garrolite. They're not wrong; hardware store mirror is what I use, and I have twice had a large flat PETG prints pull shards of mirror on the release. But then I just get out one of my backups; they're less than $5 each, and available locally.

It is one option I have considered for the printer enclosure, recycling the shelves out of an old fridge, for instance.
You may want to google the Ikea "Lack" table. Because Ikea furniture is so cheap, people use this particular end table as an enclosure frame, and there are hundreds of prints, mods, and example of what people have done with them. Doors, vents, latches, spool holders, ect, all built around a standard size end table, so there's lots of suggestions online on how to mod that for your use.
 
Sure--it's going to be a long-term thread, like my other main project threads. :)

The real advantage to the glass bed is that it's a perfectly flat and smooth surface for your first layer. You'll see online that if you use a glass bed, people say you have to use the official hardened glass bed, or something resistant to temp swings, like garrolite. They're not wrong; hardware store mirror is what I use, and I have twice had a large flat PETG prints pull shards of mirror on the release. But then I just get out one of my backups; they're less than $5 each, and available locally.
I am pretty sure I have some tempered glass from something; it would probably work.

You may want to google the Ikea "Lack" table. Because Ikea furniture is so cheap, people use this particular end table as an enclosure frame, and there are hundreds of prints, mods, and example of what people have done with them. Doors, vents, latches, spool holders, ect, all built around a standard size end table, so there's lots of suggestions online on how to mod that for your use.
There is definitely a lot of stuff out there for that. I wouldn't need to buy the table, though--I can make something that simple really easily...but I would almost certainly just make my own from the materials I already have, that is not all bulky like that. :) It probably wont' look as nice as most people's, but it should work.

It's cooling off a lot this week finally, should start being below 100F regularly now, whcih means I can do things outside...that's good and bad in that it means I can dig thru the sheds for stuff for the enclosure and ventilation.

But it also means I have to go do the yard stuff I have been unable to do much of all summer (of which there is a lot, primarily trimming the dead bits of trees and chopping them up for bulk pickup) (EDIT: deleted some grumpyguts stuff that doesn't matter)
 
Last edited:
I agree about the glass table. It's what's worked best for me.

Creality has started to get their act together. Compared to what I got (ender 2 v2) yours looks a snap to build and get running. It took forever to get mine built, leveled and set the Z offset to where it would print. Looks like they upgraded a lot of the parts too.

A enclosure is only needed for certain filaments and then it's more for air motion than insulation. So most anything will work
 
I've been a keen 3D printer for over 5 years now. Glass is the way to go for the bed, but more specifically you should get one of the capture/release heated glass beds like the Anycubic ultrabase:

I strugged for a long time trying every type of bed before I found the Ultrabase and have not had a single bed related issue since apart from the lack of auto-leveling occasionally leading to the hotend crashing into the bed when I've failed to pay attention following adjustments.

The other mod I would recommend is sinewave stepper motor drivers. Makes the whole thing much quieter. In my case that meant swapping in a whole new motherboard, but well worth it IMO.

Cheers
 
For me the enclosure is to keep the smell of hot plastic out of the house (by venting it outside) and to keep the dog hair and far-slung-slobber off the printer and objects being printed. :lol:

I can put the printer in a shed to keep the smell out but that won't stop dust, critters, and dog hair/etc from getting on it during operation, so the best compromise is to enclose it to use it inside the house, in the back room "workshop" area.

This printer was very easy to assemble; it could be done by anyone even without reading the directions if they've ever put stuff together before, or are even vaguely mechanically inclined.

Levelling took a while, perhaps an hour, but that is only because the autolevelling procedure has no way to pause or interrupt it when you can plainly see it is too far off, and there is no way to get a live readout of whatever the z-reading is as you adjust. So you have to adjust a corner, run autolevel, adjust a corner, autolevel...etc. Could be made FAR more efficient. Would also help if the knobs were marked (even just in the manual) for how many "bumps" (on the edge of the knobs) to turn to give 0.1mm of height change, and which direction to turn them to go up or down.

If I ever have to relevel it I will probably take the time to do this and note it down for next time as well as here in the thread for future readers, too. (I can say at least that they turn counterclockwise to go down, and clockwise to go up).
 
I've been a keen 3D printer for over 5 years now. Glass is the way to go for the bed, but more specifically you should get one of the capture/release heated glass beds like the Anycubic ultrabase:
<snip>

The other mod I would recommend is sinewave stepper motor drivers. Makes the whole thing much quieter. In my case that meant swapping in a whole new motherboard, but well worth it IMO.
Having it in an enclosure will help with noise, but honestly since it's in the back room the very little noise it makes wouldn't really bother any of us (even the "dog" doesn't stay back there, just passes thru on her way from inside to outside and vice-versa, except when eating breakfast or dinner which is all done back there :lol: ).

But short of replacing parts because of failures out of warranty, cost of new parts like the bed, or motherboard, etc, is not in my lack-of-budget, unless I ever start selling stuff I make for enough money to cover the costs of such things, which is highly unlikely.

I'd love to add lots of things to the system...but I don't have a "need" for them that can be justified given how fast living costs are rising and the standstill of income increases (actually decreased since hours went down after I came back to work last year, plus the half-year of no income) ...I have too many other higher priority things I can't spend money on as it is (like building the SB Cruiser MkII). :oops:


If there are ways to make these things myself out of stuff I already have...that I can do, eventually, as time permits and needs arise.


Unfortunately the all3dp site has chosen to make even their articles advertising their own products unavailable to anyone that chooses not to view ads and such, unless you are willing to pay them money to read stuff that sells you things, which is completely ridiculous. So I won't be perusing or purchasing any of their info or products. I can't even see enough info to find out how much things cost there, without paying them money to look at their site, or allow ads thru (neither of which is acceptable to me), so I give their entire site and concept a big thumbs down NOPE.
 
Levelling took a while, perhaps an hour, but that is only because the autolevelling procedure has no way to pause or interrupt it when you can plainly see it is too far off, and there is no way to get a live readout of whatever the z-reading is as you adjust. So you have to adjust a corner, run autolevel, adjust a corner, autolevel...etc. Could be made FAR more efficient. Would also help if the knobs were marked (even just in the manual) for how many "bumps" (on the edge of the knobs) to turn to give 0.1mm of height change, and which direction to turn them to go up or down.
I specifically didn't get a printer with autolevel, and I haven't looked back. It's not hard. I don't feel like I need a timesaver like an autolevel add-on, even though there are multiple options available for Enders. Plus, like anything else, the more I've done it, the better I've gotten at it. I don't trust machines anyway...
 
Unfortunately the all3dp site has chosen to make even their articles advertising their own products unavailable to anyone that chooses not to view ads and such, unless you are willing to pay them money to read stuff that sells you things, which is completely ridiculous. So I won't be perusing or purchasing any of their info or products. I can't even see enough info to find out how much things cost there, without paying them money to look at their site, or allow ads thru (neither of which is acceptable to me), so I give their entire site and concept a big thumbs down NOPE.
I agree with you.....which is why the plugin 'behind the overlay' is super useful for sites like that. Just click the button and viola, your in. :)

Cheers
 
I specifically didn't get a printer with autolevel, and I haven't looked back.

Well, this one doesn't *actually* automatically level it (that would be nice)...all it does is test 16 points of the bed in a grid for their z axis position and show them to you on the screen, color coded for how far they are from ideal (zero, relative to the center of the bed).). This info can then be used during printing to move the printhead on the z-axis to keep it parallel to the bed as it moves around...but it can only compensate a tiny bit like this, and if it exceeds that it makes you manually adjust things.

But you can also use this autolevel data to help you manually adjust the wheels at the corners to compensate by raising or lowering their respective corners, and rerun the test, repeating until they are as even as you have the patience to get them. :)
 
I agree with you.....which is why the plugin 'behind the overlay' is super useful for sites like that. Just click the button and viola, your in. :)
Oddly enough while that plugin works great for me on lots of sites (been using it for a while now), it simply doesn't work on that site for me in any of my browsers. I can make the dialogs asking for money and cookie settings go away, but there is no article behind it, just the header image and title and stuff. (no scrolling down to get to the rest of it, if that's where it is)
 
Last edited:
BTW, I did some poking around on Amazon out of curiosity and found the prices for that bed and motherboard aren't nearly as bad as I imagined--probably about $50 for both (and probably cheaper elsewhere, but I don't have to worry about shipping costs with most amazon stuff)...but still not in the budget anytime soon. ;)
 
Your machine already comes with the quieter mb and the steppers are silent on my machine(ended 3v2). Creality has the easy release plate for $20 but you probably won’t need it when using the purple glue sticks.

You can’t really properly adjust the z offset until you start printing as you won’t know if it’s causing a problem until then.

Just wait until you print the calibration cube. I’ll bet the .02 mm walls will blow you away.

Have fun!
 
Your machine already comes with the quieter mb and the steppers are silent on my machine(ended 3v2).
I guess that explains why all I thought I heard was belts moving (I can hear the click of the limit switches and the z-axis bed sensor on the head over the motion noise).

Buuut...I had an involuntary nap earlier and woke with the sound back in my head, with music around it, so I will probably rerun the levelling to record the sound and use that as the backing rhythm of a song. :) (because almost everything I hear brings up some form of music in my head; I've learned to ignore almost all of it because I can't do anything with it as I have to do so many other things there isn't time)


Creality has the easy release plate for $20 but you probably won’t need it when using the purple glue sticks.
How many of those sticks do you think I might go thru? Or rather, how fast do you use them up for various kinds of prints?

(amazon has deals for them ATM for like 12 of them for <$5, or 30 for <$9, etc., or singles for a couple bucks)
 
How many of those sticks do you think I might go thru? Or rather, how fast do you use them up for various kinds of prints?
Get 1-3 to get you started on your first prints. But on a clean glass bed (99% IPA), properly leveled, with your first layer settings dialed in after some practice, you won't need any adhesive at all.

You'll get frustrated for the first dozen times you try it, when nothing is sticking.. But keep at it. I use the mirror or glass bed, and I have my settings dialed in, and I haven't used glue or tape in a year. Perfect adhesions, and just wait for the bed to cool down for an effortless release
 
Just saying....I don't have to do any of that using an ultrabase. No sticky mess, no adhesion problems, hardly any movement during print issues. Well worth the investment.
See how you go though....there's every chance it all 'just works' in your case.

I will also add, my printer only cost about $250, and I've spent another $250 over about 5 years replacing parts, upgrading and modifying it. The benefit being, I now know how almost all of it works, and troubleshooting any issues is pretty straight forward. If you like to tinker, spending more on something that 'just works' isn't always the better option.

Cheers
 
I would just buy one stick at walmart or staples just to see how it goes. As Harrisssion mentioned, use alcohol every time before printing and applying the glue stick. You won't need much so buy a smaller sized bottle.
Just saying....I don't have to do any of that using an ultrabase. No sticky mess, no adhesion problems, hardly any movement during print issues. Well worth the investment.
See how you go though....there's every chance it all 'just works' in your case.

I will also add, my printer only cost about $250, and I've spent another $250 over about 5 years replacing parts, upgrading and modifying it. The benefit being, I now know how almost all of it works, and troubleshooting any issues is pretty straight forward. If you like to tinker, spending more on something that 'just works' isn't always the better option.

Cheers
My machine cost about the same 2 years ago and I agree that having to struggle through the building and troubleshooting process made me a better 3D printer. I probably spent $400 in upgrades (some I really didn't need). However the machine AW has comes with the upgrades I found useful for less than $50 more when new!

I can't wait to see what he comes up with!
 
Back
Top