
You are using an out of date browser. It may not display this or other websites correctly.
You should upgrade or use an alternative browser.
You should upgrade or use an alternative browser.
Suzuki GSX-R e899 K2
- Thread starter Rovi
- Start date
SlowCo
1 MW
That looks like a (long) motorcycle again :thumb:
Frank
100 W
Why four contactors?
Good progress, btw.
Good progress, btw.
Thanks Frank!
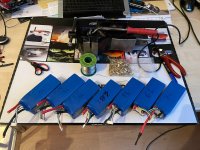
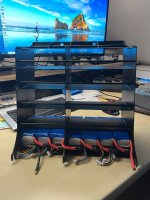
I wanna devide the battery in 4 sections. So as you know I wanna go, as in the past, with simple 6S packs and put them in series. I already put 7 in series and 4 parallel in my first motorcycle build without any problems. And so I want to manage it again. After I did this I want to connect them via the main circuit breakers in series again to get the higher voltage. And after that I can switch off the main contactors and will be hopefully back at around 175V per bank. I hope it will be working at the end . But I will start at lower voltage first and check out the batteries how they react by only 2P and increasing the current and afterwards the voltage (step by step).
I wanna devide the battery in 4 sections. So as you know I wanna go, as in the past, with simple 6S packs and put them in series. I already put 7 in series and 4 parallel in my first motorcycle build without any problems. And so I want to manage it again. After I did this I want to connect them via the main circuit breakers in series again to get the higher voltage. And after that I can switch off the main contactors and will be hopefully back at around 175V per bank. I hope it will be working at the end
. But I will start at lower voltage first and check out the batteries how they react by only 2P and increasing the current and afterwards the voltage (step by step).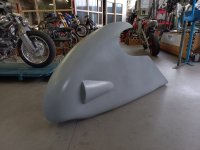
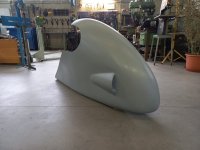
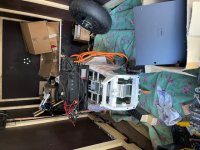
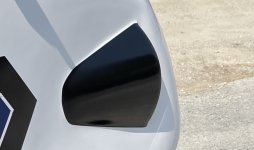
Fairing is fixed and painted.
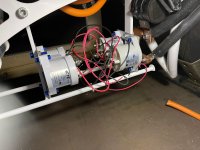
I started slowly @ 150V DC in steps with 100A, 200A, 300A and 400A. The transmission ratio actually is 19/35.
With 400A and a cold, light wet underground a burn out is easy to handle.
Also during start up I had to fight with spinning wheel or light front lifting.
But the actually top speed regarding the battery voltage is only 52-56kph.
There will be an 1/4 mile event by end of May, I took part in 2017/2018, where I was invited but for this year I was unloaded. They said: No EV’s!
To dangerous regarding fire and also to expensive regarding the regulations they have to fulfill.
So maybe I will have a chance by 10th of July at German Lausitzring (L8-Night). To make my first experience.
In the meanwhile I will continue playing with higher current (up to 600Arms) before increasing the voltage.
For this year my voltage limit will be 325V @ 10000mAh.
I started slowly @ 150V DC in steps with 100A, 200A, 300A and 400A. The transmission ratio actually is 19/35.
With 400A and a cold, light wet underground a burn out is easy to handle.
Also during start up I had to fight with spinning wheel or light front lifting.
But the actually top speed regarding the battery voltage is only 52-56kph.
There will be an 1/4 mile event by end of May, I took part in 2017/2018, where I was invited but for this year I was unloaded. They said: No EV’s!
To dangerous regarding fire
and also to expensive regarding the regulations they have to fulfill.So maybe I will have a chance by 10th of July at German Lausitzring (L8-Night). To make my first experience.
In the meanwhile I will continue playing with higher current (up to 600Arms) before increasing the voltage.
For this year my voltage limit will be 325V @ 10000mAh.
Attachments
liveforphysics
100 TW
Good luck my friend!
SlowCo
1 MW
To bad they won't let you race. It is inevitable that EV's will take over dragracing and set new records. Hopefully you'll find other events where you can race.
Any more photos of the completed bike and drive train? We love EV-porn
Any more photos of the completed bike and drive train? We love EV-porn
There will come some better pictures next time.
Tomorrow I will go to Bamberg’s little airplane field.
They have a track length of 1,1km.
I destroyed there the two hubmotors but I also run the QS273 80 to 200,49 kph.
I rised up the current to 450A, the voltage to 200V and the field weakening to 10% (45A).
Hopefully I will reach now higher top speed but
let’s see what will happen ?
?
Tomorrow I will go to Bamberg’s little airplane field.
They have a track length of 1,1km.
I destroyed there the two hubmotors
but I also run the QS273 80 to 200,49 kph.I rised up the current to 450A, the voltage to 200V and the field weakening to 10% (45A).
Hopefully I will reach now higher top speed but
let’s see what will happen
?Ok, what should I say?
Everything is still running, so no damage and I forgot to switch on the pumps …
Got a spinning wheel during start up and color the track in black for a short distance.
Regarding my transmission 19/35 the 450A are to strong at normal street surfaces and „normal“ flight tracks.
So I need glued tracks for my actually wheelbase.
Its possible to raise up the current to 600Arms.
So last settings were:
150V DC, 300A and I reached 52kph
Then I raised up the current to 400A with the result of getting around 56-57kph with quicker accelleration.
With the airport setup (200V, 450A and 10% (45A) field weakening I reached … kph and I am far away from 800V … if I will ever reach it.
Everything is still running, so no damage and I forgot to switch on the pumps …
Got a spinning wheel during start up and color the track in black for a short distance
.Regarding my transmission 19/35 the 450A are to strong at normal street surfaces and „normal“ flight tracks.
So I need glued tracks for my actually wheelbase.
Its possible to raise up the current to 600Arms.
So last settings were:
150V DC, 300A and I reached 52kph
Then I raised up the current to 400A with the result of getting around 56-57kph with quicker accelleration.
With the airport setup (200V, 450A and 10% (45A) field weakening I reached … kph and I am far away from 800V … if I will ever reach it.
Attachments
Dui ni shuo de dui
10 kW
We demand to see more pictures of the beast!!! :lol:

Have waited now long enough on this YT guy ...
And made my own clip now
First drive on Bamberg airplane field and still at the beginning of the tests
0:00 – 0:04 min.: Intro
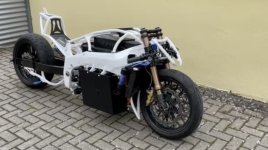
0:04 – 1:06 min.: walk around (without battery boxes)
1:06 – 1:16 min: little burnout
1:16 – 3:00 min.: test drive (side by side)
3:00 – 3:05 min.: start up from behind
3:05 – 3:14 min.: right side view of run
3:14 – 3:52 min.: Helicopter passing
3:52 – 4.03 min.: Special thanks to …
Previous results:
Speed
@ 125 V DC, 60 Arms, 0% field weakening: 43 kph
@ 150 V DC, 400 Arms, 0% field weakening: 56 kph
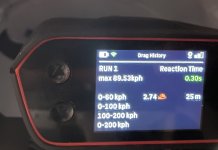
@ 200V DC, 450 Arms, 10% field weakening: 89 kph
Acceleration:
@ 125 V DC, 60 Arms : Slow motion turn of the rear wheel (cruising mode)
@ 125 V DC, 100 Arms: Smooth slow acceleration (no burnout possible)
@ 150 V DC, 200 Arms: Little bit faster in acceleration but also no burnout
@ 150 V DC, 300 Arms: Increasing again in acceleration and burnout is possible but very hard
@ 150 V DC, 400 Arms: First time of lifting front wheel and little burn out during startup
@ 200V DC, 450 Arms, 10% field weakening: Easy burnout also during start up
Next steps: Increasing the voltage up to 350V DC for this year, setting the field weakening to max. of 30% and stay @ 450 Arms.
What is possible?
Controller can handle up to 800 V DC, 600 Arms
To be continue …
[youtube]50V2XOyyOVo[/youtube]
And made my own clip now
First drive on Bamberg airplane field and still at the beginning of the tests
0:00 – 0:04 min.: Intro
0:04 – 1:06 min.: walk around (without battery boxes)
1:06 – 1:16 min: little burnout
1:16 – 3:00 min.: test drive (side by side)
3:00 – 3:05 min.: start up from behind
3:05 – 3:14 min.: right side view of run
3:14 – 3:52 min.: Helicopter passing
3:52 – 4.03 min.: Special thanks to …
Previous results:
Speed
@ 125 V DC, 60 Arms, 0% field weakening: 43 kph
@ 150 V DC, 400 Arms, 0% field weakening: 56 kph
@ 200V DC, 450 Arms, 10% field weakening: 89 kph
Acceleration:
@ 125 V DC, 60 Arms : Slow motion turn of the rear wheel (cruising mode)
@ 125 V DC, 100 Arms: Smooth slow acceleration (no burnout possible)
@ 150 V DC, 200 Arms: Little bit faster in acceleration but also no burnout
@ 150 V DC, 300 Arms: Increasing again in acceleration and burnout is possible but very hard
@ 150 V DC, 400 Arms: First time of lifting front wheel and little burn out during startup
@ 200V DC, 450 Arms, 10% field weakening: Easy burnout also during start up
Next steps: Increasing the voltage up to 350V DC for this year, setting the field weakening to max. of 30% and stay @ 450 Arms.
What is possible?
Controller can handle up to 800 V DC, 600 Arms
To be continue …
[youtube]50V2XOyyOVo[/youtube]
liveforphysics
100 TW
Great video! I love seeing that big tire light up from a roll on! If you keep dropping air pressure a bit, at some point it should hook up for you, that means time for more power until it spins again. ")
Thanks Luke!
Yes of course, actually there will be 2 bar inside the rear wheel.
On track later on I will reduce it to 0,7 bar.
Still 150Arms left and additional 600V DC to go
Scott Drive already informed me that they are working on an SD500 controller. Same voltage class but higher current.
Lenght an hight will be identical but it will grow up in widths.
That’s actually a problem for me …
But let’s see how SD300 will working …
SlowCo
1 MW
Great result and it must be nice to ride it after all that work :thumb:
liveforphysics
100 TW
SD500 sounds like a huge win for your upgrade path. What a blessing! That chassis should support a lot of HP.
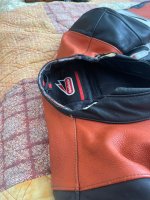
Thanks and yes of course I had a lot of fun and was so happy that everything worked well. I got only problems with the collar of my leather jacket. Which lifted the tail of the helmet and therefore I can’t see anything anymore in that lying position. Therefore I found a simple solution and now it should workSlowCo said:Great result and it must be nice to ride it after all that work :thumb:
.Attachments
Similar threads
- Replies
- 2
- Views
- 2,098